ChevyParts
My Garage
My Account
Cart
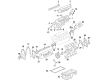
OEM GMC Yukon Harmonic Balancer
Engine Harmonic Balancer- Select Vehicle by Model
- Select Vehicle by VIN
Select Vehicle by Model
orMake
Model
Year
Select Vehicle by VIN
For the most accurate results, select vehicle by your VIN (Vehicle Identification Number).
6 Harmonic Balancers found


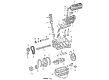
GMC Yukon Vibration Damper Part Number: 6272222
$93.12 MSRP: $150.63You Save: $57.51 (39%)


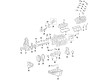
GMC Yukon Crankshaft Pulley Part Number: 12684590
$85.02 MSRP: $144.73You Save: $59.71 (42%)Ships in 1-2 Business Days

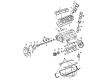
GMC Yukon Vibration Damper Part Number: 10243271
$91.05 MSRP: $156.37You Save: $65.32 (42%)Ships in 1-2 Business Days
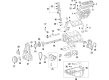
GMC Yukon Crankshaft Pulley Part Number: 12680364
$79.01 MSRP: $134.48You Save: $55.47 (42%)


GMC Yukon Vibration Damper Part Number: 12634105


GMC Yukon Vibration Damper Part Number: 10154688
GMC Yukon Harmonic Balancer
Want to cut long-term maintenance and repair costs? Choose OEM Harmonic Balancer. Those parts deliver top durability you can trust. On our site, you'll find a huge catalog of genuine GMC Yukon parts. Prices are unbeatable, so you can keep more in your pocket. Every OEM GMC Yukon Harmonic Balancer includes a manufacturer's warranty. You can also get an easy return policy that keeps buying risk free. Fast delivery, get your car on the road quickly. It's simple to search, compare, and order. Stop guessing about quality or fit. Order today and save with parts that last.
The GMC Yukon's Harmonic Balancer has a very important function of balancing the engine and reducing the torsional vibrations which are encountered during combustion. It usually integrates a steel core fixed on the crankshaft with a greener steel inertia ring and a rubber ring for elasticity. This design equally assists in combating the twisting motion of the crank shaft so as to enable a smooth running of the engine. The harmonic balancer types employed in Yukon models have included conventional ones, the viscous fluid, and multi-piece/independent tunable types. While standard original equipment balancers are built for factory engine RPM, performance balancers are for modified engines, and offer better protection from pegged up vibrations. These performance options are covered for safety at high RPM and may come with extras such as such as 360 degrees timing marks for accurate setting.
GMC Yukon Harmonic Balancer Parts and Q&A
- Q: How to replace the front harmonic balancer on GMC Yukon?A:The toolset needed for crankshaft balancer replacement comprises crankshaft balancer remover (J 41816), crankshaft end protector (J 41816-2), Flywheel holding tool (J 42386-A), crankshaft balancer and sprocket installer (J 41665) and angle meter (J 45059). The replacement process starts with belt removal from the air conditioning system unless vehicle has no air conditioning system. The beginner stage of replacement starts by taking off the lower Fan Shroud and then the Starter motor from the work area. Use the Flywheel holding tool (J 42386-A) to fit its teeth with the engine Flywheel teeth properly. No pre-marking is necessary for the crankshaft balancer before it gets removed. Use the Flywheel holding tool (J 42386-A) by mounting one m10-1.5 x 120 mm bolt and one m10-1.5 x 45 mm bolt while tightening them to 50 nm (37 ft. Lbs.). The crankshaft balancer bolt will maintain its use during the installation process. The crankshaft balancer remover (J 41816) along with the crankshaft end protector (J 41816-2) should be used to remove the balancer while cleaning and inspecting it when possible. Reposition the balancer directly around the crankshaft after which you should use the crankshaft balancer and sprocket installer (J 41665) for installation. Begin by spacing out the installation tool and apply a wrench to the hexoured threaded rod until the balancer starts moving with clock-wise nut rotation. Twist the installation tool in reverse motion and proceed with tightening the balancer until it has reached its complete position. The crankshaft balancer bolt from previous installation should be fitted followed by torquing to 330 nm (240 ft. Lbs.) then removing the bolt. Investigate the distance between crankshaft nose and balancer bore to measure between 2.4 - 4.48 mm (0.094 - 0.176 inch) recess. Recheck the installation following procedure measurements; carry out additional installation when needed. Use the angle meter (J 45059) to secure the new crankshaft balancer bolt at 140 degrees but start by tightening it to 50 nm (37 ft. Lbs.). To finish the repair replace the Starter motor followed by the lower Fan Shroud then install the accessory Drive Belt (if A/C is not present) and a/c Drive Belt (if A/C is part of the system) before performing the crankshaft position system variation learn procedure.

Related GMC Yukon Parts
 GMC Yukon Cam Gear
 GMC Yukon Crankshaft Gear
 GMC Yukon Engine Mount
 GMC Yukon Exhaust Valve
 GMC Yukon Head Gasket
 GMC Yukon Intake Valve
 GMC Yukon Lash Adjuster
 GMC Yukon Motor And Transmission Mount
 GMC Yukon Oil Pan Gasket
 GMC Yukon Pushrod
 GMC Yukon Timing Chain Guide
 GMC Yukon Valve Cover Grommet