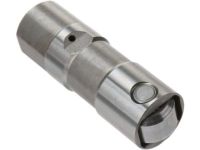
Make sure this part fits

GM 12634105
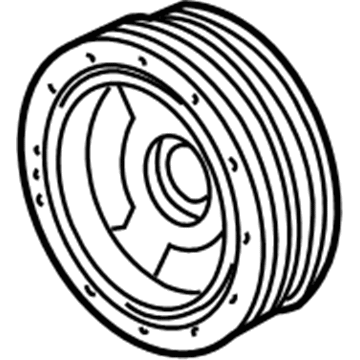
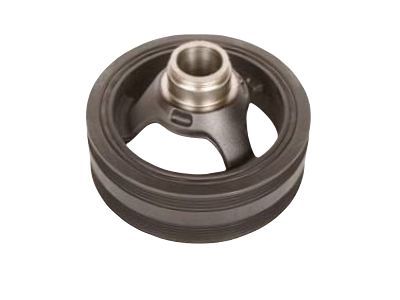
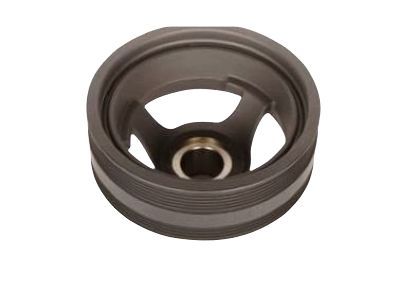
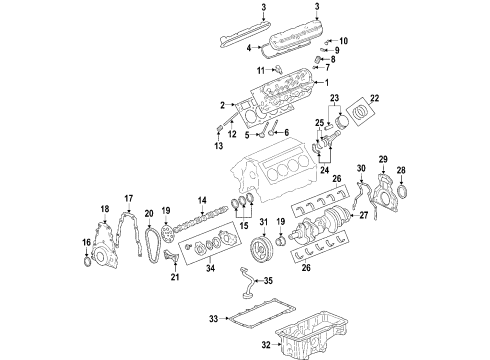
Vibration Damper

1999-2017 GM

Customer Questions & Expert Answers (47)
GM 12634105 Vibration Damper
  • Part Description
    Pulley; Harmonic Balancer
  • Replaces
    12576652, 12553112
  • Manufacturer
    General Motors
  • Manufacturer's Notes
    This part is discontinued.
Make sure this part fits
  • Related Parts
  • Product Specifications
  • Vehicle Fitment
  • Customer Questions & Expert Answers
  • Product Specifications

    BrandGenuine GM
    Manufacturer Part Number12634105
    Part DescriptionPulley; Harmonic Balancer
    Other NamesCrankshaft Balance; Balancer
    Item Dimensions9.3 x 8.6 x 6.5 inches
    Item Weight10.90 Pounds
    ConditionNew
    Replaces12576652, 12553112
    ManufacturerGeneral Motors
    SKU12634105
    WarrantyThis genuine GM part is guaranteed by GM's factory warranty.
    Shipping & ReturnShipping Policy Return Policy
    Warning: California's Proposition 65
  • Vehicle Fitment

    Year Make Model Trim Engine
    2004-2007 Buick RainierCXL, CXL Plus8 Cyl 5.3 L GAS
    2002-2014 Cadillac EscaladeBase, Hybrid, Hybrid Platinum, Luxury, Platinum, Premium8 Cyl 5.3 L GAS, 8 Cyl 6.0 L FULL HYBRID EV-FLEX (FHEV), 8 Cyl 6.0 L FULL HYBRID EV-GAS (FHEV), 8 Cyl 6.0 L GAS, 8 Cyl 6.2 L FLEX, 8 Cyl 6.2 L GAS
    2003-2014 Cadillac Escalade ESVBase, Luxury, Platinum, Premium8 Cyl 6.0 L GAS, 8 Cyl 6.2 L FLEX, 8 Cyl 6.2 L GAS
    2002-2013 Cadillac Escalade EXTBase, Luxury, Premium8 Cyl 6.0 L GAS, 8 Cyl 6.2 L FLEX, 8 Cyl 6.2 L GAS
    2007-2013 Chevrolet AvalancheBlack Diamond LS, Black Diamond LT, Black Diamond LTZ, LS, LT, LTZ8 Cyl 5.3 L FLEX, 8 Cyl 5.3 L GAS, 8 Cyl 6.0 L GAS
    2002-2006 Chevrolet Avalanche 1500Base, LS, LT, North Face, On Road Edition, WBH, Z66, Z718 Cyl 5.3 L FLEX, 8 Cyl 5.3 L GAS
    2002-2006 Chevrolet Avalanche 2500Base, LS, LT8 Cyl 8.1 L GAS
    2009-2012 Chevrolet ColoradoLT8 Cyl 5.3 L GAS
    2003-2014 Chevrolet Express 1500Base, LS, LT8 Cyl 5.3 L FLEX, 8 Cyl 5.3 L GAS
    2003-2017 Chevrolet Express 2500Base, LS, LT8 Cyl 4.8 L FLEX, 8 Cyl 4.8 L GAS, 8 Cyl 5.3 L GAS, 8 Cyl 6.0 L CNG, 8 Cyl 6.0 L FLEX, 8 Cyl 6.0 L GAS
    View More
  • Customer Questions & Expert Answers

    Q:
    Is this 12634105 designed for my car? Posted by ChevyPartsGiant Specialist
    A:
    Please Select Your Vehicle model to see if part number 12634105 is suitable before ordering.
    Posted by ChevyPartsGiant Specialist
    Q:
    How to replace the harmonic balancer on Cadillac Escalade EXT? Posted by Customer
    A:
    You need to acquire the following tools to replace the crankshaft balancer: crankshaft balancer remover (J 41816), crankshaft end protector (J 41816-2), Flywheel holding tool (J 42386-A) and crankshaft balancer and sprocket installer (J 41665) and angle meter (J 45059). If equipped with air conditioning start by removing its Drive Belt yet accessory drive belts should be removed from vehicles without an air conditioning system. Starting the replacement process involves removing both the lower Fan Shroud alongside the Starter motor from the vehicle. The Flywheel holding tool (J 42386-A) requires its teeth to fit properly with the engine Flywheel teeth but individual balance work on the crankshaft balancer means it does not need any pre-removal markings. Screw in the Flywheel holding tool (J 42386-A) using two bolts of m10-1.5 x 120 mm and m10-1.5 x 45 mm types until they reach a torque of 50 nm (37 ft. Lbs.). The crankshaft balancer bolt needs removal because it will return for installation. The crankshaft balancer remover (J 41816) combined with crankshaft end protector (J 41816-2) will aid in removing the balancer and cleaning it before inspection if required. The first step of installation includes setting the crankshaft balancer directly on the crankshaft followed by using the crankshaft balancer and sprocket installer (J 41665) to complete the process. Attach the threaded rod together with the nut and washer and introduce the smaller end of the installer across the balancer front before achieving proper installation onto the crankshaft by tightening the nut. After reversing the installation tool you should tighten it until the balancer has finished installing. Install the old crankshaft balancer bolt with 330 nm of torque (240 ft. Lbs.) after which the bolt needs to be removed. The crankshaft nose needs to reach 2.4-4.48 mm (0.094-0.176 inch) of recess depth inside the balancer bore. Reinstall as needed. The installation begins by adding a fresh crankshaft balancer bolt which receives an initial torque of 50 nm (37 ft. Lbs.) before the meter (J 45059) indicates 140 degrees. The technical steps conclude with removing the Flywheel holding tool (J 42386-A) and bolts and installing the Starter motor before reinstalling the lower Fan Shroud along with the accessory Drive Belt (if A/C is not present) and the a/c Drive Belt (if A/C is present) followed by performing the crankshaft position (CKP) system variation learn procedure.
    Posted by ChevyPartsGiant Specialist
    Q:
    How to replace the harmonic balancer on Chevrolet Avalanche 1500? Posted by Customer
    A:
    Tool requirements for replacing the crankshaft balancer include crankshaft balancer remover (J41816), crankshaft end protector (J41816-2), flywheel holding tool (J42386-A), crankshaft balancer and sprocket installer (J41665) and torque angle meter (J36660-A). Begin your replacement of the crankshaft balancer by disconnecting the air conditioning Drive Belt when installed or proceed with the accessory Drive Belt if absent. The maintenance process demands next the removal of the lower shroud and Starter motor alongside the correct insertion of Flywheel holding tool (J42386-A) between teeth on the engine Flywheel. Fasten the j42386-a and bolts together by using a m10-1.5 x 120 mm piece and a m10-1.5 x 45 mm piece then tighten them to 50 nm (37 ft. Lbs.). Use the crankshaft balancer bolt during reinstallation because you will need it for the procedure. The crankshaft balancer remover (J41816) and crankshaft end protector (J41816-2) need to be used for removing the crankshaft balancer while cleaning and checking the part is done when needed. To install the Flywheel holding tool (J42386-A) position its teeth correctly onto the engine Flywheel. Position the crankshaft balancer onto the crankshaft by using the crankshaft balancer and sprocket installer (J41665). After tightening the used crankshaft balancer bolt to 330 nm (240 ft. Lbs.), remove it to verify that the crankshaft nose penetrates 2.4-4.48 mm (0.094-0.176 inch) into the balancer bore. Perform another installation sequence of the j41665 if required. Secure the new crankshaft balancer bolt by tightening it to 50 nm (37 ft. Lbs.) followed by torque angle meter (J36660-A) usage to achieve 140 degrees of torque. After you remove the Flywheel holding tool (J42386-A) and bolts the procedure requires you to reinstall the Starter motor and lower Fan Shroud along with the accessory Drive Belt when the vehicle is not equipped with a/c system and the a/c Drive Belt when it is equipped. Finish by performing the crankshaft position system variation learn procedure.
    Posted by ChevyPartsGiant Specialist
    Q:
    How to replace the harmonic balancer on Cadillac Escalade ESV? Posted by Customer
    A:
    The replacement process for crankshaft balancer begins by removing the air conditioning (A/C) drive belt as well as the cooling fan and shroud and Starter motor. Use the tool Flywheel holding tool (J 42386-A) by having its teeth engage with the engine Flywheel. Then apply one m10-1.5 x 120 mm and one m10-1.5 x 45 mm bolt and torque them to 50 n.m (37 lb ft). Keep the crankshaft balancer bolt (139) by itself because this component needs to be reused in the future installation process. Apply the crankshaft balancer remover (J 41816) together with crankshaft end protector (J 41816-2) to detach the crankshaft balancer (138). Begin installation by fitting the balancer onto the crankshaft followed by usage of the crankshaft balancer and sprocket installer (J 41665) together with the crankshaft front oil seal installer (J 41478) to install the balancer. Tighten the used crankshaft balancer bolt (139) to 330 n.m (240 lb ft) yet remove it afterward. Follow installation validity checks on the balancer; execute the process multiple times when measurements show improper installation. The new crankshaft balancer bolt (139) requires tightening to 50 n.m (37 lb ft) at first followed by an angle meter (J 45059) measurement for a final 140-degree turn. Complete the procedure by uninstalling the Flywheel holding tool (J 42386-A) with its bolts then install the Starter motor followed by the cooling fan and shroud and a/c Drive Belt before activating the crankshaft position (CKP) system variation learn procedure.
    Posted by ChevyPartsGiant Specialist
    Q:
    How to replace the harmonic balancer on Chevrolet SSR? Posted by Customer
    A:
    The replacement process for a crankshaft balancer requires among other tools a crankshaft balancer and sprocket installer (J 41665) along with a crankshaft balancer remover (J 41816) and crankshaft end protector (J 41816-2) and a Flywheel holding tool (J 42386-A) as well as a torque angle meter (J 45059). The first step involves removing the accessory Drive Belt then the air conditioning Drive Belt (if present) together with the cooling fan along with the Starter motor. Installing the Flywheel holding tool (J 42386-A) requires matching its teeth to the engine Flywheel teeth. The crankshaft balancer does not need any preliminary marking before being removed. The installer should use the Flywheel holding tool (J 42386-A) with m10-1.5 x 120 mm and m10-1.5 x 45 mm bolts which must be tightened to 50 nm (37 ft. Lbs.). You should remove the crankshaft balancer bolt since you will use it again when installing. The crankshaft balancer remover (J 41816) in conjunction with crankshaft end protector (J 41816-2) enables the removal of the crankshaft balancer after cleaning for inspection. The installation process requires the Flywheel holding tool (J 42386-A) to fit correctly with the engine Flywheel. A four-step installation process should be followed using the crankshaft balancer and sprocket installer (J 41665), starting with tightening the used crankshaft balancer bolt to 330 nm (240 ft. Lbs.) before removal. The crankshaft nose position must fall between 2.4 - 4.48 mm (0.094 - 0.176 inch) into the balancer bore when checked. Reinstall if necessary. A new crankshaft balancer bolt needs installation and follows this procedure with initial tightening at 50 nm (37 ft. Lbs.) before reaching 140° with the torque angle meter (J 45059). To complete the installation replace the Starter motor and cooling fan as well as the accessory Drive Belt and a/c Drive Belt after removing the Flywheel holding tool (J 42386-A) and its bolts.
    Posted by ChevyPartsGiant Specialist
    Q:
    How to replace the harmonic balancer on Chevrolet Suburban 1500? Posted by Customer
    A:
    The first step to change the crankshaft balancer requires removal of either the air conditioning (A/C) Drive Belt if present or the accessory Drive Belt if absent. Start by taking out both the lower Fan Shroud along with the Starter motor. Use the Flywheel holding tool (J 42386-A) with its teeth fitted properly into the engine Flywheel teeth. You must tighten two m10-1.5 x 120 mm and m10-1.5 x 45 mm bolts onto the j 42386-a until they achieve a torque of 50 nm (37 ft. Lbs.). The original crankshaft balancer bolt should be set aside because it will return for reinstallation. The crankshaft balancer remover (J 41816) should be combined with the crankshaft end protector (J 41816-2) to detach the crankshaft balancer. After removal clean the components thoroughly then conduct an inspection. Install the crankshaft balancer on the crankshaft in a straight line before using the crankshaft balancer and sprocket installer (J 41665) to perform the installation. Screw the installer with threaded rod into the balancer before rotating the clockwise nut until the balancer starts. Use the installer tool to reverse direction before placing its larger end against the balancer. Slowly tighten the tool until the balancer achieves complete installation. The used crankshaft balancer bolt requires tightening to 330 nm (240 ft. Lbs.), after which the bolt must be removed. Check for proper balancer installation through measurements; subsequent installations using the j 41665 should happen if incorrect. A new crankshaft balancer bolt requires installation followed by initial 50 nm (37 ft. Lbs.) torque value and subsequent 140 degrees angles using the torque angle meter (J 36660-A). The procedure ends with Starter motor reinstallation followed by the Fan Shroud and accessory Drive Belt (if no A/C) and a/c Drive Belt (if equipped). The crankshaft position (CKP) system variation learn procedure must be executed at this stage.
    Posted by ChevyPartsGiant Specialist
    Q:
    How to replace the harmonic balancer on Chevrolet Tahoe? Posted by Customer
    A:
    The a/c Drive Belt and cooling fan and shroud need removal before starting the Crankshaft balancer replacement process but the engine Flywheel must have j 42386-a (Flywheel Holding Tool) teeth overlapping its surface. The installation of the j 42386-a demands two bolts with m10-1.5 x 120 mm and m10-1.5 x 45 mm specifications which must reach a torque of 50 nm (37 lb ft). Proceed by discarding the Crankshaft balancer bolt labeled 139 because it will be used again for reinstallation. The procedure starts by connecting the j 41816-a (Crankshaft Balancer Remover) and j 41816-2 (Crankshaft End Protector) on the Crankshaft balancer before removing it. During installation users must begin by placing the Crankshaft balancer (138) onto the Crankshaft while utilising the j 41665 (Crankshaft Balancer and Sprocket Installer with its threaded rod drawn from the J 41478 (Crankshaft Front Oil Seal Installer). First combine the threaded rod and nut with washer and installation tool before putting the smaller end section into the front of the balancer assembly. Use a wrench to hold the threaded rod hex end before tightening the installation tool nut clockwise until the balancer starts onto the Crankshaft. After directing the installation tool with its larger end toward the balancer front, continue tightening until full installation. The used Crankshaft balancer bolt (139) receives installation before it is torqued to 330 nm (240 lb ft) then removed. When the Crankshaft nose reaches 2.4-4.48 mm (0.094-0.176 in) below balancer bore level the installation should be redone. The installation process of new Crankshaft balancer bolt (139) should start with a 50 nm (37 lb ft) torque before finishing with a 140-degree final tightening using the j 45059 (Angle Meter). The repair procedure ends with the removal of j 42386-a and bolts then reinstalls the cooling fan and shroud with the a/c Drive Belt followed by performing Crankshaft position (CKP) system variation learn procedure.
    Posted by ChevyPartsGiant Specialist
    Q:
    How to replace the harmonic balancer on Cadillac Escalade? Posted by Customer
    A:
    The replacement of a crankshaft balancer requires users to begin by removing the air conditioning Drive Belt alongside cooling fan components along with shroud and Starter motor elements. Use the Flywheel holding tool (J 42386-A) by ensuring its teeth fit the engine Flywheel teeth before mounting it with one m10-1.5 x 120 mm and one m10-1.5 x 45 mm bolt to a torque of 50 n.m (37 lb ft). The next step involves removing crankshaft balancer bolt (139) because it must be reused when reinstalling the device. Apply both crankshaft balancer remover (J 41816) and crankshaft end protector (J 41816-2) to the crankshaft balancer before using them to take off the balancer (138). The installation requires placing the balancer onto the crankshaft followed by utilization of the crankshaft balancer and sprocket installer (J 41665) with its threaded rod function from the crankshaft front oil seal installer (J 41478) to install the balancer. Tighten the previously used crankshaft balancer bolt to 330 n.m (240 lb ft) in the first stage of tightening before removing it. Check the crankshaft nose depth in the balancer bore using the mentioned dimensions; continue installation until the specified mark is achieved. The new crankshaft balancer bolt (139) requires installation according to a tightening sequence of 50 n.m (37 lb ft) then 140 degrees using the angle meter (J 45059). After removing the Flywheel holding tool (J 42386-A) and bolts you can install the Starter motor and cooling fan along with their associated shroud and a/c Drive Belt followed by completion of the crankshaft position (CKP) system variation learn procedure.
    Posted by ChevyPartsGiant Specialist
    Q:
    How to replace the Harmonic Balancer on 4.8L, 5.3L, and 6.0L engines on Chevrolet Silverado 2500? Posted by Customer
    A:
    After collecting the crankshaft balancer remover (J 41816) and crankshaft end protector (J 41816-2) along with the Flywheel holding tool (J 42386-A) and crankshaft balancer and sprocket installer (J 41665) and angle meter (J 45059), one can proceed with the crankshaft balancer replacement on 4.8l, 5.3l, and 6.0l engines. Start by disconnecting the air conditioning Drive Belt and the lower Fan Shroud followed by removing the Starter motor then position the teeth of Flywheel holding tool (J 42386-A) to hook on the engine Flywheel. Use the crankshaft balancer remover (J 41816) together with the crankshaft end protector (J 41816-2) to remove the crankshaft balancer along with the crankshaft balancer bolt which must be maintained for later reinstallation. The crankshaft balancer requires cleaning along with thorough inspection before you install it. The balancer must sit straight on the crankshaft before using the crankshaft balancer and sprocket installer (J 41665) to install it while ensuring proper assembly of the threaded rod and nut and washer. First tighten the previously used crankshaft balancer bolt to 330 nm (240 ft. Lbs.) before removing it. A measurement of the balancer installation status should be performed to check if it is properly seated; redo the installation if necessary. New crankshaft balancer bolts must be installed and taped first to 50 nm (37 ft. Lbs.) then measured to 140 degrees using the angle meter (J 45059). The last step involves removing the Flywheel holding tool (J 42386-A) with its bolts while reinstalling the Starter motor and lower Fan Shroud and air conditioning Drive Belt then conducting the crankshaft position system variation learn procedure.
    Posted by ChevyPartsGiant Specialist
    Q:
    How to replace the harmonic balancer on GMC Yukon XL 1500? Posted by Customer
    A:
    The necessary tools for crankshaft balancer replacement include the crankshaft balancer remover (J 41816) and crankshaft end protector (J 41816-2) alongside the Flywheel holding tool (J 42386-A), crankshaft balancer and sprocket installer (J 41665), and torque angle meter (J 36660-A). The procedure starts with removing the air conditioning Drive Belt for equipped vehicles but switching to removal of the accessory Drive Belt without air conditioning. After removing the lower Fan Shroud along with the Starter motor you must verify that the teeth of the Flywheel holding tool (J 42386-A) create proper mesh contact with the engine Flywheel. Apply the Flywheel holding tool (J 42386-A) with both m10-1.5 x 120 mm and m10-1.5 x 45 mm bolts before tightening them to 50 nm (37 ft. Lbs.). The crankshaft balancer bolt will be used again as a part of the installation process. Kullanimi crankshaft balancer remover (J 41816) and crankshaft end protector (J 41816-2) for removing the crankshaft balancer while subsequently cleaning and performing an inspection. The installation process begins by positioning the crankshaft balancer directly on the crankshaft which can be facilitated by using the crankshaft balancer and sprocket installer (J 41665). Use the threaded rod along with nut and washer together with the installer to push the balancer front end before tightening to start the crankshaft installation. After reversing the installation tool start tightening the tool until the balancer reaches its complete installation position. Screw the previously used crankshaft balancer bolt into position before torquing it to 240 ft. Lbs. (330 Nm). Remove the bolt afterward. The measurement of correct balancer installation needs to be repeated for the crankshaft balancer and sprocket installer (J 41665) when the results show improper installation. Position the new crankshaft balancer bolt and tightly install it first at 50 nm (37 ft. Lbs.) and complete the installation at 140 degrees using the torque angle meter (J 36660-A). Perform the crankshaft position system variation learn procedure after reinstalling the Starter motor and lower Fan Shroud followed by accessory drive and a/c drive belts and removal of the Flywheel holding tool (J 42386-A) and bolts.
    Posted by ChevyPartsGiant Specialist
    Q:
    How to replace the front harmonic balancer on GMC Yukon? Posted by Customer
    A:
    The toolset needed for crankshaft balancer replacement comprises crankshaft balancer remover (J 41816), crankshaft end protector (J 41816-2), flywheel holding tool (J 42386-A), crankshaft balancer and sprocket installer (J 41665) and angle meter (J 45059). The replacement process starts with belt removal from the air conditioning system unless vehicle has no air conditioning system. The beginner stage of replacement starts by taking off the lower Fan Shroud and then the Starter motor from the work area. Use the Flywheel holding tool (J 42386-A) to fit its teeth with the engine Flywheel teeth properly. No pre-marking is necessary for the crankshaft balancer before it gets removed. Use the Flywheel holding tool (J 42386-A) by mounting one m10-1.5 x 120 mm bolt and one m10-1.5 x 45 mm bolt while tightening them to 50 nm (37 ft. Lbs.). The crankshaft balancer bolt will maintain its use during the installation process. The crankshaft balancer remover (J 41816) along with the crankshaft end protector (J 41816-2) should be used to remove the balancer while cleaning and inspecting it when possible. Reposition the balancer directly around the crankshaft after which you should use the crankshaft balancer and sprocket installer (J 41665) for installation. Begin by spacing out the installation tool and apply a wrench to the hexoured threaded rod until the balancer starts moving with clock-wise nut rotation. Twist the installation tool in reverse motion and proceed with tightening the balancer until it has reached its complete position. The crankshaft balancer bolt from previous installation should be fitted followed by torquing to 330 nm (240 ft. Lbs.) then removing the bolt. Investigate the distance between crankshaft nose and balancer bore to measure between 2.4 - 4.48 mm (0.094 - 0.176 inch) recess. Recheck the installation following procedure measurements; carry out additional installation when needed. Use the angle meter (J 45059) to secure the new crankshaft balancer bolt at 140 degrees but start by tightening it to 50 nm (37 ft. Lbs.). To finish the repair replace the Starter motor followed by the lower Fan Shroud then install the accessory Drive Belt (if A/C is not present) and a/c Drive Belt (if A/C is part of the system) before performing the crankshaft position system variation learn procedure.
    Posted by ChevyPartsGiant Specialist
    Q:
    How to replace the harmonic balancer on GMC Yukon? Posted by Customer
    A:
    The first step to replace a Crankshaft balancer requires removing the air conditioning Drive Belt and cooling fan and shroud and Starter motor with proper alignment of the j 42386-a (Flywheel Holding Tool) teeth to the engine Flywheel. Users must install the j 42386-a using one m10-1.5 x 120 mm and one m10-1.5 x 45 mm bolt before tightening them to 50 nm (37 lb ft). The Crankshaft balancer bolt (139) must be taken off for reinstall usage later on. This operation requires the purchaser to connect the j 41816 (Crankshaft Balancer Remover) and j 41816-2 (Crankshaft End Protector) to the Crankshaft balancer (138) before removing the component. Position the Crankshaft balancer onto the Crankshaft then use j 41665 (Crankshaft Balancer and Sprocket Installer) together with j 41478 (Crankshaft Front Oil Seal Installer)'s threaded rod for balancer installation. The balancer must be straight before tightening the Crankshaft balancer bolt (139) to 330 nm (240 lb ft) during the first bolt torque stage then continuing with the bolt removal process. A correct installation of the balancer must be confirmed through measurements before repeating the installation steps again. The j 45059 (Angle Meter) enables the technician to torque the new Crankshaft balancer bolt (139) to 50 nm (37 lb ft) and 140 degrees. After removing j 42386-a and all its bolts you can reinstall the Starter motor and cooling fan with shroud and the a/c Drive Belt and execute the Crankshaft position (CKP) system variation learn procedure.
    Posted by ChevyPartsGiant Specialist
    Q:
    What should be done after removing the crankshaft balancer for the 2006 Buick Rainier? Posted by Customer
    A:
    Take out the puller and the Crankshaft End Protector (J 41816-2), then remove the crankshaft balancer shim from the crankshaft snout and clean and inspect the crankshaft balancer.
    Posted by ChevyPartsGiant Specialist
    See expert answers on similar Harmonic Balancer
    Q:
    How do you ensure the flywheel holding tool engages properly for the 2006 Chevrolet Avalanche 2500? Posted by Customer
    A:
    Install the tool to the starter bolt holes and tighten the bolts to 50 Nm (37 ft. lbs.).
    Posted by ChevyPartsGiant Specialist
    See expert answers on similar Harmonic Balancer
    Q:
    What are the final steps after installing the crankshaft balancer for the 2008 Chevrolet Express 2500? Posted by Customer
    A:
    Remove the J 42386-A and bolts, reinstall the starter motor, lower fan shroud, and the drive belts as applicable, and perform the crankshaft position system variation learn procedure.
    Posted by ChevyPartsGiant Specialist
    See expert answers on similar Harmonic Balancer
    Q:
    What should be noted about the crankshaft balancer during removal for the 2009 Chevrolet Colorado? Posted by Customer
    A:
    The crankshaft balancer lacks a key-way, which may cause the crankshaft to turn during tightening and result in improper torque.
    Posted by ChevyPartsGiant Specialist
    See expert answers on similar Harmonic Balancer
    Q:
    What is the next step after removing the fan shroud and drive belt for the 2005 Chevrolet Express 2500? Posted by Customer
    A:
    Remove the crankshaft balancer bolt and washer, followed by the bolts and the crankshaft pulley.
    Posted by ChevyPartsGiant Specialist
    See expert answers on similar Harmonic Balancer
    Q:
    How should the new crankshaft balancer bolt be tightened for the 2004 Chevrolet Express 1500? Posted by Customer
    A:
    Install a NEW crankshaft balancer bolt, tightening it first to 50 Nm (37 ft. lbs.) and then to 140 degrees using the J45059.
    Posted by ChevyPartsGiant Specialist
    See expert answers on similar Harmonic Balancer
    Q:
    How should the J 42386-A be positioned for the 2010 Chevrolet Express 3500? Posted by Customer
    A:
    Ensure that the teeth of the J 42386-A mesh with the engine flywheel teeth.
    Posted by ChevyPartsGiant Specialist
    See expert answers on similar Harmonic Balancer
    Q:
    How do you finalize the installation of the crankshaft balancer for the 2007 Chevrolet Express 3500? Posted by Customer
    A:
    Install a new crankshaft balancer bolt, tightening it first to 50 N.m (37 lb ft) and then to 140 degrees using the J 45059.
    Posted by ChevyPartsGiant Specialist
    See expert answers on similar Harmonic Balancer
    Q:
    What is the torque specification for the crankshaft balancer bolt during installation for the 2009 Chevrolet Express 3500? Posted by Customer
    A:
    Install the used crankshaft balancer bolt and tighten it to 330 Nm (240 lb ft), then remove it again.
    Posted by ChevyPartsGiant Specialist
    See expert answers on similar Harmonic Balancer
    Q:
    What should be applied to the crankshaft front cover seal if reusing it for the 2008 Chevrolet Silverado 1500? Posted by Customer
    A:
    Apply grease to the crankshaft front cover seal.
    Posted by ChevyPartsGiant Specialist
    See expert answers on similar Harmonic Balancer
    Q:
    What should you do after removing the crankshaft balancer for the 2002 Chevrolet Suburban 2500? Posted by Customer
    A:
    Take off the J 42846.
    Posted by ChevyPartsGiant Specialist
    See expert answers on similar Harmonic Balancer
    Q:
    What is the first step in the replacement process for the 2006 Chevrolet Silverado 3500? Posted by Customer
    A:
    Begin by removing the air conditioning drive belt, lower fan shroud, and starter motor.
    Posted by ChevyPartsGiant Specialist
    See expert answers on similar Harmonic Balancer
    Q:
    What comes after reinstalling the starter assembly and engine cooling fan for the 2000 Chevrolet Tahoe? Posted by Customer
    A:
    Put the drive belt(s) back in place.
    Posted by ChevyPartsGiant Specialist
    See expert answers on similar Harmonic Balancer
    Q:
    What is the next step after removing the J 23523-F for the 2009 Chevrolet Silverado 1500? Posted by Customer
    A:
    Install the crankshaft pulley and bolts, tightening them to 58 Nm (43 lb ft).
    Posted by ChevyPartsGiant Specialist
    See expert answers on similar Harmonic Balancer
    Q:
    How is the crankshaft balancer removed for the 2007 Chevrolet Silverado 1500 Classic? Posted by Customer
    A:
    Use J 23523-F to remove the crankshaft balancer, ensuring to install the J 23523-F plate and bolts onto the balancer and tighten them to 25 Nm (18 ft. lbs.). Then, install the J 23523-F forcing screw into the plate and rotate it clockwise to remove the balancer.
    Posted by ChevyPartsGiant Specialist
    See expert answers on similar Harmonic Balancer
    Q:
    What are the final steps after the balancer installation for the 2007 Chevrolet Silverado 3500 Classic? Posted by Customer
    A:
    Remove the Flywheel Holding Tool (J 42386-A) and bolts, reinstall the starter motor, lower fan shroud, and A/C drive belt, and perform the crankshaft position system variation learn procedure.
    Posted by ChevyPartsGiant Specialist
    See expert answers on similar Harmonic Balancer
    Q:
    How do you remove the crankshaft balancer for the 2004 Chevrolet SSR? Posted by Customer
    A:
    Use the Crankshaft Balancer Remover (J 41816) and Crankshaft End Protector (J 41816-2) to take out the crankshaft balancer, then clean and inspect it.
    Posted by ChevyPartsGiant Specialist
    See expert answers on similar Harmonic Balancer
    Q:
    What is the first step in the replacement process for the 2006 Chevrolet SSR? Posted by Customer
    A:
    Remove the accessory drive belt, followed by the air conditioning drive belt if equipped, the cooling fan, and the starter motor.
    Posted by ChevyPartsGiant Specialist
    See expert answers on similar Harmonic Balancer
    Q:
    How do you ensure the balancer is correctly installed for the 2003 Chevrolet SSR? Posted by Customer
    A:
    Measure to ensure the balancer is correctly installed; if not, repeat the installation process.
    Posted by ChevyPartsGiant Specialist
    See expert answers on similar Harmonic Balancer
    Q:
    What is the next step after installing the Flywheel Holding Tool for the 2010 Chevrolet Colorado? Posted by Customer
    A:
    Lower the vehicle and then remove and discard the crankshaft balancer bolt.
    Posted by ChevyPartsGiant Specialist
    See expert answers on similar Harmonic Balancer
    Q:
    How do you verify the balancer installation for the 2006 GMC Savana 3500? Posted by Customer
    A:
    Measure to ensure the balancer is correctly installed; if not, repeat the installation procedure with the J41665.
    Posted by ChevyPartsGiant Specialist
    See expert answers on similar Harmonic Balancer
    Q:
    What is the procedure after installing the balancer for the 2008 GMC Envoy? Posted by Customer
    A:
    Remove the Crankshaft Front Oil Seal Installer (J 41478), hold the flywheel, and install the balancer washer and bolt.
    Posted by ChevyPartsGiant Specialist
    See expert answers on similar Harmonic Balancer
    Q:
    Why is it important to note that the crankshaft balancer lacks a key-way for the 2009 GMC Envoy? Posted by Customer
    A:
    It may turn during tightening, leading to improper torque.
    Posted by ChevyPartsGiant Specialist
    See expert answers on similar Harmonic Balancer
    Q:
    How do you start the balancer onto the crankshaft for the 2003 GMC Savana 2500? Posted by Customer
    A:
    Hold the hex end of the threaded rod with one wrench while rotating the installation tool nut clockwise with another wrench until the balancer is started onto the crankshaft.
    Posted by ChevyPartsGiant Specialist
    See expert answers on similar Harmonic Balancer
    Q:
    What tool is used to seat the balancer completely for the 2006 GMC Sierra 3500? Posted by Customer
    A:
    Install the crankshaft balancer installer (J 42845) to the balancer, ensuring to apply the lubricant that comes with it.
    Posted by ChevyPartsGiant Specialist
    See expert answers on similar Harmonic Balancer
    Q:
    What is the first step in the replacement process for the 2005 GMC Savana 2500? Posted by Customer
    A:
    Remove the air conditioning drive belt if equipped, or the accessory drive belt if not.
    Posted by ChevyPartsGiant Specialist
    See expert answers on similar Harmonic Balancer
    Q:
    What tools are needed to remove the crankshaft balancer for the 2003 GMC Savana 3500? Posted by Customer
    A:
    Utilize the Crankshaft Balancer Remover (J 41816) and the Crankshaft End Protector (J 41816-2).
    Posted by ChevyPartsGiant Specialist
    See expert answers on similar Harmonic Balancer
    Q:
    What is the torque specification for tightening the J 23523-F plate and bolts for the 2006 GMC Sierra 1500? Posted by Customer
    A:
    Tighten them to 25 Nm (18 ft. lbs.).
    Posted by ChevyPartsGiant Specialist
    See expert answers on similar Harmonic Balancer
    Q:
    What is the first step to replace the crankshaft balancer for the 2007 GMC Sierra 3500 Classic? Posted by Customer
    A:
    Remove the air conditioning (A/C) drive belt, cooling fan and shroud, and starter motor.
    Posted by ChevyPartsGiant Specialist
    See expert answers on similar Harmonic Balancer
    Q:
    How can damage to the crankshaft be prevented during the process for the 2007 GMC Sierra 1500 Classic? Posted by Customer
    A:
    Install a shorter bolt with the same threads as the crankshaft balancer bolt into the crankshaft before using the crankshaft balancer removal tool, J 23523-F.
    Posted by ChevyPartsGiant Specialist
    See expert answers on similar Harmonic Balancer
    Q:
    How do you remove the crankshaft balancer for the 2005 GMC Sierra 3500? Posted by Customer
    A:
    Utilize the Crankshaft Balancer Remover (J41816) and Crankshaft End Protector (J41816-2) to remove the balancer, then clean and inspect it.
    Posted by ChevyPartsGiant Specialist
    See expert answers on similar Harmonic Balancer
    Q:
    What is the method to remove the crankshaft balancer for the 2007 GMC Envoy? Posted by Customer
    A:
    Use a 3 jaw puller to remove the crankshaft balancer.
    Posted by ChevyPartsGiant Specialist
    See expert answers on similar Harmonic Balancer
    Q:
    What should be done after completing the installation for the 2009 GMC Sierra 1500? Posted by Customer
    A:
    Remove the J 42386-A and bolts, reinstall the starter motor, cooling fan, shroud, and air conditioning drive belt, and perform the crankshaft position system variation learn procedure.
    Posted by ChevyPartsGiant Specialist
    See expert answers on similar Harmonic Balancer
    Q:
    How do you install the J 23523-F for removal for the 2007 GMC Sierra 1500? Posted by Customer
    A:
    Install the J 23523-F plate and bolts onto the crankshaft balancer, tightening the bolts to 25 N.m (18 lb ft), then install the J 23523-F forcing screw into the plate and rotate it clockwise to remove the balancer.
    Posted by ChevyPartsGiant Specialist
    See expert answers on similar Harmonic Balancer
    Q:
    What is the first step to replace the crankshaft balancer for the 2010 GMC Sierra 1500? Posted by Customer
    A:
    First, remove the drive belt and the cooling fan.
    Posted by ChevyPartsGiant Specialist
    See expert answers on similar Harmonic Balancer
    If you have any questions about this product, please don't hesitate to ask us. We will be happy to help you!

OEM GM 12634105, Excellent Performance and Perfect Fitment

To ensure reliability, purchase GM part # 12634105 Vibration Damper. It is sometimes referred to as GM Crankshaft Pulley, GM Harmonic Balancer. Choosing OEM parts is the optimal decision for guaranteeing superior quality and perfect performance. These components undergo stringent quality checks and are carefully constructed to comply with GM's factory specifications, ensuring a smooth installation process.

ChevyPartsGiant.com is a leading supplier of genuine GM parts such as GM 12634105 Vibration Damper. Our website boasts an extensive inventory of OEM GM parts, available at highly competitive prices in the market. Should you require any new genuine GM parts, rest assured we will deliver them swiftly and efficiently to your doorstep. Furthermore, all our parts come with the assurance of a manufacturer's warranty. For detailed Chevy parts information, click here.
Choose ChevyPartsGiant for discounted prices, exceptional service and fast delivery