ChevyParts
My Garage
My Account
Cart
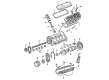
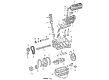
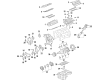
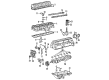
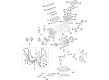
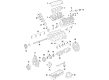
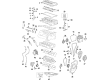
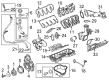
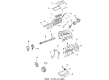
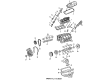
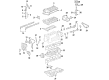
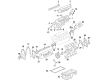
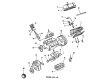
OEM GMC Harmonic Balancer
Engine Harmonic Balancer- Select Vehicle by Model
- Select Vehicle by VIN
Select Vehicle by Model
orMake
Model
Year
Select Vehicle by VIN
For the most accurate results, select vehicle by your VIN (Vehicle Identification Number).
72 Harmonic Balancers found


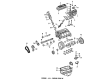
GMC Vibration Damper Part Number: 19260268
$303.76 MSRP: $517.14You Save: $213.38 (42%)Product Specifications- Other Name: Damper, Engine Crankshaft And Camshaft Balancer; Balancer, Engine Crankshaft And Camshaft Balancer
- Replaces: 10216338, 88960603


GMC Vibration Damper Part Number: 6272222
$93.12 MSRP: $150.63You Save: $57.51 (39%)Product Specifications- Other Name: Balancer Assembly-Crankshaft; Balancer, Engine Crankshaft And Camshaft Balancer; Damper, Engine Crankshaft

GMC Crankshaft Pulley Part Number: 12702118
$92.11 MSRP: $144.29You Save: $52.18 (37%)Ships in 1-3 Business DaysProduct Specifications- Other Name: Pulley; Vibration Damper; Balancer; Balancer, Engine Crankshaft And Camshaft Balancer
- Replaces: 12565992

GMC Vibration Damper Part Number: 12571619
$113.11 MSRP: $186.33You Save: $73.22 (40%)Ships in 1-2 Business DaysProduct Specifications- Other Name: Pulley; Harmonic Balancer; Balancer
- Replaced by: 12578069


GMC Vibration Damper Part Number: 12625430
$72.52 MSRP: $113.58You Save: $41.06 (37%)Ships in 1-3 Business DaysProduct Specifications- Other Name: Balancer, Engine Crankshaft And Camshaft Balancer; Harmonic Balancer; Balancer

GMC Vibration Damper Part Number: 12700427
$73.06 MSRP: $114.42You Save: $41.36 (37%)Ships in 1-3 Business DaysProduct Specifications- Other Name: Pulley; Harmonic Balancer; Vibration Damper & Pulley; Balancer; Balancer, Engine Crankshaft And Camshaft Balancer
- Replaces: 12648346, 12674649

GMC Vibration Damper Part Number: 97374383
$809.93 MSRP: $1280.12You Save: $470.19 (37%)Ships in 1-3 Business DaysProduct Specifications- Other Name: Balancer Assembly-Crankshaft (W/Pulley); Balancer, Engine Crankshaft Pulley And Balancer

GMC Vibration Damper Part Number: 19417972
$409.58 MSRP: $650.30You Save: $240.72 (38%)Ships in 1-2 Business DaysProduct Specifications- Other Name: Shaft Assembly, Balancer (Remanufacture); Harmonic Balancer; Balance Shaft; Balancer Shaft Kit; Engine Crankshaft and Camshaft Balancer.
- Replaces: 10224538

GMC Crankshaft Pulley Part Number: 12692644
$32.68 MSRP: $53.84You Save: $21.16 (40%)Ships in 1-2 Business DaysProduct Specifications- Other Name: Pulley, Engine Crankshaft And Camshaft Balancer; Pulley; Pulley, Engine Crankshaft

GMC Crankshaft Pulley Part Number: 12705813
$59.24 MSRP: $92.77You Save: $33.53 (37%)Ships in 1-3 Business DaysProduct Specifications- Other Name: Pulley; Vibration Damper; Balancer; Balancer, Engine Crankshaft And Camshaft Balancer

GMC Vibration Damper Part Number: 19432547
$321.86 MSRP: $506.42You Save: $184.56 (37%)Product Specifications- Other Name: Damper, Engine Crankshaft And Camshaft Balancer; Balancer, Engine Crankshaft And Camshaft Balancer
- Replaced by: 19540389
- Replaces: 12662602, 12674750, 12702612, 12651599, 19433088, 98062792


GMC Vibration Damper Part Number: 12578069
$118.42 MSRP: $186.33You Save: $67.91 (37%)Product Specifications- Other Name: Pulley; Harmonic Balancer; Balancer; Balancer, Engine Crankshaft And Camshaft Balancer
- Replaces: 12571619


GMC Pulley Part Number: 14102091

GMC Pulley Part Number: 14023148
Product Specifications- Other Name: Pulley, Engine Crankshaft And Camshaft Balancer; Pulley Assembly, Engine Crankshaft; Pulley, Engine Crankshaft


GMC Pulley Part Number: 14100594
Product Specifications- Other Name: Pulley Assembly-Crankshaft; Pulley, Engine Crankshaft And Camshaft Balancer


GMC Vibration Damper Part Number: 10154688
Product Specifications- Other Name: Balancer, Crankshaft; Balancer, Engine Crankshaft And Camshaft Balancer; Balancer, Engine Crankshaft


GMC Vibration Damper Part Number: 12578070
Product Specifications- Other Name: Balancer, Crankshaft; Harmonic Balancer; Crankshaft Balance; Balancer; Balancer, Engine Crankshaft And Camshaft Balancer; Balancer, Engine Crankshaft


GMC Vibration Damper Part Number: 12634105
Product Specifications- Other Name: Pulley; Harmonic Balancer; Crankshaft Balance; Balancer
- Replaces: 12576652, 12553112


GMC Pulley Part Number: 560328
Product Specifications- Other Name: Pulley Assembly- (3 Groove 7.320 Pd); Pulley, Engine Crankshaft And Camshaft Balancer; Pulley, Fan And Coolant Pump; Pulley, Engine Crankshaft
GMC Vibration Damper Part Number: 12553423
$43.22 MSRP: $67.71You Save: $24.49 (37%)Product Specifications- Other Name: Pulley; Balancer, Engine Crankshaft And Camshaft Balancer
| Page 1 of 4 |Next >
1-20 of 72 Results
GMC Harmonic Balancer
Want to cut long-term maintenance and repair costs? Choose OEM Harmonic Balancer. Those parts deliver top durability you can trust. On our site, you'll find a huge catalog of genuine GMC parts. Prices are unbeatable, so you can keep more in your pocket. Every OEM GMC Harmonic Balancer includes a manufacturer's warranty. You can also get an easy return policy that keeps buying risk free. Fast delivery, get your car on the road quickly. It's simple to search, compare, and order. Stop guessing about quality or fit. Order today and save with parts that last.
GMC Harmonic Balancer Parts Questions & Experts Answers
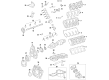
- Q: How to replace the harmonic balancer on GMC Acadia?A:Replace the crankshaft balancer by starting with the removal of the engine mount strut bracket followed by the Drive Belt and Starter. The en 46106 (Flywheel Holding Tool) must be installed through the Starter hole while right frame side support comes from jackstands. The right side frame reinforcement bolts must be taken out while right side frame bolts are loosened to drop the right side frame approximately 2 inches. First use the j 38416-2 (Crankshaft Button) to insert into the crankshaft nose then apply the j 41816 (Crankshaft Balancer Remover) for removing the crankshaft balancer from the crankshaft. Installation of en 46106 to flywheel occurs as a part of the process. Use the j 41998-b (Crankshaft Balancer Installer) while inserting a nut and bearing and washer to install the crankshaft balancer by neglecting lubricant application on the front oil seal and balancer sealing surfaces of the crankshaft. Place the balancer on the crankshaft while lubricating its hub bore with the j 41998-b tool installed before the tool reaches 10 threads in the crankshaft. ((J 41998-B)) nut should be tightened until the large washer rests against the crankshaft end before (.J 41998-B') removal allows for (J 45059) installation of the crankshaft balancer bolt which needs to be threaded to 100 nm (74 lb ft) and further tightened for 150 degrees. The final step involves Starter reinstallation followed by use of an engine support fixture to raise the engine. Additionally, the engineer must install the engine mount strut bracket together with the Drive Belt.
- Q: How to replace the harmonic balancer on GMC Sierra 1500?A:Start the crankshaft balancer replacement by taking off the Drive Belt together with the cooling fan. When using a crankshaft balancer removal tool install a bolt shorter than the crankshaft balancer bolt which has matching threads inside the crankshaft before proceeding. Start by removing the crankshaft balancer bolt with its washer then proceed to take off both crankshaft pulley bolts and pulley. Use the crankshaft balancer remover and installer (J 23523-F) to take off and position again the crankshaft balancer. Apply j 23523-f plate and its bolts to the crankshaft balancer and secure the bolts at 25 n.m (18 lb ft) torque before inserting j 23523-f forcing screw into the plate to rotate the balancer off with clockwise torque. Take note of the balancer weights' position and length before cleaning and inspection of the balancer when needed. To reuse the front cover seal, apply a minimal amount of grease on the sealing surface before installing while keeping the balancer weight(s) in their correct positions. Put adhesive into the keyway of the crankshaft balancer before aligning it with the key to mount it on the crankshaft. Press the balancer onto the crankshaft by using the j 23523-f while you install the j 23523-f plate and its bolts with a torque setting of 25 n.m (18 lb ft). The threaded assembly of j 23523-f forcing screw, bearing, washer, and nut needs clockwise rotation until the balancer hub contacts the crankshaft position sensor reluctor ring. Put in the crankshaft pulley followed by its bolts and complete their installation by stowing them with 58 n.m (43 lb ft) torque values. Direction the crown of the crankshaft balancer washer so it points away from the engine before installing the washer on top of the bolt then torquing it to 95 n.m (70 lb ft). Reposition the cooling fan and Drive Belt in its proper place.
- Q: How to replace the front harmonic balancer on GMC Yukon?A:The toolset needed for crankshaft balancer replacement comprises crankshaft balancer remover (J 41816), crankshaft end protector (J 41816-2), flywheel holding tool (J 42386-A), crankshaft balancer and sprocket installer (J 41665) and angle meter (J 45059). The replacement process starts with belt removal from the air conditioning system unless vehicle has no air conditioning system. The beginner stage of replacement starts by taking off the lower Fan Shroud and then the Starter motor from the work area. Use the Flywheel holding tool (J 42386-A) to fit its teeth with the engine Flywheel teeth properly. No pre-marking is necessary for the crankshaft balancer before it gets removed. Use the Flywheel holding tool (J 42386-A) by mounting one m10-1.5 x 120 mm bolt and one m10-1.5 x 45 mm bolt while tightening them to 50 nm (37 ft. Lbs.). The crankshaft balancer bolt will maintain its use during the installation process. The crankshaft balancer remover (J 41816) along with the crankshaft end protector (J 41816-2) should be used to remove the balancer while cleaning and inspecting it when possible. Reposition the balancer directly around the crankshaft after which you should use the crankshaft balancer and sprocket installer (J 41665) for installation. Begin by spacing out the installation tool and apply a wrench to the hexoured threaded rod until the balancer starts moving with clock-wise nut rotation. Twist the installation tool in reverse motion and proceed with tightening the balancer until it has reached its complete position. The crankshaft balancer bolt from previous installation should be fitted followed by torquing to 330 nm (240 ft. Lbs.) then removing the bolt. Investigate the distance between crankshaft nose and balancer bore to measure between 2.4 - 4.48 mm (0.094 - 0.176 inch) recess. Recheck the installation following procedure measurements; carry out additional installation when needed. Use the angle meter (J 45059) to secure the new crankshaft balancer bolt at 140 degrees but start by tightening it to 50 nm (37 ft. Lbs.). To finish the repair replace the Starter motor followed by the lower Fan Shroud then install the accessory Drive Belt (if A/C is not present) and a/c Drive Belt (if A/C is part of the system) before performing the crankshaft position system variation learn procedure.


Related GMC Parts
 GMC Oil Filter
 GMC Timing Chain
 GMC Head Gasket
 GMC Balance Shaft Bearing Set
 GMC Crankshaft
 GMC Crankshaft Gear
 GMC Crankshaft Pulley
 GMC Engine Oil Cooler
 GMC Oil Pan Baffle
 GMC Rocker Shaft Spring Kit
 GMC Timing Cover
 GMC Timing Cover Gasket
Browse GMC Harmonic Balancer by Models
Acadia Sierra 1500 Yukon Canyon Sierra 2500 HD Terrain Envoy Sonoma Typhoon Syclone Caballero C1500 Envoy XL Envoy XUV Jimmy K1500 S15 S15 Jimmy Safari Savana 2500 Savana 3500 Sierra 2500 Sierra 3500 Yukon XL Acadia Limited C2500 C3500 G2500 K2500 K3500 P3500 Savana 1500 Yukon XL 1500 C1500 Suburban C2500 Suburban G1500 G3500 K1500 Suburban K2500 Suburban P2500 R1500 R1500 Suburban R2500 R2500 Suburban R3500 Sierra 1500 Classic Sierra 1500 HD Sierra 1500 HD Classic Sierra 1500 Limited Sierra 2500 HD Classic Sierra 3500 Classic Sierra 3500 HD V1500 V1500 Suburban V2500 V2500 Suburban V3500 Yukon XL 2500