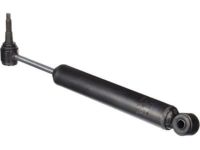
Make sure this part fits

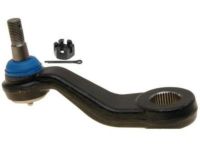
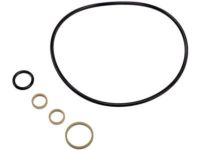
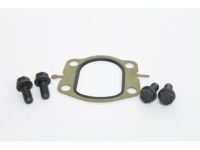
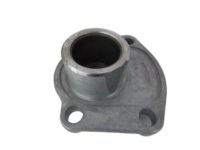
GM 15891516
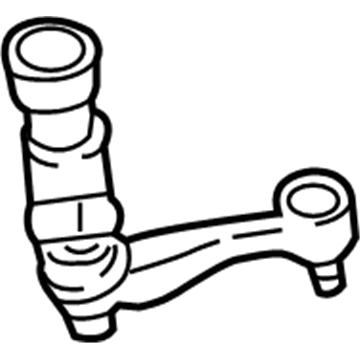
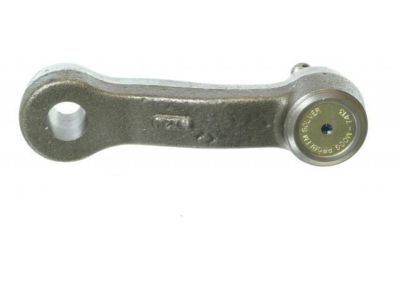
Idler Arm

1999-2009 GM

Customer Questions & Expert Answers (24)
GM 15891516 Idler Arm
  • Part Description
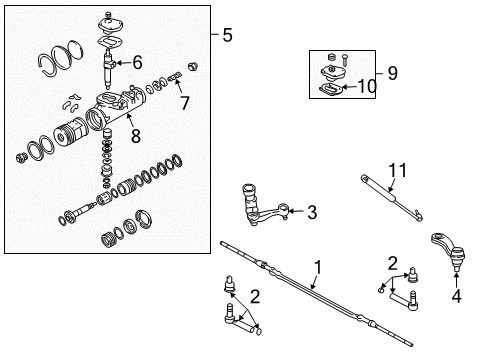
    Arm Kit, Steering Linkage Idler; Steering Idler Arm; Pitman Arm
  • Replaced By
    19435543
  • Manufacturer
    General Motors
Make sure this part fits
$144.36 MSRP: $245.79
You Save: $101.43 (42%)
Ships in 1-2 Business Days
1
ADD TO CART
  • Related Parts
  • Product Specifications
  • Vehicle Fitment
  • Customer Questions & Expert Answers
  • Product Specifications

    BrandGenuine GM
    Manufacturer Part Number15891516
    Part DescriptionArm Kit, Steering Linkage Idler; Steering Idler Arm; Pitman Arm
    Item Dimensions4.8 x 2.3 x 10.9 inches
    Item Weight4.00 Pounds
    ConditionNew
    ManufacturerGeneral Motors
    SKU15891516
    WarrantyThis genuine GM part is guaranteed by GM's factory warranty.
    Shipping & ReturnShipping Policy Return Policy
    Warning: California's Proposition 65
  • Vehicle Fitment

    Year Make Model Trim Engine
    2002-2006 Chevrolet Avalanche 1500Base, LS, LT, On Road Edition, WBH, Z668 Cyl 5.3 L FLEX, 8 Cyl 5.3 L GAS
    2002-2006 Chevrolet Avalanche 2500Base, LS, LT8 Cyl 8.1 L GAS
    2001-2008 Chevrolet Silverado 1500Base, Hybrid, LS, LT, LTZ, SS, WT, Z71 Off-Road6 Cyl 4.3 L GAS, 8 Cyl 4.8 L GAS, 8 Cyl 5.3 L FLEX, 8 Cyl 5.3 L FULL HYBRID EV-GAS (FHEV), 8 Cyl 5.3 L GAS, 8 Cyl 6.0 L GAS
    2007 Chevrolet Silverado 1500 ClassicLS, LT, SS, WT6 Cyl 4.3 L GAS, 8 Cyl 4.8 L GAS, 8 Cyl 5.3 L FLEX, 8 Cyl 5.3 L GAS, 8 Cyl 6.0 L GAS
    2005-2006, 2001-2003 Chevrolet Silverado 1500 HDBase, LS, LT8 Cyl 6.0 L GAS
    2007 Chevrolet Silverado 1500 HD ClassicLT8 Cyl 6.0 L GAS
    1999-2004 Chevrolet Silverado 2500Base, LS, LT, WT8 Cyl 5.3 L GAS, 8 Cyl 6.0 L BI-FUEL, 8 Cyl 6.0 L CNG, 8 Cyl 6.0 L GAS
    2001-2008 Chevrolet Silverado 2500 HDBase, LS, LT, LTZ, WT8 Cyl 6.0 L BI-FUEL, 8 Cyl 6.0 L CNG, 8 Cyl 6.0 L GAS, 8 Cyl 6.6 L DIESEL, 8 Cyl 8.1 L GAS
    2007 Chevrolet Silverado 2500 HD ClassicLS, LT, WT8 Cyl 6.0 L GAS, 8 Cyl 6.6 L DIESEL, 8 Cyl 8.1 L GAS
    2001-2006 Chevrolet Silverado 3500Base, LS, LT, WT8 Cyl 6.0 L CNG, 8 Cyl 6.0 L GAS, 8 Cyl 6.6 L DIESEL, 8 Cyl 8.1 L GAS
    View More
  • Customer Questions & Expert Answers

    Q:
    Is this 15891516 designed for my car? Posted by ChevyPartsGiant Specialist
    A:
    Please Select Your Vehicle model to see if part number 15891516 is suitable before ordering.
    Posted by ChevyPartsGiant Specialist
    Q:
    How to replace the idler arm on Chevrolet Avalanche 1500? Posted by Customer
    A:
    A successful idler arm replacement requires Universal Steering Linkage Puller (J 24319-B) alongside Steering Linkage Installer (12 mm) (J 29193) and Steering Linkage Installer (14 mm) (J 29194). Start by elevating the vehicle then disconnect any engine protection shield from the vehicle when present. Remove the idler arm ball stud nut but do not reuse it and then use the Universal Steering Linkage Puller (J 24319-B) to separate the idler arm from the relay rod. First remove frame bolts of the idler arm together with nuts before removing the arm from the vehicle. The new idler arm should be positioned on the frame before inserting all frame bolts and nuts properly with torque set to 99 Nm (73 ft. lbs.). Fasten the relay rod onto the idler arm ball stud while verifying the seal sits correctly on the stud then apply the Steering Linkage Installer (J 29193) to seat the tapers before torquing it to 54 Nm (40 ft. lbs. with a J 29194 or use the J 29193 tool instead). The new idler arm ball stud prevailing torque nut needs to be installed onto the idler arm ball stud and torqued to 62 Nm (46 ft. lbs.). You should reinstall the engine protection shield if your vehicle is equipped then lower the vehicle before inspecting the wheel alignment.
    Posted by ChevyPartsGiant Specialist
    Q:
    How to replace the idler arm on Chevrolet Avalanche 2500? Posted by Customer
    A:
    A successful idler arm replacement requires Universal Steering Linkage Puller (J 24319-B) alongside Steering Linkage Installer (12 mm) (J 29193) and Steering Linkage Installer (14 mm) (J 29194). Start by elevating the vehicle then disconnect any engine protection shield from the vehicle when present. Remove the idler arm ball stud nut but do not reuse it and then use the Universal Steering Linkage Puller (J 24319-B) to separate the idler arm from the relay rod. First remove frame bolts of the idler arm together with nuts before removing the arm from the vehicle. The new idler arm should be positioned on the frame before inserting all frame bolts and nuts properly with torque set to 99 Nm (73 ft. lbs.). Fasten the relay rod onto the idler arm ball stud while verifying the seal sits correctly on the stud then apply the Steering Linkage Installer (J 29193) to seat the tapers before torquing it to 54 Nm (40 ft. lbs. with a J 29194 or use the J 29193 tool instead). The new idler arm ball stud prevailing torque nut needs to be installed onto the idler arm ball stud and torqued to 62 Nm (46 ft. lbs.). You should reinstall the engine protection shield if your vehicle is equipped then lower the vehicle before inspecting the wheel alignment.
    Posted by ChevyPartsGiant Specialist
    Q:
    How to replace the idler arm on Chevrolet Silverado 1500 Classic? Posted by Customer
    A:
    To replace the Idler Arm, first gather the necessary tools: three pieces of equipment required for Idler Arm replacement include universal steering linkage puller (J 24319-B) along with steering linkage installer (12 mm) (J 29193) and steering linkage installer (14 mm) (J 29194). First elevate the vehicle then detach the engine protection shield when present. First eliminate the Idler Arm ball stud nut before detaching the Idler Arm from the relay rod with a universal steering linkage puller (J 24319-B). First identify and remove Idler Arm frame bolts and nuts before extracting the Idler Arm from the vehicle. To install the new Idler Arm first place it on the frame before inserting the frame bolts and nuts with tightening torque set to 99 nm (73 ft. Lbs.). Use j 29193 steering linkage installer (12 mm) to position the tapers then torque with j 29194 steering linkage installer (14 mm) to 54 nm (40 ft. Lbs.). Use a new Idler Arm ball stud prevailing torque nut to tighten the Idler Arm ball stud to 62 nm (46 ft. Lbs.). Reinstall the engine protection shield if equipped after you lower the vehicle for a wheel alignment inspection.
    Posted by ChevyPartsGiant Specialist
    Q:
    How to replace the pitman arm on Chevrolet Silverado 3500? Posted by Customer
    A:
    Start the Pitman Arm replacement process by elevating the vehicle then positioning suitable support under it. Before continuing with the replacement process you must remove the power steering gear and store it properly in a vise. First disconnect the Pitman Arm washer and nut from the assembly. The Pitman Arm puller (J 6632-01) or Pitman Arm puller (J 29107-A) should be used for separating the Pitman Arm from its position on the pitman shaft. Begin the installation with connecting the new Pitman Arm to the power steering gear after which a new Pitman Arm washer and nut should be installed before tightening the nut to 250 nm (184 ft. Lbs.). The power steering gear should be extracted from the vise before its reinstallation into the vehicle and vehicle lowering should be followed by wheel alignment testing.
    Posted by ChevyPartsGiant Specialist
    Q:
    How to replace the pitman arm on Chevrolet Suburban 2500? Posted by Customer
    A:
    The first step for replacing the Pitman Arm requires a vehicle lift to remove an optional engine protection shield. First separate the relay rod nut that connects the Pitman Arm ball stud before discarding it because this part will be new. When working with the Pitman Arm along with its shaft and puller always refrain from using hammers to maintain equipment integrity. You should use the universal steering linkage puller (J24319-B) to separate the relay rod from the Pitman Arm ball stud followed by removing the power steering gear by carefully marking both the Pitman Arm and pitman shaft for future assembly alignment. The Pitman Arm extraction from the steering gear pitman shaft requires either the universal Pitman Arm puller (J29107-A) or the Pitman Arm puller (J6632-01) and removing the Pitman Arm nut. Check the ball stud thread along with its seals to spot any signs of damage or extreme wear then wash the ball stud threads thoroughly. Alignment of installation marks from removal step is needed when fitting the Pitman Arm onto the pitman shaft. Fasten the new Pitman Arm nut to 250 nm (184 ft. Lbs.). Install the power steering gear alongside the relay rod attachment to the Pitman Arm ball stud while ensuring proper seal position. Tighten the steering linkage installer (J29193) (12mm) or j29194 (14mm) to 54 nm (40 ft. Lbs.) to establish tapers before uninstalling the tool. Place the new relay rod prevailing torque nut then proceed to tighten it to 62 nm (46 ft. Lbs.). Put the engine protection shield back if your vehicle has it. Lastly lower the vehicle for inspection of wheel alignment.
    Posted by ChevyPartsGiant Specialist
    Q:
    How to replace the pitman arm on Chevrolet Silverado 3500 Classic? Posted by Customer
    A:
    Start the Pitman Arm replacement process by positioning the steering gear into a vise prior to its removal. Start by removing both the Pitman Arm nut together with its washer. Both the Pitman Arm puller (J 6632-01) and the Pitman Arm puller (J 29107-A) can be used to unfasten the Pitman Arm from its Pitman Arm shaft position. Install the new Pitman Arm to the steering gear after putting on a new Pitman Arm washer and nut and tighten the nut to 250 nm (184 ft. Lbs.). Reposition the steering gear back into the vise before you install it along with necessary steps to adjust the front toe.
    Posted by ChevyPartsGiant Specialist
    Q:
    How to replace the idler arm on Chevrolet Silverado 2500? Posted by Customer
    A:
    The first step of Idler Arm replacement starts with vehicle lifting followed by removing an engine protection shield whenever present. Begin by removing the Idler Arm ball stud nut without reuse and detach the Idler Arm from the relay rod by using the universal steering linkage puller (J 24319-B). The vehicle needs an engine lift to proceed with the Idler Arm removal process. First remove the Idler Arm frame bolts and nuts then take the Idler Arm out of the vehicle. Organize the new Idler Arm onto the frame before securing frame bolts with nuts while tightening them to 99 nm (73 ft. Lbs.). Install the relay rod onto the ball stud of the Idler Arm while placing the seal onto the stud. Make sure to use the specified steering linkage installers to fit the tapers until torque reaches 54 nm (40 ft. Lbs). Install the new Idler Arm ball stud prevailing torque nut onto its corresponding arm ball stud with proper torque set to 62 nm (46 ft. Lbs.). To complete the procedure you must reinstall the engine protection shield if present and then lower the vehicle while inspecting wheel alignment.
    Posted by ChevyPartsGiant Specialist
    Q:
    How to replace the pitman arm on GMC Sierra 1500 Classic? Posted by Customer
    A:
    Start the Pitman Arm replacement process by positioning the steering gear into a vise prior to its removal. Start by removing both the Pitman Arm nut together with its washer. Both the Pitman Arm puller (J 6632-01) and the Pitman Arm puller (J 29107-A) can be used to unfasten the Pitman Arm from its Pitman Arm shaft position. Install the new Pitman Arm to the steering gear after putting on a new Pitman Arm washer and nut and tighten the nut to 250 nm (184 ft. Lbs.). Reposition the steering gear back into the vise before you install it along with necessary steps to adjust the front toe.
    Posted by ChevyPartsGiant Specialist
    Q:
    How to replace the pitman arm on GMC Sierra 3500? Posted by Customer
    A:
    Start the Pitman Arm replacement process by elevating the vehicle then positioning suitable support under it. Before continuing with the replacement process you must remove the power steering gear and store it properly in a vise. First disconnect the Pitman Arm washer and nut from the assembly. The Pitman Arm puller (J 6632-01) or Pitman Arm puller (J 29107-A) should be used for separating the Pitman Arm from its position on the pitman shaft. Begin the installation with connecting the new Pitman Arm to the power steering gear after which a new Pitman Arm washer and nut should be installed before tightening the nut to 250 nm (184 ft. Lbs.). The power steering gear should be extracted from the vise before its reinstallation into the vehicle and vehicle lowering should be followed by wheel alignment testing.
    Posted by ChevyPartsGiant Specialist
    Q:
    How to replace the pitman arm on GMC Sierra 3500 Classic? Posted by Customer
    A:
    Start the Pitman Arm replacement by taking out the steering gear followed by vise mounting it. The first step involves removing the Pitman Arm nut together with its washer. Two available tools include the Pitman Arm puller (J 6632-01) and the Pitman Arm puller (J 29107-A) for removing the Pitman Arm from its shaft. Install the new Pitman Arm onto the steering gear by following the order starting with placing a new Pitman Arm washer and nut correctly in position. Secure the nut tightness to 250 n.m (184 lb ft). Finally, take out the steering gear from the vise, reinstall the front steering gear before finishing with an adjustment of the front toe.
    Posted by ChevyPartsGiant Specialist
    Q:
    What should be done after raising the 2006 Chevrolet Avalanche 1500? Posted by Customer
    A:
    Remove the power steering gear and secure it in a vise.
    Posted by ChevyPartsGiant Specialist
    See expert answers on similar Pitman Arm
    Q:
    What should be done after raising the 2006 Chevrolet Avalanche 2500? Posted by Customer
    A:
    Remove the power steering gear and secure it in a vise.
    Posted by ChevyPartsGiant Specialist
    See expert answers on similar Pitman Arm
    Q:
    What is the next step after detaching the pitman arm for the 2007 Chevrolet Silverado 1500 Classic? Posted by Customer
    A:
    Place the new pitman arm onto the steering gear, ensuring to install a new pitman arm washer and nut.
    Posted by ChevyPartsGiant Specialist
    See expert answers on similar Pitman Arm
    Q:
    What tools are needed to replace the idler arm for the 2006 Chevrolet Silverado 3500? Posted by Customer
    A:
    Universal Steering Linkage Puller (J 24319-B), Steering Linkage Installer (12 mm) (J 29193), and Steering Linkage Installer (14 mm) (J 29194).
    Posted by ChevyPartsGiant Specialist
    See expert answers on similar Idler Arm
    Q:
    What is the torque specification for tightening the nut for the 2008 Chevrolet Silverado 1500? Posted by Customer
    A:
    Tighten the nut to 250 N.m (184 lb ft).
    Posted by ChevyPartsGiant Specialist
    See expert answers on similar Pitman Arm
    Q:
    How do you install the new idler arm for the 2007 Chevrolet Silverado 3500 Classic? Posted by Customer
    A:
    Position the new idler arm on the frame and install the frame bolts and nuts, tightening them to 99 Nm (73 ft. lbs.).
    Posted by ChevyPartsGiant Specialist
    See expert answers on similar Idler Arm
    Q:
    What should be done after installing the new idler arm for the 2002 Chevrolet Suburban 2500? Posted by Customer
    A:
    Attach the relay rod to the idler arm ball stud, ensuring the seal is on the stud.
    Posted by ChevyPartsGiant Specialist
    See expert answers on similar Idler Arm
    Q:
    What should be done with the power steering gear before removing the pitman arm for the 2004 Chevrolet Silverado 2500? Posted by Customer
    A:
    Install the power steering gear into a vise.
    Posted by ChevyPartsGiant Specialist
    See expert answers on similar Pitman Arm
    Q:
    What should be done with the old idler arm nut for the 2008 GMC Sierra 1500? Posted by Customer
    A:
    Discard the old idler arm nut.
    Posted by ChevyPartsGiant Specialist
    See expert answers on similar Idler Arm
    Q:
    What is the next step after detaching the idler arm for the 2006 GMC Sierra 3500? Posted by Customer
    A:
    Remove the idler arm frame bolts and nuts, then take out the idler arm from the vehicle.
    Posted by ChevyPartsGiant Specialist
    See expert answers on similar Idler Arm
    Q:
    How do you attach the relay rod to the idler arm for the 2004 GMC Yukon XL 2500? Posted by Customer
    A:
    Attach the relay rod to the idler arm ball stud, ensuring the seal is on the stud.
    Posted by ChevyPartsGiant Specialist
    See expert answers on similar Idler Arm
    Q:
    What should be done after removing the idler arm from the relay rod for the 2007 GMC Sierra 3500 Classic? Posted by Customer
    A:
    Take out the idler arm bolts and nuts at the vehicle frame to remove the idler arm from the vehicle.
    Posted by ChevyPartsGiant Specialist
    See expert answers on similar Idler Arm
    Q:
    What tools are necessary to replace the idler arm for the 2007 GMC Sierra 1500 Classic? Posted by Customer
    A:
    Universal Steering Linkage Puller (J 24319-B), Steering Linkage Installer (12 mm) (J 29193), and Steering Linkage Installer (14 mm) (J 29194).
    Posted by ChevyPartsGiant Specialist
    See expert answers on similar Idler Arm
    If you have any questions about this product, please don't hesitate to ask us. We will be happy to help you!

OEM GM 15891516, Excellent Performance and Perfect Fitment

To ensure reliability, purchase GM part # 15891516 Idler Arm. It is sometimes referred to as GM Idler Arm, GM Pitman Arm. Choosing OEM parts is the optimal decision for guaranteeing superior quality and perfect performance. These components undergo stringent quality checks and are carefully constructed to comply with GM's factory specifications, ensuring a smooth installation process.

ChevyPartsGiant.com is a leading supplier of genuine GM parts such as GM 15891516 Idler Arm. Our website boasts an extensive inventory of OEM GM parts, available at highly competitive prices in the market. Should you require any new genuine GM parts, rest assured we will deliver them swiftly and efficiently to your doorstep. Furthermore, all our parts come with the assurance of a manufacturer's warranty. For detailed Chevy parts information, click here.
Choose ChevyPartsGiant for discounted prices, exceptional service and fast delivery