Make sure this part fits

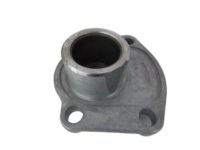
GM 26054932
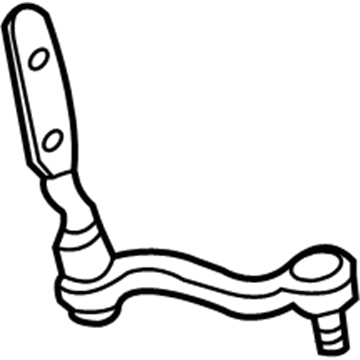
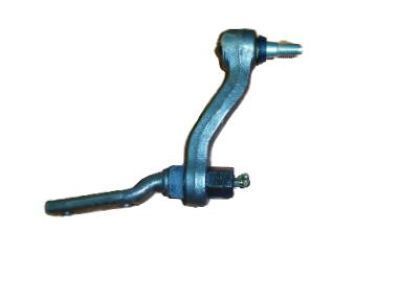
Idler Arm

1984-2005 GM

Customer Questions & Expert Answers (11)
GM 26054932 Idler Arm
  • Part Description
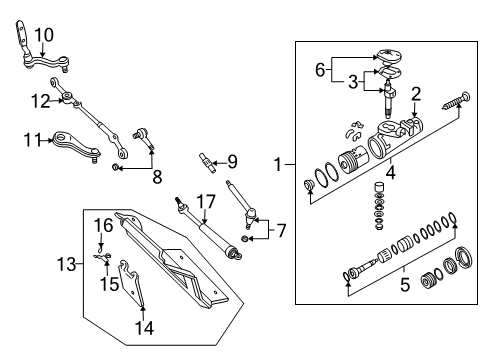
    Arm Kit, Steering Linkage Idler; Steering Idler Arm; Pitman Arm
  • Replaces
    26033093, 31022859
  • Manufacturer
    General Motors
  • Manufacturer's Notes
    This part is discontinued.
Make sure this part fits
  • Related Parts
  • Product Specifications
  • Vehicle Fitment
  • Customer Questions & Expert Answers
  • Product Specifications

    BrandGenuine GM
    Manufacturer Part Number26054932
    Part DescriptionArm Kit, Steering Linkage Idler; Steering Idler Arm; Pitman Arm
    Other NamesArm Kit, Steering Idler
    Item Dimensions13.5 x 7.3 x 3.2 inches
    Item Weight3.20 Pounds
    ConditionNew
    Fitment TypeDirect Replacement
    Replaces26033093, 31022859
    ManufacturerGeneral Motors
    SKU26054932
    WarrantyThis genuine GM part is guaranteed by GM's factory warranty.
    Shipping & ReturnShipping Policy Return Policy
    Warning: California's Proposition 65
  • Vehicle Fitment

    Year Make Model Trim Engine
    1985 Buick RivieraBase, Luxury, T-Type6 Cyl 3.8 L GAS, 8 Cyl 5.0 L GAS, 8 Cyl 5.7 L DIESEL
    1984-1985 Cadillac EldoradoBase, Biarritz8 Cyl 4.1 L GAS, 8 Cyl 5.7 L DIESEL
    1985 Cadillac SevilleBase, Elegante8 Cyl 4.1 L GAS
    1995-2005 Chevrolet BlazerBase, LS, LT, Trailblazer, Xtreme, ZR26 Cyl 4.3 L GAS
    1985-2004 Chevrolet S10Baja, Base, Durango, EL, LS, Sport, SS, Tahoe, Xtreme, ZR2, ZR54 Cyl 1.9 L GAS, 4 Cyl 2.2 L DIESEL, 4 Cyl 2.2 L FLEX, 4 Cyl 2.2 L GAS, 4 Cyl 2.5 L GAS, 6 Cyl 2.8 L GAS, 6 Cyl 4.3 L GAS
    1984-1994 Chevrolet S10 BlazerBase, High Country, LT, Sport, Tahoe, Tahoe LT4 Cyl 1.9 L GAS, 4 Cyl 2.5 L GAS, 6 Cyl 2.8 L GAS, 6 Cyl 4.3 L GAS
    1992-2001 GMC JimmyBase, Diamond Edition, Envoy, SL, SLE, SLS, SLT6 Cyl 4.3 L GAS
    1984-1990 GMC S15Base, EL, Gypsy, High Sierra, Sierra Classic4 Cyl 1.9 L GAS, 4 Cyl 2.0 L GAS, 4 Cyl 2.2 L DIESEL, 4 Cyl 2.5 L GAS, 6 Cyl 2.8 L GAS, 6 Cyl 4.3 L GAS
    1984-1991 GMC S15 JimmyBase, Gypsy, High Sierra, Sierra Classic, SLE, SLS, SLT, Timberline4 Cyl 1.9 L GAS, 4 Cyl 2.0 L GAS, 4 Cyl 2.5 L GAS, 6 Cyl 2.8 L GAS, 6 Cyl 4.3 L GAS
    1991-2004 GMC SonomaBase, GT, SL, SLE, SLS4 Cyl 2.2 L FLEX, 4 Cyl 2.2 L GAS, 4 Cyl 2.5 L GAS, 6 Cyl 2.8 L GAS, 6 Cyl 4.3 L GAS
    View More
  • Customer Questions & Expert Answers

    Q:
    Can you help me check if this 26054932 is the right part for my car? Posted by ChevyPartsGiant Specialist
    A:
    Please Select Your Vehicle model to see if part number 26054932 is suitable before ordering.
    Posted by ChevyPartsGiant Specialist
    Q:
    How to replace the idler arm on a 4WD on Chevrolet Blazer? Posted by Customer
    A:
    Safety stands are essential for vehicle support before starting replacement of the 4wd Idler Arm. Start by taking out the steering linkage shield before detaching both bolts from the differential carrier shield mounting and finally removing the shield. Secondly separate the Idler Arm mounting bolts and nuts from the frame using proper tools to break all ball joints. The steering linkage and tie rod puller (J 24319-B) helps disconnect the relay rod from the Idler Arm before you can take out the arm. Check if the ball stud threads and seal have any signs of damage then clean the threaded ball stud along with the ball stud nut threads. Place the new Idler Arm onto the frame before installing its mounting bolts and nuts which need to be tightened to 108 nm (79 ft. Lbs.). The ball stud installation requires a new nut fitted to the ball stud after reattaching the relay rod to the Idler Arm ball stud. Tighten this nut to 82 nm (60 ft. Lbs.). The reinstallation process begins with differential carrier shield installation and its mounting bolts should be tightened to 25 nm (19 ft. Lbs.) then steer the linkage shield. Complete the procedure by lowering the vehicle then adjusting the front toe.
    Posted by ChevyPartsGiant Specialist
    Q:
    How to replace the Pitman Arm on a 4WD on Chevrolet Blazer? Posted by Customer
    A:
    The first step to replace the Pitman Arm in a 4wd vehicle requires the power steering gear removal and vise insertion. First detach the Pitman Arm shaft's washer and its nut while being careful to not strike any tools against the Pitman Arm and shaft or puller to protect components. The disconnect operation for the Pitman Arm from the pitman shaft can be achieved using either the Pitman Arm puller (J 29107-A) or the Pitman Arm puller (J 6632-01). Before assembly you must check the ball stud threads for damage while inspecting ball stud seals for wear. Clean all thread surfaces on the ball stud. Install the Pitman Arm by first placing it on the Pitman Arm shaft followed by adding the Pitman Arm washer together with the nut which requires tightening up to 250 nm (185 ft. Lbs.). Complete the installation by taking out the power steering gear from its vise position.
    Posted by ChevyPartsGiant Specialist
    Q:
    How to replace the idler arm on Chevrolet S10? Posted by Customer
    A:
    Before commencing Idler Arm replacement start by elevating and stabilizing the vehicle with proper safety stands. Start by removing the steering linkage shield and continuing with differential carrier shield mounting bolt removal until the shield becomes free. Remove the Idler Arm mounting bolts and nuts from the frame, using the correct tool for removing all ball joints. Disconnect the relay rod from the Idler Arm while using the steering linkage and tie rod puller (J 24319-B) for this operation before removing the Idler Arm. Check ball-stud threads alongside the seal for damage and clean the threaded ball stud and ball-stud nut components thoroughly. Place the new Idler Arm onto the frame before installing its mounting bolts and nuts which should become tight at 108 nm (79 ft. Lbs.). Position the relay rod onto the Idler Arm ball stud while maintaining the seal location before seating it with either the steering linkage installer (12 mm) (J 29193) or (14 mm) (J 29194) while tightening the rod to 54 nm (40 ft. Lbs.). After removing the installer from the Idler Arm ball stud, replace it with a new nut then apply torque to 82 nm (60 ft. Lbs.). The service concludes with differential carrier shield replacement along with mounting bolt torquing to 25 nm (19 ft. Lbs.) while installing steering linkage shield before vehicle lowering and front tenoxic adjustment.
    Posted by ChevyPartsGiant Specialist
    Q:
    How to replace the Pitman Arm on a 4WD on Chevrolet S10? Posted by Customer
    A:
    You must start Pitman Arm replacement by removing the power steering gear and fastening it to a vise. Begin by disassembling the Pitman Arm shaft components which includes the washer and nut after which you must avoid hammering these parts or the Pitman Arm and Pitman Arm shaft to prevent failures. You can detached the Pitman Arm from the pitman shaft by employing either the Pitman Arm puller (J 6632-01) or the Pitman Arm puller (J 29107-A). Look for damage on the ball stud threads and check the ball stud seals for wear before cleaning the ball stud threads. The installation procedure begins by uniting the Pitman Arm with its shaft then adding the washer followed by the nut which needs to be tightened up to 250 nm (185 ft. Lbs.). Terminate the power steering gear installation by taking it out from the vise before reattaching it.
    Posted by ChevyPartsGiant Specialist
    Q:
    How to Properly Maintain and Fix the Idler Arm on GMC Jimmy? Posted by Customer
    A:
    Vehicle service and Idler Arm repair starts by raising the vehicle through the use of safety stands. First disconnect the mounting bolts securing both the steering linkage shield and differential carrier shield. Begin the Idler Arm service by taking out the frame-mounted bolts and nuts using a correct tool for Ball Joint separation. Make use of the steering linkage and tie rod puller (J 24319-B) to separate the relay rod from the Idler Arm before you take off the Idler Arm. Thoroughly check the ball stud thread along with its seal for damage before cleansing the ball stud threads and nut. Attach the Idler Arm to the frame before installing its mounting bolts and nuts which need to be tightened to 79 ft. Lbs. (108 Nm). The ball stud of the Idler Arm should be connected to the relay rod with proper seal positioning while using the steering linkage installer (12 mm) (J 29193) or the steering linkage installer (14 mm) (J 29194) for taper seating that requires a 54 nm (40 ft. Lbs.) torque. Use the steering linkage installer to remove the ball stud nut before you can install a fresh nut on the Idler Arm ball stud where you should set the torque to 60 ft. Lbs. Return the differential carrier shield along with its mounting bolts to their position and tighten the bolts to 25 nm (19 ft. Lbs.). Then install the steering linkage shield. Proceed by lowering the vehicle then undertake front wheel toe adjustment.
    Posted by ChevyPartsGiant Specialist
    Q:
    How to service and repair the idler arm on GMC Jimmy? Posted by Customer
    A:
    Service and repair processes for the Idler Arm begin with using safety stands to lift and support the vehicle. Start the Idler Arm service and differential carrier shield repair by removing the mounting bolts to remove the steering linkage shield and differential carrier shield. The next step requires removal of the Idler Arm mounting bolts coupled with nuts from the frame using correct tools to separate all ball joints. The universal steering linkage puller (J 24319-B) enables removal of the Idler Arm by disconnecting its relay rod from the steering linkage. An inspection of ball stud threads and seal should be performed before cleaning the ball stud threads and the ball stud nut. Position the Idler Arm on the frame then install its mounting bolts followed by the nuts while tightening everything to 108 nm (79 ft. Lbs.). Reattach the relay rod to the Idler Arm ball stud while placing the seal properly before tightening the taper with either the steering linkage installer (112 mm) (J 29193) or steering linkage installer (114 mm) (J 29194) up to 54 nm (40 ft. Lbs.). Use the replacement nut on the Idler Arm ball stud and torque it to 82 nm (60 ft. Lbs.). Install the differential carrier shield along with its mounting bolts which need to be tightened to 25 nm (19 ft. Lbs.) before putting on the steering linkage shield. Complete the process by performing front toe adjustment while lowering the vehicle.
    Posted by ChevyPartsGiant Specialist
    Q:
    How to service and repair the pitman arm off on GMC Sonoma? Posted by Customer
    A:
    Beginning the repair process for the Pitman Arm requires initial removal of the pitman shaft together with the side cover from the vehicle. First detach the Pitman Arm from the steering gear and remove the pitman shaft boot together with the dust seal. The j 4245 (Internal Snap Ring Pliers) helps remove the retaining ring but the steering gear housing bore should not develop scores as the seals and washers pry out. The screwdriver assists in removing back up washer and double lip seal from steering gear housing . It is essential to inspect the housing for burrs during this step. The j 6278 (Pitman Shaft Bearing Remover and Installer) should be used with the steering gear housing opening to remove the needle bearing. The needle bearing insertion into the steering gear housing should use j 6278 before applying grease onto the double lip seal and washer. Next, install the double lip seal followed by the back up washer. The installation of the retaining ring must be handled with the j 4245 before finalize the Pitman Arm assembly with its components and lock washer and nut placement. Mount the pitman shaft first with the side cover subsequently and then the dust seal and pitman shaft boot and finally the Pitman Arm onto the steering gear . Following the installation of the Pitman Arm nut includes the addition of the lock washer and nut. Tighten the nut to 250 nm (184 ft. Lbs.) and perform pitman shaft adjustments when needed.
    Posted by ChevyPartsGiant Specialist
    Q:
    How to replace the idler arm on GMC Sonoma? Posted by Customer
    A:
    Before commencing Idler Arm replacement start by elevating and stabilizing the vehicle with proper safety stands. Start by removing the steering linkage shield and continuing with differential carrier shield mounting bolt removal until the shield becomes free. Remove the Idler Arm mounting bolts and nuts from the frame, using the correct tool for removing all ball joints. Disconnect the relay rod from the Idler Arm while using the steering linkage and tie rod puller (J 24319-B) for this operation before removing the Idler Arm. Check ball-stud threads alongside the seal for damage and clean the threaded ball stud and ball-stud nut components thoroughly. Place the new Idler Arm onto the frame before installing its mounting bolts and nuts which should become tight at 108 nm (79 ft. Lbs.). Position the relay rod onto the Idler Arm ball stud while maintaining the seal location before seating it with either the steering linkage installer (12 mm) (J 29193) or (14 mm) (J 29194) while tightening the rod to 54 nm (40 ft. Lbs.). After removing the installer from the Idler Arm ball stud, replace it with a new nut then apply torque to 82 nm (60 ft. Lbs.). The service concludes with differential carrier shield replacement along with mounting bolt torquing to 25 nm (19 ft. Lbs.) while installing steering linkage shield before vehicle lowering and front tenoxic adjustment.
    Posted by ChevyPartsGiant Specialist
    Q:
    What tools are required to service and repair the Pitman Arm, and what are the steps involved in the process on GMC Jimmy? Posted by Customer
    A:
    Repairing and servicing the Pitman Arm needs at least two essential tools including Pitman Arm puller (J 29107-A) and Pitman Arm puller (J 6632-01). The procedure starts by uninstalling the power steering gear followed by the installation of the gear into a vise. You should carefully eliminate the Pitman Arm washer along with nut from the shaft without hitting any sections of the Pitman Arm or shaft or puller to uphold safety. The pitman shaft connection needs to be removed through the use of the Pitman Arm puller (J 6632-01) or the Pitman Arm puller (J 29107-A). Check for damage on the ball stud threads and inspect the ball stud seals to evaluate their wear level before cleaning the ball stud threads. Put the Pitman Arm onto the Pitman Arm shaft then install the washer followed by the nut and torque the nut to 250 nm (185 ft. Lbs.). Viewers should finish the installation by removing the power steering gear from its resting spot in the vise.
    Posted by ChevyPartsGiant Specialist
    Q:
    What tools are required to service and repair the pitman arm on GMC Jimmy? Posted by Customer
    A:
    The necessary tools for servicing and repairing a Pitman Arm include Pitman Arm puller (J 29107-A), Pitman Arm remover (J 6632-01), steering linkage installer (12 mm) (J 29193), and steering linkage installer (14 mm) (J 29194). The power steering gear should be placed in a vise after its removal. Disconnect the Pitman Arm nut and washer which secure the Pitman Arm shaft while shielding the Pitman Arm and Pitman Arm shaft and puller from any unnecessary hammering that could result in damage. Users can disconnect the Pitman Arm from the pitman shaft through the use of either Pitman Arm remover (J 6632-01) or Pitman Arm puller (J 29107-A). Before ball stud installation you must check for damage on threads and verify that seals have not worn out before thoroughly cleaning the ball stud threads. To put the arm together start with attaching the Pitman Arm to its shaft then apply the washer and finally tighten the nut to 250 nm (185 foot-pounds). After detaching the power steering gear from the vise you must reattach it.
    Posted by ChevyPartsGiant Specialist
    If you have any questions about this product, please don't hesitate to ask us. We will be happy to help you!

OEM GM 26054932, Excellent Performance and Perfect Fitment

To ensure reliability, purchase GM part # 26054932 Idler Arm. It is sometimes referred to as GM Idler Arm, GM Pitman Arm. Choosing OEM parts is the optimal decision for guaranteeing superior quality and perfect performance. These components undergo stringent quality checks and are carefully constructed to comply with GM's factory specifications, ensuring a smooth installation process.

ChevyPartsGiant.com is a leading supplier of genuine GM parts such as GM 26054932 Idler Arm. Our website boasts an extensive inventory of OEM GM parts, available at highly competitive prices in the market. Should you require any new genuine GM parts, rest assured we will deliver them swiftly and efficiently to your doorstep. Furthermore, all our parts come with the assurance of a manufacturer's warranty. For detailed Chevy parts information, click here.
Choose ChevyPartsGiant for discounted prices, exceptional service and fast delivery