Make sure this part fits

GM 12476000
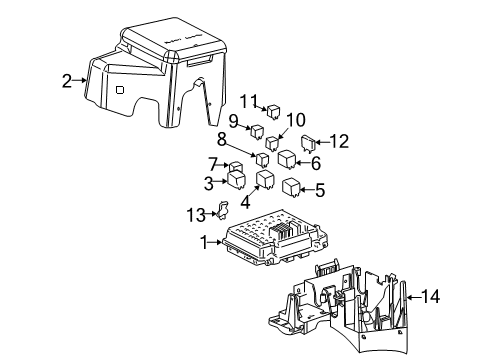
Control Module

1999-2000 GM

Customer Questions & Expert Answers (5)
GM 12476000 Control Module
  • Part Description
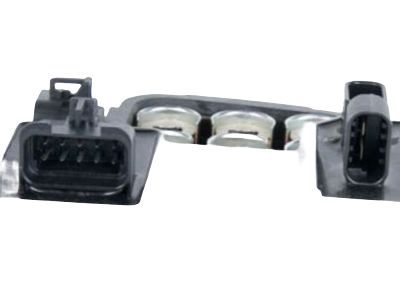
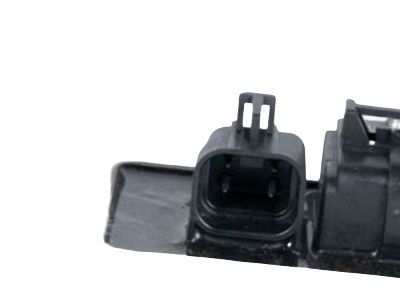
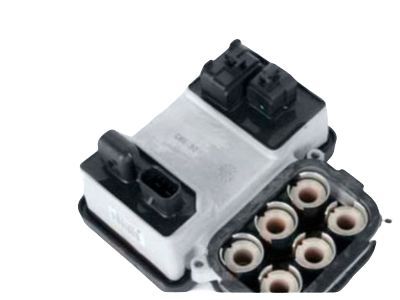
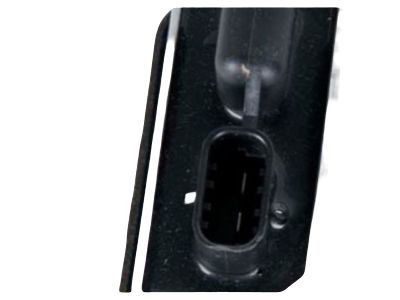
    Module Kit, Electronic Brake Control; ABS Control Module
  • Manufacturer
    General Motors
  • Manufacturer's Notes
    This part is discontinued.
Make sure this part fits
  • Related Parts
  • Product Specifications
  • Vehicle Fitment
  • Customer Questions & Expert Answers
  • Product Specifications

    BrandGenuine GM
    Manufacturer Part Number12476000
    Part DescriptionModule Kit, Electronic Brake Control; ABS Control Module
    Item Dimensions10.8 x 5.6 x 9.0 inches
    Item Weight2.70 Pounds
    ConditionNew
    Fitment TypeDirect Replacement
    ManufacturerGeneral Motors
    SKU12476000
    WarrantyThis genuine GM part is guaranteed by GM's factory warranty.
    Shipping & ReturnShipping Policy Return Policy
    Warning: California's Proposition 65
  • Vehicle Fitment

    Year Make Model Trim Engine
    1999-2000 Cadillac EscaladeBase8 Cyl 5.7 L GAS
    1999 Chevrolet C1500LS8 Cyl 5.0 L GAS, 8 Cyl 5.7 L GAS
    1999 Chevrolet C1500 SuburbanBase, LS, LT8 Cyl 5.7 L GAS, 8 Cyl 6.5 L DIESEL
    1999-2000 Chevrolet C2500Base, LS8 Cyl 5.0 L GAS, 8 Cyl 5.7 L CNG, 8 Cyl 5.7 L GAS, 8 Cyl 6.5 L DIESEL, 8 Cyl 7.4 L GAS
    1999 Chevrolet C2500 SuburbanBase, LS8 Cyl 5.7 L GAS, 8 Cyl 6.5 L DIESEL, 8 Cyl 7.4 L GAS
    1999-2000 Chevrolet C3500Base, LS8 Cyl 5.7 L CNG, 8 Cyl 5.7 L GAS, 8 Cyl 6.5 L DIESEL, 8 Cyl 7.4 L GAS
    1999 Chevrolet K1500LS8 Cyl 5.0 L GAS, 8 Cyl 5.7 L GAS
    1999 Chevrolet K1500 SuburbanBase, LS, LT8 Cyl 5.7 L GAS, 8 Cyl 6.5 L DIESEL
    1999-2000 Chevrolet K2500Base, LS8 Cyl 5.7 L GAS, 8 Cyl 6.5 L DIESEL, 8 Cyl 7.4 L GAS
    1999 Chevrolet K2500 SuburbanBase, LS8 Cyl 5.7 L GAS, 8 Cyl 6.5 L DIESEL, 8 Cyl 7.4 L GAS
    View More
  • Customer Questions & Expert Answers

    Q:
    Is this 12476000 designed for my car? Posted by ChevyPartsGiant Specialist
    A:
    Please Select Your Vehicle model to see if part number 12476000 is suitable before ordering.
    Posted by ChevyPartsGiant Specialist
    Q:
    How to service and repair the ABS Control Module on Cadillac Escalade? Posted by Customer
    A:
    It is important to first disconnect the negative Battery Cable when dealing with the service or repair of the ABS Control Module. Carefully undo the four t-25 torx screws (1) that attach the ABS Control Module to the bpmv so damage to each component is avoided. Pull the ABS Control Module upwards (2) slightly to get access to the electrical connectors and then unplug the four electrical connectors before finishing the removal of the ABS Control Module from the bpmv. Please don't reuse the previous mounting screws and never put rtv or any sealant on either the ABS Control Module gasket or its mating surfaces. Attach the ABS Control Module (2) to the bpmv (3) and link all the electrical connectors. Install each of the new t-25 torx screws (1) and make sure they're tightened to 5 nm (39 inch lbs.) in an x pattern. The end of your procedure includes securing the negative Battery Cable, calibrating tires with the scan tool and running another diagnostic system check.
    Posted by ChevyPartsGiant Specialist
    Q:
    How to service and repair the ABS Control Module on Chevrolet K3500? Posted by Customer
    A:
    It is important to first disconnect the negative Battery Cable when dealing with the service or repair of the ABS Control Module. Carefully undo the four t-25 torx screws (1) that attach the ABS Control Module to the bpmv so damage to each component is avoided. Pull the ABS Control Module upwards (2) slightly to get access to the electrical connectors and then unplug the four electrical connectors before finishing the removal of the ABS Control Module from the bpmv. Please don't reuse the previous mounting screws and never put rtv or any sealant on either the ABS Control Module gasket or its mating surfaces. Attach the ABS Control Module (2) to the bpmv (3) and link all the electrical connectors. Install each of the new t-25 torx screws (1) and make sure they're tightened to 5 nm (39 inch lbs.) in an x pattern. The end of your procedure includes securing the negative Battery Cable, calibrating tires with the scan tool and running another diagnostic system check.
    Posted by ChevyPartsGiant Specialist
    Q:
    How to service and repair the ABS Control Module on GMC C2500? Posted by Customer
    A:
    Initiating ABS Control Module (ABSCM) service and repair begins with negative Battery Cable disconnection and protecting the electronic hydraulic control unit (EHCU) area from loose dirt to preserve the cleanliness of the abs components during all disassembly steps. First wash thoroughly any contaminants from the ehcu area and afterward separate the abscm electrical connectors. Release the three bracket securing bolts on the frame rail of the ehcu mounting bracket for access to remove the four mounting screws which connect the abscm to brake pressure modulator valve (BPMV). Take out the abscm from the bpmv by applying gentle pressure because heavy force could harm the abscm component. Clean both surfaces that abscm and bpmv are mounted to using a clean cloth. The new abscm installation requires fresh screws instead of old hardware and professionals should not apply any sealants at either the abscm gasket or mating surfaces. The bpmv requires the abscm to be installed and secured through four new screws tightened to 5 n.m (39 lb in) in an x-pattern. Complete the abscm installation by reconnecting the electrical connectors to the abscm and the negative Battery Cable after reassembling and tightening the mounting bolts of ehcu bracket to 25 n.m (18 lb ft). Complete calibration of tire size requires using the scan tool tire size calibration function before returning to diagnostic starting point.
    Posted by ChevyPartsGiant Specialist
    Q:
    How to replace the ABS Control Module on GMC C3500? Posted by Customer
    A:
    The first step is to disconnect the combination valve's electrical connector (9) from the bpmv and then take off the brake pipes from both the master cylinder and the combination valve. After that, separate the brake pipes from the tube adapters at the right front, left front and rear hubs and pull out the 10 mm bolts that fasten the ehcu assembly to the vehicle's mounting bracket. Raise the ehcu out of the engine compartment partly and then disconnect the four cables plugged into ebcm (2), before removing it entirely. After that, unfasten the three allen bolts (10) from the combination valve (11) and get rid of the combination valve. You should always add new transfer tubes which means that you must remove the two transfer tubes (12) and the three 13 mm bolts (9) connecting the ehcu mounting bracket (6) to the bpmv (3). Take out the four t-25 torx bolts (1) in the ebcm (2) so that you do not use excessive force, as that could end up damaging the ebcm or bpmv. Make sure to use new bolts when installing the ebcm (1) instead of reusing the old ones. With gentle force, take the ebcm (2) off the bpmv (3) from its side. To begin, put the new transfer tubes (12) into the combination valve (11) and after that, attach the combination valve (11) to the bpmv (3). Ultimately, tighten the combination valve (11) to the bpmv (3) using the three allen bolts (10) and make sure to fasten them to 8 nm (6 ft. Lbs.) first, then increase to 16 nm (12 ft. Lbs.). It is important not to put sealant such as rtv, on the ebcm gasket or the mating surfaces. Subsequently, fit the ebcm (2) to the bpmv (3) by using new bolts and then secure the four bolts (1) of the ebcm to 5 nm (39 inch lbs.). Screw the bpmv (4) into bracket (6) and fasten the three bpmv to bracket bolts (8) to 9 nm (7 ft. Lbs.). Screw on the four electrical connectors to the ebcm (2), then connect and secure the ehcu to the car's frame using the three screws and tightening them to 12 nm (9 ft. Lbs.). Next, hook up the right front, left front and rear brake pipes to the adapters (5) and use a wrench to fasten them to 30 nm (22 ft. Lbs.). After that, hook up the brake pipes from the master cylinder to the combination valve (11) and once again fasten them to 30 nm (22 ft. Lbs.). In the end, attach the electrical connector (9) to the combination valve (11) and join the negative Battery Cable, making sure that the combination valve metering rod is down during bleeding, then bleed the brakes and come back to the diagnostic system check.
    Posted by ChevyPartsGiant Specialist
    If you have any questions about this product, please don't hesitate to ask us. We will be happy to help you!

OEM GM 12476000, Excellent Performance and Perfect Fitment

To ensure reliability, purchase GM part # 12476000 Control Module. It is sometimes referred to as GM ABS Control Module. Choosing OEM parts is the optimal decision for guaranteeing superior quality and perfect performance. These components undergo stringent quality checks and are carefully constructed to comply with GM's factory specifications, ensuring a smooth installation process.

ChevyPartsGiant.com is a leading supplier of genuine GM parts such as GM 12476000 Control Module. Our website boasts an extensive inventory of OEM GM parts, available at highly competitive prices in the market. Should you require any new genuine GM parts, rest assured we will deliver them swiftly and efficiently to your doorstep. Furthermore, all our parts come with the assurance of a manufacturer's warranty. For detailed Chevy parts information, click here.
Choose ChevyPartsGiant for discounted prices, exceptional service and fast delivery