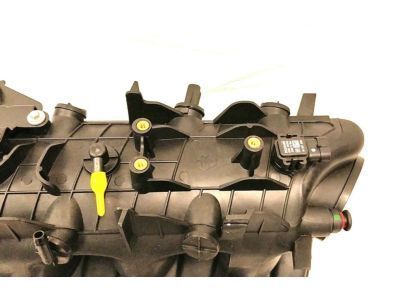
Make sure this part fits

GM 17113697
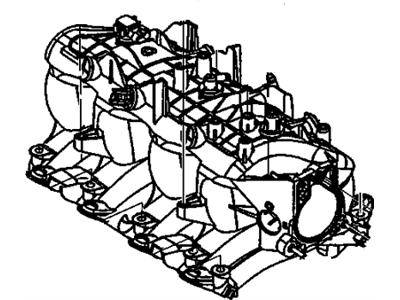
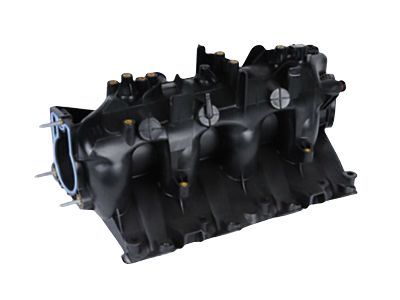
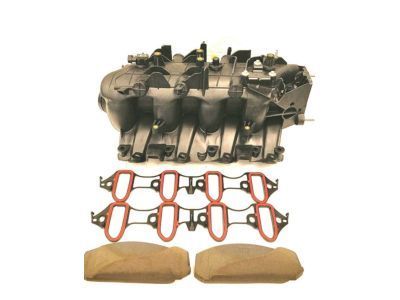
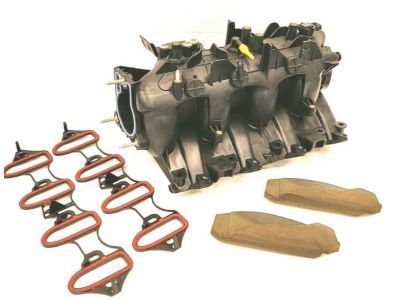
Manifold

1999-2002 GM

Customer Questions & Expert Answers (9)
GM 17113697 Manifold
  • Part Description
    Manifold, Engine Fuel Intake Manifold
  • Replaces
    17113546
  • Manufacturer
    General Motors
  • Manufacturer's Notes
    This part is discontinued.
Make sure this part fits
  • Product Specifications
  • Vehicle Fitment
  • Customer Questions & Expert Answers
  • Product Specifications

    BrandGenuine GM
    Manufacturer Part Number17113697
    Part DescriptionManifold, Engine Fuel Intake Manifold
    Other NamesIntake Manifold
    Item Dimensions28.3 x 16.8 x 15.5 inches
    Item Weight19.30 Pounds
    ConditionNew
    Fitment TypeDirect Replacement
    Replaces17113546
    ManufacturerGeneral Motors
    SKU17113697
    WarrantyThis genuine GM part is guaranteed by GM's factory warranty.
    Shipping & ReturnShipping Policy Return Policy
    Warning: California's Proposition 65
  • Vehicle Fitment

    Year Make Model Trim Engine
    2002 Cadillac EscaladeBase8 Cyl 5.3 L GAS, 8 Cyl 6.0 L GAS
    2002 Cadillac Escalade EXTBase8 Cyl 6.0 L GAS
    2002 Chevrolet Avalanche 1500Base, North Face, On Road Edition, Z718 Cyl 5.3 L GAS
    1999-2002 Chevrolet Silverado 1500Base, LS, LT, WT8 Cyl 4.8 L GAS, 8 Cyl 5.3 L FLEX, 8 Cyl 5.3 L GAS
    2001-2002 Chevrolet Silverado 1500 HDLS, LT8 Cyl 6.0 L GAS
    1999-2002 Chevrolet Silverado 2500Base, LS, LT8 Cyl 5.3 L GAS, 8 Cyl 6.0 L BI-FUEL, 8 Cyl 6.0 L CNG, 8 Cyl 6.0 L GAS
    2001-2002 Chevrolet Silverado 2500 HDBase, LS, LT8 Cyl 6.0 L BI-FUEL, 8 Cyl 6.0 L CNG, 8 Cyl 6.0 L GAS
    2001-2002 Chevrolet Silverado 3500Base, LS, LT8 Cyl 6.0 L GAS
    2000-2002 Chevrolet Suburban 1500Base, LS, LT8 Cyl 5.3 L FLEX, 8 Cyl 5.3 L GAS
    2000-2002 Chevrolet Suburban 2500Base, LS, LT8 Cyl 6.0 L GAS
    View More
  • Customer Questions & Expert Answers

    Q:
    Is this 17113697 designed for my car? Posted by ChevyPartsGiant Specialist
    A:
    Please Select Your Vehicle model to see if part number 17113697 is suitable before ordering.
    Posted by ChevyPartsGiant Specialist
    Q:
    How to install the intake manifold on Chevrolet Suburban 1500? Posted by Customer
    A:
    First of all to install the Intake Manifold, make sure you have new Intake Manifold-to-cylinder head gaskets. Later, place the Intake Manifold and apply 5 mm (0.20 inch) wide threadlock gm p/n 12345382 or equivalent as a band to the threads of the Intake Manifold bolts. Put the bolts on Intake Manifold, tighten them in sequence on the first pass to 5 nm (44 inch lbs.) and on the final pass, to 10 nm (89 inch lbs.). If the manifold absolute pressure sensor was taken out, then it should be replaced with the electrical connector end toward the front engine. Thereafter install the positive crankcase ventilation (PCV) valve and hose, along with the engine coolant air bleed hose and clamp to the Throttle Body. If available install the accelerator control cable bracket and bolts securing the bracket bolts to 10 nm (89 inch lbs.). Finally, mount the evaporative emission (EVAP) purge solenoid, bolt, and isolator while allowing the solenoid bolt to be tightened to 10 nm (89 inch lbs).
    Posted by ChevyPartsGiant Specialist
    Q:
    How to replace the intake manifold on Chevrolet Suburban 2500? Posted by Customer
    A:
    For replacement of Intake Manifold, first loosen the clamp on the air cleaner sides and at the Throttle Body body and remove the air cleaner outlet duct. Loosen the Intake Manifold sight shield bolt, then remove the sight shield from the bracket, then the sight shield bracket and nuts. Relieve the fuel system pressure and disconnect the lines of the fuel feed and return lines. Vehicle harness clips disconnect from studs front of dash and wheelhouse splash panel. Remove the pressure cycling switch , surge tank switch , mass air flow (MAP) sensor. Reposition the engine harness branch on the topsurface of the engine and remove the connector position assurance (CPA) retainer at the ignition coil harness and disconnect the manifold absolute pressure(MAP) sensor, ignition coil harness and the engine coolant temperature (ECT) sensor. The parts to be removed include the engine harness bolts and studs, cpa retainer at the pioneer haul out coil harness, generator , injector harness , ignitors coil harness , throttle position (TP) sensor , electronic throttle control (Etc), and purge valve solenoid to be disconnected. Slide the engine harness to the driver side of the engine compartment, unplug the bypass valve vacuum hose from the Intake Manifold, and disconnect the exhaust gas recirculation (EGR) valve electrical connector. Loosen the bolts on the egr pipe on the egr adapter and reposition the egr pipe and discard the EGR Valve pipe gasket. Take out the fuel pressure regulator vacuum hose, and when replacing the Intake Manifold, remove the Fuel Rail studs and the Fuel Rail. Remove the Intake Manifold bolts but without prying under the gasket surface and remove the Intake Manifold, discard Intake Manifold; side gaskets; end seals. Before replacing the Intake Manifold, remove the splash shield, otherwise, bring the new Intake Manifold in place. Make sure that the splash shield does snap fit between the cylinder heads, replace the Intake Manifold with new end seals and side gaskets to the cylinder heads, but made sure to align the gasket tabs properly. Install the Intake Manifold gaskets with this side up stamped in an upward direction and then install the Intake Manifold. Apply threadlock gm U.S. P/N 12345382, canada P/N10953489 or equivalent to a minimum of eight threads of the Intake Manifold bolts, and install. Make sure to tighten the Intake Manifold bolts in a sequence, using four passes: first pass: 5 nm (44 inch lbs), second pass: 5 nm (44 inch lbs) third pass:10 nm (89 inch lbs), and last pass: 12 nm (106 inch lbs). Apply clean engine oil to the o-ring seals on the fuel injectors and then attach them to the spray tip of each fuel injector. If replacing the Intake Manifold, the Fuel Rail must be installed and the Fuel Rail studs should be tightened to 12 nm (106 inch lb). Mount the fuel pressure regulator vacuum hose, egr valve pipe gasket, and align the egr pipe; squeeze and tighten the egr pipe bolts to 30 nm (22 ft. Lbs.). Connect the EGR Valve electrical connector, and the bypass valve vacuum hose to the Intake Manifold. Shove the engine harness in the engine compartment and join the generator , injector harness , ignition coil harness , tp sensor , and etc as well as purge valve solenoid . Mount the cpa retainer at the ignition coil harness and install the engine harness bolt and studs. The bolt is to be tightened to 5 nm (44 inch lbs.), while the studs are to be tightened to 10 nm (89 inch lbs.) connect the MAP Sensor , ignition coil harness & ect sensor and over the engine set the engine harness branch on the top of the engine. Concert the pressure cycling switch , surge tank switch and maf sensor before connecting the engine harness clip to the wheelhouse splash shield and the clips to the studs on the front of the dash. Connect the fuel feed and return pipes attaching the engine sight shield bracket and nuts tighten the nuts 5 nm (44 inch lbs.) and install the sight shield to the bracket and tighten the Intake Manifold sight shield bolt to 10 nm (89-inch lbs.). Finally, take a look at the air cleaner outlet duct and tighten the clamps where the Throttle Body and air cleaner are located at a torque of 4 nm (35 inch lbs.).
    Posted by ChevyPartsGiant Specialist
    Q:
    How to replace the intake manifold on Chevrolet Tahoe? Posted by Customer
    A:
    The first step involved in the replacement of the Intake Manifold would be disconnecting the battery negative cable as well as draining the engine coolant. Take off the engine sight shield and restore the accelerator control cable down with a hereditary one whenever the magnitude of the engine is removed, and locate the cruise control cable out of reach to avoid the damage due to physical activity. Now disconnect the accelerator control cable and the cruise control cable from the throttle shaft, then put them aside. Silently remove the engine sight shield mounting bracket and screws, the air cleaner duct, the inlet coolant hose, the vapor vent tube hose, and the exhaust gas recirculation (EGR) pipe bracket. Pull off large electrical harness retainer and withdraw one turn of m6 nut to remove the engine harness from the Intake Manifold. Pull off the eight fuel injector connectors, idle air control (IAC) motor, throttle position (TP) sensor, evaporative emission (EVAP) canister purge solenoid, and manifold absolute pressure (MAP) sensor, placing the electrical harness aside. Remove the purge solenoid vent tube from the solenoid, fuel pipes to the Fuel Rail, vacuum absorber brake booster hose if available, and the positive crankcase ventilation (PCV) valve and hose. Undertake the removal of Intake Manifold together with thorough cleaning and inspection of the same and the sealing surfaces. For installation, apply the Intake Manifold to the engine, reinstall the vacuum brake booster hose if needed, and also the PCV Valve and hose. Mount the fuel pipes to the Fuel Rail and the purge solenoid vent tube to the purge solenoid. Mount the engine electrical harness and nut and tighten the nut to 10 nm (89 inch lbs.) and run the harness over the engine and you will install the evap, tp, map, fuel pipes iac, and 8 fuel injector connectors. Reattach the engine sight shield mounting bracket and bolts and attach the accelerator control cable as well as the cruise control cable to the throttle shaft. Mount the engine sight shield, egr pipe bracket, vapor vent tube hose, coolant hose, and air cleaner duct. Finally, add coolant into the engine and connect the battery negative cable.
    Posted by ChevyPartsGiant Specialist
    Q:
    How to remove the intake manifold, throttle body, fuel injection rail, and fuel injectors as an assembly on Chevrolet Tahoe? Posted by Customer
    A:
    The initial step before removing the Intake Manifold and Throttle Body with fuel injection rail and fuel injectors as one piece starts by disconnecting positive crankcase ventilation (PCV) hose and valve. Remove the manifold absolute pressure (MAP) sensor only when required. Begin by first removing the clamps holding the engine coolant air bleed hose near the Throttle Body then proceed with removal of the accelerator control cable bracket together with any necessary bolts. Third remove the evaporative emission (EVAP) solenoid and its bolt to remove the isolator. Begin by removing the bolts securing the Intake Manifold and separate both the manifold and gaskets. The technician should separate the Intake Manifold-to-cylinder head gaskets from their position at the manifold then discard the Intake Manifold gaskets while preventing their use elsewhere.
    Posted by ChevyPartsGiant Specialist
    Q:
    How to service and repair the intake manifold on Chevrolet Tahoe? Posted by Customer
    A:
    When repairing or servicing the Intake Manifold start with sensor removal from the intake's rear end before cleaning and reinstalling to the intake. Check the sealing grommet on the MAP Sensor for indications of damage or tears. Start by removing and discarding the Intake Manifold-to-cylinder head gaskets before you proceed to remove the Fuel Rail with injectors along with the Throttle Body and gasket. You should now disconnect the evaporative emissions (EVAP) purge solenoid from the bolt and isolator. Wear safety goggles before cleaning the Intake Manifold with solvent then focus on both gasket surfaces and internal channels. Clean the Intake Manifold by blowing it dry using compressed air. Check for loose or damaged threads on the Throttle Body studs and inserts and wire harness stud and insert and Fuel Rail bolt inserts during inspection. Check the vacuum passages inside the Intake Manifold for debris and inspect the MAP Sensor mounting bore in combination with retaining tabs for damage. Check the composite Intake Manifold assembly for cracks and examine every area between intake runners and assess all gasket sealing surfaces and fuel injector bore regions for extreme scoring and damage. Assess the Intake Manifold cylinder head deck for warpage by placing a straight edge across the surface and using a feeler gauge; the manifold requires replacement when the observed warpage reaches 3 mm (0.118 inch) across a 200 mm (7.87 inch) area. Reinstall the MAP Sensor and evap solenoid, bolt, and isolator. Additionally, torque the evap solenoid bolt to 10 nm (89 inch lbs.).
    Posted by ChevyPartsGiant Specialist
    Q:
    How to install the NEW intake manifold on GMC Yukon XL 1500? Posted by Customer
    A:
    Begin the new Intake Manifold installation by securing the evap solenoid isolator , solenoid , and bolt onto the manifold then torque the evap solenoid bolt to 10 nm (89 inch lbs.). Then install the accelerator control cable bracket and its corresponding bolts before tightening them to 10 nm (89 inch lbs.). Place map sensors before installing the Throttle Body, fuel rail, and injectors onto the new Intake Manifold. Apply new Intake Manifold gaskets onto the manifold before you set it into position. Apply a 5 mm (0.20 inch) band of threadlock gm p/n 12345382 or equivalent to the threads of the Intake Manifold bolts, then install and tighten the bolts in sequence to 5 nm (44 inch lbs.) for the first pass and 10 nm (89 inch lbs.) for the final pass. If available route the pcv hose with valve and the vacuum brake booster hose through the rear opening of the Intake Manifold. Set a new egr pipe gasket onto the exhaust manifold while you attach the egr pipe (with valve) using bolts securing it to the Intake Manifold , cylinder head , and exhaust manifold . Torque bolts to a firm state. Tighten the EGR Valve pipe-to-Intake Manifold bolts to 10 nm (89 inch lbs.), the EGR Valve pipe-to-cylinder head bolts to 50 nm (37 ft. Lbs.)secure the egr pipe to exhaust manifold with bolts tightened to 30 nm (22 ft. Lbs.). Secure the electrical harness by directing it above the engine and attach the Knock Sensor harness electrical connector to the Intake Manifold. Install the MAP Sensor and Knock Sensor electrical connectors into position. Connect the main ignition coil harness and the fuel injectors alongside the EGR Valve connectors and finish with harness clips to the Fuel Rail. Repeat the connection for the main ignition coil harness and fuel injectors , then attach the wiring harness clips to the Fuel Rail. Install the accelerator control cable onto the bracket and throttle blade before connecting the cruise control cable bracket to the throttle blade stud. Finish by installing the engine sight shield and retainer.
    Posted by ChevyPartsGiant Specialist
    Q:
    How to remove the intake manifold on GMC Yukon XL 1500? Posted by Customer
    A:
    Removing the Intake Manifold starts by removing the engine sight shield and retainer followed by fuel system pressure relief. First disconnect the cruise control cable from the throttle blade stud before removing it from the bracket and then remove the accelerator control cable from the throttle blade and its bracket. The procedure continues by disconnecting the Fuel Rail's main ignition coil harness and fuel injectors while also removing the harness clips. You should next proceed to uninstall the main ignition coil harness and fuel injectors while also disconnecting the exhaust gas recirculation (EGR) valve. Lastly remove the harness clips that secure the Fuel Rail. Fasten the Knock Sensor harness electrical connector to the Intake Manifold while you disconnect the manifold absolute pressure (MAP) sensor and Knock Sensor. Set the electrical harness to the side. Connectors should first be removed from the throttle position (TP) sensor if present before proceeding to disconnect the electronic throttle control (ETC) motor if present and the idle air control (IAC) valve and purge solenoid then generator . Remove the wiring harness bracket nut and its bracket attachment at the stud before readjusting the engine wiring harness alongside the coolant air bleed hose at the Throttle Body. Ensure the Throttle Body remains hose-free during this process. Remove the radiator vent inlet hose from the Throttle Body by removing its clamp. The positive crankcase ventilation (PVC) hose needs to be taken from the Throttle Body and rocker arm cover and the pcv hose (with valve) needs to be taken from the Intake Manifold and rocker arm cover. The egr pipe bolts need removal from three points: Intake Manifold and Cylinder Head and Exhaust Manifold. The egr pipe (with valve) and Exhaust Manifold gasket must also be extracted. Remove the vacuum brake booster hose from the rear of the Intake Manifold when equipment requires it. You need to first disconnect the evaporative emission (EVAP) purge solenoid vent tube from its solenoid section while pressing the evap pipe fastener to separate the tube end from the vapor pipe. Begin by disconnecting the fuel line quick connect fittings before you remove the bolts from the Intake Manifold and its adjoining gaskets which must be discarded. Wipe down both the gasket surfaces on the egr pipe and the Exhaust Manifold for cleanup. The Throttle Body and Fuel Rail with injectors must be removed along with the MAP Sensor along with the accelerator control cable bracket bolts and bracket and the evap solenoid bolt and solenoid and isolator when replacing the Intake Manifold.
    Posted by ChevyPartsGiant Specialist
    Q:
    What should be done if it is equipped with an EGR system during reinstallation for the 2002 Chevrolet Tahoe? Posted by Customer
    A:
    Position a new EGR pipe gasket on the exhaust manifold and install the EGR pipe with valve, tightening the EGR pipe bolts as specified.
    Posted by ChevyPartsGiant Specialist
    See expert answers on similar Intake Manifold
    If you have any questions about this product, please don't hesitate to ask us. We will be happy to help you!

OEM GM 17113697, Excellent Performance and Perfect Fitment

To ensure reliability, purchase GM part # 17113697 Manifold. It is sometimes referred to as GM Intake Manifold. Choosing OEM parts is the optimal decision for guaranteeing superior quality and perfect performance. These components undergo stringent quality checks and are carefully constructed to comply with GM's factory specifications, ensuring a smooth installation process.

ChevyPartsGiant.com is a leading supplier of genuine GM parts such as GM 17113697 Manifold. Our website boasts an extensive inventory of OEM GM parts, available at highly competitive prices in the market. Should you require any new genuine GM parts, rest assured we will deliver them swiftly and efficiently to your doorstep. Furthermore, all our parts come with the assurance of a manufacturer's warranty. For detailed Chevy parts information, click here.
Choose ChevyPartsGiant for discounted prices, exceptional service and fast delivery