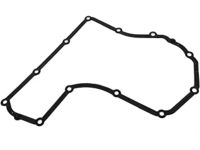
Make sure this part fits

GM 8685184
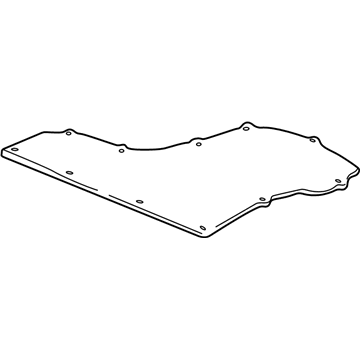
Oil Pan

1995-2011 GM

Customer Questions & Expert Answers (21)
GM 8685184 Oil Pan
  • Part Description
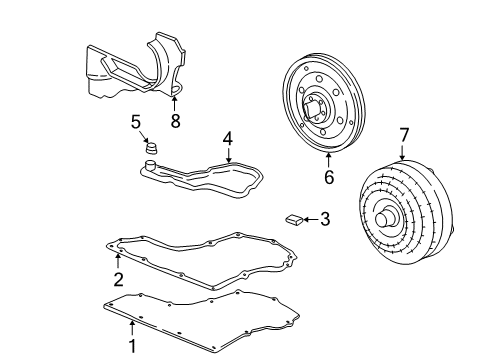
    Pan Assembly-Automatic Transmission Oil; Automatic Transmission Oil Pan; Transmission Oil Pan
  • Replaces
    8684384
  • Manufacturer
    General Motors
Make sure this part fits
$105.74 MSRP: $165.55
You Save: $59.81 (37%)
Ships in 1-2 Business Days
1
ADD TO CART
  • Related Parts
  • Product Specifications
  • Vehicle Fitment
  • Customer Questions & Expert Answers
  • Product Specifications

    BrandGenuine GM
    Manufacturer Part Number8685184
    Part DescriptionPan Assembly-Automatic Transmission Oil; Automatic Transmission Oil Pan; Transmission Oil Pan
    Other NamesTransmission Pan; Pan, Transmission Oil Pan
    Item Dimensions3.1 x 20.4 x 18.9 inches
    Item Weight3.30 Pounds
    ConditionNew
    Fitment TypeDirect Replacement
    Replaces8684384
    ManufacturerGeneral Motors
    SKU8685184
    WarrantyThis genuine GM part is guaranteed by GM's factory warranty.
    Shipping & ReturnShipping Policy Return Policy
    Warning: California's Proposition 65
  • Vehicle Fitment

    Year Make Model Trim Engine
    1995-2005 Chevrolet CavalierBase, LS, LS Sport, RS, Z244 Cyl 2.2 L BI-FUEL, 4 Cyl 2.2 L GAS, 4 Cyl 2.4 L GAS
    2004-2005 Chevrolet ClassicBase, LS4 Cyl 2.2 L GAS
    2009-2010 Chevrolet CobaltBase, LS, LT4 Cyl 2.2 L GAS
    2009-2011 Chevrolet HHRLS, LS Panel, LT, LT Panel4 Cyl 2.2 L FLEX, 4 Cyl 2.4 L FLEX
    1997-2010 Chevrolet MalibuBase, Classic LS, Classic LT, Hybrid, LS, LT, LTZ, Maxx, Maxx LS, Maxx LT, Maxx LTZ, Maxx SS, SS4 Cyl 2.2 L GAS, 4 Cyl 2.4 L FLEX, 4 Cyl 2.4 L FULL HYBRID EV-GAS (FHEV), 4 Cyl 2.4 L GAS, 6 Cyl 3.1 L GAS, 6 Cyl 3.5 L FLEX, 6 Cyl 3.5 L GAS, 6 Cyl 3.9 L GAS
    1997-1999 Oldsmobile CutlassBase, GL, GLS6 Cyl 3.1 L GAS
    2007-2009 Pontiac G5Base, GT4 Cyl 2.2 L GAS, 4 Cyl 2.4 L GAS
    2005-2010 Pontiac G6Base, GT4 Cyl 2.4 L FLEX, 4 Cyl 2.4 L GAS, 6 Cyl 3.5 L FLEX, 6 Cyl 3.5 L GAS
    1999-2005 Pontiac Grand AmGT, GT1, SE, SE1, SE24 Cyl 2.2 L GAS, 4 Cyl 2.4 L GAS, 6 Cyl 3.4 L GAS
    1995-2005 Pontiac SunfireBase, GT, SE4 Cyl 2.2 L GAS, 4 Cyl 2.3 L GAS, 4 Cyl 2.4 L GAS
    View More
  • Customer Questions & Expert Answers

    Q:
    Is 8685184 compatible with my car? Posted by ChevyPartsGiant Specialist
    A:
    Please Select Your Vehicle model to see if part number 8685184 is suitable before ordering.
    Posted by ChevyPartsGiant Specialist
    Q:
    How to replace the transmission pan on Chevrolet Cobalt? Posted by Customer
    A:
    A vehicle needs to be raised for a proper access to the Oil Pan replacement process. Use a catching container and suitable tools to empty the transmission oil through Oil Pan bolts you have already opened. The first step is to remove all Oil Pan attaching bolts to take away both the Oil Pan and its gasket. Review the condition of the Oil Pan while thoroughly cleaning it to confirm the surface dryness before mounting. The replacement starts by installing an entirely new Oil Pan Gasket because the sealing ribs failed before installing the new Oil Pan that may require replacing the lower pan. You should place the Oil Pan attaching bolts into position before torquing them to 10 nm (89 lb in). Check the Transmission Pan hereafter vehicle lowering and address any potential leaks by refilling the transmission to its proper mark. The fluid level requires reinspection alongside an examination of the Oil Pan Gasket for any signs of leakage.
    Posted by ChevyPartsGiant Specialist
    Q:
    How to replace the transmission pan on Chevrolet Cavalier? Posted by Customer
    A:
    The first step for replacing the Oil Pan requires vehicle lift and positioning it correctly followed by placing a drain pan beneath the transaxle Oil Pan. When you detach the Oil Pan bolts be aware of the sealing surfaces so you can avoid developing any oil leakage. Start by removing the bolts at the front of the Oil Pan before moving to the side bolts and finally loosening the back bolts just four turns. You can extract the Oil Pan fluid by gently hitting it with a mallet or small pry and finish the work by unbolting the rest and taking away the Oil Pan and its gasket. Perform a cleaning operation on the Oil Pan followed by an inspection process to check for damage or denting. The pan must complete drying before its installation. If the Oil Pan gasket sealing ribs show damage you must replace it before reinstalling the Oil Pan unless it proves damaged. Secure the bolts that fix the Oil Pan using a torque of 14 nm (124 inch lbs.). To complete the fix inspect the fluid level while filling the transmission along with checking for any leakage from the Oil Pan gasket.
    Posted by ChevyPartsGiant Specialist
    Q:
    How to replace the transmission pan on Chevrolet Classic? Posted by Customer
    A:
    Begin replacement of the fluid pan by elevating and sustaining the vehicle. Use a suitable container to drain transmission fluid from the Oil Pan by opening all bolts then loosening them first. The first step involves removing the attaching bolts of the Oil Pan before separating the pan from the Oil Pan Gasket. A thorough examination must identify any damage or denting on the Oil Pan which needs to be dry before its reinstallation. After inspecting the sealing ribs on the new Oil Pan Gasket install it before putting back the Oil Pan except when the bottom pan requires replacement. Guide the Oil Pan attaching bolts into place before torquing them to 10 nm (89 inch lbs.). After lowering the vehicle you should inspect the pan for leaks before adding dexron(R)-iii to the transmission to maintain the correct fluid level. Check the oil level while also looking for leakages in the Oil Pan Gasket.
    Posted by ChevyPartsGiant Specialist
    Q:
    How to replace the transmission pan on Chevrolet Malibu? Posted by Customer
    A:
    When changing the Oil Pan position the vehicle properly on a hoist to prevent injuries and add assistance to the end that is not being worked on. Set up a drain pan beneath the transaxle Oil Pan when you hoist the vehicle. The technician should remove bolts from the front and sides of the Oil Pan before giving the rear bolts 4 initial turns of loosening. The procedure for removing the Oil Pan involves gentle prying while lightly tapping it with either a rubber mallet or prying tool to drain the oil. Drain the oil whereas you extract the remaining Oil Pan bolts and then remove both components and the Oil Pan gasket. Use solvent to clean all remaining old gasket debris from both transaxle case surfaces and Oil Pan gasket areas until the surfaces are dry. To perform installation start by placing the Oil Pan gasket followed by the Oil Pan then manually start the Oil Pan bolts before tightening them to 12 nm (9 ft. Lbs.). The transaxle requires dexron-iii (P/N 21019223) transaxle fluid or equivalent to reach its specified refill capacities amounting to 6.5 liters (6.9 quarts) when removing only the bottom pan and 9 liters (9.5 quarts) for full overhauls and 12.2 liters (12.9 quarts) for dry capacity. Experiment with engine operation after which you should check for leaks and ensure correct fluid levels during the testing period.
    Posted by ChevyPartsGiant Specialist
    Q:
    How to replace the transmission pan on a 4T45-E automatic transaxle on Chevrolet Malibu? Posted by Customer
    A:
    When replacing an Oil Pan for a 4t45-e automatic transaxle you should first position the vehicle properly along with supporting it adequately. After hoisting the vehicle position a drain pan below the transaxle Oil Pan. First remove front Oil Pan bolts together with the ones located on the sides and then turn the rear bolts four turns for easier removal. Completely remove the Oil Pan by using small pry tools, while preventing damages to the transaxle case and sealing points. You can assist the process by using a rubber mallet or by carefully prying the pan gently to let the oil drain. Few more bolts remain before the Oil Pan removal and Oil Pan Gasket removal process while properly cleaning off all remaining old gasket material. Use solvent to clean both transaxle case and Oil Pan Gasket surfaces before letting them dry naturally. Start the Oil Pan bolts manually then tighten them to 12 n.m (9 lb ft). The transaxle requires a refill of dexron(R) iii p/n 21019223 transaxle fluid or its equivalent to reach the specified fluid amounts of 6.5 l (6.9 qt) for bottom pan removal and 9 l (9.5 qt) for complete overhaul or 12.2 l (12.9 qt) for dry capacity at this stage. Begin the engine operation followed by warming the transaxle system then inspect all fluids for leaks while monitoring the fluid level.
    Posted by ChevyPartsGiant Specialist
    Q:
    What is the next step after draining the fluid for the 2005 Chevrolet Cavalier? Posted by Customer
    A:
    Remove the remaining bolts and take off the oil pan along with the gasket.
    Posted by ChevyPartsGiant Specialist
    See expert answers on similar Transmission Pan
    Q:
    How should the oil pan attaching bolts be installed for the 2000 Chevrolet Cavalier? Posted by Customer
    A:
    Install the oil pan attaching bolts and tighten them to 14 Nm (124 inch lbs.).
    Posted by ChevyPartsGiant Specialist
    See expert answers on similar Transmission Pan
    Q:
    What is the first step to replace the oil pan on the Automatic Transaxle-4T40-E/4T45-E for the 2001 Chevrolet Cavalier? Posted by Customer
    A:
    First, raise and support the vehicle.
    Posted by ChevyPartsGiant Specialist
    See expert answers on similar Transmission Pan
    Q:
    What should be done after raising it for the 2004 Chevrolet Classic? Posted by Customer
    A:
    Loosen the oil pan bolts and drain the oil using a suitable container.
    Posted by ChevyPartsGiant Specialist
    See expert answers on similar Transmission Pan
    Q:
    What should be done after draining the fluid for the 2002 Chevrolet Cavalier? Posted by Customer
    A:
    Remove the remaining bolts and take off the oil pan along with the gasket.
    Posted by ChevyPartsGiant Specialist
    See expert answers on similar Transmission Pan
    Q:
    What should be done after refilling the transmission for the 2009 Chevrolet HHR? Posted by Customer
    A:
    Recheck the fluid level and inspect the oil pan gasket for leaks.
    Posted by ChevyPartsGiant Specialist
    See expert answers on similar Transmission Pan
    Q:
    What should be done after refilling the transaxle for the 2006 Chevrolet Malibu? Posted by Customer
    A:
    Start the engine, warm up the transaxle, and check for leaks, then inspect for proper fluid level.
    Posted by ChevyPartsGiant Specialist
    See expert answers on similar Transmission Pan
    Q:
    What is the next step after draining the oil for the 2008 Chevrolet Malibu? Posted by Customer
    A:
    Remove the remaining bolts and the oil pan, followed by the oil pan gasket, ensuring all old gasket material is cleared.
    Posted by ChevyPartsGiant Specialist
    See expert answers on similar Transmission Pan
    Q:
    How should the oil pan attaching bolts be tightened for the 2001 Chevrolet Malibu? Posted by Customer
    A:
    Tighten them to 14 Nm (124 inch lbs.).
    Posted by ChevyPartsGiant Specialist
    See expert answers on similar Transmission Pan
    Q:
    What is the next step after draining the oil for the 2002 Chevrolet Malibu? Posted by Customer
    A:
    Remove the oil pan attaching bolts and take off the oil pan along with the oil pan gasket.
    Posted by ChevyPartsGiant Specialist
    See expert answers on similar Transmission Pan
    Q:
    What should you take care of while removing the oil pan for the 2007 Chevrolet Malibu? Posted by Customer
    A:
    Take care not to damage the mating surfaces to prevent oil leaks.
    Posted by ChevyPartsGiant Specialist
    See expert answers on similar Transmission Pan
    Q:
    What should you do to avoid damaging the transaxle case when prying the oil pan for the 2005 Chevrolet Malibu? Posted by Customer
    A:
    Carefully pry the oil pan and lightly tap it with a rubber mallet or pry gently to allow the oil to drain.
    Posted by ChevyPartsGiant Specialist
    See expert answers on similar Transmission Pan
    Q:
    What is the first step to service and repair the fluid pan for the 2000 Chevrolet Malibu? Posted by Customer
    A:
    Raise and support the vehicle.
    Posted by ChevyPartsGiant Specialist
    See expert answers on similar Transmission Pan
    Q:
    What is the first step to replace the oil pan for the 2009 Chevrolet Malibu? Posted by Customer
    A:
    Ensure the vehicle is properly supported and positioned, providing additional support on the opposite end from where components are being removed.
    Posted by ChevyPartsGiant Specialist
    See expert answers on similar Transmission Pan
    Q:
    How should the oil pan attaching bolts be tightened for the 2003 Chevrolet Malibu? Posted by Customer
    A:
    Tighten them to 14 Nm (124 inch lbs.).
    Posted by ChevyPartsGiant Specialist
    See expert answers on similar Transmission Pan
    If you have any questions about this product, please don't hesitate to ask us. We will be happy to help you!

OEM GM 8685184, Excellent Performance and Perfect Fitment

To ensure reliability, purchase GM part # 8685184 Oil Pan. It is sometimes referred to as GM Transmission Pan. Choosing OEM parts is the optimal decision for guaranteeing superior quality and perfect performance. These components undergo stringent quality checks and are carefully constructed to comply with GM's factory specifications, ensuring a smooth installation process.

ChevyPartsGiant.com is a leading supplier of genuine GM parts such as GM 8685184 Oil Pan. Our website boasts an extensive inventory of OEM GM parts, available at highly competitive prices in the market. Should you require any new genuine GM parts, rest assured we will deliver them swiftly and efficiently to your doorstep. Furthermore, all our parts come with the assurance of a manufacturer's warranty. For detailed Chevy parts information, click here.
Choose ChevyPartsGiant for discounted prices, exceptional service and fast delivery