Make sure this part fits

GM 12557558
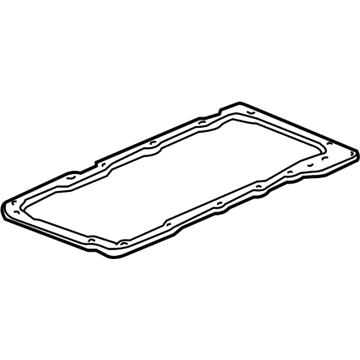
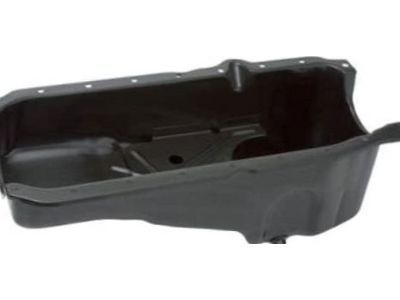
Oil Pan

1986-2002 GM

Customer Questions & Expert Answers (8)
GM 12557558 Oil Pan
GM 12557558 Oil Pan
  • Part Description
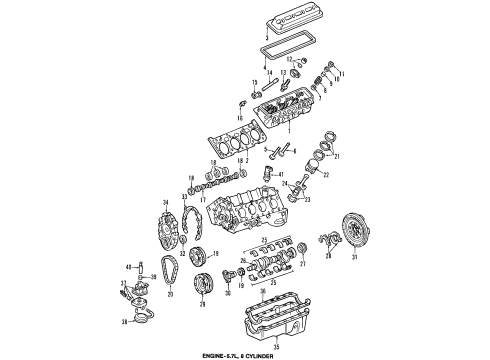
    Pan, Engine Oil; Oil Pan Gasket
  • Replaces
    12528916
  • Manufacturer
    General Motors
Make sure this part fits
$173.79 MSRP: $295.88
You Save: $122.09 (42%)
Ships in 1-3 Business Days
1
ADD TO CART
  • Related Parts
  • Product Specifications
  • Vehicle Fitment
  • Customer Questions & Expert Answers
  • Product Specifications

    BrandGenuine GM
    Manufacturer Part Number12557558
    Part DescriptionPan, Engine Oil; Oil Pan Gasket
    Item Dimensions24.9 x 11.6 x 9.0 inches
    Item Weight7.50 Pounds
    ConditionNew
    Fitment TypeDirect Replacement
    Replaces12528916
    ManufacturerGeneral Motors
    SKU12557558
    WarrantyThis genuine GM part is guaranteed by GM's factory warranty.
    Shipping & ReturnShipping Policy Return Policy
    Warning: California's Proposition 65
  • Vehicle Fitment

    Year Make Model Trim Engine
    1999-2000 Cadillac EscaladeBase8 Cyl 5.7 L GAS
    1992-1994 Chevrolet BlazerBase, Cheyenne, Silverado, Silverado Sport8 Cyl 5.7 L GAS
    1988-1999 Chevrolet C1500Base, Cheyenne, LS, Scottsdale, Silverado, WT8 Cyl 5.0 L GAS, 8 Cyl 5.7 L CNG, 8 Cyl 5.7 L GAS
    1992-1999 Chevrolet C1500 SuburbanBase, LS, LT, Silverado8 Cyl 5.7 L GAS
    1988-2000 Chevrolet C2500Base, Cheyenne, LS, Scottsdale, Silverado, WT8 Cyl 5.0 L GAS, 8 Cyl 5.7 L CNG, 8 Cyl 5.7 L GAS
    1992-1999 Chevrolet C2500 SuburbanBase, LS, LT, Silverado8 Cyl 5.7 L GAS
    1988-2000 Chevrolet C3500Base, Cheyenne, LS, Scottsdale, Silverado8 Cyl 5.7 L CNG, 8 Cyl 5.7 L GAS
    1986-1997 Chevrolet CamaroBase, Berlinetta, Indianapolis 500 Pace Car, Iroc-Z, LT, RS, RS Heritage Edition, Sport, Z28, Z28 Heritage Edition8 Cyl 5.0 L GAS, 8 Cyl 5.7 L GAS
    1996-2002 Chevrolet Express 1500Base, LS, LT8 Cyl 5.0 L GAS, 8 Cyl 5.7 L GAS
    1996-2002 Chevrolet Express 2500Base, LS8 Cyl 5.0 L GAS, 8 Cyl 5.7 L BI-FUEL, 8 Cyl 5.7 L CNG, 8 Cyl 5.7 L GAS
    View More
  • Customer Questions & Expert Answers

    Q:
    Is this 12557558 designed for my car? Posted by ChevyPartsGiant Specialist
    A:
    Please Select Your Vehicle model to see if part number 12557558 is suitable before ordering.
    Posted by ChevyPartsGiant Specialist
    Q:
    How to replace the oil pan on Chevrolet Express 2500? Posted by Customer
    A:
    To replace the Oil Pan, one should remove the battery negative cable and jack the vehicle up. Drain the engine oil and Oil Filter pan, then remove the Oil Filter and Oil Filter adapter. After that, remove the bolt that secures the wire Starter bracket and transmission cooler pipes, then the crankcase position (CKP) sensor wiring harness, starter transmission cover. Conversely, pull the access plugs for the Oil Pan rear nuts as well as the transmission to Oil Pan bolts. Note that the low oil limit sensor is not reusable therefore, if needed to install a new one. Pull the old Oil Pan Gasket out and throw it away, and then clean both the sealing surfaces on the engine and Oil Pan. When install, use a 5mm (0.197 inch wide) x 25mm (1.0 inch long) bead of adhesive p/n 12346141 or equivalent to the engine front cover to engine block junction and the crankshaft rear oil seal housing and the engine block junction at the Oil Pan sealing surfaces. Always change a new Oil Pan Gasket by putting it in the groove of the Oil Pan and align the Oil Pan flush or no more than 0.3mm (0,011 inch) ahead of the rear of the engine block. Mount the Oil Pan onto the engine block, with pressing the gasket into the grooves and slide it back against a suitable straight edge. Mount the Oil Pan bolts and nuts without sealing, subsequently using a feeler gauge to measure the clearance between this law and the housing of the transmission. Therefore, when checking the measured gap at any point, ensure it does not exceed 0 to 0.3426 mm (0 to 0.011 inch). If exceeded, the firmware wizard may repeatedly perform its role to correct the issue. Secure the Oil Pan bolts to 25 nm (18 ft. Lbs.) in a sequential manner, and then recheck the clearance for the proper alignment. Install a new oil Drain Plug o-ring (seal) onto the Oil Pan Drain Plug and tighten it to 25 nm (18ft lbf) install a new oil level sensor if fitted on the engine and tighten to 13 nm (115 inch lbf). Next, install the transmission to Oil Pan bolts and tighten it to 47nm 35ft lbs, then install the transmission cover bolts to 12nm 106 inch lbs. Install the access plugs for the rear Oil Pan nuts, starter motor, and bracket bolt for the Starter wiring harness and the transmission cooler pipes with 9 nm (80-inch-lbs.). Lastly, locate the ckp sensor wiring harness, Oil Filter adapter, Oil Filter, and oilpan Drain Plug, lower the vehicle, fill the crankcase with engine oil, and reconnect the battery negative cable.
    Posted by ChevyPartsGiant Specialist
    Q:
    How to service and repair the oil pan on Chevrolet Express 3500? Posted by Customer
    A:
    In order to service and repair the Oil Pan, first perform the removal of the Exhaust Pipe on the Exhaust Manifold. Next, drain the engine oil and the engine Oil Filter is removed. Remove the oil level indicator and tube, and then the Oil Filter adapter. Remove the oil cooler pipes and the retainer from the side of the engine and remove Starter motor. Unscrew the through bolts on the engine mount and remove the Oil Pan nuts and bolts, writing down the location of any studs for you to reinstall. Carefully remove the engine Oil Pan and the Oil Pan Gasket with all sealing surfaces cleaned up. For installation, put in a new Oil Pan Gasket and position the engine Oil Pan and then install the engine onto the mounts and bolt the engine mount through-bolts. Replace the Starter motor and the Oil Filter adapter, after that the oil level indicator and tube. Lastly, change the engine Oil Filter and fill in engine oil before lowering the vehicle back and reconnecting the Exhaust Pipe to the Exhaust Manifold.
    Posted by ChevyPartsGiant Specialist
    Q:
    How to Properly Service and Repair an Oil Pan on Chevrolet K3500? Posted by Customer
    A:
    To service and repair the Oil Pan, you should start by disconnect the battery negative cable. Take out the oil level indicator tube off the engine and lift the vehicle and drain the crankcase. Then, uninstall the Starter out of the engine block and turn the front drive axle incase it's a 4wd truck. For those with this installed, remove the Flywheel inspection cover and Oil Filter and adapter (4WD). Remove the transmission from the vehicle, clutch from the Flywheel where applicable, and the Flywheel from the Crankshaft after you detach an oil cooler line retainer from retaining bracket. Then remove its bolts and Oil Pan, then Oil Pan Gasket from engine block and clean its sealing surfaces. For installation, position the reusable Oil Pan Gasket on the Oil Pan, and install the Oil Pan and gasket onto the engine block at the bolt stage; tighten bolts to 25 nm (18 ft. Lbs.)). Replace the clutch assembly at the Flywheel, and the Flywheel back to the Crankshaft, then the Flywheel inspection cover back to the transmission. Reinstall the transmission, and then the Starter to the block of the engine. Connect the oil cooler line to the retainers and Oil Filter adapter (4WD) to the cylinder block in case it is equipped. When servicing a 4wd truck, adjust the front drive axle, bring the track back down, and reinstall the oil level indicator and tube. Finally, add the new engine oil in the crankcase, and get the battery negative cable back.
    Posted by ChevyPartsGiant Specialist
    Q:
    How to replace the oil pan on GMC C2500? Posted by Customer
    A:
    Before changing the Oil Pan, begin with disconnecting the negative Battery Cable. Should the car have four-wheel drive, take out the front Differential. Next, get rid of the underbody shield and the Oil Pan underbody shield and also take out the cross brace if it exists. Drain out the engine oil and get rid of the engine Oil Filter. After that, unbolt the lower transmission-to-Oil Pan, cut off the electrical cable from strain gauge block and remove two front wiring harness connections on the engine Oil Pan. Take out the engine oil cooler pipe from the Oil Pan bolt and the transmission oil cooler pipe retainer and bolt as well. Then, take away the Starter motor and the cover and fastener on the left and finally remove the engine Oil Pan. Before the installation, apply a 5 mm (0.20 inch) bead of sealant gm p/n 12378190 or its equivalent to both the engine block and the front and rear cover's protruding gasket tabs that contact the Oil Pan. Set the Oil Pan Gasket onto the Oil Pan before installing the whole assembly with tightened bolts to the engine block. Place the two lower bellhousing bolts to properly fix the Oil Pan and tighten them with your fingers. Fix the Oil Pan-to-block, Oil Pan-to-Oil Pan front cover and Oil Pan-to-rear cover bolts to a tension of 25 n.m (18 lb ft) and tighten all the bellhousing bolts to 50 n.m (37 lb ft). Put back the left closeout cover and bolt and make sure to tighten the Oil Pan closeout cover bolt to 9 n.m (80 lb in). Make sure to fit the Starter motor, secure the transmission pipe retainer and bolt it to the Oil Pan, plus the oil cooler pipe to the Oil Pan and fasten the oil cooler pipe nut at 10 n.m (89 lb in). Fix the engine wiring harness retainer bolts into the engine Oil Pan, fitting the oil level sensor electrical connector and attach the transmission to Oil Pan bolts, tightening them until you reach 55 n.m (41 lb ft). In case your vehicle is equipped with four-wheel drive, replace the front Differential and finish by putting the underbody shield back on. Turn the vehicle upside down, top up the engine with motor oil and insert the Oil Filter before you replace the negative cable.
    Posted by ChevyPartsGiant Specialist
    Q:
    How to replace the oil pan on GMC Savana 1500? Posted by Customer
    A:
    In replacing the Oil Pan, start by disconnecting the negative cable of the battery and raise the vehicle. Drain out the engine oil by removing the Oil Pan Drain Plug; remove the Oil Filter, and Oil Filter adapter. Then remove the bolt that hold bracket of Starter wire and transmission cooler pipes; this will be followed by the crankcase position (CKP) sensor wiring harness, starter and the transmission cover. Demand the removal of the access plugs for the oil recalcitrant posterior nuts and the transmissibility to oil pane bolts. Discard the engine level sensor for oil if applicable, and then unbolt the Oil Pan nuts and bolts to remove the Oil Pan and gasket, and then cleaning all the sealing surfaces on the engine and Oil Pan. During installation, squeeze 5mm (0.197 inch) wide by 25mm (1.0 inch) long bead of adhesive gm p/n 12346141 or equivalent between the front of the engine cover and block along sealing surface of Oil Pan to block joint at crankshaft rear oil seal housing joining areas. Always install a new Oil Pan Gasket sealing the Oil Pan before the adhesive dries out. Install the Oil Pan on the engine block in such a way that it faces straight or it is provided no more than 0.3mm (0.011inch) rearward compared with the rear face of engine block. Install the Oil Pan bolts and nuts but don't tighten them up and then using a feeler gauge measure the pan-to-transmission housing clearance. If clearance is greater than 0.3 mm (0.011 inch) at the first three points of measurement, align again. After aligning, tighten the Oil Pan bolts to 25 nm (18 ft. Lbs) to re-measure the clearance and install a new Oil Pan Drain Plug head (O-ring) before securing Oil Pan Drain Plug to 25 nm (18 ft. Lbs). If so, then install the new engine oil level sensor, and tighten it to 13 nm (115 inch lbs.), moving on to the transmission to Oil Pan, which should be tightened to 47 nm (35 ft. Lbs.), while the transmission cover bolts should be tightened to 12 nm (106 inch lbs.). Finally, install the access plugs to the Oil Pan rear nuts, starter motor and the Starter wiring harness bracket bolt for the transmission cooler pipes at 9 nm (80 inch lbs.) and clamp the ckp sensor wiring harness, oil filter, and adapter. Lower the vehicle and pour engine oil into the crankcase, reconnect the battery negative cable.
    Posted by ChevyPartsGiant Specialist
    Q:
    How to replace the oil pan on GMC Savana 3500? Posted by Customer
    A:
    The procedure to replace the Oil Pan starts with Exhaust Manifold pipe removal before emptying engine oil and removing the filter. Start by removing the oil level indicator with tube before proceeding with the Oil Filter adapter. Start by detaching oil cooler piping and retaining hardware positioned near the engine's side. Subsequently remove Starter motor and engine mount with bolts. Before pan removal, mark the location of visible studs to help guide reassembly and take off both the nuts and bolts securing the pan. Take out your engine Oil Pan while keeping the Oil Pan Gasket alongside as you clean all surfaces that seal. Installation involves applying a new Oil Pan Gasket followed by engine Oil Pan installation before lowering the engine onto its mounts using engine mount through bolts for final attachment. First replace the Starter motor followed by Oil Filter adapter then oil level indicator and tube and finally reinstall the engine Oil Filter and engine oil. Drop the vehicle and reinstall the Exhaust Pipe so it can be connected to the Exhaust Manifold.
    Posted by ChevyPartsGiant Specialist
    Q:
    What should be removed after the oil level indicator and tube for the 2001 GMC Savana 3500? Posted by Customer
    A:
    The oil filter adapter.
    Posted by ChevyPartsGiant Specialist
    See expert answers on similar Oil Pan
    If you have any questions about this product, please don't hesitate to ask us. We will be happy to help you!

OEM GM 12557558, Excellent Performance and Perfect Fitment

To ensure reliability, purchase GM part # 12557558 Oil Pan. It is sometimes referred to as GM Oil Pan. Choosing OEM parts is the optimal decision for guaranteeing superior quality and perfect performance. These components undergo stringent quality checks and are carefully constructed to comply with GM's factory specifications, ensuring a smooth installation process.

ChevyPartsGiant.com is a leading supplier of genuine GM parts such as GM 12557558 Oil Pan. Our website boasts an extensive inventory of OEM GM parts, available at highly competitive prices in the market. Should you require any new genuine GM parts, rest assured we will deliver them swiftly and efficiently to your doorstep. Furthermore, all our parts come with the assurance of a manufacturer's warranty. For detailed Chevy parts information, click here.
Choose ChevyPartsGiant for discounted prices, exceptional service and fast delivery