Make sure this part fits

GM 97361353
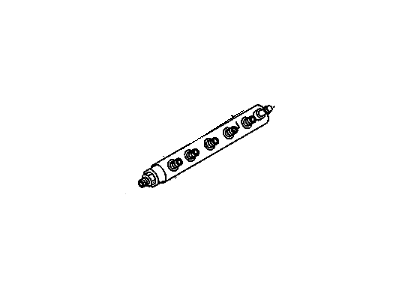
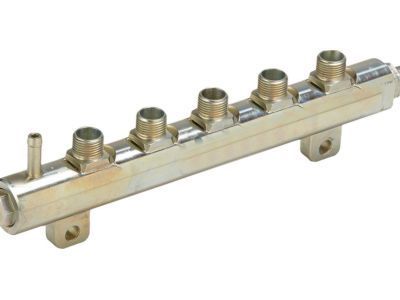
Fuel Rail

2006-2010 GM

Customer Questions & Expert Answers (10)
GM 97361353 Fuel Rail
  • Part Description
    Rail, Fuel Injection
  • Manufacturer
    General Motors
Make sure this part fits
$381.23 MSRP: $683.83
You Save: $302.60 (45%)
1
ADD TO CART
  • Product Specifications
  • Vehicle Fitment
  • Customer Questions & Expert Answers
  • Product Specifications

    BrandGenuine GM
    Manufacturer Part Number97361353
    Part DescriptionRail, Fuel Injection
    Item Dimensions14.5 x 4.5 x 4.3 inches
    Item Weight3.60 Pounds
    ConditionNew
    Fitment TypeDirect Replacement
    ManufacturerGeneral Motors
    SKU97361353
    WarrantyThis genuine GM part is guaranteed by GM's factory warranty.
    Shipping & ReturnShipping Policy Return Policy
    Warning: California's Proposition 65
  • Vehicle Fitment

    Year Make Model Trim Engine
    2006 Cadillac EscaladeBase8 Cyl 6.0 L GAS
    2006 Cadillac Escalade ESVBase8 Cyl 6.0 L GAS
    2006 Cadillac Escalade EXTBase8 Cyl 6.0 L GAS
    2006 Chevrolet Avalanche 1500LS, LT, Z66, Z718 Cyl 5.3 L FLEX, 8 Cyl 5.3 L GAS
    2006 Chevrolet Avalanche 2500LS, LT8 Cyl 8.1 L GAS
    2006-2009 Chevrolet Express 2500Base, LS, LT8 Cyl 6.6 L DIESEL
    2006-2009 Chevrolet Express 3500Base8 Cyl 6.6 L DIESEL
    2006 Chevrolet Silverado 1500Hybrid, LS, LT, SS, WT6 Cyl 4.3 L GAS, 8 Cyl 4.8 L GAS, 8 Cyl 5.3 L FLEX, 8 Cyl 5.3 L FULL HYBRID EV-GAS (FHEV), 8 Cyl 5.3 L GAS, 8 Cyl 6.0 L GAS
    2007 Chevrolet Silverado 1500 ClassicHybrid, LS, LT, SS, WT6 Cyl 4.3 L GAS, 8 Cyl 4.8 L GAS, 8 Cyl 5.3 L FLEX, 8 Cyl 5.3 L FULL HYBRID EV-GAS (FHEV), 8 Cyl 5.3 L GAS, 8 Cyl 6.0 L GAS
    2006 Chevrolet Silverado 1500 HDLT8 Cyl 6.0 L GAS
    View More
  • Customer Questions & Expert Answers

    Q:
    Hey, is 97361353 a good match for my vehicle? Posted by ChevyPartsGiant Specialist
    A:
    Please Select Your Vehicle model to see if part number 97361353 is suitable before ordering.
    Posted by ChevyPartsGiant Specialist
    Q:
    How to replace the fuel rail assembly on Chevrolet Avalanche 2500? Posted by Customer
    A:
    Recovery of the Fuel Rail assembly starts by exhaust fuel system pressure and removing the engine sight shield. The service technician should first disconnect the generator electrical connector followed by the evaporative emission (EVAP) canister purge valve electrical connector and then disconnect the electronic throttle control (ETC) electrical connector. The engine harness needs the bolt and studs removed while the position moves to the driver's side of the engine space. The fuel injector connectors need identification based on their firing order sequence before pulling each connector top up to reach the white area adjacent to releasing the tab that removes the injector connector. After disconnecting the fuel feed line from the Fuel Rail you must support the rail to stop damage to the injector electrical connector terminals and spray tips. Use caps and plugs to block entry of contaminants through the openings. Use gm x-30a engine cleaner to spray the Fuel Rail before you remove it with the Fuel Rail studs. Take out all the lower o-ring seals from each injector before disposal. The installation process requires the application of clean engine oil to new lower injector o-ring seals which must be placed on each injector spray tip end. Fasten the Fuel Rail and its studs with a torque of 12 n.m which equals 106 lb in. Secure the fuel feed line and attach fuel injector electrical connectors by matching each connector with its designated injector then turning injectors if necessary to prevent wire harness strain. Reorder all engine harness elements before installing the engine harness bolt and studs using a 10 n.m (89 lb in) torque value. Connect the etc electrical connector to its port and fit the evap canister purge valve electrical connector and the generator electrical connector. Place the engine sight shield along with the fuel fill cap while performing the reattachment of the negative Battery Cable. The inspection of fuel leaks requires turning on the ignition while engine power is off for 2 seconds followed by turning it off for 10 seconds and repeating the process of turning on the ignition before checking for any fuel leaks.
    Posted by ChevyPartsGiant Specialist
    Q:
    How to replace the Fuel Injection Fuel Rail Assembly on Chevrolet Express 2500? Posted by Customer
    A:
    The replacement process for the fuel injection Fuel Rail assembly starts with removing both the engine cover and air cleaner resonator outlet duct first. A service technician needs to check the eight-digit number on the Fuel Rail assembly because it serves as identification for future maintenance operations. The gm x-30a Fuel Rail assembly should undergo cleaning with equivalent engine cleaners based on package instructions but needs to be protected from liquid cleaning solvents when admitted to service. The first step involves disconnecting the accelerator control cable as well as cruise control cable from the cable bracket alongside Throttle Body if present and removing the cruise control cable engine-end fitting from the throttle lever. Separate the upper engine wire harness retainer nut while discharging the evap purge valve harness connector from its port so you can shift the upper engine wire harness to another location. Use ch 48027 or without it to release fuel system pressure before marking all electrical connectors to their proper position so reassembly can ensure the correct firing sequence. Use only fingers to disconnect multec 2 fuel injector connectors because hand tools and pliers can cause harm to the components. The fuel injector connector can be disconnected by pulling up the connector position assurance (CPA) while pushing the tab then letting go of the cpa . Execute this process for every connector before removing the Fuel Rail assembly in a way that protects both electrical terminals and spray tips by supporting the rail afterward. After capping and plugging the fittings and the holes to minimize contamination you should disconnect the fuel feed and return pipes (1, 2) from the Fuel Rail and the fuel pressure regulator vacuum line. Begin by loosening the crossover tube to right Fuel Rail retainer screw and proceeding to remove the Fuel Rail bolts before extracting the Fuel Rail. Remove the o-ring seals from the lower part of the fuel injectors before disposal. After lubricating the new fuel injector lower o-ring seals with engine oil you can install them on the injectors before installation. First disconnect the screw attaching the retaining clip from the right-hand Fuel Rail while also removing its crossover pipe with o-ring. Clean engine oil should be used to prepare and install a new o-ring on the crossover pipe before inserting it into the right Fuel Rail. Prevent thread stripping by hand-starting the retaining clip attaching screw prior to installing the crossover pipe retainer and screw along with the Fuel Rail. Before tightening the Fuel Rail bolts use a 5 mm (0.020 in) band of gm p/n 12345382 (Canadian P/N 10953489) threadlock on their threads. Then install the bolts at 10 n.m (89 lb in) and the screw requires 3.8 n.m (34 lb in) torque. Attach the vacuum line from the fuel pressure regulator and connect both fuel feed and return pipes (1, 2) and install electrical connectors to the correct fuel injectors according to their firing order. The upper engine wire harness needs to be positioned first then you need to install the evap purge solenoid connector followed by installing and tightening to 5.5 n.m (49 lb in) the retainer nut on the upper engine wire harness. Fasten the accelerator control cable until it reaches the cable bracket as well as the Throttle Body alongside the cruise control cable engine-end fitting to the throttle lever. Last in the installation sequence is the engine cover followed by the installation of the air cleaner resonator outlet duct. A proper check for fuel leaks requires you to switch the ignition on with the engine off for two seconds followed by a ten-second ignition off period before turning it back on with the engine off to detect any fuel leakage.
    Posted by ChevyPartsGiant Specialist
    Q:
    How to replace the Fuel Injection Fuel Rail Assembly on Chevrolet Silverado 3500 Classic? Posted by Customer
    A:
    The first task for Fuel Rail assembly replacement involves relieving fuel system pressure through the use of ch 48027 or without tool usage. Start by untightening the wire harness bracket nut then disconnect the evap purge solenoid electrical connector along with the generator electrical connector and manifold absolute pressure (MAP) sensor and Knock Sensor. You must first disconnect the electronic throttle control (ETC) electrical connector by removing its gray retainer then pushing down the black clip before separating the connector. Begin by taking out the cpa retainer from the connector position assurance on both right and left side engine areas before disconnecting the main coils and fuel injectors on their respective sides. Uninstall the harness clips from the Fuel Rail while setting the engine wire harness to one side. First mark the Fuel Injector electrical connectors for assembly then pull the cpa retainer up one click while pushing the tab in and disconnect each Fuel Injector electrical connector. Before extracting the Fuel Rail bolts one must detach both the positive crankcase ventilation (PCV) hose and fuel feed pipe from the Fuel Rail. You should carefully take out the Fuel Rail while maintaining the injector electrical connector terminals and spray tips intact before using caps to block off the fittings and prevent contaminants. Use a spray type engine cleaner to clean the Fuel Rail before removing the Fuel Rail with each Fuel Injector containing a new low end o-ring seal that needs discarding. Before Fuel Injector lower o-ring seal installation attention should be given to lubricating them with clean engine oil. Copper threadocker gm p/n 12345382 (Canadian P/N 10953489) needs application on each Fuel Rail bolt threads before bolting and tightening to 10 n.m (89 lb in) torque. The correct reassembly method requires installation of Fuel Injector electrical connectors to matching injectors followed by pushing the cpa retainer for one click per connector. The engine wire harness must be positioned while you connect main coil along with fuel injectors on the left side before installing harness clips onto the Fuel Rail and cpa retainer. Next mount the cpa retainer before attaching the harness clips to the Fuel Rail of the right side. Start with the gray retainer connection of the etc electrical connector before proceeding to connect the MAP Sensor and Knock Sensor then moving to the Intake Manifold for the Knock Sensor harness connector and evap purge solenoid electrical connector and generator electrical connector. To complete the installation process install the wire harness bracket nut and tighten it to 5 n.m (44 lb in) while also tightening the fuel fill cap and connecting the negative Battery Cable and inspect for leaks by starting the ignition for 2 seconds and waiting 10 seconds before a second ignition start-up to check for fuel leaks.
    Posted by ChevyPartsGiant Specialist
    Q:
    How to replace the Fuel Injection Fuel Rail Assembly on GMC Savana 2500? Posted by Customer
    A:
    The fuel injection Fuel Rail assembly replacement process starts with removing the engine cover and the air cleaner resonator outlet duct. A part number identification based on eight digits exists on the Fuel Rail assembly for service purposes. Spray type engine cleaning solution gm x-30a should be used to clean the Fuel Rail assembly while avoiding liquid cleaning solvents. Start the replacement by disconnecting both accelerator control cables and cruise control cables from the cable bracket that connects to the Throttle Body when needed. Also separate the upper engine wire harness retaining nut. Move the evap purge valve harness connector while disconnecting it then reposition the upper engine wire harness. The technician should use ch-48027 or not to relieve fuel system pressure while marking electrical connectors to match their proper sequential firing order. The disconnect procedure starts with pulling the connector position assurance (CPA) while raising it on the injector connector and then pressing the tab before releasing cpa to detach the fuel injector connector. Follow this procedure with all injector connectors by ensuring protection of the electrical connector terminals along with the spray tips throughout the process. Remove the Fuel Rail by disconnecting its fuel feed and return pipes together with the fuel pressure regulator vacuum line then unfastening the crossover tube to right Fuel Rail retainer screw and carefully removing all Fuel Rail bolts. After getting rid of the old fuel injector lower o-ring seals users should apply oil to new parts which get fitted to each injector before installation. Next dispose of the retaining clip attaching screw from the right-hand Fuel Rail then remove the crossover pipe and its o-ring material. New o-rings must first receive oil before installation onto the crossover pipe which will return to the right Fuel Rail. The crossover pipe retainer and its attaching screw receive loose attachment before installation of the Fuel Rail. Apply gm p/n 12345382 threadlock for a 5 mm band to the Fuel Rail bolts' threads and tighten the bolts to 10 nm before screw tightening reaches 3.8 nm. The next steps involve reattaching the fuel pressure regulator vacuum pipeline and the fuel feed and return hoses while making sure every electrical connection fits its designated fuel injector specific place and each injector needs some rotation to prevent wire harness damage. The technician should position the upper engine wire harness then install an evap purge solenoid connector and tighten the retainer nut to 5.5 nm. You should install both the accelerator control cable and cruise control cable. Afterward attach the air cleaner resonator outlet duct and engine cover. The inspection for leaks should be performed by turning on the ignition with the engine off for two seconds followed by engine shutdown for ten seconds and ignition restart before checking for fuel leaks.
    Posted by ChevyPartsGiant Specialist
    Q:
    How to install the fuel injector and fuel rail on GMC Sierra 3500 Classic? Posted by Customer
    A:
    Align the installation process with new Fuel Injector O-Ring seals (532, 534) which should receive engine oil lubrication before mounting onto fuel injectors (533). The sequence starts with fuel injectors and retainers (521) installation before attaching the fuel rail assembly (510) to the manifold through forceful side-to-side presses until each injector fits its bore. The threads of fuel rail bolts (511) need threadlock gm p/n 12345382 (Canadian P/N 10953489) applied as a 5 mm (0.2 in) band followed by tightening these bolts to 10 n.m (89 lb in). The next installation step involves adding the evap canister purge solenoid valve (730) together with tubes (729, 735) while finishing by tightening the bracket bolt to 50 n.m (37 lb ft).
    Posted by ChevyPartsGiant Specialist
    Q:
    What precautions should be taken when removing the fuel rail for the 2006 Chevrolet Silverado 3500? Posted by Customer
    A:
    Carefully take out the fuel rail, ensuring not to damage the injector electrical connector terminals and spray tips, and cap the fittings to prevent contamination.
    Posted by ChevyPartsGiant Specialist
    See expert answers on similar Fuel Rail
    Q:
    What should be marked before disconnecting the fuel injector connectors for the 2007 GMC Savana 3500? Posted by Customer
    A:
    Mark the electrical connectors to their corresponding injectors to ensure correct sequential firing order after reassembly.
    Posted by ChevyPartsGiant Specialist
    See expert answers on similar Fuel Rail
    Q:
    What should be done with the fuel injector lower O-ring seals for the 2006 GMC Savana 3500? Posted by Customer
    A:
    Discard the fuel injector lower O-ring seals from the injectors, lubricate the new seals with clean engine oil, and install them on each injector.
    Posted by ChevyPartsGiant Specialist
    See expert answers on similar Fuel Rail
    Q:
    What should be done after removing the fuel rail for the 2006 GMC Sierra 3500? Posted by Customer
    A:
    Remove the fuel rail studs, clean the fuel rail with a spray type engine cleaner if necessary, and then remove the fuel rail.
    Posted by ChevyPartsGiant Specialist
    See expert answers on similar Fuel Rail
    If you have any questions about this product, please don't hesitate to ask us. We will be happy to help you!

OEM GM 97361353, Excellent Performance and Perfect Fitment

To ensure reliability, purchase GM part # 97361353 Fuel Rail. It is sometimes referred to as GM Fuel Rail. Choosing OEM parts is the optimal decision for guaranteeing superior quality and perfect performance. These components undergo stringent quality checks and are carefully constructed to comply with GM's factory specifications, ensuring a smooth installation process.

ChevyPartsGiant.com is a leading supplier of genuine GM parts such as GM 97361353 Fuel Rail. Our website boasts an extensive inventory of OEM GM parts, available at highly competitive prices in the market. Should you require any new genuine GM parts, rest assured we will deliver them swiftly and efficiently to your doorstep. Furthermore, all our parts come with the assurance of a manufacturer's warranty. For detailed Chevy parts information, click here.
Choose ChevyPartsGiant for discounted prices, exceptional service and fast delivery