Make sure this part fits

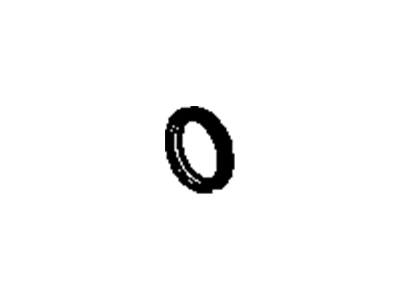
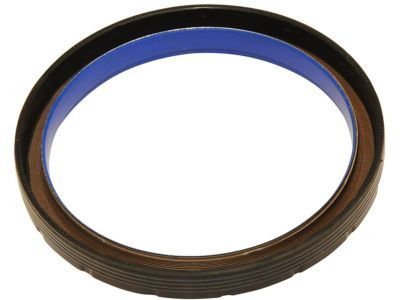
GM 12568025
Rear Main Seal

1997-2011 GM

Customer Questions & Expert Answers (40)
GM 12568025 Rear Main Seal
  • Part Description
    Seal, Crankshaft Rear Main Bearing Cap; Crankshaft Seal
  • Position
    Rear
  • Replaces
    12556355, 12556107
  • Manufacturer
    General Motors
Make sure this part fits
$56.73 MSRP: $88.86
You Save: $32.13 (37%)
Ships in 1-3 Business Days
1
ADD TO CART
  • Related Parts
  • Product Specifications
  • Vehicle Fitment
  • Customer Questions & Expert Answers
  • Product Specifications

    BrandGenuine GM
    Manufacturer Part Number12568025
    Part DescriptionSeal, Crankshaft Rear Main Bearing Cap; Crankshaft Seal
    Other NamesSeal, Engine Rear Main Bearing
    Item Dimensions5.2 x 5.3 x 0.6 inches
    Item Weight0.40 Pounds
    PositionRear
    ConditionNew
    Fitment TypeDirect Replacement
    Replaces12556355, 12556107
    ManufacturerGeneral Motors
    SKU12568025
    WarrantyThis genuine GM part is guaranteed by GM's factory warranty.
    Shipping & ReturnShipping Policy Return Policy
    Warning: California's Proposition 65
  • Vehicle Fitment

    Year Make Model Trim Engine
    2006-2011 Buick LucerneCXL, CXS, Super8 Cyl 4.6 L GAS
    2006-2011 Cadillac DTSBase, Livery, Luxury, Platinum, Premium8 Cyl 4.6 L GAS
    1998-2005 Cadillac DeVilleBase, Concours, d'Elegance, DHS, DTS, Protection Series8 Cyl 4.6 L GAS
    1998-2002 Cadillac EldoradoESC, ETC8 Cyl 4.6 L GAS
    2004-2009 Cadillac SRXBase8 Cyl 4.6 L GAS
    2005-2010 Cadillac STSBase, Platinum, V8 Cyl 4.4 L GAS, 8 Cyl 4.6 L GAS
    1998-2004 Cadillac SevilleSLS, STS8 Cyl 4.6 L GAS
    2004-2009 Cadillac XLRBase, Platinum, V8 Cyl 4.4 L GAS, 8 Cyl 4.6 L GAS
    2001-2003, 1997-1999 Oldsmobile AuroraBase6 Cyl 3.5 L GAS, 8 Cyl 4.0 L GAS
    1999-2002 Oldsmobile IntrigueGL, GLS, GX6 Cyl 3.5 L GAS
    View More
  • Customer Questions & Expert Answers

    Q:
    Is this 12568025 designed for my car? Posted by ChevyPartsGiant Specialist
    A:
    Please Select Your Vehicle model to see if part number 12568025 is suitable before ordering.
    Posted by ChevyPartsGiant Specialist
    Q:
    How to replace the rear crankshaft seal on Cadillac Eldorado? Posted by Customer
    A:
    The beginning of crankshaft rear oil seal replacement requires Flywheel removal. Fit the crankshaft rear oil seal remover (J 42841) onto the crankshaft while using retaining bolts to secure it. The variable speed drill motor combined with the socket adapter allows you to install eight one-inch self-drilling screws into the seal using the guide holes of the removal tool while manually decreasing drills speed as screws thread into position. After installing all screws onto the j 42841, detach the retaining bolts to drive forward the screw controlling removal of the seal assembly from the crankshaft. You need to verify that the drain maintains complete clearness to stop any potential leaks when preparing to install the new crankshaft rear oil seal. Wipe out debris from the crankshaft rear oil seal drain using wire or an unbound plastic tie-wrap. Apply gm p/n 12345501 (Canadian P/N 992704) or equivalent clean engine oil to coat the outer cylinder block crankshaft rear oil seal area while making sure to not touch the green coating inside the new seal's inner diameter. Clean the outer diameter of the Flywheel flange with a lint-free cloth before applying clean engine oil to the new crankshaft rear oil seal's outer rubber surface. Use the crankshaft rear oil seal installer (J 42842) to loose its center bolt until the center edge reaches one-half inch beyond the outer plate before mounting it onto the crankshaft and threading three bolts onto the crankshaft flange. Tighten these bolts until the j 42842 sits securely. Insert the crankshaft rear oil seal through tightening the central bolt until the j 42842 touches the crankcase before easing tension by loosening the center bolt then unplugging the three mounting bolts. After removing the j 42842 from the crankshaft flange look at the depth of installation across the crankshaft rear oil seal's full circumference before redocking when needed. Finally, reinstall the Flywheel.
    Posted by ChevyPartsGiant Specialist
    Q:
    How to replace the rear crankshaft seal on Cadillac DTS? Posted by Customer
    A:
    Start by removing the Flywheel as the primary step to replace the crankshaft rear oil seal. Secure the rear oil seal remover (J42841-A) on the crankshaft using its retaining bolts according to instructions. A socket adapter and variable speed drill motor lets you install eight 25 mm (1.0 inch) self-drilling screws into the seal through the removal tool guide holes while shifting drill speed to prevent damage to the seal. When all screws reach their position, uninstall the retaining bolts and mount the center forcing screw to peel off the seal assembly from the crankshaft. The drain needs to be free from obstructions when you replace the crankshaft rear oil seal to avoid leakage. Clean the crankshaft rear oil seal drain with wire or an unbound plastic tie-wrap before proceeding with maintenance. Clean engine oil gm p/n 12345501 (Canadian P/N 992704) needs to coat the crankshaft rear oil seal area of the cylinder block while applying gasket maker gm p/n 1052942 (Canadian P/N 10953466) onto the crankcase split line. Keep the green coating on the inside of the crankshaft rear oil seal free from contamination. Apply gm p/n 12345501 (registered as Canadian P/N 992704) clean engine oil to both sides of the crankshaft rear oil seal's outer rubber surface before using a lint-free cloth to clean the Flywheel flange. Use the crankshaft rear oil seal installer j45930-a center bolt to create a 0.5 inch (13 mm) hollow depth from its center hub before placing the j45930-a onto the crankshaft rear and installing two mounting bolts into the crankshaft flange until the installer achieves solid fixation. Set the crankshaft rear oil seal in position by turning the center bolt until the j45930-a hits the crankcase bottom and then relax the center bolt and two mounting bolts before pulling out the j45930-a from the crankshaft flange. When the installation depth of the crankshaft rear oil seal is not uniform, replace the j45930-a and restart the installation sequence. Finally, reinstall the Flywheel.
    Posted by ChevyPartsGiant Specialist
    Q:
    How to Service and Repair the Crankshaft Seal on Cadillac Seville? Posted by Customer
    A:
    To service and repair the Crankshaft main bearing seal, first, you will have to turn off the transaxle and the Flywheel. Mount on the Crankshaft rear oil seal remover (J 42841) onto the Crankshaft and tighten the retaining bolts. I would use a variable speed drill motor with a socket adapter and install eight one-inch self-drilling screws into the foil by using the guide holes located on the removal tool, ensuring that i slow down the drill having finished threading the screws into the seal at that point. After we have all screws installed, remove retaining bolts and use the center screw to attach to therx Crankshaft rear oil seal remove (J 42841). Screw it to draw the seal assembly off of thecrankshaft. When installing the new Crankshaft rear oil seal, check on it that the drain is free from leaks. Clean off any debris from the Crankshaft rear oil seal by draining (for this use a wire or an unbound plastic tie-wrap), and the outer diameter of the cylinder block, crankshaft rear oil seal alone should be covered with clean engine oil (GM P/N: 12345501 or similar). Do not contaminate the green coating present on the inner diameter of the new Crankshaft rear oil seal. Cleanine the outer diameter of the Flywheel flange and lubricate the outer rubber working surface of the new Crankshaft rear oil seal with clean engine oil. Loose the center bolt of Crankshaft rear oil seal installer (J 42B42) out until the center hub extends about 1/2 inch past the outer plate or on the Crankshaft, insert the installer and screw the three mounting bolts into the Crankshaft flange and tighten adequately. Install the Crankshaft rear oil seal-turning the center bolt until the installer bottoms on the crankcase, then loosening the center bolt to relieve pressure and removing the installer povinna. Check on the installation depth all around the circumference of Crankshaft rear oil seal and if required reinstall the Crankshaft rear oil seal installer (J 42B42), and go through the installation procedures again. To finish, re-install the Flywheel and the transaxle.
    Posted by ChevyPartsGiant Specialist
    Q:
    How to replace the rear crankshaft seal on Cadillac DeVille? Posted by Customer
    A:
    One should remove the Flywheel before starting the crankshaft rear oil seal replacement process. Set the crankshaft rear oil seal remover (J 42841) on the crankshaft before fastening it with retaining bolts. A variable speed drill motor together with a socket adapter drives eight one-inch self-drilling screws through the guide holes in the removal tool into the seal while gradually decreasing drill speed during screw threading. After screw installation the retaining bolts can be removed to attach the center screw which will pull the Crankshaft Seal assembly from the shaft. The new crankshaft rear oil seal installation requires a debris-free drain area to avoid oil leaks. The crankshaft rear oil seal drain must be cleaned using wire or an unbound plastic tie-wrap while applying gm p/n 12345501 or equivalent clean engine oil to coat the cylinder block crankshaft rear oil seal area's outer diameter. Keep the new crankshaft rear oil seal free from green coating that lines its inner diameter. Clean your Flywheel flange with a lint-free cloth while applying clean engine oil to the new seal's external rubber surface. The crankshaft rear oil seal installer (J 42842) requires its center hub to extend past the outer plate by one-half inch before placement onto the crankshaft while the three mounting bolts should be threaded into the crankshaft flange. Secure the j42842 with bolt tightening then install the crankshaft rear oil seal by advancing the center bolt until the j42842 reaches full contact with the crankcase. You must loosen the center bolt while keeping pressure minimal. Next tighten the mounting bolts on the crankshaft flange before fully removing the j 42842. The installation depth surrounding the crankshaft rear oil seal needs inspection. If installation depths are unequal, reinstall the j 42842 before redoing the installation process. Finally, reinstall the Flywheel.
    Posted by ChevyPartsGiant Specialist
    Q:
    How to Ensure Proper Installation of the Crankshaft Seal on Cadillac XLR? Posted by Customer
    A:
    The cranking process starts with Flywheel removal before changing the crankshaft rear oil seal. You must use the crankshaft rear oil seal remover (J 42841-A) to fit the removal tool onto the crankshaft before securing it with retaining bolts. Thread eight 25 mm (1.0 in) self-drilling screws through the seal's guide holes on the removal tool while decreasing drill speed when the screws start threading into the seal. After installing all screws on the seal assembly the retaining bolts should be removed and steady pressure from the center forcing screw will extract the crankshaft component. Use the seal applicator (EN-48072) to evenly coat the bore with sealant to avoid clogging the drain back hole during installation. The bore must be clean and dry before application. Check if the crankshaft flange and engine block bore show signs of damage before thoroughly cleaning the oil drain back hole. When cleaning the bore utilize cleaner solvent gm p/n 12378392 or 12346139 (Canadian P/N 88901247). The crankshaft rear oil seal installer (J 45930-A) requires either 8 mm or 11 mm bolts to fasten its base component en-48072 in position. Lock the applicator housing onto the pilot base while making sure it stays at the bottom of the bore. Use gm p/n 12378521 (Canadian P/N 88901148) sealant on the bore's outer diameter. Spread the sealant across the bore area before you lift off the applicator housing to avoid twisting it. Secure the new cassette style crankshaft rear oil seal onto the center hub of the j 45930-a. Then, tighten the mounting bolts until the drive portion bottoms against the crankcase while keeping the drain back hole free from obstructions. Finish the procedure by removing pressure from the tool followed by removing the installer. After cleaning away extra sealant you can reinstall the Flywheel.
    Posted by ChevyPartsGiant Specialist
    Q:
    How to replace the rear crankshaft seal on Cadillac XLR? Posted by Customer
    A:
    Begin Crankshaft rear oil seal replacement by removing the Flywheel first. Installation requires the Crankshaft rear oil seal remover (J 42841-A) which should be positioned on the Crankshaft with retaining bolt attachment. Drive eight 25 mm (1.0 in) self-drilling screws through the seal while following the guideholes inside the removal tool, slowing the drill speed as each screw threads into position. The seal assembly operation requires complete screw installation followed by bolt removal to permit the center forcing screw which will extract the seal assembly from the Crankshaft. Use the seal applicator (EN-48072) to evenly apply sealant onto a clean and dry bore before installation to avoid drain back holes becoming blocked. Check engine block bore and Crankshaft flange for possible damage before removing debris from the oil drain-back hole. Use gm p/n 12378392 or 12346139 cleaner solvent (Canadian P/N 88901247) to clean the bore. The Crankshaft rear oil seal installer (J 45930-A) provides the correct bolts to secure the en-48072 pilot base before the applicator housing must be installed over the base using the bottoming installation method in the bore. The bore's outer diameter should receive sealant gm p/n 12378521 (Canadian P/N 88901148) application avoiding the drain hole blockage. Gently pull out the applicator housing while checking both that the sealant spreads smoothly and that the drain back hole remains clear. Secure the new cassette style Crankshaft rear oil seal onto the center hub of the j 45930-a by tightening its mounting bolts to a secure attachment on the Crankshaft. Twist the center nut so the drive section of j 45930-a reaches crankcase bottom then loosen all components to separate the installer from the mounting bolts. Apply the new seal correctly following defined surface measurements then inspect tools to eliminate leftover sealant before reinstalling the Flywheel.
    Posted by ChevyPartsGiant Specialist
    Q:
    What is the final step after installing the oil seal for the 2009 Buick Lucerne? Posted by Customer
    A:
    Finally, reinstall the crankshaft balancer.
    Posted by ChevyPartsGiant Specialist
    See expert answers on similar Crankshaft Seal
    Q:
    What is the first step to replace the front crankshaft oil seal for the 2010 Buick Lucerne? Posted by Customer
    A:
    First, remove the crankshaft balancer.
    Posted by ChevyPartsGiant Specialist
    See expert answers on similar Crankshaft Seal
    Q:
    What tool is used to remove the seal from the housing for the 2008 Buick Lucerne? Posted by Customer
    A:
    Use a suitable driving tool and hammer to lightly tap around the outer edge of the seal for removal.
    Posted by ChevyPartsGiant Specialist
    See expert answers on similar Crankshaft Seal
    Q:
    What should be checked before installing the new seal for the 2005 Cadillac STS? Posted by Customer
    A:
    Ensure that the drain is clear to prevent any potential leaks.
    Posted by ChevyPartsGiant Specialist
    See expert answers on similar Crankshaft Seal
    Q:
    How should the crankshaft sealing surface be cleaned for the 2006 Buick Lucerne? Posted by Customer
    A:
    Clean the crankshaft sealing surface with a lint-free towel and inspect for burrs or sharp edges, removing any with crocus cloth.
    Posted by ChevyPartsGiant Specialist
    See expert answers on similar Crankshaft Seal
    Q:
    How should the crankshaft sealing surface be cleaned for the 2007 Buick Lucerne? Posted by Customer
    A:
    Clean the crankshaft sealing surface with a lint-free towel and inspect for burrs or sharp edges, removing any with crocus cloth.
    Posted by ChevyPartsGiant Specialist
    See expert answers on similar Crankshaft Seal
    Q:
    What is the next step after removing the flywheel for the 2009 Buick Lucerne? Posted by Customer
    A:
    Take out the crankshaft rear oil seal following the Crankshaft Rear Oil Seal Removal instructions.
    Posted by ChevyPartsGiant Specialist
    See expert answers on similar Crankshaft Seal
    Q:
    What should be done after all screws are installed for the 2010 Cadillac DTS? Posted by Customer
    A:
    Remove the retaining bolts and attach the center screw to the J 42841-A, tightening it to pull the seal assembly off the crankshaft.
    Posted by ChevyPartsGiant Specialist
    See expert answers on similar Crankshaft Seal
    Q:
    What should be done with the self-drilling screws during the removal process for the 2000 Cadillac DeVille? Posted by Customer
    A:
    Install eight one-inch self-drilling screws into the seal through the guide holes in the removal tool, reducing drill speed as the screws begin threading into the seal.
    Posted by ChevyPartsGiant Specialist
    See expert answers on similar Crankshaft Seal
    Q:
    How do you prepare the Crankshaft Rear Oil Seal Installer (J 42842) for installation for the 2001 Cadillac Eldorado? Posted by Customer
    A:
    Loosen the center bolt until the center hub protrudes about one-half inch beyond the outer plate.
    Posted by ChevyPartsGiant Specialist
    See expert answers on similar Crankshaft Seal
    Q:
    What tool is used to install the retaining bolts on the crankshaft for the 2008 Cadillac DTS? Posted by Customer
    A:
    Use the J 42841-A on the crankshaft to install its retaining bolts.
    Posted by ChevyPartsGiant Specialist
    See expert answers on similar Crankshaft Seal
    Q:
    What should be done to the flywheel flange before installation for the 2004 Cadillac DeVille? Posted by Customer
    A:
    Wipe the outer diameter of the flywheel flange clean and lubricate the outer rubber surface of the crankshaft rear oil seal with clean engine oil, GM P/N 12345501 (Canadian P/N 992704).
    Posted by ChevyPartsGiant Specialist
    See expert answers on similar Crankshaft Seal
    Q:
    What should be applied at the crankcase split line before installing the new seal for the 2005 Cadillac DeVille? Posted by Customer
    A:
    A small amount of Gasket Maker, GM P/N 1052942 (Canadian P/N 10953466).
    Posted by ChevyPartsGiant Specialist
    See expert answers on similar Crankshaft Seal
    Q:
    What is the procedure for applying sealant for the 2009 Cadillac DTS? Posted by Customer
    A:
    Place the EN-48072 applicator housing over the pilot base, apply sealant GM P/N 12378521 (Canadian P/N 88901148) to the bore's outer diameter without blocking the drain hole, and spread the sealant evenly.
    Posted by ChevyPartsGiant Specialist
    See expert answers on similar Crankshaft Seal
    Q:
    What should you do after applying sealant for the 2007 Cadillac DTS? Posted by Customer
    A:
    Slowly remove the applicator housing and ensure the sealant is evenly spread.
    Posted by ChevyPartsGiant Specialist
    See expert answers on similar Crankshaft Seal
    Q:
    What should be done to the outer diameter of the flywheel flange for the 2000 Cadillac Eldorado? Posted by Customer
    A:
    Wipe it clean with a lint-free cloth and lubricate the outer rubber surface of the new crankshaft rear oil seal with clean engine oil.
    Posted by ChevyPartsGiant Specialist
    See expert answers on similar Crankshaft Seal
    Q:
    What is the first step to replace the crankshaft rear oil seal for the 2003 Cadillac Seville? Posted by Customer
    A:
    First, remove the flywheel.
    Posted by ChevyPartsGiant Specialist
    See expert answers on similar Crankshaft Seal
    Q:
    How many screws need to be installed into the seal for the 2001 Cadillac Seville? Posted by Customer
    A:
    Eight one-inch self-drilling screws.
    Posted by ChevyPartsGiant Specialist
    See expert answers on similar Crankshaft Seal
    Q:
    What should be inspected after installation for the 2004 Cadillac Seville? Posted by Customer
    A:
    The installation depth around the crankshaft rear oil seal's circumference.
    Posted by ChevyPartsGiant Specialist
    See expert answers on similar Crankshaft Seal
    Q:
    What is the procedure for installing the crankshaft rear oil seal for the 2002 Cadillac Seville? Posted by Customer
    A:
    Tighten the center bolt until the J 42842 bottoms against the crankcase, then loosen the center bolt to release pressure and remove the three mounting bolts.
    Posted by ChevyPartsGiant Specialist
    See expert answers on similar Crankshaft Seal
    Q:
    What is the second step in the replacement process for the 2004 Cadillac SRX? Posted by Customer
    A:
    Remove the oil pan.
    Posted by ChevyPartsGiant Specialist
    See expert answers on similar Crankshaft Seal
    Q:
    What is the first step in the installation process for the 2009 Cadillac SRX? Posted by Customer
    A:
    Place the new crankshaft rear oil seal and housing.
    Posted by ChevyPartsGiant Specialist
    See expert answers on similar Crankshaft Seal
    Q:
    What is the process for installing screws into the seal for the 2002 Cadillac DeVille? Posted by Customer
    A:
    Use a variable speed drill and a socket adapter to install eight one-inch self-drilling screws into the seal using the guide holes in the removal tool, reducing drill speed as the screws thread into the seal.
    Posted by ChevyPartsGiant Specialist
    See expert answers on similar Crankshaft Seal
    Q:
    Is lubrication required for the crankshaft front oil seal during installation for the 2009 Cadillac SRX? Posted by Customer
    A:
    No, do not lubricate the crankshaft front oil seal or the crankshaft balancer sealing surfaces.
    Posted by ChevyPartsGiant Specialist
    See expert answers on similar Crankshaft Seal
    Q:
    What is the first step to replace the crankshaft rear oil seal for the 2007 Cadillac SRX? Posted by Customer
    A:
    First, remove the flywheel.
    Posted by ChevyPartsGiant Specialist
    See expert answers on similar Crankshaft Seal
    Q:
    What is the final step in the process for the 2009 Cadillac STS? Posted by Customer
    A:
    Reinstall the engine flywheel.
    Posted by ChevyPartsGiant Specialist
    See expert answers on similar Crankshaft Seal
    Q:
    What should you avoid doing when installing the new crankshaft front oil seal for the 2010 Cadillac STS? Posted by Customer
    A:
    Do not lubricate the crankshaft front oil seal or the crankshaft balancer sealing surfaces.
    Posted by ChevyPartsGiant Specialist
    See expert answers on similar Crankshaft Seal
    Q:
    What is the final step in the process for the 2010 Cadillac STS? Posted by Customer
    A:
    Reinstall the engine flywheel and ensure all parts are secured properly during reassembly.
    Posted by ChevyPartsGiant Specialist
    See expert answers on similar Crankshaft Seal
    Q:
    How many screws need to be installed and what is their size for the 2007 Cadillac XLR? Posted by Customer
    A:
    Eight 25 mm (1.0 in) self-drilling screws.
    Posted by ChevyPartsGiant Specialist
    See expert answers on similar Crankshaft Seal
    Q:
    What is the next component to remove after the generator and water pump drive belt for the 2007 Cadillac STS? Posted by Customer
    A:
    The crankshaft balancer.
    Posted by ChevyPartsGiant Specialist
    See expert answers on similar Crankshaft Seal
    Q:
    What is the order of reattaching components after the installation for the 2006 Cadillac SRX? Posted by Customer
    A:
    Reattach the crankshaft balancer, then the generator and water pump drive belt, and finally the A/C compressor and power steering pump drive belt.
    Posted by ChevyPartsGiant Specialist
    See expert answers on similar Crankshaft Seal
    Q:
    What is the final step after installing the new oil seal for the 2006 Cadillac STS? Posted by Customer
    A:
    Finally, reinstall the flywheel.
    Posted by ChevyPartsGiant Specialist
    See expert answers on similar Crankshaft Seal
    Q:
    What is the first step to replace the front crankshaft oil seal for the 2005 Cadillac SRX? Posted by Customer
    A:
    Remove the A/C compressor and power steering pump drive belt.
    Posted by ChevyPartsGiant Specialist
    See expert answers on similar Crankshaft Seal
    If you have any questions about this product, please don't hesitate to ask us. We will be happy to help you!

OEM GM 12568025, Excellent Performance and Perfect Fitment

To ensure reliability, purchase GM part # 12568025 Rear Main Seal. It is sometimes referred to as GM Crankshaft Seal. Choosing OEM parts is the optimal decision for guaranteeing superior quality and perfect performance. These components undergo stringent quality checks and are carefully constructed to comply with GM's factory specifications, ensuring a smooth installation process.

ChevyPartsGiant.com is a leading supplier of genuine GM parts such as GM 12568025 Rear Main Seal. Our website boasts an extensive inventory of OEM GM parts, available at highly competitive prices in the market. Should you require any new genuine GM parts, rest assured we will deliver them swiftly and efficiently to your doorstep. Furthermore, all our parts come with the assurance of a manufacturer's warranty. For detailed Cadillac parts information, click here.
Choose ChevyPartsGiant for discounted prices, exceptional service and fast delivery