Make sure this part fits

GM 23270117
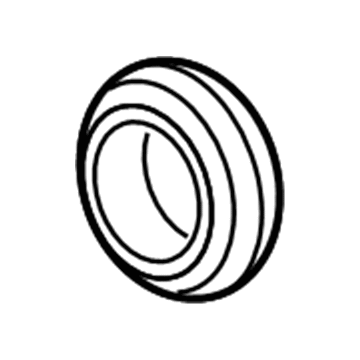
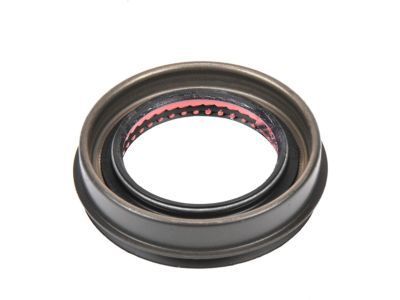
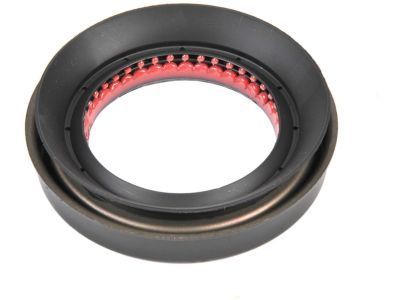
Pinion Seal, Front

1999-2020 GM

Customer Questions & Expert Answers (17)
GM 23270117 Pinion Seal, Front
  • Part Description
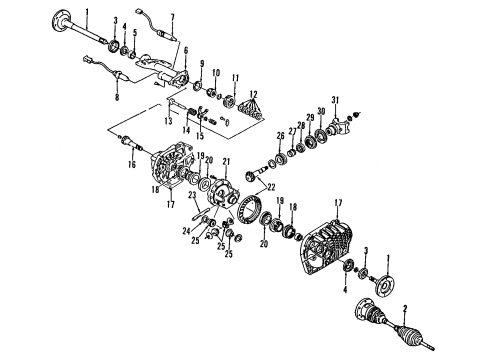
    Seal-Front Differential Drive Pinion Gear
  • Position
    Front
  • Manufacturer
    General Motors
Make sure this part fits
$10.69 MSRP: $20.07
You Save: $9.38 (47%)
Ships in 1 Business Day
1
ADD TO CART
  • Related Parts
  • Product Specifications
  • Vehicle Fitment
  • Customer Questions & Expert Answers
  • Product Specifications

    BrandGenuine GM
    Manufacturer Part Number23270117
    Part DescriptionSeal-Front Differential Drive Pinion Gear
    Other NamesRear Seal; Seal, Differential Drive Pinion Shaft Bearing
    Item Dimensions3.6 x 3.8 x 0.6 inches
    Item Weight0.40 Pounds
    PositionFront
    ConditionNew
    Fitment TypeDirect Replacement
    ManufacturerGeneral Motors
    SKU23270117
    WarrantyThis genuine GM part is guaranteed by GM's factory warranty.
    Shipping & ReturnShipping Policy Return Policy
    Warning: California's Proposition 65
  • Vehicle Fitment

    Year Make Model Trim Engine
    2013-2019 Cadillac ATSBase, Luxury, Performance, Premium, Premium Luxury, Premium Performance, V4 Cyl 2.0 L GAS, 4 Cyl 2.5 L GAS, 6 Cyl 3.6 L FLEX, 6 Cyl 3.6 L GAS
    2014-2019 Cadillac CTSBase, Luxury, Performance, Premium, Premium Luxury, V, Vsport, Vsport Premium, Vsport Premium Luxury4 Cyl 2.0 L GAS, 6 Cyl 3.6 L FLEX, 6 Cyl 3.6 L GAS, 8 Cyl 6.2 L GAS
    2002-2020 Cadillac EscaladeBase, Hybrid, Hybrid Platinum, Luxury, Platinum, Premium, Premium Luxury8 Cyl 5.3 L GAS, 8 Cyl 6.0 L FULL HYBRID EV-FLEX (FHEV), 8 Cyl 6.0 L FULL HYBRID EV-GAS (FHEV), 8 Cyl 6.0 L GAS, 8 Cyl 6.2 L FLEX, 8 Cyl 6.2 L GAS
    2015-2020, 2003-2006 Cadillac Escalade ESVBase, Luxury, Platinum, Premium, Premium Luxury8 Cyl 6.0 L GAS, 8 Cyl 6.2 L FLEX, 8 Cyl 6.2 L GAS
    2002-2013 Cadillac Escalade EXTBase, Luxury, Premium8 Cyl 6.0 L GAS, 8 Cyl 6.2 L FLEX, 8 Cyl 6.2 L GAS
    2007-2013 Chevrolet AvalancheBlack Diamond LS, Black Diamond LT, Black Diamond LTZ, LS, LT, LTZ8 Cyl 5.3 L FLEX, 8 Cyl 5.3 L GAS, 8 Cyl 6.0 L GAS
    2002-2006 Chevrolet Avalanche 1500Base, LS, LT, North Face, WBH, Z718 Cyl 5.3 L FLEX, 8 Cyl 5.3 L GAS
    2002-2006 Chevrolet Avalanche 2500Base, LS, LT8 Cyl 8.1 L GAS
    1999-2018 Chevrolet Silverado 1500Base, Custom, High Country, Hybrid, LS, LT, LTZ, SS, SSV, WT, XFE, Z71 Off-Road6 Cyl 4.3 L FLEX, 6 Cyl 4.3 L GAS, 8 Cyl 4.8 L FLEX, 8 Cyl 4.8 L GAS, 8 Cyl 5.3 L FLEX, 8 Cyl 5.3 L FULL HYBRID EV-GAS (FHEV), 8 Cyl 5.3 L GAS, 8 Cyl 5.3 L MILD HYBRID EV-GAS (MHEV), 8 Cyl 6.0 L FULL HYBRID EV-FLEX (FHEV), 8 Cyl 6.0 L FULL HYBRID EV-GAS (FHEV), 8 Cyl 6.0 L GAS, 8 Cyl 6.2 L FLEX, 8 Cyl 6.2 L GAS
    2007 Chevrolet Silverado 1500 ClassicHybrid, LS, LT, WT6 Cyl 4.3 L GAS, 8 Cyl 4.8 L GAS, 8 Cyl 5.3 L FLEX, 8 Cyl 5.3 L FULL HYBRID EV-GAS (FHEV), 8 Cyl 5.3 L GAS, 8 Cyl 6.0 L GAS
    View More
  • Customer Questions & Expert Answers

    Q:
    Can you help me check if this 23270117 is the right part for my car? Posted by ChevyPartsGiant Specialist
    A:
    Please Select Your Vehicle model to see if part number 23270117 is suitable before ordering.
    Posted by ChevyPartsGiant Specialist
    Q:
    How to replace the Differential Seal in the drive pinion housing on Cadillac Escalade? Posted by Customer
    A:
    You must document the driveline component positions regarding propeller shaft and axles before undoing everything for replacement work followed by precise reinstallation at their initial settings according to specifications and torque standards. Start by elevating the vehicle on stands and remove the axle lubricating fluid. The first step needs to eliminate both rear axle shafts and rear propeller shaft to proceed with replacement work. Remove the drive pinion flange/yoke along with the oil seal followed by the use of a suitable hydraulic press tool to uninstall the pinion assembly along with the collapsible spacer. You should use a hammer combined with a brass drift which requires forward and backward drift movement to meticulously extract the outer and inner pinion bearing cups. Operation of the inner pinion bearing cup into the pinion gear bearing retainer uses j 37624 and j 8092 followed by j 8608 and j 8092 for the outer pinion bearing cup installation. You need to apply sealant to the selective shim before setting the pinion gear bearing retainer with its bolts and tightening them to 88 nm (65 lb ft). First reinstall the oil seal or drive pinion flange along with the rear propeller shaft along with the rear axle shafts. The vehicle should receive its lubricant fill before removing the support so it can return to ground level.
    Posted by ChevyPartsGiant Specialist
    Q:
    How to replace the Differential Seal in the drive pinion housing on Cadillac Escalade EXT? Posted by Customer
    A:
    The following tools are required to change drive pinion housing or seal: pinion seal installer (J 44414), split-plate bearing puller (J 22912-01), pinion cone and side bearing installer (J 24433), pinion bearing installer (J 37624), universal driver handle 3/4 in -- 10 (J 8092), rear pinion bearing race installer (J 8608) and flange/pulley holding tool (J 8614-01). First drain axle lubricant after lifting the vehicle followed by taking out axle shafts then make a note of the rear propeller shaft position to the rear axle pinion yoke. The propeller shaft needs to be disconnected after wrapping the bearing caps with tape to avoid bearing roller loss. Record the measurement of pinion and ring gear rotational torque taken with an inch-pound torque wrench for later axle assembly. First remove the retainer bolts from the pinion gear bearing then remove the retainer followed by the pinion and shortly after remove the selective shim. Record the required pinion rotation torque that you measure before using the flange/pulley holding tool (J 8614-01) for pinion nut extraction. The pinion yoke and pinion oil seal should be unplugged from the flange/pulley holding tool (J 8614-01). Later take out the outer and inner pinion bearings using the split-plate bearing puller (J 22912-01) over a hydraulic press. Crank the pinion bearing installer (J 37624) with universal driver handle (J 8092) to put the inner pinion bearing cup in place before ringing up the outer pinion bearing cup with rear pinion bearing race installer (J 8608) and universal driver handle (J 8092). After inserting the inner pinion bearing onto its position using the pinion cone and side bearing installer (J 24433), users must add a new collapsible spacer followed by pinion bearing lubrication and the final pinion installation into the bearing retainer. Position the outer pinion bearing and fresh pinion oil seal into their proper places with the help of the pinion seal installer (J 44414). Sealant application occurs on the splines of the pinion yoke followed by its installation in alignment with pre-made removal marks onto the pinion shaft. Using flange/pulley holding tool (J 8614-01) maintain pinion end play readiness as you tighten the washer and newer pinion nut. Measure the rotating pinion torque which should be 0.40 - 0.57 nm (3 - 5 inch lbs.) more than the recorded removal torque. You should turn the pinion several times after achieving the specified torque to verify bearing seating before repeating the torque measurement for adjustments. Start by choosing the proper thickness of pinion gear bearing retainer shim, then apply sealant to both sealing surfaces followed by shim placement facing the unmachined area before adding sealant to the shim and finally tighten retainer bolts to 88 nm (65 ft. Lbs.). You must check the pinion and ring gear's rotating torque which should lie between 3.9 - 6.2 nm (30 - 55 inch lbs.) for new bearings or between 2.8-5.6 nm (25-50 inch lbs.) for used bearings during the testing process. A preload adjustment needs to be made on the pinion or differential side bearings when required. After realignment of reference marks completes the installation of propeller shaft while retaining clamps and bolts secure in place and axle shafts reattach before lubricating the axle and allowing the vehicle to descend.
    Posted by ChevyPartsGiant Specialist
    Q:
    How to replace the Differential Seal in the drive pinion housing on Chevrolet Silverado 1500? Posted by Customer
    A:
    The process of drive pinion housing or seal replacement requires initial observation of all driveline component positions relative to propeller shafts and axles before disassembly according to their original locations following specifications with torques values. The first step involves vehicle lifting followed by draining all lubricant from the axle bearing system. The drive proceeds by unattaching both rear axle shafts together with the rear propeller shaft based on whether the design uses one piece or two pieces. To take out both the drive pinion flange or yoke and oil seal you need a hydraulic press and matching equipment. The collapsible spacer needs removal before using a hammer and brass drift to gently extract both pinion bearing cups in equal steps. The installation process requires the j 37624 (Pinion Bearing Installer) and j 8092 (Universal Driver Handle) to place the inner pinion bearing cup and then install the outer pinion bearing cup by using the j 8608 (Pinion Bearing Cup Installer) and j 8092 (Universal Driver Handle). Sealant should be applied to the selective shim before installing the pinion gear bearing retainer along with its bolts that need to be tightened to 88 nm (65 lb ft). Allow the drive pinion flange/yoke or oil seal to reenter its place followed by the propeller shaft before completing the installation with the rear axle shafts. To finish up the procedure you need to add lubricant to the axle before taking away the support to lower the vehicle.
    Posted by ChevyPartsGiant Specialist
    Q:
    How to replace the Differential Seal in the drive pinion housing on Chevrolet Suburban 1500? Posted by Customer
    A:
    The following tools are required to change drive pinion housing or seal: pinion seal installer (J 44414), split-plate bearing puller (J 22912-01), pinion cone and side bearing installer (J 24433), pinion bearing installer (J 37624), universal driver handle 3/4 in -- 10 (J 8092), rear pinion bearing race installer (J 8608) and flange/pulley holding tool (J 8614-01). First drain axle lubricant after lifting the vehicle followed by taking out axle shafts then make a note of the rear propeller shaft position to the rear axle pinion yoke. The propeller shaft needs to be disconnected after wrapping the bearing caps with tape to avoid bearing roller loss. Record the measurement of pinion and ring gear rotational torque taken with an inch-pound torque wrench for later axle assembly. First remove the retainer bolts from the pinion gear bearing then remove the retainer followed by the pinion and shortly after remove the selective shim. Record the required pinion rotation torque that you measure before using the flange/pulley holding tool (J 8614-01) for pinion nut extraction. The pinion yoke and pinion oil seal should be unplugged from the flange/pulley holding tool (J 8614-01). Later take out the outer and inner pinion bearings using the split-plate bearing puller (J 22912-01) over a hydraulic press. Crank the pinion bearing installer (J 37624) with universal driver handle (J 8092) to put the inner pinion bearing cup in place before ringing up the outer pinion bearing cup with rear pinion bearing race installer (J 8608) and universal driver handle (J 8092). After inserting the inner pinion bearing onto its position using the pinion cone and side bearing installer (J 24433), users must add a new collapsible spacer followed by pinion bearing lubrication and the final pinion installation into the bearing retainer. Position the outer pinion bearing and fresh pinion oil seal into their proper places with the help of the pinion seal installer (J 44414). Sealant application occurs on the splines of the pinion yoke followed by its installation in alignment with pre-made removal marks onto the pinion shaft. Using flange/pulley holding tool (J 8614-01) maintain pinion end play readiness as you tighten the washer and newer pinion nut. Measure the rotating pinion torque which should be 0.40 - 0.57 nm (3 - 5 inch lbs.) more than the recorded removal torque. You should turn the pinion several times after achieving the specified torque to verify bearing seating before repeating the torque measurement for adjustments. Start by choosing the proper thickness of pinion gear bearing retainer shim, then apply sealant to both sealing surfaces followed by shim placement facing the unmachined area before adding sealant to the shim and finally tighten retainer bolts to 88 nm (65 ft. Lbs.). You must check the pinion and ring gear's rotating torque which should lie between 3.9 - 6.2 nm (30 - 55 inch lbs.) for new bearings or between 2.8-5.6 nm (25-50 inch lbs.) for used bearings during the testing process. A preload adjustment needs to be made on the pinion or differential side bearings when required. After realignment of reference marks completes the installation of propeller shaft while retaining clamps and bolts secure in place and axle shafts reattach before lubricating the axle and allowing the vehicle to descend.
    Posted by ChevyPartsGiant Specialist
    Q:
    How to replace the Differential Seal in the drive pinion housing on GMC Sierra 1500? Posted by Customer
    A:
    The proper method for drive pinion housing or seal replacement involves making ram observations for all driveline components based on their propeller shaft and axle positions initially. Reassembly requires following all specifications and torque values to return components to their original positions. Start the procedure through vehicle lifting then draining the axle fluid. Mark the rear propeller shaft to its position on the rear axle pinion yoke and then remove the axle shafts. Unwinding the bearing caps enables the propeller shaft removal from the axle with tape applied to halt bearing rollers from escaping. Use an inch-pound torque wrench to measure the required torque needed for pinion and ring gear rotation and document the combined preload values affecting pinion bearings together with the pilot bearing and oil seal and differential case bearings. An alignment mark should be established between pinion yoke and pinion gear before retainer bolts and then the retainer and pinion can be removed. The torque measurement should occur after selective shim removal while assessing the pinion rotation capacity. Set up the j 8614-01 flange/pulley holding tool and loosen the pinion nut while using holding services. Place the j 8614-2 and j 8614-3 into the j 8614-01. Use the j 8614-3 to turn clockwise which will remove the pinion yoke. A suitable tool should be used to remove the pinion oil seal from the housing without damaging it before proceeding with the outer Pinion Bearing and pinion and collapsible spacer. The bearing puller (J 22912-B) and hydraulic press will extract the inner Pinion Bearing before using a hammer and brass drift to remove both outer and inner Pinion Bearing cups. Install the inner Pinion Bearing cup into the pinion gear bearing retainer through the combination of Pinion Bearing installer (J 37624) with driver handle (J 8092). Then use rear Pinion Bearing race installer (J 8608) and driver handle (J 8092) to deliver the outer Pinion Bearing cup. The installer (J 24433) should be used to install the inner Pinion Bearing until the cone seats on the pinion before adding a new collapsible spacer followed by lubricating the pinion bearings with the required axle lubricant. First install the pinion inside the bearing retainer and place the outer bearing afterward before installing a fresh oil seal using the pinion seal installer (J 44414). Apply gm p/n 12346004 (Canadian P/N 10953480) sealant to the splines of the pinion yoke before installing it while the assembly keeps the same position as marked before removal. Tighten the new pinion nut with assistance from the flange/pulley holding tool (J 8614-01) until the pinion end play reaches its limit and measure the rotating torque. Record a rotating torque measure of the pinion at 0.40-0.57 n.m (3-5 lb in) above the previously recorded value. The pinion needs multiple rotations before checking the torque again because this process secures bearing installation properly. Future torque readings might require adjustments. You must determine the specific shim thickness for the pinion gear bearing retainer before applying gm p/n 1052942 (Canadian P/N 10953466) sealant to its sealing surface. Then place the shim with its tab oriented to the unmachined surface. Employ sealant on the shim surface before installing the pinion gear bearing retainer and torquing its bolts to 88 n.m (65 lb ft). Check the torque between the pinion and ring gear after installation while confirming their reading stays between 0.57 and 1.13 n.m over the initial measurement result (5-10 lb in). Check preload until it reaches proper specifications. Reinstall the propeller shaft to the pinion yoke and keep the reference marks aligned before securing the propeller shaft yoke retaining clamps and bolts to 25 n.m (18 lb ft). Proceed with installing the axle shafts while filling the assembly with proper lubrication followed by a vehicle descent.
    Posted by ChevyPartsGiant Specialist
    Q:
    How to replace the Differential Seal in the drive pinion housing on GMC Yukon? Posted by Customer
    A:
    The replacement of drive pinion housing and seal requires Pinion Seal Installer (J 44414), Bearing Puller (J 22912-B), Pinion Cone and Side Bearing Installer (J 24433), Pinion Bearing Installer (J 37624), Driver Handle (J 8092), Rear Pinion Bearing Race Installer (J 8608) and Flange/Pulley Holding Tool (J 8614-01) as essential tools. First raise the vehicle until you drain the axle lubricant. Begin by marking the exact position of all driveline components that relate to the propeller shaft and axles for proper reassembly. Secure the bearing caps by taping them to avoid the loss of rollers before disengaging the propeller shaft from the axle. Before moving on, you should write down the torque needed to rotate the pinion and ring gear along with making an alignment mark between the pinion and pinion yoke. First remove the pinion gear bearing retainer bolts before taking off the retainer along with the pinion and finally the selective shim. The pinion requires a second measurement of necessary torque to keep rotating. Start by placing the Flange/Pulley Holding Tool (J 8614-01) on the assembly before removing the pinion nut while securely gripping it. First remove the washer before you use the Flange/Pulley Holding Tool (J 8614-01) alongside its tools (J 8614-2 and J 8614-3) to remove the pinion yoke. Use the Bearing Puller (J 22912-B) and a hydraulic press to uninstall the pinion oil seal as well as both outer and inner pinion bearings. Follow this order to install both inner pinion bearing cup using Pinion Bearing Installer (J 37624) and driver handle (J 8092) followed by outer pinion bearing cup using Rear Pinion Bearing Race Installer (J 8608) with driver handle (J 8092). Apply the Pinion Cone and Side Bearing Installer (J 24433) to install the inner pinion bearing that will be followed by a new collapsible spacer and pinion bearing lubrication procedures. Installation of the pinion starts with inserting it into the bearing retainer followed by outer pinion bearing mounting and finally mounting a new pinion oil seal using the Pinion Seal Installer (J 44414). Secure the Pinion Yoke splines with sealant before installing it correctly without using any hammering method. Push the new pinion nut through the washer while using the Flange/Pulley Holding Tool (J 8614-01) to reach the pinion end play just to the point of stoppage. The technician should measure pinion torque during rotation while adjusting torques until they meet required specifications. Use the selective shim while applying sealant to the pinion gear bearing retainer seal surface before tightening the bolts to 88 N.m (65 lb ft). The next step is to check the torque of both the pinion and the ring gear before reassembling the propeller shaft, axle shafts and adding lubricant to the axle before lowering the vehicle.
    Posted by ChevyPartsGiant Specialist
    Q:
    How to replace the Differential Seal in the drive pinion housing on GMC Sierra 3500 Classic? Posted by Customer
    A:
    To replace the drive pinion housing or seal, all you will need is the following tools: pinion seal installer (J 44414), bearing puller, pinion cone and side bearing installer (J 24433), pinion bearing installer (J 37624), driver handle (J 8092), rear pinion bearing race installer (J 8608), and flange pulley holding tool (J 8614-01). Start by lifting the vehicle and removing the axle lubricant. Unscrew the axle shafts and note where the rear propeller shaft is positioned with respect to the rear axle pinion yoke, then disconnect the propeller shaft. Measure and record the torque of rotating the pinion and ring gear then place an alignment mark between them. Remove the pinion gear then bottom out the pinion while using the projects that are used on the project when pinion. Another measurement to be made is the torque required to rotate the pinion. Mount the flange/pulley holding tool (J 8614-01) and loosen the pinion nut; keep it. Strip the washer and then the yoke through the right tools. Pry out the pinion oil seal and the outer and inner pinion bearings using the bearing puller (J 22912-B) with the aid of a hydraulic press. Install the inner pinion bearing cup using the pinion bearing installer (J 37624) and driver handle (J 8092), and the outer pinion bearing cup using the rear pinion bearing race installer (J 8608), and driver handle (J 8092). Install the inner pinion bearing with the pinion cone and side bearing installer (J 24433) and a new collapsible spacer, followed by lubing the pinion bearing. Mount the pinion in the bearing retainer, then the outer pinion bearing and a fresh pinion oil seal with the pinion seal installer (J 44414) into position. Apply sealant to the splines of the pinion yoke, install it with the marks made while isolation to align with the marks while isolation and seat it properly. Mount the washer and a new pinion nut, then tighten the nut, holding the flange/pulley holding tool (J 8614-01) until the pinion end play is just taken up. Measure the rotating torque of the pinion and adjust as required to meet specifications. After checking for a correct torque value, find the selective thickness of the pinion gear bearing retainer and then apply sealant; add the shim and bear retainer. Adjust the preload by tightening retainer bolts by 88 n.m (65 lb ft) and measure the rotating torque of the pinion and ring gear. Lastly, reassemble the propeller shaft, match the reference marks, tighten the retaining clamps, replace the axle shafts, bulk up the axle with oil, and put the vehicle back down on the ground.
    Posted by ChevyPartsGiant Specialist
    Q:
    How should the propeller shaft be disconnected for the 2004 Cadillac Escalade ESV? Posted by Customer
    A:
    Disconnect the propeller shaft, ensuring to wrap the bearing caps with tape to prevent loss of bearing rollers.
    Posted by ChevyPartsGiant Specialist
    See expert answers on similar Differential Seal
    Q:
    How is the pinion oil seal installed for the 2004 Chevrolet Silverado 2500? Posted by Customer
    A:
    Insert the pinion into the bearing retainer, install the outer pinion bearing, and use the J 44414 to install a new pinion oil seal.
    Posted by ChevyPartsGiant Specialist
    See expert answers on similar Differential Seal
    Q:
    How do you remove the pinion nut for the 2008 Chevrolet Silverado 1500? Posted by Customer
    A:
    Install the Flange/Pulley Holding Tool (J 8614-01) and remove the pinion nut while holding it.
    Posted by ChevyPartsGiant Specialist
    See expert answers on similar Differential Seal
    Q:
    What is the first step in the replacement process for the 2004 Chevrolet Silverado 3500? Posted by Customer
    A:
    Raise the vehicle and mark the positions of all driveline components relative to the propeller shaft and axles before disassembly.
    Posted by ChevyPartsGiant Specialist
    See expert answers on similar Differential Seal
    Q:
    What components need to be removed next for the 2010 Chevrolet Silverado 1500? Posted by Customer
    A:
    Remove the rear axle shafts and the rear propeller shaft, depending on whether it is a one-piece or two-piece design.
    Posted by ChevyPartsGiant Specialist
    See expert answers on similar Differential Seal
    Q:
    What tools are used for installing the inner pinion bearing cup for the 2010 Chevrolet Tahoe? Posted by Customer
    A:
    J 37624 and J 8092.
    Posted by ChevyPartsGiant Specialist
    See expert answers on similar Differential Seal
    Q:
    What measurement should be taken before removing the pinion gear for the 2005 GMC Sierra 3500? Posted by Customer
    A:
    Measure and record the torque required to rotate the pinion and ring gear using an inch-pound torque wrench.
    Posted by ChevyPartsGiant Specialist
    See expert answers on similar Differential Seal
    Q:
    What should be applied to the surface of the selective shim before installation for the 2009 GMC Yukon? Posted by Customer
    A:
    Apply sealant.
    Posted by ChevyPartsGiant Specialist
    See expert answers on similar Differential Seal
    Q:
    What should be measured before removing the pinion gear for the 2004 GMC Yukon XL 2500? Posted by Customer
    A:
    Measure the torque required to rotate the pinion and ring gear with an inch-pound torque wrench, and record this for reassembly.
    Posted by ChevyPartsGiant Specialist
    See expert answers on similar Differential Seal
    If you have any questions about this product, please don't hesitate to ask us. We will be happy to help you!

OEM GM 23270117, Excellent Performance and Perfect Fitment

To ensure reliability, purchase GM part # 23270117 Pinion Seal, Front. It is sometimes referred to as GM Differential Seal. Choosing OEM parts is the optimal decision for guaranteeing superior quality and perfect performance. These components undergo stringent quality checks and are carefully constructed to comply with GM's factory specifications, ensuring a smooth installation process.

ChevyPartsGiant.com is a leading supplier of genuine GM parts such as GM 23270117 Pinion Seal, Front. Our website boasts an extensive inventory of OEM GM parts, available at highly competitive prices in the market. Should you require any new genuine GM parts, rest assured we will deliver them swiftly and efficiently to your doorstep. Furthermore, all our parts come with the assurance of a manufacturer's warranty. For detailed Chevy parts information, click here.
Choose ChevyPartsGiant for discounted prices, exceptional service and fast delivery