Make sure this part fits

GM 15808251
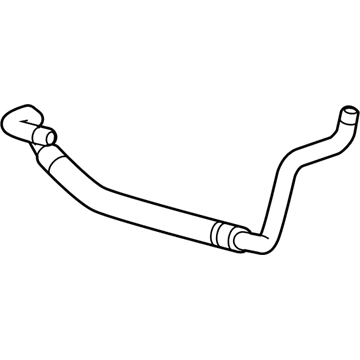
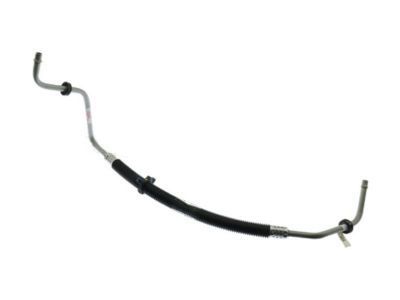
Inlet Pipe

2003-2020 GM

Customer Questions & Expert Answers (7)
GM 15808251 Inlet Pipe
  • Part Description
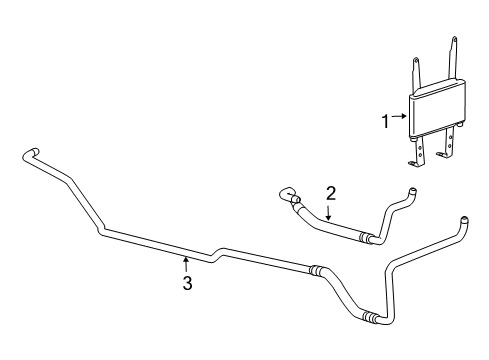
    Hose Assembly-Transmission Fluid Auxiliary Cooler Inlet
  • Replaces
    15751520, 15230697
  • Manufacturer
    General Motors
Make sure this part fits
$27.54 MSRP: $45.37
You Save: $17.83 (40%)
Ships in 1 Business Day
1
ADD TO CART
  • Related Parts
  • Product Specifications
  • Vehicle Fitment
  • Customer Questions & Expert Answers
  • Product Specifications

    BrandGenuine GM
    Manufacturer Part Number15808251
    Part DescriptionHose Assembly-Transmission Fluid Auxiliary Cooler Inlet
    Other NamesHose, Transmission Oil Cooler; Pipe, Transmission Oil Cooler
    Item Dimensions24.3 x 6.9 x 3.5 inches
    Item Weight0.60 Pounds
    ConditionNew
    Fitment TypeDirect Replacement
    Replaces15751520, 15230697
    ManufacturerGeneral Motors
    SKU15808251
    WarrantyThis genuine GM part is guaranteed by GM's factory warranty.
    Shipping & ReturnShipping Policy Return Policy
    Warning: California's Proposition 65
  • Vehicle Fitment

    Year Make Model Trim Engine
    2003-2014 Chevrolet Express 1500Base, LS, LT8 Cyl 5.3 L FLEX, 8 Cyl 5.3 L GAS
    2003-2020 Chevrolet Express 2500Base, LS, LT8 Cyl 4.8 L FLEX, 8 Cyl 4.8 L GAS, 8 Cyl 5.3 L GAS, 8 Cyl 6.0 L CNG, 8 Cyl 6.0 L FLEX, 8 Cyl 6.0 L GAS
    2003-2020 Chevrolet Express 3500Base, LS, LT8 Cyl 4.8 L FLEX, 8 Cyl 4.8 L GAS, 8 Cyl 6.0 L CNG, 8 Cyl 6.0 L FLEX, 8 Cyl 6.0 L GAS
    2003-2014 GMC Savana 1500Base, LS, LT, SLE8 Cyl 5.3 L FLEX, 8 Cyl 5.3 L GAS
    2003-2020 GMC Savana 2500Base, LS, LT, SLE8 Cyl 4.8 L FLEX, 8 Cyl 4.8 L GAS, 8 Cyl 5.3 L GAS, 8 Cyl 6.0 L CNG, 8 Cyl 6.0 L FLEX, 8 Cyl 6.0 L GAS
    2003-2020 GMC Savana 3500Base, LS, LT, SLE8 Cyl 4.8 L FLEX, 8 Cyl 4.8 L GAS, 8 Cyl 6.0 L CNG, 8 Cyl 6.0 L FLEX, 8 Cyl 6.0 L GAS
  • Customer Questions & Expert Answers

    Q:
    Is this 15808251 designed for my car? Posted by ChevyPartsGiant Specialist
    A:
    Please Select Your Vehicle model to see if part number 15808251 is suitable before ordering.
    Posted by ChevyPartsGiant Specialist
    Q:
    How to properly install and connect the Oil Cooler Hose on Chevrolet Express 2500? Posted by Customer
    A:
    The oil cooler might be installed as part of the Radiator or it might be a separate unit located in front of it and has serviceable cooler lines and hoses. First, disconnect the lines of the cooler. Pull or pry out the lower hose clips, which is attached to the Oil Cooler Hose on the lower Fan Shroud. Then, pull off the hoses from the clips. Carefully, extract the oil cooler pipe fittings from the Radiator quick connect fittings. Lift and adequately support the vehicle, dismantle the Oil Cooler Hose bracket bolt and the Oil Cooler Hose adapter bolts. Remove the assembly of the Oil Cooler Hose and gasket, and throw the gasket in the garbage. Examine fittings, connectors, and cooler hoses for any defects or warping. A clear snap is heard when installing the ends of the tube or hose assembly to the quick connectors, and you sure the tube is quite inserted by a powerful pulling force on it. Install on the Oil Cooler Hose assembly and new gasket; install the lower Oil Cooler Hose adapter bolts and assemble, then tighten down to 12 n.m (106 lb in). After that, tighten the Oil Cooler Hose bracket bolt to 25n.m (18 lb ft). Hook the oil cooler hoses to the hose clip on the Fan Shroud and snap the hose clip shut. Make sure the oil cooler line, currently being installed, has a plastic cap fitted on the end that connects to the quick connect fitting". If the cap is either missing or damaged, procure a new one, attach it to the cooler line but do not use the cap to fasten the cooler line into the fitting before you install it on the system. Finally, connect the oil cooler lines and pull back simply on the cooler line to check it properly fits in the quick connect fitting.
    Posted by ChevyPartsGiant Specialist
    Q:
    How to replace the Engine Oil Cooler Hose/Pipe on Chevrolet Express 1500? Posted by Customer
    A:
    Serviceable cooler lines and hoses exist as part of an oil cooler system which could either integrate with the Radiator or act as an independent unit placed in front. The Engine Oil Cooler hose/pipe replacement should begin with cooler line disconnection and opening the Oil Cooler Hose clip on the lower Fan Shroud before extracting the oil cooler hoses from their clip. Complete the Radiator quick-connect fittings before extracting the oil cooler pipe fittings normally after you support the vehicle properly. Start by unbolting the Oil Cooler Hose bracket then remove the Oil Cooler Hose adapter bolts before completely disassembling the hose assembly that you must discard afterward. Examine the fittings along with connectors and all cooler hoses for signs of structural change or physical damage. An audible snap from the hose tube assembly during their insertion into quick connectors confirms proper insertion requiring a firm pull to verify complete insertion. Fit together the Oil Cooler Hose assembly with a fresh gasket before torquing the cooler hose adapter bolts to 12 nm (106 inch lbs.) then twisting the outer Oil Cooler Hose bracket bolt to 25 nm (18 ft. Lbs.). Fasten the oil cooler hoses through their designated clip on the Fan Shroud before closing the hose clip mechanism. Make sure both the new oil cooler line and its quick connect end possess an attached plastic cap before connection. Obtain a new plastic cap if one is lost or damaged and install it before fitting the cooler lines but never use the cap to connect the lines. Carefully join the oil cooler lines before pulling the line back hard to verify proper fitting in the quick connect connector.
    Posted by ChevyPartsGiant Specialist
    Q:
    How to replace the Engine Oil Cooler Hose/Pipe on Chevrolet Express 3500? Posted by Customer
    A:
    The oil cooler is a component of the Radiator that can be integral to it or a separate unit located ahead of it with the serviceable cooler lines and hoses. First, disconnect the cooler lines, and then open the Oil Cooler Hose clip under the lower Fan Shroud to remove the oil cooler hoses from the clip. Carefully push the oil cooler pipe fittings out from the Radiator quick connect fittings. Lift and appropriately prop the vehicle up, after which remove the Oil Cooler Hose bracket bolts and the Oil Cooler Hose adapter bolts. Remove the Oil Cooler Hose assembly and gasket, discard the gasket and inspect for damage or distortion in the fittings, connectors and cooler hoses. For installation, be sure to hear a distinct snap when assembling the tube ends of the hose assembly to the quick connectors and for a full insertion of the tube try and pull it hard. Install the Oil Cooler Hose assembly, along with new gasket (more important new gasket), and install the Oil Cooler Hose adapter bolts and tighten the bolts 12 nm (106 inch lbs.). Next, install the Oil Cooler Hose bck ratt bolt and tighten it to 25 nm (18 ft. Lbs.). Connect the oil cooler hoses to the hose clip on the Fan Shroud and snap the Oil Cooler Hose clip in place. Make sure that there is a plastic cap on the end of the oil cooler line you are installing to where it connects with the quick connect fitting. In case the cap is lost or damaged, you should have a new one installed on the cooler line prior to installation but don't use the cap to install the cooler line into the fitting. Finally, attach the oil cooler lines and pull back stringently on the cooler line to confirm that it's correctly installed in the quick connect fitting.
    Posted by ChevyPartsGiant Specialist
    Q:
    How to replace the Engine Oil Cooler Hose/Pipe on GMC Savana 3500? Posted by Customer
    A:
    The oil cooler, which can be part of the Radiator or a stand-alone component placed ahead of the Radiator, has serviceable cooler lines and hoses. To replace the Engine Oil Cooler hose: first, disconne the cooler lines and open the oil cower hose clip mounted on the lower Fan Shroud; then remove the oil cower hoses from the clip. Carefully withdraw the oil cooler pipe fittings from the Radiator quick connect fittings. Lift and adequately support the vehicle and then disconnect the Oil Cooler Hose bracket bolt and the Oil Cooler Hose adapter bolts. Remove the Oil Cooler Hose assembly and gasket; throw away the gasket. Check for the condition of the fittings, connectors, and cooler hoses for any signs of damage or deformation. For installation, feel for a distinct snap when joining the tube ends of the hose assembly to the quick connectors, and then test if it is fully inserted, by forcefully pulling on the tube. Add the Oil Cooler Hose assembly with the new gasket and add on the Oil Cooler Hose adaptive bolts and torquer them to 12 n.m (106 lb in). Then, secure the bracket bolt for the Oil Cooler Hose and, tighten it to 25 n.m (18 lb ft). Connect the oil cooler hoses to the hose clip on the Fan Shroud and snap the Oil Cooler Hose clip shut. Make sure you have a plastic cap on the end of the oil cooler line that is going to be installed that has been connected to the quick connect fitting; if the cap is missing or broken, procure a new cap for installation on the cooler line prior to installation. Lastly, join the oil cooler lines together and yank the cooler line back hard to make sure you have correctly installed the line in the quick connect fitting.
    Posted by ChevyPartsGiant Specialist
    Q:
    How to replace the Engine Oil Cooler Hose/Pipe on GMC Savana 1500? Posted by Customer
    A:
    The oil cooler exists as either a standalone unit in front of the Radiator or integrates into the Radiator core itself. This cooling component has accessible hoses and cooler lines. The procedure starts with disconnecting cooler lines before opening the lower Fan Shroud Oil Cooler Hose clip to extract the oil cooler hoses from their clip. Dismantle the oil cooler pipe from the Radiator quick connectors before raising the vehicle for support while you remove both the Oil Cooler Hose bracket bolt and adapter bolts. To begin installation first discard the gasket then remove the Oil Cooler Hose assembly for inspection of fittings connectors and cooler hoses for damage. When you join the hose assembly tube ends to quick connectors you must listen for a distinct snap sound before pulling the tube with force to ensure complete insertion. Fasten the Oil Cooler Hose assembly with a new gasket before tightening its adapter bolts to 12 nm (106 inch lbs.) and finally the bracket bolt to 25 nm (18 ft. Lbs.). Insert the oil cooler hoses into the hose clip of the Fan Shroud then activate the Oil Cooler Hose snap mechanism. Prior to fitting the oil cooler line make sure it has a plastic cap attached to its end that will mate with the quick connect fitting. A new cap should replace any missing or damaged ones on the cooler line before installation while avoiding the cap to fit the line into the fitting. Finish by attaching the oil cooler lines before performing a vigorous pull on the line to guarantee complete fitting installation.
    Posted by ChevyPartsGiant Specialist
    Q:
    How to replace the engine oil cooler hose/pipe for a 6.0L and 8.1L engine on GMC Savana 2500? Posted by Customer
    A:
    The oil cooler features serviceable cooler lines and hoses found within or in front of the radiators separately. Replacements begin with disconnecting all lines attached to the Engine Oil Cooler hose/pipe. Engineers should remove the lower Fan Shroud hose clip on 6.0l vehicles before doing the following procedures: extracting the hoses from the clip followed by slow withdrawal of the pipe fittings from the Radiator's quick connect fittings. Raise the vehicle while applying a support then disconnect engine shield bolts before removing the engine shield. The next step includes removing the oil cooler bracket bolt and bolted adapter nuts of the cooler hose while removing both the hose assembly and retaining gasket which should be discarded. Check every fitting and connector and cooler hose for signs of damage or distortion. An 8.1l engine requires the removal of its Oil Cooler Hose bracket bolt as well as the quick connect fittings at the engine before uninstalling the Oil Cooler Hose assembly while discarding the gasket and performing a damage inspection. Installation requires hearing a distinct snap while connecting tube ends to quick connectors followed by a firm pull to confirm full insertion of the hose assembly. In the installation of the 6.0l engine, install the new gasket after fitting the Oil Cooler Hose assembly followed by applying torque of 12 nm (106 inch lbs.) to loose adapter bolts and 25 nm (18 ft. Lbs.) to the Oil Cooler Hose bracket bolt. Begin by installing engine shields followed by shield bolt tightening to 20 nm (15 ft. Lbs.). When working with a 6.0l vehicle install the oil cooler hoses to the Fan Shroud hose clip before snapping it shut while also checking that the quick connect fitting's end contains a plastic cap. Connect the oil cooler lines. When installing hoses to the clip on an 8.1l engine for the cooler lines until you hear or feel a click against the quick connect fitting then perform a sharp pull-back check.
    Posted by ChevyPartsGiant Specialist
    If you have any questions about this product, please don't hesitate to ask us. We will be happy to help you!

OEM GM 15808251, Excellent Performance and Perfect Fitment

To ensure reliability, purchase GM part # 15808251 Inlet Pipe. It is sometimes referred to as GM Cooling Hose, GM Oil Cooler Hose, GM Automatic Transmission Oil Cooler Line. Choosing OEM parts is the optimal decision for guaranteeing superior quality and perfect performance. These components undergo stringent quality checks and are carefully constructed to comply with GM's factory specifications, ensuring a smooth installation process.

ChevyPartsGiant.com is a leading supplier of genuine GM parts such as GM 15808251 Inlet Pipe. Our website boasts an extensive inventory of OEM GM parts, available at highly competitive prices in the market. Should you require any new genuine GM parts, rest assured we will deliver them swiftly and efficiently to your doorstep. Furthermore, all our parts come with the assurance of a manufacturer's warranty. For detailed Chevy parts information, click here.
Choose ChevyPartsGiant for discounted prices, exceptional service and fast delivery