ChevyParts
My Garage
My Account
Cart
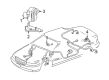
OEM 2000 Cadillac Seville ABS Control Module
Anti Lock Brake Control Module- Select Vehicle by Model
- Select Vehicle by VIN
Select Vehicle by Model
orMake
Model
Year
Select Vehicle by VIN
For the most accurate results, select vehicle by your VIN (Vehicle Identification Number).
1 ABS Control Module found

2000 Cadillac Seville Control Module Part Number: 9382835
Product Specifications- Other Name: Module Assembly, Electronic Brake & Traction Control; ABS Control Module; Module, Electronic Brake Control
- Item Weight: 2.20 Pounds
- Item Dimensions: 7.2 x 7.0 x 4.8 inches
- Condition: New
- Fitment Type: Direct Replacement
- SKU: 9382835
- Warranty: This genuine part is guaranteed by GM's factory warranty.
2000 Cadillac Seville ABS Control Module
With a comprehensive array of OEM 2000 Cadillac Seville ABS Control Module, from fuel pumps to door handles, our website is a one-stop-shop for your needs. All our genuine 2000 Cadillac Seville ABS Control Module are backed by the manufacturer's warranty and are offered at competitive prices in the market. Rest assured, you can shop with complete confidence.
2000 Cadillac Seville ABS Control Module Parts and Q&A
- Q: Should the ABS Control Module in the brake pressure modulator valve assembly be repaired or replaced for safety reasons on 2000 Cadillac Seville?A: Safety regulations restrict any repair of the brake pressure modulator valve assembly since it needs a full unit replacement. Technical maintenance personnel may only work on the ebcm and all other screws on the brake pressure modulator valve assembly remain inaccessible to avoid brake circuit leakages which pose personal safety risks. First turn off ignition power before raising the vehicle. The front wheel and fascia extension and pump should be removed from the left side of the vehicle. The ebcm connector position assurance can be taken off from the ebcm electrical connector by rotating its tab into the unlocked position. Discarding the ebcm wiring harness connection at any time while using the ignition with power state will damage equipment. Disconnect the ebcm electrical connector which is attached to the ebcm. Vehicle operators should note that brake fluid causes skin and eye irritation thus requiring immediate eye water rinse followed by soap-water skin wash and seeking physician evaluation for ingestion. The vehicle exterior needs protection from brake fluid overflows because the substance can harm vehicle paint finish. Brake pipes should not bend excessively throughout bpmv installation or removal since this can result in permanent damage that needs new replacement parts. Note down the positions of all brake pipes before installation to the bpmv for the final stage. Clean up all brake fluid spilled from the bpmv before proceeding to remove the 2 master cylinder brake pipes and 4 wheel brake pipes from the bpmv. First remove the ebcm/bpmv assembly along with the 2 bpmv bracket nuts from the bpmv bracket. Use a stepladder to access the ebcm and proceed with disconnecting the bpmv electrical connector then unfastening all 6 ebcm to bpmv screws . Clean the surface of the ebcm/bpmv assembly before taking out the ebcm from its position in the bpmv . The bpmv requires cleaning of its seal surfaces before installers place the ebcm onto the bpmv. Screw and tighten the 6 ebcm to bpmv screws to 3.2 nm (28 inch lbs.). Secure the bpmv electrical connector onto the ebcm through proper placement of the three bpmv rubber isolators to limit harmful vehicle vibrations on the ebcm/bpmv assembly. The ebcm/bpmv assembly requires installation onto the bpmv bracket that includes installation of 2 bpmv bracket nuts with 10 nm (89 inch lbs.) torque specification. Correct coupling of brake pipes to the bpmv prevents wheel lockup together with personal injury incidents. The installation of a new bpmv demands that users remove protecting plugs inserted into the valve ports. Properly connect all brake pipes to the bpmv by using recorded locations before tightening both to 15 nm (11 ft. Lbs.). The assembly surface should be cleaned first before installing the ebcm electrical connector and its position assurance connector to ebcm. When the ebcm connector tab reaches its locked position rotate it down while putting on the left air pump (if equipped) and left front fascia extension and left front wheel. Complete the vehicle descent then fuel and purge the hydraulic brake system for bleeding. Both the auto bleed procedure and the abs diagnostic system check need to be performed.
Related 2000 Cadillac Seville Parts
 2000 Cadillac Seville Brake Backing Plate
 2000 Cadillac Seville Brake Booster
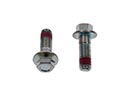 2000 Cadillac Seville Brake Caliper Bolt
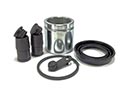 2000 Cadillac Seville Brake Caliper Repair Kit
 2000 Cadillac Seville Brake Calipers
 2000 Cadillac Seville Brake Line
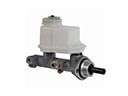 2000 Cadillac Seville Brake Master Cylinder
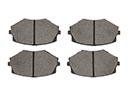 2000 Cadillac Seville Brake Pad
 2000 Cadillac Seville Brake Proportioning Valve
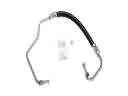 2000 Cadillac Seville Hydraulic Hose
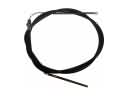 2000 Cadillac Seville Parking Brake Cable
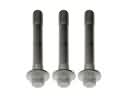 2000 Cadillac Seville Wheel Hub Bolt