ChevyParts
My Garage
My Account
Cart
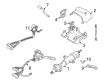
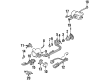
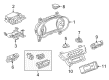
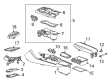
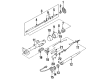
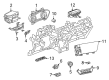
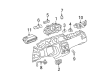
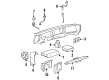
OEM Buick Headlight Switch
Headlamp Switch- Select Vehicle by Model
- Select Vehicle by VIN
Select Vehicle by Model
orMake
Model
Year
Select Vehicle by VIN
For the most accurate results, select vehicle by your VIN (Vehicle Identification Number).
193 Headlight Switches found

Buick Headlamp Switch, Black Part Number: 20862474
$90.34 MSRP: $136.26You Save: $45.92 (34%)Ships in 1-2 Business DaysProduct Specifications- Other Name: Switch Assembly-Headlamp *Ebony; Multi Purpose Switch; Switch, Headlamp/Fog Lamp/Turn Signal
- Replaces: 25865112

Buick Turn Signal Switch Part Number: 22831562
$36.84 MSRP: $57.66You Save: $20.82 (37%)Ships in 1-2 Business DaysProduct Specifications- Other Name: Switch, Turn Signal; Multi Purpose Switch; Signal Switch; Switch, Turn Signal Lamp

Buick Headlamp Switch Part Number: 9060788
$34.32 MSRP: $53.72You Save: $19.40 (37%)Ships in 1-2 Business DaysProduct Specifications- Other Name: Switch Assembly-Headlamp *Neutral; Multi Purpose Switch; Switch, Headlamp/Fog Lamp/Turn Signal
Buick Turn Signal Switch, Black Part Number: 84545369
$34.90 MSRP: $50.81You Save: $15.91 (32%)Ships in 1-2 Business DaysProduct Specifications- Other Name: Switch Assembly-Turn Signal *Black; Multi Purpose Switch; Signal Switch; Switch, Turn Signal Lamp
- Replaces: 95220563
Buick Headlamp Switch Part Number: 9060243
$66.37 MSRP: $103.86You Save: $37.49 (37%)Ships in 1-2 Business DaysProduct Specifications- Other Name: Switch Assembly-Headlamp *Cocoa; Switch, Headlamp/Fog Lamp/Turn Signal
Buick Headlamp Switch Part Number: 20862479
$88.75 MSRP: $118.33You Save: $29.58 (25%)Ships in 1-2 Business DaysProduct Specifications- Other Name: Switch, Headlamp/Fog Lamp/Turn Signal; Multi Purpose Switch
- Replaces: 25933541

Buick Combination Switch Part Number: 20885944
$15.85 MSRP: $19.44You Save: $3.59 (19%)Ships in 1-2 Business DaysProduct Specifications- Other Name: Switch, Accessory; Switch, Headlamp/Fog Lamp/Turn Signal
- Replaces: 25993279

Buick Fog Lamp Switch Part Number: 10403858
$29.93 MSRP: $60.09You Save: $30.16 (51%)Product Specifications- Other Name: Switch Assembly-Fog Lamp; Switch, Headlamp/Fog Lamp/Turn Signal
- Replaces: 10292961

Buick Dimmer Switch Part Number: 26055979
$17.44 MSRP: $85.12You Save: $67.68 (80%)Ships in 1-2 Business DaysProduct Specifications- Other Name: Switch Assembly, Headlamp Dimmer; Switch, Headlamp Dimmer

Buick Headlamp Switch, Jet Black Part Number: 26229264
$22.97 MSRP: $86.93You Save: $63.96 (74%)Ships in 1-2 Business DaysProduct Specifications- Other Name: Switch Assembly-Headlamp *Jet Black; Multi Purpose Switch; Switch, Headlamp/Fog Lamp/Turn Signal
- Replaces: 26687986
Buick Headlamp Switch, Titanium Part Number: 20862471
$43.56 MSRP: $163.39You Save: $119.83 (74%)Ships in 1-2 Business DaysProduct Specifications- Other Name: Switch, Headlamp/Fog Lamp/Turn Signal; Multi Purpose Switch
- Replaces: 25933544

Buick Headlamp Switch, Jet Black Part Number: 84201604
$24.92 MSRP: $82.38You Save: $57.46 (70%)Ships in 1-2 Business DaysProduct Specifications- Other Name: Switch Assembly-Headlamp *Jet Black; Multi Purpose Switch; Switch, Headlamp/Fog Lamp/Turn Signal
Buick Headlamp Switch, Titanium Part Number: 20862480
$46.30 MSRP: $115.41You Save: $69.11 (60%)Ships in 1-2 Business DaysProduct Specifications- Other Name: Switch, Headlamp/Fog Lamp/Turn Signal
- Replaces: 25933542

Buick Dimmer Switch Part Number: 26035239
$7.69 MSRP: $14.44You Save: $6.75 (47%)Ships in 1-2 Business DaysProduct Specifications- Other Name: Switch, Dimmer; Multi Purpose Switch; Headlamp Dimmer Switch; Switch, Headlamp Dimmer

Buick Headlamp Switch, Jet Black Part Number: 39145400
$39.58 MSRP: $62.01You Save: $22.43 (37%)Ships in 1-3 Business DaysProduct Specifications- Other Name: Switch Assembly-Headlamp *Jet Black; Multi Purpose Switch; Switch, Headlamp/Fog Lamp/Turn Signal

Buick Headlamp Switch Part Number: 25824871
Product Specifications- Other Name: Switch, Headlamp/Fog Lamp/Turn Signal
Buick Headlamp Switch Part Number: 25824860
Product Specifications- Other Name: Switch, Headlamp/Fog Lamp/Turn Signal
- Replaces: 25860253

Buick Switch Part Number: 25642525
Product Specifications- Other Name: Switch Assembly-Headlamp Auto Control & Instrument Panel Lamp Dimmer; Switch, Headlamp/Fog Lamp/Turn Signal

Buick Headlamp Switch Part Number: 1995320
Product Specifications- Other Name: Headlight; Multi Purpose Switch; Switch, Headlamp/Fog Lamp/Turn Signal

Buick Headlamp Switch Part Number: 10216341
Product Specifications- Other Name: Multi Purpose Switch; Switch, Headlamp/Fog Lamp/Turn Signal
- Replaces: 01995397, 1995397
| Page 1 of 10 |Next >
1-20 of 193 Results
Buick Headlight Switch
Want to cut long-term maintenance and repair costs? Choose OEM Headlight Switch. Those parts deliver top durability you can trust. On our site, you'll find a huge catalog of genuine Buick parts. Prices are unbeatable, so you can keep more in your pocket. Every OEM Buick Headlight Switch includes a manufacturer's warranty. You can also get an easy return policy that keeps buying risk free. Fast delivery, get your car on the road quickly. It's simple to search, compare, and order. Stop guessing about quality or fit. Order today and save with parts that last.
Buick Headlight Switch Parts Questions & Experts Answers
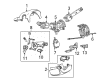
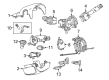
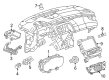
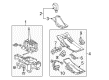
- Q: How to remove and install the Headlight Switch on Buick Century?A:Users need to pull the back edge of the left instrument panel access cover to free its retainers using a plastic flat-bladed tool. You must loosen the forward edge of the LH IP access opening cover by accessing it behind the hinge pillar so you can remove it. The headlamp switch retention screws must be unscrewed followed by a methodical outboard removal of the switch to reach the electrical connector which can then be disconnected. Connect the electrical connector to the headlamp switch and then position the switch tabs onto the IP before pressing it into its final location. Secure the retaining screws on the headlamp switch while torquing them to 1.8 N.m (16 lb in). The final installation step consists of mounting the LH IP access opening cover forward edge into the hinge pillar slot while securing the retainer mechanism to the IP trim pad holes through strong pressure.
- Q: How to replace the Headlight Switch on Buick LeSabre?A:The first step to replace a headlamp switch involves removing the left IP trim plate after disconnecting electrical connectors (2 and 3). You must separate the headlamp switch from the left IP trim plate using the removal of the fastener and performing a tilting motion that will allow its detachment. The IP trim plate installation method involves securing the headlamp switch with its fastener by tightening it to 2 N.m (18 lb in). Reinstall the IP trim plate when both electrical connectors are connected to (2, 3).
- Q: How to Properly Service and Replace the Headlight Switch on Buick Regal?A:Start by opening the access opening cover at the left side of the instrument panel (I/P) by pulling its rearward edge outboard. A plastic flat-bladed tool should be used carefully to release the retainers. Extract the forward edge of the access opening cover through the pillar behind the hinge and take it out. The headlamp switch requires you to remove its screws before you pull it gently toward the outside to reach the electrical connector so you can disconnect it. The installation process begins by attaching the electrical connector to the headlamp switch followed by alignment of the switch tabs to the i/p and finishing with switch positioning while screwing it tightly to 1.8 n.m (16 lb in). Push the forward part of the left i/p access opening cover behind the hinge pillar until the access opening cover retainers fit into slots on the i/p trim pad before you firmly press to secure it.


Related Buick Parts
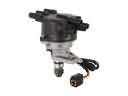 Buick Distributor
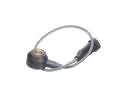 Buick Knock Sensor
 Buick Fuel Pump Relay
 Buick Air Bag Clockspring
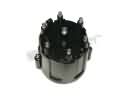 Buick Distributor Cap
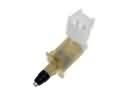 Buick Door Jamb Switch
 Buick Headlight Relay
 Buick Ignition Coil Boot
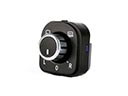 Buick Mirror Switch
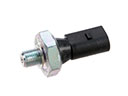 Buick Oil Pressure Switch
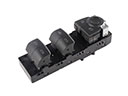 Buick Power Window Switch
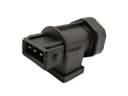 Buick Vehicle Speed Sensor