ChevyParts
My Garage
My Account
Cart
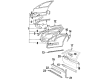
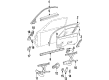
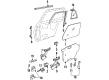
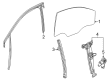
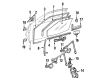
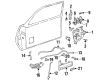
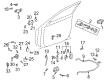
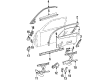
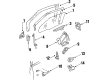
OEM Buick Window Regulator
Electric Power Window Regulator- Select Vehicle by Model
- Select Vehicle by VIN
Select Vehicle by Model
orMake
Model
Year
Select Vehicle by VIN
For the most accurate results, select vehicle by your VIN (Vehicle Identification Number).
211 Window Regulators found

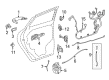
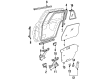
Buick Window Regulator, Front Driver Side Part Number: 10180309
$90.97 MSRP: $208.24You Save: $117.27 (57%)Product Specifications- Other Name: Regulator, Front Door Window Regulator; Regulator
- Position: Front Driver Side

Buick Power Regulator, Front Passenger Side Part Number: 16621658
$89.89 MSRP: $247.10You Save: $157.21 (64%)Product Specifications- Other Name: Regulator Assembly, Front Side Door Window; Window Regulator; Regulator; Regulator, Front Door Window Regulator; Regulator, Door Lock Remote Control
- Position: Front Passenger Side

Buick Power Regulator, Rear Passenger Side Part Number: 16621660
$62.43 MSRP: $247.10You Save: $184.67 (75%)Ships in 1-2 Business DaysProduct Specifications- Other Name: Regulator, Rear Door Window Regulator; Regulator; Window Regulator
- Position: Rear Passenger Side

Buick Power Regulator, Driver Side Part Number: 16621659
$140.38 MSRP: $261.95You Save: $121.57 (47%)Product Specifications- Other Name: Regulator, Door Lock Remote Control; Window Regulator; Regulator; Regulator, Front Door Window Regulator
- Position: Driver Side

Buick Window Regulator, Front Driver Side Part Number: 42748835
$26.41 MSRP: $47.16You Save: $20.75 (44%)Ships in 1-3 Business DaysProduct Specifications- Other Name: Regulator, Front Door Window Regulator
- Position: Front Driver Side
- Replaces: 42654617

Buick Window Regulator Part Number: 95299901
$47.85 MSRP: $86.60You Save: $38.75 (45%)Ships in 1-2 Business DaysProduct Specifications- Other Name: Regulator Assembly-Rear Side Door Window (W/O Motor); Regulator, Rear Door Window Regulator
- Position: Rear

Buick Window Regulator, Front Driver Side Part Number: 20952452
$142.15 MSRP: $257.28You Save: $115.13 (45%)Ships in 1-2 Business DaysProduct Specifications- Other Name: Regulator, Front Door Window Regulator; Regulator Assembly; Regulator, Door Lock Remote Control
- Position: Front Driver Side
- Replaces: 13302451, 13290261

Buick Window Regulator, Passenger Side Part Number: 20474282
Product Specifications- Other Name: Regulator; Regulator, Front Door Window Regulator
- Position: Passenger Side

Buick Window Regulator, Rear Driver Side Part Number: 22745794
Product Specifications- Other Name: Regulator, Rear Door Window Regulator; Regulator Assembly
- Position: Rear Driver Side
- Replaces: 13237870, 13290263
Buick Window Regulator, Rear Passenger Side Part Number: 22745795
Product Specifications- Other Name: Regulator, Rear Door Window Regulator; Regulator Assembly
- Position: Rear Passenger Side
- Replaces: 13290264, 13237871
Buick Window Regulator, Rear Driver Side Part Number: 22862886
Product Specifications- Other Name: Regulator Assembly-Rear Side Door Window (Left-Hand); Regulator Assembly; Regulator, Rear Door Window Regulator
- Position: Rear Driver Side
Buick Window Regulator, Rear Passenger Side Part Number: 22862887
Product Specifications- Other Name: Regulator Assembly-Rear Side Door Window (Right-Hand); Regulator Assembly; Regulator, Rear Door Window Regulator
- Position: Rear Passenger Side
Buick Window Regulator, Front Driver Side Part Number: 20474283
Product Specifications- Other Name: Regulator, Front Door Window Regulator; Regulator
- Position: Front Driver Side
Buick Window Regulator, Rear Passenger Side Part Number: 16625030
Product Specifications- Other Name: Regulator, Rear Door Window Regulator; Regulator
- Position: Rear Passenger Side

Buick Window Regulator, Front Driver Side Part Number: 20718371
Product Specifications- Other Name: Regulator, Front Door Window Regulator; Manual Regulator
- Position: Front Driver Side
Buick Window Regulator, Front Passenger Side Part Number: 16633098
Product Specifications- Other Name: Regulator Assembly-Front Side Door Window; Regulator; Regulator, Front Door Window Regulator; Regulator, Door Lock Remote Control
- Position: Front Passenger Side
- Replaces: 16636174

Buick Window Regulator, Front Driver Side Part Number: 15231241
Product Specifications- Other Name: Regulator, Front Door Window Regulator; Power Window Motor and Regulator Assembly; Regulator, Door Lock Remote Control
- Position: Front Driver Side
- Replaces: 25713422, 10387928, 25769928, 25750513, 25699762

Buick Power Regulator, Front Passenger Side Part Number: 16636616
Product Specifications- Other Name: Regulator, Front Door Window Regulator; Power Window Regulator Assembly; Regulator; Regulator, Door Lock Remote Control; Window Regulator
- Position: Front Passenger Side
- Replaces: 16636178, 16633100

Buick Window Regulator, Front Passenger Side Part Number: 25544676
Product Specifications- Other Name: Regulator, Front Door Window Regulator; Regulator
- Position: Front Passenger Side
Buick Window Regulator, Front Driver Side Part Number: 25544677
Product Specifications- Other Name: Regulator, Front Door Window Regulator; Regulator
- Position: Front Driver Side
| Page 1 of 11 |Next >
1-20 of 211 Results
Buick Window Regulator
Want to cut long-term maintenance and repair costs? Choose OEM Window Regulator. Those parts deliver top durability you can trust. On our site, you'll find a huge catalog of genuine Buick parts. Prices are unbeatable, so you can keep more in your pocket. Every OEM Buick Window Regulator includes a manufacturer's warranty. You can also get an easy return policy that keeps buying risk free. Fast delivery, get your car on the road quickly. It's simple to search, compare, and order. Stop guessing about quality or fit. Order today and save with parts that last.
Buick Window Regulator Parts Questions & Experts Answers
- Q: How to replace the rear door window regulator on Buick LeSabre?A:The replacement process of the rear door Window Regulator starts with removing the door trim panel and door module together with the water deflector. Place tape across the window before performing four revolutions of adjustment to the window clamp fasteners and partially lowering the Window Regulator. To change the Window Regulator pull the power Window Motor electrical connector besides removing fasteners (1,2,3) between the regulator and inner door panel. Then glide the regulator out of the door by rotating its motor end toward the door front and its top to the lower rear corner before pulling the unit through the front access hole at the door panel. Routine installation requires the Window Regulator to enter the door through the front access slot after tightening fasteners in this sequence: first fastener at 9 n.m (80 LB.IN) then the second fastener at 9 n.m (80 LB.IN) and finally the third fastener at 9 n.m (80 LB.IN). After removing tape from the window you can insert it into the Window Regulator clamps before plugging the power Window Motor electrical connector. Start the engine and elevate the window to full closure before securing both clamp fasteners at 11 n.m (95 lb in). Check the window function and its sealing quality before reinstalling the water deflector and door module followed by the door trim panel.
- Q: How to replace the rear side door window regulator on Buick Enclave?A:One should start the process of Window Regulator replacement by dismantling the door trim panel then the water deflector. The next step is to extract the energy absorber retainers combined with the energy absorber from the door before removing the coverings that shield the holes for the regulator bolts. Remove window to regulator bolts to disconnect the window from its regulator before elevating it to the highest point as support. First disconnect the electrical connector from the regulator motor and then loosen the upper bolt which retains the regulator to the inner door. First disconnect the lower regulator bolt then release the motor from the door through the nut connection. Raise the regulator/motor eventfully to unlock the upper bolt from the door and move the regulator upper segment in a forward direction. The first step involves removing the lower part of the regulator through the door opening before removing the upper bolt from the regulator and Window Regulator motor from the same component. Install the Window Regulator motor to the regulator by fastening it partially to the upper bolt of the regulator. To install the regulator insert it through the door opening with a semi-horizontal seating position before fully positioning it ahead in the door cavity before rotating to vertical. Fasten the regulator onto the door sheet metal by using the already existing upper bolt. Insert the nut to retain the motor on the door and tighten it to 9 n.m (80 lb in) before securing the regulator to the door using upper and lower bolts (3, 4) tightened to 10 n.m (88 lb in). Return the electrical connector to the regulator motor followed by uninstalling the window support. Drop the window onto the side guide of the regulator. First stabilize the regulator window carrier bolts with loose tightening. After putting the window in the full up position within the run channels maintain its position. Following this install the door energy absorber along with its retainers. End the installation by putting on protective covers that should cover the regulator bolt holes together with the water deflector and the door trim panel.
- Q: How to Service and Repair a Window Regulator on a Buick Regal?A:The first step to change a front door Window Regulator consists of removing the front door water deflector and then taking out the front door window. After the arm rest bracket removal you must note the position of the Window Regulator screws which rest in specific slots on the inner door panel and remain in place. The first step is to unfasten the front door Window Regulator mounting screws followed by disconnecting the left lower screw from the front door Window Regulator rail. The front door Window Regulator motor needs lowering into the door opening to disconnect its electrical connector. Extract the front door Window Regulator unit from its mounting position in the door. First insert the new front door Window Regulator into the door then connect its electrical connector to the motor. Place the motor within the key slots found on the inside of the door panel before letting the Window Regulator rail assembly slot into its matching key slots. Fasten the left lower mounting screw and secure it at 10 n.m (89 lb in). Turn and tighten the remaining screws that anchor the Window Regulator beginning from the lower rear section moving to upper rear then lower front and finishing with upper front but only torque them to a secure 10 n.m (89 lb in). Proceed with putting back the front door window followed by the arm rest bracket and finishing with the front door water deflector.


Related Buick Parts
 Buick Door Handle
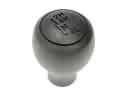 Buick Shift Knob
 Buick Window Motor
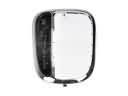 Buick Automatic Transmission Shift Indicator
 Buick Door Lock
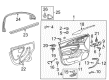
 Buick Door Moldings
 Buick Lift Support
 Buick Liftgate Hinge
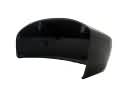 Buick Mirror Cover
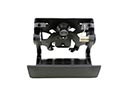 Buick Tailgate Handle
 Buick Tailgate Lock
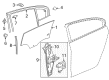
 Buick Window Channel