ChevyParts
My Garage
My Account
Cart
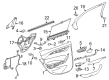
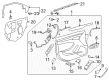
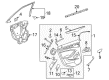
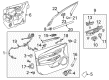
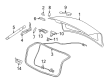
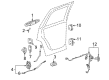
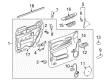
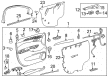
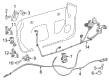
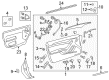
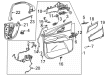
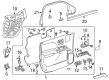
OEM Cadillac Door Lock Actuator
Power Door Lock Actuator- Select Vehicle by Model
- Select Vehicle by VIN
Select Vehicle by Model
orMake
Model
Year
Select Vehicle by VIN
For the most accurate results, select vehicle by your VIN (Vehicle Identification Number).
305 Door Lock Actuators found


Cadillac Lock Actuator, Rear Passenger Side Part Number: 22862238
$152.75 MSRP: $224.34You Save: $71.59 (32%)Ships in 1-2 Business DaysProduct Specifications- Other Name: Lock, Rear Side Door; Door Lock Actuator Motor; Door Lock; Lock Assembly; Latch, Rear Side Door
- Position: Rear Passenger Side
- Replaces: 25843164, 20825340, 25992282, 20922247, 22791036


Cadillac Lock Actuator, Front Passenger Side Part Number: 22862245
$195.23 MSRP: $291.88You Save: $96.65 (34%)Ships in 1-3 Business DaysProduct Specifications- Other Name: Lock, Front Side Door; Door Lock Actuator Motor; Door Lock Actuator; Door Lock; Lock Assembly
- Position: Front Passenger Side
- Replaces: 22791030, 20922216, 20786540


Cadillac Lock Actuator, Rear Driver Side Part Number: 22862242
$160.40 MSRP: $235.58You Save: $75.18 (32%)Ships in 1-2 Business DaysProduct Specifications- Other Name: Lock, Rear Side Door; Door Lock Actuator Motor; Door Lock; Lock Assembly; Latch, Rear Side Door
- Position: Rear Driver Side
- Replaces: 20825339, 22791035, 25992281, 20922246, 25843163


Cadillac Lock Actuator, Rear Passenger Side Part Number: 13579552
$185.56 MSRP: $272.54You Save: $86.98 (32%)Ships in 1-3 Business DaysProduct Specifications- Other Name: Latch, Rear Side Door; Door Lock Actuator Motor; Door Latch Assembly; Door Lock; Lock; Latch
- Position: Rear Passenger Side
- Replaces: 13503808, 13503784, 13578019


Cadillac Lock, Rear Part Number: 25885392
$155.16 MSRP: $225.90You Save: $70.74 (32%)Ships in 1-2 Business DaysProduct Specifications- Other Name: Latch, Rear Compartment Lid Or Tail Gate Latch; Trunk Latch; Door Lock; Latch; Latch, Rear Compartment Lid Release Or Ajar; Latch, Rear Compartment Lid
- Position: Rear


Cadillac Lock Actuator, Rear Driver Side Part Number: 13579551
$137.91 MSRP: $202.56You Save: $64.65 (32%)Ships in 1-3 Business DaysProduct Specifications- Other Name: Lock, Rear Side Door; Door Lock Actuator Motor; Door Latch Assembly; Door Lock; Lock; Latch; Latch, Rear Side Door
- Position: Rear Driver Side
- Replaces: 13578018, 13503807, 13503783


Cadillac Lock Actuator, Rear Passenger Side Part Number: 22862033
$171.84 MSRP: $250.18You Save: $78.34 (32%)Ships in 1-2 Business DaysProduct Specifications- Other Name: Latch Assembly-Rear Side Door; Door Lock Actuator Motor; Door Lock; Lock Assembly; Latch, Door Lock
- Position: Rear Passenger Side
- Replaces: 22785476


Cadillac Lock Actuator, Front Driver Side Part Number: 22862024
$171.84 MSRP: $250.18You Save: $78.34 (32%)Ships in 1-3 Business DaysProduct Specifications- Other Name: Lock, Front Side Door; Door Lock Actuator Motor; Door Lock Actuator; Door Lock; Lock Assembly; Lock, Door Lock
- Position: Front Driver Side
- Replaces: 22785467, 22741769, 25955016


Cadillac Lock Actuator, Front Passenger Side Part Number: 13579491
$165.66 MSRP: $247.67You Save: $82.01 (34%)Ships in 1-3 Business DaysProduct Specifications- Other Name: Lock, Front Side Door; Door Lock Actuator Motor; Door Latch Assembly; Door Lock Actuator; Door Lock; Lock; Latch; Latch, Front Side Door
- Position: Front Passenger Side
- Replaces: 13503752


Cadillac Lock Actuator, Front Passenger Side Part Number: 22862025
$202.73 MSRP: $303.09You Save: $100.36 (34%)Ships in 1-2 Business DaysProduct Specifications- Other Name: Lock, Front Side Door; Door Lock Actuator Motor; Door Lock Actuator; Door Lock; Lock Assembly; Lock, Door Lock
- Position: Front Passenger Side
- Replaces: 22785468, 22741770, 25955017


Cadillac Lock Assembly, Front Driver Side Part Number: 20995846
$171.84 MSRP: $250.18You Save: $78.34 (32%)Ships in 1-2 Business DaysProduct Specifications- Other Name: Lock-Front Side Door (W/O Handle); Door Latch Assembly; Door Lock; Lock, Front Side Door
- Position: Front Driver Side


Cadillac Lock Actuator, Front Driver Side Part Number: 22862244
$185.94 MSRP: $277.99You Save: $92.05 (34%)Ships in 1-3 Business DaysProduct Specifications- Other Name: Lock, Front Side Door; Door Lock Actuator Motor; Door Lock Actuator; Door Lock; Lock Assembly
- Position: Front Driver Side
- Replaces: 20922215, 25876534, 20786539, 22791029


Cadillac Lock Actuator, Front Driver Side Part Number: 23190383
$198.44 MSRP: $288.91You Save: $90.47 (32%)Ships in 1-2 Business DaysProduct Specifications- Other Name: Latch Assembly-Front Side Door (Left-Hand); Door Lock Actuator Motor; Door Lock Actuator; Door Lock; Lock Assembly; Latch, Front Side Door
- Position: Front Driver Side
- Replaces: 22922943, 22791011, 25876536, 19210210, 20922217, 25831217

Cadillac Lock Actuator, Rear Part Number: 13542875
$201.55 MSRP: $301.33You Save: $99.78 (34%)Ships in 1-3 Business DaysProduct Specifications- Other Name: Latch Assembly-Rear Side Door; Door Lock Actuator Motor; Latch, Door Lock
- Position: Rear
- Replaced by: 13544233

Cadillac Lock Actuator, Front Passenger Side Part Number: 13533694
$137.12 MSRP: $205.01You Save: $67.89 (34%)Ships in 1-2 Business DaysProduct Specifications- Other Name: Latch Assembly-Front Side Door; Door Lock Actuator Motor; Door Latch Assembly; Door Lock Actuator; Door Lock; Latch Assembly; Lock Assembly; Lock; Latch, Door Lock
- Position: Front Passenger Side
- Replaced by: 13546507

Cadillac Lock Actuator, Rear Passenger Side Part Number: 13579540
$137.16 MSRP: $205.06You Save: $67.90 (34%)Ships in 1-3 Business DaysProduct Specifications- Other Name: Lock, Rear Side Door; Door Lock Actuator Motor; Door Latch Assembly; Door Lock; Latch
- Position: Rear Passenger Side
- Replaces: 13503768
Cadillac Lock Actuator, Front Part Number: 13541718
$113.46 MSRP: $169.63You Save: $56.17 (34%)Ships in 1-3 Business DaysProduct Specifications- Other Name: Latch Assembly-Front Side Door; Door Lock Actuator Motor; Door Latch Assembly; Door Lock Actuator; Latch, Door Lock
- Position: Front
- Replaced by: 13542865

Cadillac Lock, Front Driver Side Part Number: 25843196
$123.90 MSRP: $185.24You Save: $61.34 (34%)Ships in 1-3 Business DaysProduct Specifications- Other Name: Lock, Front Side Door; Door Lock
- Position: Front Driver Side
- Replaces: 10373665, 12451631, 15900164, 10352115, 15253273, 25759054, 25773440, 15817041, 25766249

Cadillac Lock Actuator, Front Passenger Side Part Number: 20783845
$148.40 MSRP: $221.86You Save: $73.46 (34%)Ships in 1-3 Business DaysProduct Specifications- Other Name: Lock, Front Side Door; Door Lock Actuator Motor; Door Lock Actuator; Door Lock; Lock Assembly; Lock, Door Lock
- Position: Front Passenger Side
- Replaces: 22741764, 25945747

Cadillac Lock Part Number: 13537049
$131.16 MSRP: $196.04You Save: $64.88 (34%)Ships in 1-3 Business DaysProduct Specifications- Other Name: Latch Assembly-Lift Gate; Trunk Latch; Door Lock; Latch
- Replaced by: 13545829
| Page 1 of 16 |Next >
1-20 of 305 Results
Cadillac Door Lock Actuator
Want to cut long-term maintenance and repair costs? Choose OEM Door Lock Actuator. Those parts deliver top durability you can trust. On our site, you'll find a huge catalog of genuine Cadillac parts. Prices are unbeatable, so you can keep more in your pocket. Every OEM Cadillac Door Lock Actuator includes a manufacturer's warranty. You can also get an easy return policy that keeps buying risk free. Fast delivery, get your car on the road quickly. It's simple to search, compare, and order. Stop guessing about quality or fit. Order today and save with parts that last.
Cadillac Door Lock Actuator Parts Questions & Experts Answers
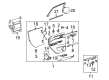
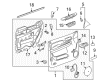
- Q: How to replace the rear door lock actuator on Cadillac Catera?A:Beginning your replacement of the rear Door Lock actuator requires you to remove the door trim panel then proceed to take out the door water deflector. The next step involves removing the inside Door Handle before disconnecting every rod connected to the lock assembly. The Door Lock actuator electrical connector should be disconnected while you also remove the screws that secure the Door Lock before removing the device. The next step should be screw removal from the Door Lock actuator followed by detaching the actuator from the Door Lock mechanism. You should install the new Door Lock actuator on the Door Lock while making sure actuator screws achieve a torque value of 3 n.m (27 lb in). Secure the Door Lock by using screws which need tightening to reach 8 n.m (71 lb in). Complete the installation by reattaching Door Lock actuator electrical connector and reinstalling inside Door Handle and door water deflector. Reinstall door trim panel as the last step.
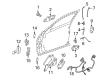
- Q: How to replace the power door lock actuator on Cadillac Eldorado?A:The first step to change the power door lock actuator involves removing the lock assembly. Begin by detaching the actuator from the lock assembly using the 2 TORX(R) fasteners before removering the actuator unit. Install new power actuator after checking that the latch remains in complete openness and pushing all lock actuator teeth against the actuator arm for lock assembly safety. The plastic teeth of the lock switch require positioning to meet the lock assembly teeth while using force to push them towards the actuator arm. Check that the rubber bumper from the actuating arm properly rests on the specified part of the actuating arm before installing the new actuator to the lock assembly. Secure the actuating arm together with bumper into the locking lever before setting the lock switch teeth to match the gear tooth fork bolt and its fastener holes. Use two TORX(R) fasteners to fasten them at 8 N.m (71 lb in). Users need to operate the lock assembly manually by applying force to the fork bolt which should establish a full closure with a proper locking mechanism. The lock switch along with actuator requires electrical connection after which their functionality needs testing. Placement and mounting of the lock carrier must be checked before installing the lock assembly.
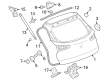
- Q: How to replace the door lock actuator on Cadillac XLR?A:The procedure to replace the Door Inside Manual Release Actuator starts by putting the seat in its rear position followed by removing both floor-mounted door release trim plugs from their fastener sockets. Start by removing the front seat riser cover pushpin at its position nearest to the door release. Then angle the cover forward to reach the rear fastener of the door release. The first step of replacing the Door Inside Manual Release Actuator starts with removing both fasteners situated on the door release and continuing to remove the fasteners located on the backside of the door release actuator. Disassemble the housing parts while keeping track of the cable sheath end position which will be needed for later reinstallation. To install the cable in the actuator halves, rotate the door release towards the back while simultaneously guiding the cable into position between the actuator halves. Then release the cable end from the latch actuating lever. To install mount the door release actuator with its back facing forward. Then attach the cable end to the release actuating lever before rotating the assembly in a forward direction with cable guidance. Place the cable sheath inside the actuator body before attaching the halves with the sheath positioned in the molded fingers of the actuator housing. The fasteners must be secured at 2 N.m (18 lb in) torque on the back face of the door release actuator and afterward attach it to the door sill while tightening the fasteners to 10 N.m (89 lb in). Fastener trim plugs need to be installed on the door release actuator before setting the seat riser cover into its correct slot while securing the pushpin.


Related Cadillac Parts
 Cadillac Emblem
 Cadillac Cup Holder
 Cadillac Window Motor
 Cadillac Window Regulator
 Cadillac Car Speakers
 Cadillac Center Console Base
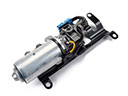 Cadillac Convertible Top Motor
 Cadillac Door Moldings
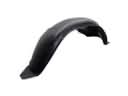 Cadillac Fender Splash Shield
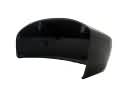 Cadillac Mirror Cover
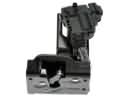 Cadillac Tailgate Lock Actuator Motor
 Cadillac Trunk Lid Lift Support