ChevyParts
My Garage
My Account
Cart
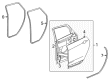
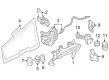
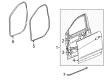
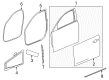
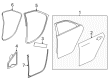
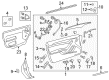
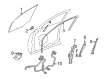
OEM Cadillac Window Regulator
Electric Power Window Regulator- Select Vehicle by Model
- Select Vehicle by VIN
Select Vehicle by Model
orMake
Model
Year
Select Vehicle by VIN
For the most accurate results, select vehicle by your VIN (Vehicle Identification Number).
194 Window Regulators found


Cadillac Window Regulator, Rear Driver Side Part Number: 22847911
$77.47 MSRP: $150.36You Save: $72.89 (49%)Ships in 1-2 Business DaysProduct Specifications- Other Name: Regulator Assembly-Rear Side Door Window (Left-Hand); Regulator, Rear Door Window Regulator
- Position: Rear Driver Side
- Replaces: 20841501, 20906007, 15883168
Cadillac Window Regulator, Rear Passenger Side Part Number: 22912131
$93.15 MSRP: $168.60You Save: $75.45 (45%)Ships in 1-2 Business DaysProduct Specifications- Other Name: Regulator Assembly-Rear Side Door Window (Right-Hand); Regulator, Rear Door Window Regulator
- Position: Rear Passenger Side

Cadillac Window Regulator, Front Driver Side Part Number: 84631515
$118.41 MSRP: $212.40You Save: $93.99 (45%)Ships in 1-3 Business DaysProduct Specifications- Other Name: Regulator, Front Door Window Regulator
- Position: Front Driver Side
- Replaces: 84143040, 84243692, 23287651

Cadillac Window Regulator, Front Driver Side Part Number: 84718590
$92.87 MSRP: $165.84You Save: $72.97 (44%)Ships in 1-3 Business DaysProduct Specifications- Other Name: Regulator, Front Door Window Regulator
- Position: Front Driver Side
- Replaced by: 85611401

Cadillac Window Regulator, Rear Passenger Side Part Number: 25719488
$336.83 MSRP: $659.47You Save: $322.64 (49%)Ships in 1-2 Business DaysProduct Specifications- Other Name: Regulator, Rear Door Window Regulator; Window Motor
- Position: Rear Passenger Side
- Replaces: 25645077

Cadillac Window Regulator, Front Passenger Side Part Number: 84005654
$94.14 MSRP: $182.72You Save: $88.58 (49%)Ships in 1-2 Business DaysProduct Specifications- Other Name: Regulator, Front Door Window Regulator; Regulator, Door Lock Remote Control
- Position: Front Passenger Side
- Replaces: 22914587, 22961493

Cadillac Window Regulator, Rear Driver Side Part Number: 87827012
$41.08 MSRP: $73.36You Save: $32.28 (44%)Ships in 1-3 Business DaysProduct Specifications- Other Name: Regulator, Rear Door Window Regulator; Window Motor; Regulator, Door And End Gate Window
- Position: Rear Driver Side
- Replaced by: 87833810

Cadillac Window Regulator, Rear Passenger Side Part Number: 84898055
$50.41 MSRP: $90.01You Save: $39.60 (44%)Ships in 1-3 Business DaysProduct Specifications- Other Name: Regulator, Rear Door Window Regulator
- Position: Rear Passenger Side


Cadillac Window Regulator, Rear Driver Side Part Number: 23189480
$81.44 MSRP: $152.94You Save: $71.50 (47%)Ships in 1-2 Business DaysProduct Specifications- Other Name: Regulator, Rear Door Window Regulator
- Position: Rear Driver Side

Cadillac Window Regulator, Front Passenger Side Part Number: 20896933
$335.74 MSRP: $651.60You Save: $315.86 (49%)Ships in 1-2 Business DaysProduct Specifications- Other Name: Regulator, Front Door Window Regulator; Regulator, Door Lock Remote Control
- Position: Front Passenger Side
- Replaces: 25980842, 15825746, 15948274

Cadillac Window Regulator, Front Passenger Side Part Number: 87815928
$126.05 MSRP: $226.10You Save: $100.05 (45%)Ships in 1-3 Business DaysProduct Specifications- Other Name: Regulator, Front Door Window Regulator
- Position: Front Passenger Side

Cadillac Window Regulator, Front Part Number: 23277563
$110.34 MSRP: $207.22You Save: $96.88 (47%)Ships in 1-2 Business DaysProduct Specifications- Other Name: Regulator, Front Door Window Regulator
- Position: Front

Cadillac Window Regulator, Front Passenger Side Part Number: 84652667
$103.11 MSRP: $193.64You Save: $90.53 (47%)Ships in 1-2 Business DaysProduct Specifications- Other Name: Regulator, Front Door Window Regulator
- Position: Front Passenger Side
- Replaces: 22910146, 84213553, 84142420
Cadillac Window Regulator, Front Passenger Side Part Number: 84631516
$117.24 MSRP: $210.30You Save: $93.06 (45%)Ships in 1-3 Business DaysProduct Specifications- Other Name: Regulator, Front Door Window Regulator
- Position: Front Passenger Side
- Replaces: 23287652, 84143041, 84243693

Cadillac Window Regulator, Rear Driver Side Part Number: 84546866
$84.75 MSRP: $159.16You Save: $74.41 (47%)Ships in 1-2 Business DaysProduct Specifications- Other Name: Regulator, Rear Door Window Regulator
- Position: Rear Driver Side
- Replaces: 84213554, 84142419, 23376330
Cadillac Window Regulator, Rear Passenger Side Part Number: 84182557
$52.58 MSRP: $93.90You Save: $41.32 (44%)Ships in 1-3 Business DaysProduct Specifications- Other Name: Regulator, Rear Door Window Regulator
- Position: Rear Passenger Side


Cadillac Window Regulator, Front Driver Side Part Number: 20888397
$151.21 MSRP: $271.22You Save: $120.01 (45%)Product Specifications- Other Name: Regulator, Front Door Window Regulator; Window Motor; Regulator, Door Lock Remote Control
- Position: Front Driver Side
- Replaces: 15237525, 20849250, 25949773

Cadillac Window Regulator, Passenger Side Part Number: 19244839
Product Specifications- Other Name: Regulator, Door Lock Remote Control; Power Window Motor and Regulator Assembly; Power Window Regulator Assembly; Regulator, Front Door Window Regulator
- Position: Passenger Side
- Replaces: 17801303, 25714289
Cadillac Window Motor, Driver Side Part Number: 19244844
Product Specifications- Other Name: Motor, Front Door Window Regulator
- Position: Driver Side
Cadillac Window Regulator, Rear Passenger Side Part Number: 16627728
Product Specifications- Other Name: Regulator, Rear Door Window Regulator; Regulator
- Position: Rear Passenger Side
| Page 1 of 10 |Next >
1-20 of 194 Results
Cadillac Window Regulator Parts Questions & Experts Answers
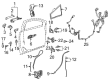
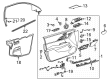
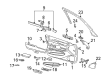
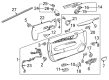
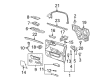
- Q: How to replace the front side door window regulator in a sedan or wagon on Cadillac CTS?A: Beginning the front side door Window Regulator replacement for sedans and wagons requires first opening the window to maximum height then removing the door trim panel. You must then remove the water deflector before taping the window to remain at full up. The door trim panel wiring harness connection occurs after you use the inner door panel access holes to loosen the window clamp fasteners by 4 revolutions. Betray the Window Regulator until it rests at 3/4 of its total range and then remove the electrical connector from the motor. Remove fasteners 1, 2, 3, 4, 5 to extract the Window Regulator from the door opening. Before installing the Window Regulator take it into the door panel while maintaining fastener safety instructions. Secure the Window Regulator fasteners (1, 2, 3, 4, 5) by torquing them to 9 nm (80 lb in). Lower the window using the tape until glass reaches its maximum rearward point inside the window channel. Start the vehicle while connecting the power Window Motor electrical connector to obtain peak power that helps the Window Motor position itself correctly. Raising the window to its maximum height enables you to tighten the window clamp fasteners to 11 nm (98 lb in). Drive the vehicle while verifying proper operation and tight sealing of the window before turning off the engine. The installation concludes by fitting the water deflector along with the door trim panel.
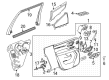
- Q: How to replace the rear side door window regulator on Cadillac SRX?A: The first step to replace the rear side door Window Regulator includes raising the window until it reaches the top and then removing door trim combined with the water deflector. Apply tape to keep the window at top position before hooking up the wire harness connector of the door trim panel. The first step is to turn the window clamp nuts 4 times loose before using the Power Window Switch to guide the regulator down to halfway. The first task requires removing the power Window Regulator bolts (1, 2, 3, 4, 5) after disconnecting the electrical connector from the power Window Motor. Remove the Window Regulator by opening the door panel access hole at the rear. The Window Regulator installation requires you to first guide it through the rear access hole in the door and then secure Window Regulator bolts with 9 n.m (80 lb in) torque starting at (1) and proceeding to bolt (5). Drop the window by removing tape from its surface then place it inside the regulator clamps. The vehicle should be started after connecting the power Window Motor electrical connector to achieve maximum power for proper window seating and adjustment. Operate the window until it reaches maximum height before fastening all clamp nuts to 11 n.m (95 lb in). Check the window for correct movement and check for a proper seal before killing the engine. You should install the water deflector followed by the door trim panel as the final step.
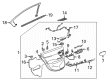
- Q: How to service and replace a window regulator on a Cadillac XLR?A: The first step for applying new front door Window Regulator installation is to lower the door window and disable the car battery. A large water deflector must be taken out first after removing both the door trim panel and door panel electrical connector to reveal the door back section. Access the upper and lower regulator mounting fasteners by removing small mastic seals from the door's top section and small plug from the bottom. To proceed disconnect the electrical harness from the radio speaker first by removing fasteners from the speaker then its electrical connector lock before removing the radio speaker from the door while avoiding contact with the water deflector. Begin by removing the door window and disconnecting the regulator motor electrical connector through the process of sliding the connector lock. Identify where to position the regulator so it can be put back together later, take note of where the regulator pads mount on the door. The nuts from all three regulator components must be removed. After compacting the regulator you can pull it out through the inner door access opening. To install a new Window Regulator begin by adjusting the replacement assembly jack screws to match the original regulator settings while compacting the regulator assembly before completely inserting the unit with motor forward into the door. Feed the motor studs through the door inner panel before screwing nuts onto them while torquing them to 10nm (89lb in). Insert the regulator channel studs through door holes before installing the nuts on them slightly tight. Connect the electrical connector to the motor before securing the lock of the connector to its seated position. Adjust the window placement carefully for the door opening before connecting the battery power source. Connect the door window switch before running the Window Regulator clamps to meet the glass while tightening them to 16 n.m (12 lb ft). First tighten the regulator channel studs nuts starting with the upper forward then follow with the upper rearward and finish with the lower forward and lower rearward applications of 10 n.m force (89 lb in torque). After placing the tiny mastic seals into the window clamp sight access holes you should connect the harness electrical connector to the speakers then lock the connector. Install the speaker assembly to the door by using first the uppermost screws then check the speaker tab alignment before completely tightening the screws to 3 n.m (27 lb in). Put back the water deflector after plugging in the door panel electrical connector then install the door trim panel. Check if the windows fit properly followed by speaker trim installation then connect the door access plug and test if all electrical components of the window(s) mirror(s) and door switch work correctly.