ChevyParts
My Garage
My Account
Cart
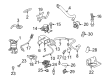
OEM Cadillac Seville Fuel Pressure Regulator
Fuel Tank Pressure Regulator- Select Vehicle by Model
- Select Vehicle by VIN
Select Vehicle by Model
orMake
Model
Year
Select Vehicle by VIN
For the most accurate results, select vehicle by your VIN (Vehicle Identification Number).
5 Fuel Pressure Regulators found

Cadillac Seville Fuel Pressure Regulator Part Number: 19245527
$118.59 MSRP: $222.69You Save: $104.10 (47%)Ships in 1-2 Business Days
Cadillac Seville Fuel Pressure Regulator Part Number: 89017530
$47.86 MSRP: $89.90You Save: $42.04 (47%)Ships in 1-2 Business Days

Cadillac Seville Fuel Pressure Regulator Part Number: 12559037
$47.70 MSRP: $85.17You Save: $37.47 (44%)
Cadillac Seville Fuel Pressure Regulator Part Number: 17091410
Cadillac Seville Fuel Pressure Regulator Part Number: 17089203
Cadillac Seville Fuel Pressure Regulator
Want to cut long-term maintenance and repair costs? Choose OEM Fuel Pressure Regulator. Those parts deliver top durability you can trust. On our site, you'll find a huge catalog of genuine Cadillac Seville parts. Prices are unbeatable, so you can keep more in your pocket. Every OEM Cadillac Seville Fuel Pressure Regulator includes a manufacturer's warranty. You can also get an easy return policy that keeps buying risk free. Fast delivery, get your car on the road quickly. It's simple to search, compare, and order. Stop guessing about quality or fit. Order today and save with parts that last.
Cadillac Seville Fuel Pressure Regulator Parts and Q&A
- Q: How to replace the fuel pressure regulator on Cadillac Seville?A:A proper replacement procedure for the Fuel Pressure Regulator begins by draining fuel pressure through proper servicing of the quick-connect metal collars. The Fuel Pressure Regulator needs cleaning of all dust before disconnecting its vacuum line. Use a shop towel to absorb flowing fuel when you remove the retainer clip before lifting then twisting off the Fuel Pressure Regulator from its attachment to the Fuel Rail. Start by taking out both the lower o-ring along with the regulator assembly filter and the upper o-ring and finally remove the back up ring. You should cap the Fuel Pressure Regulator housing to stop foreign substances from accessing the fuel system. New o-rings need to be applied for installation when the regulator is unchanged. The rings should receive light lubrication with clean engine oil. The first step involves placing the upper o-ring while moving to the filter and afterward setting the lower o-ring in position. Fasten the retainer clip on the Fuel Pressure Regulator then return the vacuum line. Reinstall the negative Battery Cable while checking for fuel leaks by using the following on-off-off sequence that starts with on for 2 seconds before moving to off for 10 seconds and finishing with another on position. Place the fuel injector sight shield as the last step.

Related Cadillac Seville Parts
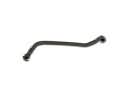 Cadillac Seville Crankcase Breather Hose
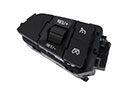 Cadillac Seville Cruise Control Switch
 Cadillac Seville Fuel Injector
 Cadillac Seville Fuel Injector O-Ring
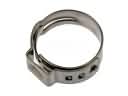 Cadillac Seville Fuel Line Clamps
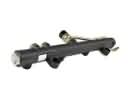 Cadillac Seville Fuel Rail
 Cadillac Seville Fuel Tank Sending Unit
 Cadillac Seville Idle Control Valve
 Cadillac Seville Intake Manifold Gasket
 Cadillac Seville PCV Valve Hose
 Cadillac Seville Throttle Body
 Cadillac Seville Throttle Cable