ChevyParts
My Garage
My Account
Cart
OEM Cadillac Seville Fuel Rail
Engine Fuel Rail- Select Vehicle by Model
- Select Vehicle by VIN
Select Vehicle by Model
orMake
Model
Year
Select Vehicle by VIN
For the most accurate results, select vehicle by your VIN (Vehicle Identification Number).
7 Fuel Rails found


Cadillac Seville Fuel Rail Part Number: 12499784

Cadillac Seville Fuel Rail Part Number: 17086696
Cadillac Seville Fuel Rail Part Number: 17113142
Cadillac Seville Fuel Rail Part Number: 17105956

Cadillac Seville Fuel Rail Part Number: 12579067
Cadillac Seville Fuel Rail Part Number: 12499785
Cadillac Seville Fuel Rail Part Number: 12499782
Cadillac Seville Fuel Rail
Want to cut long-term maintenance and repair costs? Choose OEM Fuel Rail. Those parts deliver top durability you can trust. On our site, you'll find a huge catalog of genuine Cadillac Seville parts. Prices are unbeatable, so you can keep more in your pocket. Every OEM Cadillac Seville Fuel Rail includes a manufacturer's warranty. You can also get an easy return policy that keeps buying risk free. Fast delivery, get your car on the road quickly. It's simple to search, compare, and order. Stop guessing about quality or fit. Order today and save with parts that last.
Cadillac Seville Fuel Rail Parts and Q&A
- Q: How to replace the fuel rail assembly on Cadillac Seville?A:The first step to change the Fuel Rail assembly includes pressure relief from the fuel system followed by gm x-30a engine cleaner application to the assembly. Service technicians must prevent long exposure to liquid solvent. Disconnect first all fuel pipes (2,3) and then proceed to remove the Fuel Pressure Regulator vacuum hose from the cam cover followed by the pcv air tube and the PCV Valve. The first step involves removing the Fuel Rail bracket retainer nut followed by disconnecting Fuel Injector electrical connectors from all fuel injectors before placing the harness to the side. Take out the engine wiring harness from its position on the Fuel Rail studs before extracting the Fuel Rail attaching studs together with the Fuel Rail. You need to remove the o-ring seals positioning at the injector spray tips before discarding them. When replacing the Fuel Rail alongside its accessory parts users should detach both the fuel injectors and the pressure regulator. You should apply clean engine oil to new o-ring seals installed at the lower part of each Fuel Injector before adding fuel injectors when replacing the Fuel Rail and adding new o-ring seals to the spray tip end of every injector. Fasten the Fuel Rail by tightening each Fuel Rail attaching stud to 10 n.m (89 lb in). After installing the PCV Valve between the cam cover and coolant surge tank inlet pipe and pcv air tube, attach Fuel Injector electrical connectors to each Fuel Injector before installing the Fuel Rail bracket retainer nut which requires 10 n.m (89 lb in) torque. The installation should be completed with attaching the Fuel Pressure Regulator vacuum hose and the fuel feed and return pipes (2, 3) to the Fuel Rail. Inspect for fuel leaks by turning the ignition on for 2 seconds, off for 10 seconds and then on again after reattaching the negative Battery Cable. The inspection should check for leaks during the entire Battery Cable and on/off sequence. You must install the Fuel Injector sight shield as the last step.

Related Cadillac Seville Parts
 Cadillac Seville Fuel Pump
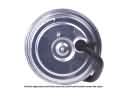 Cadillac Seville Cruise Control Servo
 Cadillac Seville Fuel Injector
 Cadillac Seville Fuel Injector O-Ring
 Cadillac Seville Fuel Pressure Regulator
 Cadillac Seville Fuel Pump Seal
 Cadillac Seville Fuel Tank
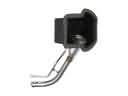 Cadillac Seville Fuel Tank Filler Neck
 Cadillac Seville Gas Cap
 Cadillac Seville Idle Control Valve
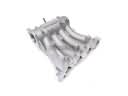 Cadillac Seville Intake Manifold
 Cadillac Seville Throttle Body