ChevyParts
My Garage
My Account
Cart
OEM Chevrolet Aveo Oil Pan
Oil Drain Pan- Select Vehicle by Model
- Select Vehicle by VIN
Select Vehicle by Model
orMake
Model
Year
Select Vehicle by VIN
For the most accurate results, select vehicle by your VIN (Vehicle Identification Number).
2 Oil Pans found


Chevrolet Aveo Oil Pan Part Number: 25181235
$120.53 MSRP: $189.65You Save: $69.12 (37%)Ships in 1-3 Business Days

Chevrolet Aveo Oil Pan Part Number: 96481581
$110.60 MSRP: $173.20You Save: $62.60 (37%)Ships in 1-3 Business Days
Chevrolet Aveo Oil Pan
Want to cut long-term maintenance and repair costs? Choose OEM Oil Pan. Those parts deliver top durability you can trust. On our site, you'll find a huge catalog of genuine Chevrolet Aveo parts. Prices are unbeatable, so you can keep more in your pocket. Every OEM Chevrolet Aveo Oil Pan includes a manufacturer's warranty. You can also get an easy return policy that keeps buying risk free. Fast delivery, get your car on the road quickly. It's simple to search, compare, and order. Stop guessing about quality or fit. Order today and save with parts that last.
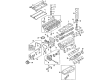
Chevrolet Aveo Oil pan is a part of the lubrication system in the engine and well known for its use in Chevrolet Aveo models manufactured from year 2002 to 2020. This Oil Pan is intended to contain and store engine oil within a wet sump system so that the oil can be easily pumped and circulated to lubricate and cool different engine parts. This functionality if vital in ensuring that the engine of the car is performing to the premier of its ability and not leaking hence improving the efficiency and security of the vehicle. Oil Pan traditional manufacture was from stamped steel, however, the usage of cast aluminum in modern models demonstrated excellent results and is one of the strongest specifics in the automotive industry. Depending on the version, the Chevrolet Aveo is a 3/5-door hatchback or 4-door sedan; as for the engine, the oil pan design contains the 1.2 L, 1.4 L, and 1.8 L Ecotec I4 engines. This compatibility makes it possible for the driver to enjoy maximum acceleration and outstanding performance and indeed the Aveo can go very fast. Also, the Oil Pan prevents oil surge during high-performance driving, making lubrication even more stable. The Oil Pan is a great example of the use of the challenging materials along with the profound efforts made during the engineering process which all points to the fact that Chevrolet has not compromised its quality and performance in making the Aveo Oil Pan hence, should be parts that any Aveo car owner should ensure that they install in their cars.
Chevrolet Aveo Oil Pan Parts and Q&A
- Q: How to replace the oil pan on Chevrolet Aveo?A:Here is how you should replace the Oil Pan of your motor vehicle: first you must disconnect the negative Battery Cable and remove the right front wheel and splash shield. Drain out the engine oil from the crankcase and then remove the heated Oxygen Sensor (HO2S). Remove the nuts that connect the catalytic lower flange to the Exhaust Manifold and the bracket's bolts, and nuts connecting the front pipe. Removing the Catalytic Converter and Exhaust Pipe as one unit, then removing bolts that hold the Oil Pan to the transaxle housing and the bolt holding the transaxle housing to the Oil Pan. Remove the grommet and the Oil Pan retaining bolts, then you will need to remove the Oil Pan from the engine block and remove the gasket. For the installation, mount the gasket on the Oil Pan and install it within 5 minutes after applying the liquid gasket. Assemble the Oil Pan to the engine block and screw in Oil Pan retaining bolts tight at 10 nm (89 inch lbs.). Put the grommet and the bolt that secures the transaxle housing to the Oil Pan. Tighten the bolt to 25 nm (18 ft. Lbs.), then continue to do the bolts to secure the Oil Pan to the transaxle housing, which must be tightened to 25 nm (18 ft. Lbs.). Put back on the catalytic converters and Exhaust Pipe as a whole and tighten the nuts securing the catalytic to the Exhaust Manifold with 50 nm (37 ft. Lbs.), exhaust pipe bracket bolts with 50 nm (37 ft. Lbs.) and front muffler nuts with 30 nm (22 ft. Lbs.). Connect the ho2s, replace the right front splash shield and wheel, and connect the negative Battery Cable, and fill the engine crankcase with engine oil.

Related Chevrolet Aveo Parts
 Chevrolet Aveo Valve Cover Gasket
 Chevrolet Aveo Coolant Filter
 Chevrolet Aveo Crankshaft Gear
 Chevrolet Aveo Crankshaft Pulley
 Chevrolet Aveo Crankshaft Seal
 Chevrolet Aveo Crankshaft Thrust Washer Set
 Chevrolet Aveo Dipstick
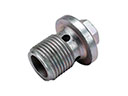 Chevrolet Aveo Drain Plug
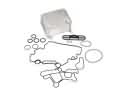 Chevrolet Aveo Engine Oil Cooler
 Chevrolet Aveo Intake Valve
 Chevrolet Aveo Oil Drain Plug Gasket
 Chevrolet Aveo Rocker Guide