ChevyParts
My Garage
My Account
Cart
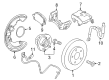
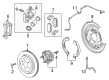
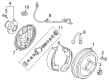
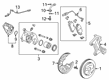
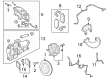
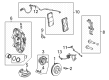
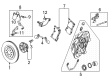
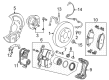
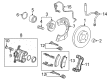
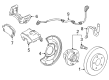
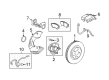
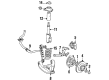
OEM Chevrolet Brake Dust Shields
Brake Backing Plate- Select Vehicle by Model
- Select Vehicle by VIN
Select Vehicle by Model
orMake
Model
Year
Select Vehicle by VIN
For the most accurate results, select vehicle by your VIN (Vehicle Identification Number).
374 Brake Dust Shields found


Chevrolet Backing Plate, Front Part Number: 22802367
$32.12 MSRP: $52.90You Save: $20.78 (40%)Ships in 1-2 Business DaysProduct Specifications- Other Name: Shield-Front Brake; Brake Dust Shield; Splash Shield; Shield, Brake Flange Plate
- Position: Front

Chevrolet Backing Plate, Front Part Number: 22802366
$33.78 MSRP: $52.90You Save: $19.12 (37%)Ships in 1-2 Business DaysProduct Specifications- Other Name: Shield-Front Brake; Brake Dust Shield; Splash Shield; Shield, Brake Flange Plate
- Position: Front


Chevrolet Backing Plate, Rear Driver Side Part Number: 23316764
$45.15 MSRP: $67.20You Save: $22.05 (33%)Ships in 1-2 Business DaysProduct Specifications- Other Name: Plate-Rear Parking Brake Anchor Backing; Brake Dust Shield; Plate, Brake Flange/Backing
- Position: Rear Driver Side

Chevrolet Backing Plate, Rear Passenger Side Part Number: 23316765
$41.18 MSRP: $60.48You Save: $19.30 (32%)Ships in 1-2 Business DaysProduct Specifications- Other Name: Plate-Rear Parking Brake Anchor Backing; Brake Dust Shield; Plate, Brake Flange/Backing
- Position: Rear Passenger Side


Chevrolet Backing Plate Part Number: 96574700
$35.89 MSRP: $67.40You Save: $31.51 (47%)Ships in 1-2 Business DaysProduct Specifications- Other Name: Plate, Brake Flange/Backing; Brake Dust Shield
- Position: Rear


Chevrolet Backing Plate, Rear Part Number: 22775568
$67.59 MSRP: $131.18You Save: $63.59 (49%)Ships in 1-2 Business DaysProduct Specifications- Other Name: Shield-Rear Brake; Brake Dust Shield; Shield, Brake Flange Plate
- Position: Rear


Chevrolet Splash Shield, Front Driver Side Part Number: 84763235
$17.66 MSRP: $31.54You Save: $13.88 (45%)Ships in 1-3 Business DaysProduct Specifications- Other Name: Shield-Front Brake; Brake Dust Shield; Shield, Brake Flange Plate; Shield, Brakes
- Position: Front Driver Side
- Replaces: 84126254

Chevrolet Backing Plate Part Number: 92274272
$19.92 MSRP: $37.39You Save: $17.47 (47%)Ships in 1-2 Business DaysProduct Specifications- Other Name: Shield-Rear Brake; Brake Dust Shield; Shield, Brake Flange Plate
- Position: Rear
Chevrolet Backing Plate Part Number: 92274271
$19.92 MSRP: $37.39You Save: $17.47 (47%)Ships in 1-2 Business DaysProduct Specifications- Other Name: Shield-Rear Brake; Brake Dust Shield; Shield, Brake Flange Plate
- Position: Rear

Chevrolet Backing Plate, Front Part Number: 23385147
$8.72 MSRP: $15.78You Save: $7.06 (45%)Ships in 1-2 Business DaysProduct Specifications- Other Name: Shield-Front Brake; Shield, Brake Flange Plate
- Position: Front


Chevrolet Backing Plate, Passenger Side Part Number: 42713141
$27.43 MSRP: $48.98You Save: $21.55 (44%)Ships in 1-3 Business DaysProduct Specifications- Other Name: Plate, Brake Flange/Backing; Brake Dust Shield
- Position: Passenger Side


Chevrolet Splash Shield, Front Driver Side Part Number: 84309157
$13.60 MSRP: $24.28You Save: $10.68 (44%)Ships in 1-2 Business DaysProduct Specifications- Other Name: Shield-Front Brake; Shield, Brake Flange Plate
- Position: Front Driver Side

Chevrolet Backing Plate, Rear Part Number: 84569496
$7.03 MSRP: $12.56You Save: $5.53 (45%)Ships in 1-3 Business DaysProduct Specifications- Other Name: Shield-Rear Brake; Brake Dust Shield; Shield, Brake Flange Plate
- Position: Rear
- Replaced by: 87849510

Chevrolet Splash Shield, Front Passenger Side Part Number: 42640094
$7.36 MSRP: $13.17You Save: $5.81 (45%)Ships in 1-3 Business DaysProduct Specifications- Other Name: Shield-Front Brake; Brake Dust Shield; Shield, Brake Flange Plate
- Position: Front Passenger Side

Chevrolet Backing Plate Part Number: 96892383
$37.79 MSRP: $73.34You Save: $35.55 (49%)Ships in 1-2 Business DaysProduct Specifications- Other Name: Shield-Front Brake; Brake Dust Shield; Splash Shield; Shield, Brake Flange Plate
- Position: Front

Chevrolet Splash Shield, Front Driver Side Part Number: 13324456
$10.77 MSRP: $20.22You Save: $9.45 (47%)Ships in 1-2 Business DaysProduct Specifications- Other Name: Shield-Front Brake; Brake Dust Shield; Shield, Brake Flange Plate
- Position: Front Driver Side


Chevrolet Dust Cover Part Number: 92199863
Product Specifications- Other Name: Shield, Front Wheel Hub & Drum
- Position: Front


Chevrolet Backing Plate Part Number: 92199929
Product Specifications- Other Name: Shield-Front Brake; Brake Dust Shield; Splash Shield; Shield, Brake Flange Plate
- Position: Front


Chevrolet Backing Plate Part Number: 92199930
Product Specifications- Other Name: Shield-Front Brake; Brake Dust Shield; Splash Shield; Shield, Brake Flange Plate
- Position: Front

Chevrolet Splash Shield, Driver Side Part Number: 14026873
Product Specifications- Other Name: Shield, Brake Flange Plate; Brake Dust Shield
- Position: Driver Side
| Page 1 of 19 |Next >
1-20 of 374 Results
Chevrolet Brake Dust Shields
Choose OEM Brake Dust Shields, you're making the optimal decision for superior quality and perfect performance. You can feel confident because each component goes through stringent quality checks. Every part is carefully built to comply with Chevrolet's factory specifications. You'll enjoy a smooth, worry-free installation that fits just right. At ChevyPartsGiant.com, you'll find it easy to get top-quality OEM Chevrolet Brake Dust Shields. You can shop at highly competitive prices and protect your budget. All our genuine Chevrolet parts include a dependable manufacturer's warranty. You'll also appreciate our straightforward return policy and swift delivery services for extra convenience.
Chevrolet Brake Dust Shields Parts and Q&A
- Q: How to replace the front disc brake dust shields on Chevrolet SSR?A:The vehicle needs to be raised and drivers must remove the tire and wheel assembly before replacing the front disc brake dust shields. The first step is to remove the front hub and bearing assembly before moving onto the retaining bolts of the dust shields which allow the dust shields' removal. Once the new dust shields attain their proper position, secure them using retaining bolts in the same manner as the wheel hub and bearing. Lower the vehicle after reinstalling the front hub and bearing assembly and tire and wheel assembly components.
- Q: How to replace the brake dust shields on Chevrolet Tahoe?A:When replacing the disc Brake Dust Shields you need to lift and stabilize the vehicle first. Take off both tire and wheel before removing hub and bearing parts. Move both the dust shield pieces known as 15 series and 25 series. Install the dust shield 15 series first and then put on the dust shield 25 series part. Reinstall the hub then bearing assembly and finally put the tire wheel assembly back in place. Afterward remove the parking stands and let the car reach ground level.


Related Chevrolet Parts
 Chevrolet Brake Calipers
 Chevrolet Wheel Bearing
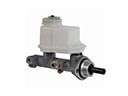 Chevrolet Brake Master Cylinder
 Chevrolet Wheel Cylinder
 Chevrolet Wheel Speed Sensor
 Chevrolet Brake Caliper Bracket
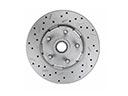 Chevrolet Brake Disc
 Chevrolet Brake Line
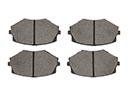 Chevrolet Brake Pad
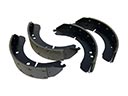 Chevrolet Brake Shoe
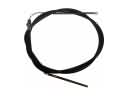 Chevrolet Parking Brake Cable
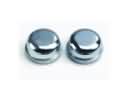 Chevrolet Wheel Bearing Dust Cap
Browse Chevrolet Brake Dust Shields by Models
Nova S10 Colorado C10 Tahoe Cruze Malibu Camaro Equinox Impala SS SSR Avalanche Silverado 1500 Silverado 2500 HD Caprice Classic Cobalt Suburban Traverse Blazer HHR Sonic Tracker Volt El Camino K10 Spark Trax Trailblazer Astro Cavalier Corvette C20 Aveo Beretta Bolt EUV Bolt EV C1500 C2500 C30 C3500 Celebrity Chevette City Express Corsica Express 1500 Express 2500 Express 3500 G10 G20 G30 K1500 K20 K2500 K30 K3500 K5 Blazer Lumina Metro Monte Carlo P30 Prizm S10 Blazer Silverado 2500 Uplander Venture Lumina APV Silverado 3500 Suburban 1500 Trailblazer EXT Avalanche 1500 Avalanche 2500 Aveo5 C10 Suburban C1500 Suburban C20 Suburban C2500 Suburban Captiva Sport Citation II Cruze Limited Impala Limited K10 Suburban K1500 Suburban K20 Suburban K2500 Suburban Malibu Limited P20 R10 R10 Suburban R1500 Suburban R20 R20 Suburban R2500 R2500 Suburban R30 R3500 Silverado 1500 Classic Silverado 1500 HD Silverado 1500 HD Classic Silverado 1500 LD Silverado 1500 LTD Silverado 2500 HD Classic Silverado 3500 Classic Silverado 3500 HD Spark EV Spectrum Suburban 2500 Suburban 3500 HD V10 V10 Suburban V1500 Suburban V20 V20 Suburban V2500 Suburban V30 V3500