ChevyParts
My Garage
My Account
Cart
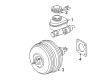
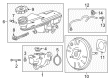
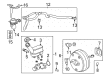
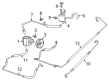
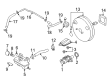
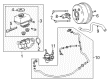
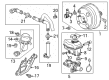
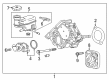
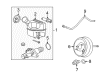
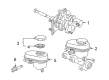
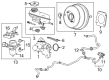
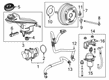
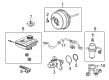
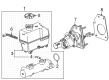
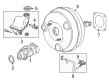
OEM Chevrolet Brake Master Cylinder
- Select Vehicle by Model
- Select Vehicle by VIN
Select Vehicle by Model
orMake
Model
Year
Select Vehicle by VIN
For the most accurate results, select vehicle by your VIN (Vehicle Identification Number).
226 Brake Master Cylinders found


Chevrolet Master Cylinder Part Number: 15142479
$53.25 MSRP: $100.00You Save: $46.75 (47%)Ships in 1-3 Business DaysProduct Specifications- Other Name: Cylinder, Brake Master Cylinder; Brake Master Cylinder


Chevrolet Master Cylinder Part Number: 13486146
$104.88 MSRP: $203.56You Save: $98.68 (49%)Ships in 1-2 Business DaysProduct Specifications- Other Name: Cylinder Kit, Brake Master Cylinder; Brake Master Cylinder
- Replaced by: 42704194

Chevrolet Master Cylinder Part Number: 84744483
$91.59 MSRP: $285.22You Save: $193.63 (68%)Ships in 1-3 Business DaysProduct Specifications- Other Name: Cylinder, Brake Master Cylinder
- Replaces: 22823315, 25805646, 84279343, 84158419, 25894721

Chevrolet Master Cylinder Part Number: 85105169
$135.29 MSRP: $264.88You Save: $129.59 (49%)Ships in 1-3 Business DaysProduct Specifications- Other Name: Cylinder, Brake Master Cylinder
- Replaces: 84397948, 84543808, 84680664, 84873078

Chevrolet Master Cylinder Part Number: 18011970
$132.45 MSRP: $248.74You Save: $116.29 (47%)Ships in 1-2 Business DaysProduct Specifications- Other Name: Cylinder, Brake Master Cylinder; Brake Master Cylinder
- Replaced by: 18060114


Chevrolet Master Cylinder Part Number: 19432944
$156.87 MSRP: $281.38You Save: $124.51 (45%)Product Specifications- Other Name: Cylinder, Brake Master Cylinder
- Replaced by: 19432746

Chevrolet Master Cylinder Part Number: 19316593
$159.18 MSRP: $285.52You Save: $126.34 (45%)Ships in 1-3 Business DaysProduct Specifications- Other Name: Cylinder, Brake Master Cylinder; Brake Master Cylinder

Chevrolet Master Cylinder Part Number: 92457837
$93.96 MSRP: $167.78You Save: $73.82 (44%)Ships in 1-3 Business DaysProduct Specifications- Other Name: Cylinder Assembly-Brake Master (Repair); Brake Master Cylinder; Cylinder, Brake Master Cylinder
- Replaced by: 92288943
Chevrolet Master Cylinder Part Number: 19417223
$163.38 MSRP: $293.06You Save: $129.68 (45%)Ships in 1-3 Business DaysProduct Specifications- Other Name: Cylinder, Brake Master Cylinder
- Replaces: 25828524, 84164395

Chevrolet Master Cylinder Part Number: 22796285
$162.29 MSRP: $314.98You Save: $152.69 (49%)Ships in 1-2 Business DaysProduct Specifications- Other Name: Cylinder, Brake Master Cylinder; Brake Master Cylinder
- Replaces: 25908489, 20885005, 20967783
Chevrolet Brake Booster Part Number: 84658877
$663.82 MSRP: $1196.08You Save: $532.26 (45%)Ships in 1-2 Business DaysProduct Specifications- Other Name: Cylinder, Brake Master Cylinder
- Replaces: 84237373

Chevrolet Master Cylinder Part Number: 15939484
$195.92 MSRP: $367.92You Save: $172.00 (47%)Ships in 1-2 Business DaysProduct Specifications- Other Name: Cylinder, Brake Master Cylinder; Brake Master Cylinder
- Replaces: 22725390
Chevrolet Master Cylinder Part Number: 19420965
$186.37 MSRP: $361.72You Save: $175.35 (49%)Ships in 1-2 Business DaysProduct Specifications- Other Name: Cylinder, Brake Master Cylinder; Brake Master Cylinder
- Replaces: 25809242

Chevrolet Master Cylinder Part Number: 84905627
$113.54 MSRP: $203.66You Save: $90.12 (45%)Ships in 1-3 Business DaysProduct Specifications- Other Name: Cylinder, Brake Master Cylinder; Brake Master Cylinder

Chevrolet Master Cylinder Part Number: 95414477
$63.57 MSRP: $124.46You Save: $60.89 (49%)Ships in 1-3 Business DaysProduct Specifications- Other Name: Cylinder Kit, Brake Master Cylinder; Brake Master Cylinder

Chevrolet Master Cylinder Part Number: 23191760
$116.16 MSRP: $218.15You Save: $101.99 (47%)Ships in 1-3 Business DaysProduct Specifications- Other Name: Cylinder, Brake Master Cylinder; Brake Master Cylinder
- Replaced by: 84121991

Chevrolet Master Cylinder Part Number: 18029965
$95.95 MSRP: $265.88You Save: $169.93 (64%)Ships in 1-2 Business DaysProduct Specifications- Other Name: Cylinder, Brake Master Cylinder; Brake Master Cylinder

Chevrolet Master Cylinder Part Number: 84939473
$103.81 MSRP: $185.38You Save: $81.57 (44%)Ships in 1-3 Business DaysProduct Specifications- Other Name: Cylinder, Brake Master Cylinder

Chevrolet Booster Assembly Part Number: 96471214
Product Specifications- Other Name: Cylinder, Brake Master Cylinder; Brake Booster

Chevrolet Master Cylinder Part Number: 84749956
$72.76 MSRP: $129.92You Save: $57.16 (44%)Product Specifications- Other Name: Cylinder Kit, Brake Master Cylinder; Brake Master Cylinder
- Replaces: 23234982, 84367261
| Page 1 of 12 |Next >
1-20 of 226 Results
Chevrolet Brake Master Cylinder
Want to cut long-term maintenance and repair costs? Choose OEM Brake Master Cylinder. Those parts deliver top durability you can trust. On our site, you'll find a huge catalog of genuine Chevrolet parts. Prices are unbeatable, so you can keep more in your pocket. Every OEM Chevrolet Brake Master Cylinder includes a manufacturer's warranty. You can also get an easy return policy that keeps buying risk free. Fast delivery, get your car on the road quickly. It's simple to search, compare, and order. Stop guessing about quality or fit. Order today and save with parts that last.
Chevrolet Brake Master Cylinder Parts Questions & Experts Answers
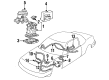
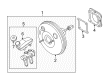
- Q: How to replace the brake master cylinder on Chevrolet Colorado?A:First use the required tool to drain brake fluid from the master cylinder tank. Separate the electrical connector for the fluid sensor while using rubber caps to seal each end of the brake lines as you disconnect them from the abs module to the master cylinder. Take out the Brake Master Cylinder after unthreading its mounting bolts. Prepare the master cylinder through bench bleeding then install it onto the mounting studs. Bolt the mounting nuts into proper position and make sure they reach 30 n.m torque settings during tightening. Plug in the fluid sensor electrical connection followed by sealing the Brake Line tubing ends after installing them between the abs module and master cylinder unit. Tighten all fittings to 17 n.m (13 lb ft). Fill the reservoir with brake fluid while performing system checks and let air out through the brake lines.
- Q: How to replace the brake master cylinder without RPO LAT on Chevrolet Malibu?A:The Brake Master Cylinder replacement starts with depleting vacuum from the booster by removing its vacuum check valve. Disconnect the electrical connector from the brake fluid level indicator switch plus the master cylinder secondary brake pipe fitting. Seal the fitting with caps and close the outlet port to preserve the brake fluid. Apply this process to the connection of the main brake tube. Pull the master cylinder from its position when you unscrew all its mounting nuts first. Check for damage on the cylinder seal that connects the master cylinder to the vacuum Brake Booster. Replace if necessary. Take out the master cylinder reservoir when necessary. Place the Brake Master Cylinder reservoir onto the master cylinder if it was removed and carry out the bench bleeding process on the master cylinder. Place the master cylinder barrel seal correctly on the vacuum Brake Booster before attaching it. Secure the master cylinder nuts tightly to 25 n.m (18 lb ft). Fit the primary brake pipe connection first then the secondary one and fasten it using 20 n.m (15 lb ft) torque. Use denatured alcohol as a lubricant to place the vacuum check valve onto the grommet but stay away from using soap. Connect the brake fluid level indicator switch and let hydraulic brake fluid flow through the system.
- Q: How to replace the Brake Master Cylinder with a Vacuum Brake Booster on Chevrolet Tahoe?A:Before you start working install the parking brake then disconnect the Brake Fluid Level Sensor power wire. Before starting work disconnect the brake pipes to protect brake fluid from leaking out or being contaminated. Take off the master cylinder nuts and remove the part before getting rid of the master cylinder reservoir. Start setup by inserting the master cylinder reservoir. Afterward prepare the master cylinder for bleeding. Mount the master cylinder onto the vehicle while adhering to fastener notices found in service precautions and tighten the mounting nuts to 36 n.m (27 lb ft). Join the brake pipes end to end and tighten their fittings to 25 n.m (18 lb ft). Reattach the Brake Fluid Level Sensor electrical connection and perform brake bleeding before let go of the parking brake.


Related Chevrolet Parts
 Chevrolet ABS Sensor
 Chevrolet Wheel Cylinder
 Chevrolet Wheel Hub
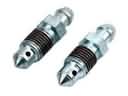 Chevrolet Brake Bleeder Screw
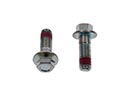 Chevrolet Brake Caliper Bolt
 Chevrolet Brake Caliper Piston
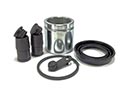 Chevrolet Brake Caliper Repair Kit
 Chevrolet Brake Fluid Level Sensor
 Chevrolet Brake Line
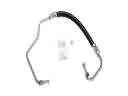 Chevrolet Hydraulic Hose
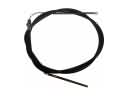 Chevrolet Parking Brake Cable
 Chevrolet Spindle Nut
Browse Chevrolet Brake Master Cylinder by Models
Nova S10 Colorado Tahoe Cruze Malibu Camaro Equinox Impala SS SSR Avalanche Silverado 1500 Silverado 2500 HD Caprice Classic Cobalt Suburban Traverse Blazer HHR Sonic Tracker Volt El Camino Spark Trax Trailblazer Astro Cavalier Corvette C20 Aveo Beretta Bolt EUV Bolt EV C1500 C2500 C30 C3500 Celebrity Chevette City Express Corsica Express 1500 Express 2500 Express 3500 G10 G20 G30 K1500 K20 K2500 K30 K3500 K5 Blazer Lumina Metro Monte Carlo P30 Prizm S10 Blazer Silverado 2500 Sprint Uplander Venture Lumina APV Silverado 3500 Suburban 1500 Trailblazer EXT Avalanche 1500 Avalanche 2500 Aveo5 C1500 Suburban C20 Suburban C2500 Suburban Captiva Sport Citation II Cruze Limited Impala Limited K1500 Suburban K20 Suburban K2500 Suburban Malibu Limited R20 R20 Suburban R2500 R2500 Suburban R30 R3500 Silverado 1500 Classic Silverado 1500 HD Silverado 1500 HD Classic Silverado 1500 LD Silverado 1500 LTD Silverado 2500 HD Classic Silverado 3500 Classic Silverado 3500 HD Spark EV Suburban 2500 Suburban 3500 HD V20 V20 Suburban V2500 Suburban V30 V3500