ChevyParts
My Garage
My Account
Cart
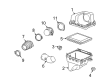
OEM Chevrolet Equinox Engine Control Module
Engine Control Computer- Select Vehicle by Model
- Select Vehicle by VIN
Select Vehicle by Model
orMake
Model
Year
Select Vehicle by VIN
For the most accurate results, select vehicle by your VIN (Vehicle Identification Number).
14 Engine Control Modules found


Chevrolet Equinox PCM Part Number: 12653998
$389.84 MSRP: $791.80You Save: $401.96 (51%)


Chevrolet Equinox PCM Part Number: 12651994
$459.23 MSRP: $932.72You Save: $473.49 (51%)


Chevrolet Equinox ECM Part Number: 12651993
$379.04 MSRP: $769.86You Save: $390.82 (51%)


Chevrolet Equinox PCM Part Number: 19210738
$243.78 MSRP: $456.42You Save: $212.64 (47%)Ships in 1-2 Business Days
Chevrolet Equinox ECM Part Number: 12623327
$272.19 MSRP: $552.85You Save: $280.66 (51%)Ships in 1-2 Business Days
Chevrolet Equinox PCM Part Number: 19210070
$316.50 MSRP: $592.06You Save: $275.56 (47%)Ships in 1-2 Business Days
Chevrolet Equinox PCM Part Number: 19210069
$339.79 MSRP: $618.94You Save: $279.15 (46%)Ships in 1-2 Business Days
Chevrolet Equinox ECM Part Number: 12700116
$173.70 MSRP: $352.81You Save: $179.11 (51%)

Chevrolet Equinox ECM Part Number: 12721355
$251.99 MSRP: $452.00You Save: $200.01 (45%)Chevrolet Equinox ECM Part Number: 12721351
$206.07 MSRP: $369.65You Save: $163.58 (45%)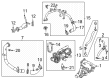
Chevrolet Equinox ECM Part Number: 12719250
$249.31 MSRP: $447.18You Save: $197.87 (45%)Chevrolet Equinox PCM Part Number: 12667002
$248.14 MSRP: $504.00You Save: $255.86 (51%)Ships in 1-2 Business DaysChevrolet Equinox PCM Part Number: 12612384
$261.01 MSRP: $488.26You Save: $227.25 (47%)Ships in 1-2 Business Days
Chevrolet Equinox PCM Part Number: 19210734
Chevrolet Equinox Engine Control Module
Want to cut long-term maintenance and repair costs? Choose OEM Engine Control Module. Those parts deliver top durability you can trust. On our site, you'll find a huge catalog of genuine Chevrolet Equinox parts. Prices are unbeatable, so you can keep more in your pocket. Every OEM Chevrolet Equinox Engine Control Module includes a manufacturer's warranty. You can also get an easy return policy that keeps buying risk free. Fast delivery, get your car on the road quickly. It's simple to search, compare, and order. Stop guessing about quality or fit. Order today and save with parts that last.
The Chevrolet Equinox Engine Control Module also called the powertrain control module is a very crucial part that boosts the dependability and power of the Chevrolet Equinox. The Engine Control Module is the engine's electronic control center that get data from many sensors like the oxygen sensor and throttle position sensor and controls the air-fuel mixture and idle speed. This ECM technology has progressed in the course of generations of this automobile model, beginning with the integrated circuits in the initial model to further and advanced microprocessor technologies in the later models which control other operations such as the VVT and integration of the transmission system. Different models across the three generations of Chevrolet Equinox can be interfaced and hence all the generations gain from the ECM. Such compatibility not only improves the fuel economy needs but also helps in safety parameters by providing the premier combustion and efficiency. Some of the antecedent characteristics of the Chevrolet Equinox ECM being its capacity to regulate fuel related operations and deploy ignition coils placed it in a special place in the automobile market. The Chevrolet Equinox now boasts of above 2 million units sold within the market and this is traced to the Engine Control Module that gives reliability and efficiency. All in all, the Chevrolet Equinox Engine Control Module is crucial in making the vehicle optimized for efficiency, safety, and other sophisticated technologies.
Chevrolet Equinox Engine Control Module Parts Questions & Experts Answers
- Q: How to replace the Engine Control Module (ECM) on Chevrolet Equinox?A:A safe procedure starts with turning off the ignition system when replacing or uninstalling connectors attached to the Engine Control Module (ECM) and its power connections that encompass Battery Cable and control module fuse. The control module metal case must not come into contact with battery voltage and touching either connector pins or soldered components leads to electrostatic discharge damage. Prior to servicing the control module one should conduct debris removal from connector surfaces and double-check the gaskets for correct installation to stop contaminant intrusion. A scan tool should be used to record the life span of engine oil and automatic transmission fluid. Failure to program these values into the new control module will force the system to initialize default values at 5000 km (3,000 mi) and 83000 km (50,000 mi) respectively. Disengaging the ecm retainer from the battery shield occurs by sliding it toward the back before removing both components from the shield. Break the negative battery connection as well as remove the two engine wiring harness electrical connectors from the ecm. Install the ecm by connecting its two engine wiring harness electrical connectors followed by putting it back on the battery shield before secure the retainer into place. First place the ecm and retainer on the top of the battery shield after which push the retainer toward the rear to create a proper connection and reconnect the negative Battery Cable. Reprogramming of the pcm follows installation completion.

Related Chevrolet Equinox Parts
 Chevrolet Equinox Camshaft Position Sensor
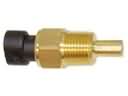 Chevrolet Equinox Coolant Temperature Sensor
 Chevrolet Equinox Ignition Coil
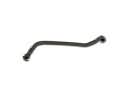 Chevrolet Equinox Crankcase Breather Hose
 Chevrolet Equinox Crankshaft Position Sensor
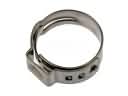 Chevrolet Equinox Fuel Line Clamps
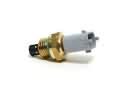 Chevrolet Equinox Intake Manifold Temperature Sensor
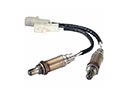 Chevrolet Equinox Oxygen Sensor
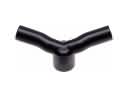 Chevrolet Equinox PCV Valve Hose
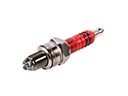 Chevrolet Equinox Spark Plug
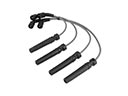 Chevrolet Equinox Spark Plug Wires
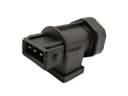 Chevrolet Equinox Vehicle Speed Sensor