ChevyParts
My Garage
My Account
Cart
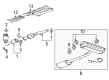
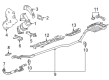
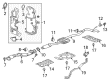
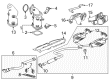
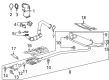
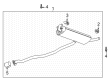
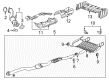
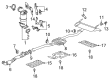
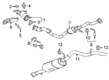
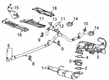
OEM Chevrolet Exhaust Hanger
Exhaust Tail Pipe Hanger- Select Vehicle by Model
- Select Vehicle by VIN
Select Vehicle by Model
orMake
Model
Year
Select Vehicle by VIN
For the most accurate results, select vehicle by your VIN (Vehicle Identification Number).
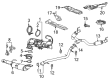
255 Exhaust Hangers found


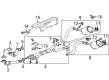
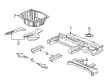
Chevrolet Converter & Pipe Bracket Part Number: 23471501
$29.33 MSRP: $43.65You Save: $14.32 (33%)Ships in 1-3 Business DaysProduct Specifications- Other Name: Bracket, Exhaust Pipe; Exhaust Bracket; Exhaust Hanger; Bracket
- Position: Front
- Replaces: 25800916


Chevrolet Converter & Pipe Insulator Part Number: 23469850
$21.04 MSRP: $31.32You Save: $10.28 (33%)Ships in 1-3 Business DaysProduct Specifications- Other Name: Insulator-Exhaust System; Exhaust Insulator; Exhaust Bracket; Exhaust Hanger; Center Muffler Insulator; Muffler & Pipe Insulator; Exhaust Pipe Insulator; Hanger Insulator; Muffler W/Tpipe Hanger.


Chevrolet Converter & Pipe Insulator, Front Part Number: 22907444
$33.36 MSRP: $49.65You Save: $16.29 (33%)Ships in 1-3 Business DaysProduct Specifications- Other Name: Insulator-Exhaust Pipe Front Hanger; Exhaust Insulator; Exhaust Hanger; Front Pipe Insulator; Insulator, Exhaust Pipe
- Position: Front
- Replaces: 13229780

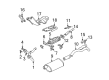
Chevrolet Mount Bracket Part Number: 15681411
$13.11Product Specifications- Other Name: Hanger; Exhaust Bracket; Exhaust Hanger; Tailpipe Bracket; Bracket, Exhaust Muffler/Resonator
- Position: Rear

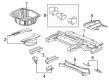
Chevrolet Reinforcement Plate Part Number: 92457029
$1.42 MSRP: $2.12You Save: $0.70 (34%)Ships in 1-3 Business DaysProduct Specifications- Other Name: Reinforcement Assembly-Exhaust Muffler Hanger; Reinforcement, Exhaust Muffler/Resonator

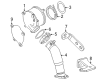
Chevrolet Converter Bracket Part Number: 12664859
$8.22 MSRP: $12.24You Save: $4.02 (33%)Ships in 1-3 Business DaysProduct Specifications- Other Name: Bracket, Catalytic Converter

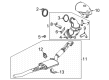
Chevrolet Intermed Pipe Hanger, Rear Part Number: 20968766
$18.52 MSRP: $28.32You Save: $9.80 (35%)Product Specifications- Other Name: Hanger Assembly-Exhaust Pipe Rear; Exhaust Hanger; Hanger, Exhaust Muffler/Resonator; Hanger, Exhaust Pipe
- Position: Rear

Chevrolet Exhaust Pipe Lower Bracket Part Number: 12657320
$28.97 MSRP: $43.10You Save: $14.13 (33%)Ships in 1-3 Business DaysProduct Specifications- Other Name: Bracket, Exhaust Pipe
- Position: Front
- Replaced by: 12729776

Chevrolet Converter & Pipe Upper Bracket Part Number: 12670599
$27.00 MSRP: $40.18You Save: $13.18 (33%)Ships in 1-3 Business DaysProduct Specifications- Other Name: Bracket, Catalytic Converter; Exhaust Hanger; Converter & Pipe Bracket; Converter & Pipe Brace
- Replaced by: 25203352


Chevrolet Converter & Pipe Bracket Part Number: 23128666
$34.68 MSRP: $51.60You Save: $16.92 (33%)Product Specifications- Other Name: Bracket, Exhaust Pipe; Exhaust Hanger
- Position: Front

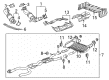
Chevrolet Muffler & Pipe Hanger, Rear Passenger Side Part Number: 84205378
$30.27 MSRP: $47.38You Save: $17.11 (37%)Ships in 1-3 Business DaysProduct Specifications- Other Name: Insulator Assembly-Exhaust Rear Muffler; Exhaust Hanger; Insulator, Exhaust Muffler/Resonator
- Position: Rear Passenger Side

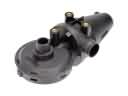
Chevrolet Catalytic Converter Lower Bracket Part Number: 12672003
$65.32 MSRP: $97.20You Save: $31.88 (33%)Ships in 1-3 Business DaysProduct Specifications- Other Name: Bracket, Catalytic Converter; Exhaust Bracket; Exhaust Hanger; Catalytic Converter Lower Brace

Chevrolet Catalytic Converter Bracket Part Number: 12664902
$15.79 MSRP: $23.49You Save: $7.70 (33%)Ships in 1-2 Business DaysProduct Specifications- Other Name: Bracket, Catalytic Converter; Exhaust Bracket; Exhaust Hanger; Preconverter Lower Bracket

Chevrolet Muffler & Pipe Insulator, Passenger Side Part Number: 42708943
$13.72 MSRP: $20.40You Save: $6.68 (33%)Ships in 1-3 Business DaysProduct Specifications- Other Name: Insulator-Exhaust System; Exhaust Insulator; Exhaust Hanger; Insulator, Exhaust Pipe
- Position: Passenger Side

Chevrolet Converter & Pipe Lower Bracket Part Number: 12656956
$7.15 MSRP: $10.62You Save: $3.47 (33%)Ships in 1-3 Business DaysProduct Specifications- Other Name: Bracket, Catalytic Converter; Converter & Pipe Brace

Chevrolet Catalytic Converter Upper Bracket Part Number: 12665795
$30.37 MSRP: $45.18You Save: $14.81 (33%)Ships in 1-3 Business DaysProduct Specifications- Other Name: Bracket, Catalytic Converter; Exhaust Bracket; Exhaust Hanger
- Position: Upper

Chevrolet Converter & Pipe Hanger Part Number: 23319270
$21.11 MSRP: $31.43You Save: $10.32 (33%)Ships in 1-3 Business DaysProduct Specifications- Other Name: Hanger Assembly-Exhaust Front; Exhaust Hanger; Hanger, Exhaust Pipe
- Position: Front
- Replaces: 23143586

Chevrolet Tailpipe Hanger Part Number: 84981631
$104.05 MSRP: $154.82You Save: $50.77 (33%)Ships in 1-3 Business DaysProduct Specifications- Other Name: Hanger, Exhaust Muffler/Resonator; Muffler & Pipe Hanger; Hanger, Exhaust Tail Pipe
- Replaced by: 85049692
- Replaces: 84712190, 23388780

Chevrolet Reinforcement Plate Part Number: 92263696
$2.34 MSRP: $3.48You Save: $1.14 (33%)Ships in 1-3 Business DaysProduct Specifications- Other Name: Reinforcement, Exhaust Muffler/Resonator

Chevrolet Lower Bracket, Passenger Side Part Number: 12684193
$7.11 MSRP: $10.58You Save: $3.47 (33%)Ships in 1-3 Business DaysProduct Specifications- Other Name: Bracket, Catalytic Converter; Exhaust Bracket; Exhaust Hanger
- Position: Passenger Side
| Page 1 of 13 |Next >
1-20 of 255 Results
Chevrolet Exhaust Hanger
Want to cut long-term maintenance and repair costs? Choose OEM Exhaust Hanger. Those parts deliver top durability you can trust. On our site, you'll find a huge catalog of genuine Chevrolet parts. Prices are unbeatable, so you can keep more in your pocket. Every OEM Chevrolet Exhaust Hanger includes a manufacturer's warranty. You can also get an easy return policy that keeps buying risk free. Fast delivery, get your car on the road quickly. It's simple to search, compare, and order. Stop guessing about quality or fit. Order today and save with parts that last.
Chevrolet Exhaust Hanger Parts Questions & Experts Answers
- Q: How to service the exhaust hangers and maintain the support of the exhaust system on Chevrolet Colorado?A:Service the exhaust hangers while supporting the exhaust system by first raising your vehicle on its stands. Oil-based lubricants should never be used because of their improper execution. A soapy solution treated to both the frame support bracket rod and exhaust pipe hanger rod will help exhaust pipe hanger removal. Use the tool to separate the exhaust pipe hanger while it is free from both the frame support bracket rod and the exhaust pipe hanger rod . The correct soapy solution serves as a safe installation aid by being applied to the frame support bracket rod and the inner diameter of the exhaust pipe hanger and exhaust pipe hanger rod. Lower the vehicle while mounting the exhaust pipe hanger to the frame support bracket rod followed by attaching it to the exhaust pipe hanger rod.
- Q: How to replace the exhaust hanger on Chevrolet Impala?A:The first step to replace the exhaust hanger includes vehicle lifting by using supports to stabilize both the exhaust system and the vehicle height. After removing the exhaust pipe rear hanger insulator from its bracket on the exhaust pipe rear hanger bracket you should proceed to detach the exhaust pipe rear hanger bolt and exhaust pipe rear hanger bracket. The replacement process starts with removing the exhaust pipe rear hanger insulators from the exhaust muffler rear hanger bracket before removing both the rear bumper impact bar bolt and the exhaust muffler rear hanger bracket. Installation of the exhaust muffler rear hanger bracket begins by adhering to the Fastener Notice in Service Precautions. Fasten together the rear bumper impact bar bolt while tightening it to 25 Nm (18 ft. lbs.). The installation sequence begins with affixing the exhaust pipe rear hanger insulators onto the exhaust muffler rear hanger bracket and continuing with the exhaust pipe rear hanger bracket and its bolt which requires tightening to 25 Nm (18 ft. lbs.). You must place the exhaust pipe rear hanger insulator on the exhaust pipe rear hanger bracket. Then remove the exhaust system support and check for any contact between the exhaust system and underbody before lowering the vehicle.
- Q: How to replace the left adjustable exhaust hanger on Chevrolet SSR?A:The procedure to change a left adjustable Exhaust Hanger starts by lifting the vehicle then taking off the left rear tire assembly and the left rear inner wheelwell housing. The suitable jack should support the left exhaust Tail Pipe before you remove its insulator. Users should mark the frame next to the Exhaust Hanger bracket before removing rivets retaining the hanger with a grinder followed by gentle prying to detach the hanger. Knock the rivet stems into the frame structure by using either an appropriate hammer or punch. Drilling holes on the frame requires a 7/16 drill bit. Use a paper to transfer frame scribe marks to the new Exhaust Hanger while marking the drill spots and complete the hole drilling process using a 7/16 drill bit. Follow the new Exhaust Hanger installation by fastening the frame with provided hardware while tightening the nut and bolts to 25 nm (18 ft. Lbs.). You should reinstall the Tail Pipe insulator followed by removing the support from the left exhaust Tail Pipe before installing the rear fascia and left rear inner wheelwell housing plus left rear tire assembly. Lower the vehicle after you verify and adjust the necessary settings on the Exhaust Hanger.


Related Chevrolet Parts
 Chevrolet PCV Valve
 Chevrolet EGR Valve
 Chevrolet Exhaust Flange Gasket
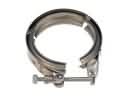 Chevrolet Exhaust Manifold Clamp
 Chevrolet Muffler
 Chevrolet Air Inject Check Valve
 Chevrolet Canister Purge Valves
 Chevrolet Diverter Valve
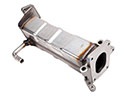 Chevrolet EGR Cooler
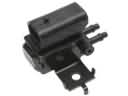 Chevrolet EGR Vacuum Solenoid
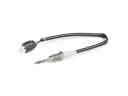 Chevrolet Exhaust Gas Temperature Sensor
 Chevrolet Secondary Air Injection Check Valve
Browse Chevrolet Exhaust Hanger by Models
S10 Colorado Tahoe Cruze Malibu Camaro Equinox Impala SS SSR Avalanche Silverado 1500 Silverado 2500 HD Caprice Cobalt Suburban Traverse Blazer HHR Sonic Tracker Volt Spark Trax Trailblazer Astro Cavalier Corvette Aveo City Express Express 1500 Express 2500 Express 3500 G30 Lumina Metro Monte Carlo Prizm Uplander Venture Silverado 3500 Suburban 1500 Trailblazer EXT Aveo5 Captiva Sport Cruze Limited Impala Limited Malibu Limited Silverado 1500 Classic Silverado 1500 LD Silverado 1500 LTD Silverado 2500 HD Classic Silverado 3500 Classic Silverado 3500 HD Spark EV Suburban 2500