ChevyParts
My Garage
My Account
Cart
OEM Chevrolet Prizm Intake Manifold
Engine Intake Manifold- Select Vehicle by Model
- Select Vehicle by VIN
Select Vehicle by Model
orMake
Model
Year
Select Vehicle by VIN
For the most accurate results, select vehicle by your VIN (Vehicle Identification Number).
1 Intake Manifold found


Chevrolet Prizm Manifold Part Number: 94856789
Chevrolet Prizm Intake Manifold
Want to cut long-term maintenance and repair costs? Choose OEM Intake Manifold. Those parts deliver top durability you can trust. On our site, you'll find a huge catalog of genuine Chevrolet Prizm parts. Prices are unbeatable, so you can keep more in your pocket. Every OEM Chevrolet Prizm Intake Manifold includes a manufacturer's warranty. You can also get an easy return policy that keeps buying risk free. Fast delivery, get your car on the road quickly. It's simple to search, compare, and order. Stop guessing about quality or fit. Order today and save with parts that last.
This product known as the Chevrolet Prizm Intake Manifold is one of the most important parts with a big boost in performance and durability. Proved to have a high efficiency the Chevrolet Prizm Intake Manifold equally distributes the air or mined air/fuel mixture to the cylinder or cylinders as per the desire of the engine in all the Prizms manufactured and used between 1989 to 2002. This intake manifold is capable of accepting carbureted and multiport fuel injected engines which assures the Chevrolet Prizm to give out an even power and torque. The Chevrolet Prizm Intake Manifold in the contemporary models mainly comes in lightweight versions using the plastic composites which enhance the efficiency in fuel usage and also improves the cooling which is a major selling point in the market. Some of these models also feature Variable Length Intake Manifolds (VLIM) that change the intake air flow according to the load in the engine to realize better performance. That's why the models such as Chevrolet Prizm with its several types of engines, including 1.8 L 1ZZ-FE, is suitably benefited from this development of intake manifold enhancing the fuel economy of 28 mpg in city and 32 mpg on the highway. Chevrolet Prizm Intake Manifold is another significant component within an automobile since it helps support the safety and optimum function of the car. Chevrolet Prizm Intake Manifold is another peculiar element that proves the cars' quality and engineering majoring on the Chevrolet Prizm models since the Chevrolet company is known to be elaborative on its reliability and performance.
Chevrolet Prizm Intake Manifold Parts and Q&A
- Q: How to replace the intake manifold on Chevrolet Prizm?A:The replacement process for an Intake Manifold starts by disconnecting the negative cable from the battery and draining the cooling system. Disconnect both the accelerator cable and the throttle valve (TV) cable from the Throttle Body before removing the iat sensor connector from the air cleaner and its hose from the Throttle Body. Begin by disconnection of throttle position (TP) sensor connector and idle air control (IAC) valve connector along with manifold absolute pressure (MAP) sensor connector and two coolant bypass hose clamps and the coolant bypass hoses from Throttle Body after removing air cleaner top assembly. Remove the three bolts securing the fuel injector wiring harness from positions 3 and 4. Then detach this wiring harness from the Intake Manifold. Pull out the bolts that anchor the support bracket after removing both the support bracket itself. Start by disconnecting the upper Radiator Hose at its radiator connection before relocating that hose to the side. Remove the upper Radiator Hose support bracket bolt and the nut while also discarding the Intake Manifold bolts. Use the socket set to remove the top hose support bracket then disconnect the three rubber hoses operating at the Intake Manifold. Remove the two injector harness support brackets before correctly extracting the Throttle Body with the Intake Manifold off the Cylinder Head. To fit the parts place a new Intake Manifold Gasket and the Intake Manifold with Throttle Body onto the Cylinder Head while securing it with 3 nuts along with 2 bolts which must be tightened up to 18 nm (13 ft. Lbs.). Complete the installation by placing the upper Radiator Hose support bracket and reattaching both injector harness support brackets before connecting the three vacuum lines. Use two bolts to attach the Intake Manifold support bracket where tightness must reach 18 nm (13 ft. Lbs.). Reattach the fuel injector wiring harness with three bolts (3, 4) tightened to 12.7 nm (9 ft. Lbs.), connect the four fuel injector connectors, and then reconnect the Throttle Body components: the correct installation of a new volvo xc90 requires connecting the throttle position (TP) sensor connector and idle air control (IAC) valve connector and manifold absolute pressure (MAP) sensor connector while securing two coolant bypass hose clamps and coolant bypass hoses. The repair process includes fitting the air cleaner top assembly followed by hose connection to the Throttle Body and sensor connector reattachment of intake air temperature (IAT). Install the throttle valve (TV) cable and the accelerator cable to the Throttle Body before completing the process by adding fluid to the cooling system as needed and securing the negative Battery Cable by tightening its bolt to 15 nm (11 ft. Lbs.).

Related Chevrolet Prizm Parts
 Chevrolet Prizm Air Filter
 Chevrolet Prizm Air Filter Box
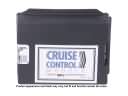 Chevrolet Prizm Cruise Control Module
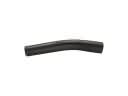 Chevrolet Prizm Fuel Filler Hose
 Chevrolet Prizm Fuel Injector
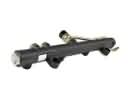 Chevrolet Prizm Fuel Rail
 Chevrolet Prizm Fuel Tank Sending Unit
 Chevrolet Prizm Intake Manifold Gasket
 Chevrolet Prizm Mass Air Flow Sensor
 Chevrolet Prizm Throttle Body
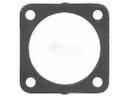 Chevrolet Prizm Throttle Body Gasket
 Chevrolet Prizm Throttle Cable