ChevyParts
My Garage
My Account
Cart
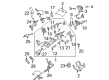
OEM Chevrolet Tahoe Neutral Safety Switch
Transmission Neutral Safety Switch- Select Vehicle by Model
- Select Vehicle by VIN
Select Vehicle by Model
orMake
Model
Year
Select Vehicle by VIN
For the most accurate results, select vehicle by your VIN (Vehicle Identification Number).
11 Neutral Safety Switches found


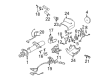
Chevrolet Tahoe Neutral Safety Switch Part Number: 29540479
$189.55 MSRP: $300.94You Save: $111.39 (38%)

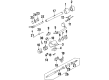
Chevrolet Tahoe Neutral Safety Switch Part Number: 29541852
$96.96 MSRP: $166.52You Save: $69.56 (42%)Ships in 1 Business Day


Chevrolet Tahoe Back-Up Switch Part Number: 19152823
$14.18 MSRP: $34.18You Save: $20.00 (59%)

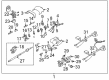
Chevrolet Tahoe Neutral Safety Switch Part Number: 24229422
$79.63 MSRP: $130.34You Save: $50.71 (39%)


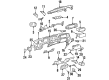
Chevrolet Tahoe Neutral Safety Switch Part Number: 24221125
$86.84 MSRP: $147.85You Save: $61.01 (42%)Ships in 1-2 Business Days


Chevrolet Tahoe Neutral Safety Switch Part Number: 14094368
$14.91 MSRP: $24.54You Save: $9.63 (40%)Ships in 1-2 Business Days


Chevrolet Tahoe Clutch Switch Part Number: 15027967
$31.20 MSRP: $97.33You Save: $66.13 (68%)Ships in 1-2 Business Days
Chevrolet Tahoe Neutral Safety Switch Part Number: 29542692
$140.79 MSRP: $229.70You Save: $88.91 (39%)Ships in 1-2 Business Days
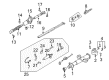
Chevrolet Tahoe Switch Part Number: 23190137
$26.69 MSRP: $43.97You Save: $17.28 (40%)Ships in 1-2 Business Days


Chevrolet Tahoe Neutral Safety Switch Part Number: 15705308


Chevrolet Tahoe Back-Up Switch Part Number: 12479776
Chevrolet Tahoe Neutral Safety Switch
Want to cut long-term maintenance and repair costs? Choose OEM Neutral Safety Switch. Those parts deliver top durability you can trust. On our site, you'll find a huge catalog of genuine Chevrolet Tahoe parts. Prices are unbeatable, so you can keep more in your pocket. Every OEM Chevrolet Tahoe Neutral Safety Switch includes a manufacturer's warranty. You can also get an easy return policy that keeps buying risk free. Fast delivery, get your car on the road quickly. It's simple to search, compare, and order. Stop guessing about quality or fit. Order today and save with parts that last.
Neutral Safety Switch is a safety switch in Chevrolet Tahoe vehicles which is intended to ensure that the starting of the engine can only be initiated if the transmission of the car is in neutral or park position only. This mechanism helps to prevent the vehicle to move unintentionally when starting and thus increases safety of the driver and the passengers. In the course of years of manufacturing, many styles of the Neutral Safety Switches may have been fitted in different models of Tahoe though specific forms are not elaborated. Stakes still tops remain similar across these variations, keeping the primary goal in mind and which stays as stopping unintended motion of a vehicle during ignition. Hence, the Neutral Safety Switch should be effective to ensure safe maneuver of of the vehicle.
Chevrolet Tahoe Neutral Safety Switch Parts and Q&A
- Q: How to replace the Neutral Safety Switch on the 4L60-E/4L65-E/4L70-E automatic transmission on Chevrolet Tahoe?A:To replace the park/neutral position switch on the 4l60-e/4l65-e/4l70-e transmission, it starts by applying the park brake and shifting the transmission into neutral. If the vehicle is 4 wheeler, remove the front propeller shaft. Lift and appropriately support the car and remove the park/neutral position (PNP) switch electric connector . This will involve removing the nuts holding the manual shaft or lever and the nuts that hold the transmission control lever in place. Besides, removing the bolts and the pnp switch. If the pnp switch will not slide off easily, file the outer edge of the manual shaft to eliminate any burrs. For installation, line up the pnp switch with the manual shaft flats and slide on to the shaft, and allow it to contact the transmission bosses with mounting bracket. In the case of installing a new pnp switch, it will include a positive assurance bracket and hence there will be no need to use the park neutral switch aligner. Install the pnp switch bolts finger tight. Pnp refers to a polarized non-polarized connector, which is a connector in which the wire end needs to be inserted into the correct position when attaching the connector to its matching socket. Then install the j 41364-a park neutral switch aligner onto the pnp switch and make sure the slots to locate the tool tabs and rotates the tool until the upper locator pin is aligned with the switch slot. Tighten the bolts to 25 nm (18 ft. Lbs.) after which remove the j 41364-a and, if appropriate, positive assurance bracket. Replace the transmission control lever with the nut, which should be tightened to 25 nm (18 ft. Twin.) and reconnect pnp switch the electrical connectors of the switch. If equipped with 4wd, reinstall front propeller shaft, depress the vehicle, check switch (engine should only run in park (P) or neutral (N)), replace the switch if this fails to work properly.

Related Chevrolet Tahoe Parts
 Chevrolet Tahoe Body Control Module
 Chevrolet Tahoe Ignition Switch
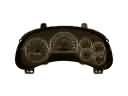 Chevrolet Tahoe Instrument Cluster
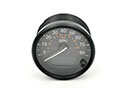 Chevrolet Tahoe Speedometer
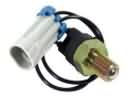 Chevrolet Tahoe Back Up Light Switch
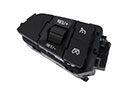 Chevrolet Tahoe Cruise Control Switch
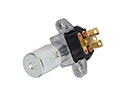 Chevrolet Tahoe Dimmer Switch
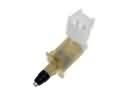 Chevrolet Tahoe Door Jamb Switch
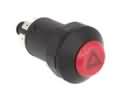 Chevrolet Tahoe Hazard Warning Switch
 Chevrolet Tahoe Headlight Switch
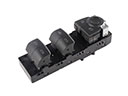 Chevrolet Tahoe Power Window Switch
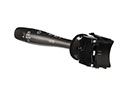 Chevrolet Tahoe Turn Signal Switch