ChevyParts
My Garage
My Account
Cart
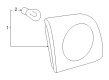
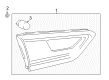
OEM Chevrolet Tail Light
Tail Lamp- Select Vehicle by Model
- Select Vehicle by VIN
Select Vehicle by Model
orMake
Model
Year
Select Vehicle by VIN
For the most accurate results, select vehicle by your VIN (Vehicle Identification Number).
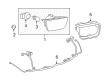
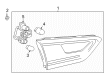
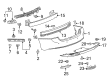
464 Tail Lights found


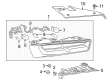
Chevrolet Backup Lamp Assembly, Driver Side Part Number: 15271120
$103.97 MSRP: $154.75You Save: $50.78 (33%)Ships in 1-2 Business DaysProduct Specifications- Other Name: Lamp, Back Up Lamp; Tail Light Assembly; Other Lamp
- Position: Driver Side

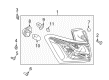
Chevrolet Tail Lamp Assembly Part Number: 92244324
$105.53 MSRP: $157.06You Save: $51.53 (33%)Ships in 1-3 Business DaysProduct Specifications- Other Name: Lamp, Tail Lamp; Back Up Light; Tail Light
- Replaces: 92199774

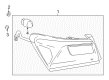
Chevrolet Backup Lamp Assembly, Rear Driver Side Part Number: 84130996
$138.62 MSRP: $196.86You Save: $58.24 (30%)Ships in 1-3 Business DaysProduct Specifications- Other Name: Lamp Assembly-Rear Combination; Lamp, Tail Lamp
- Position: Rear Driver Side
- Replaces: 23508091

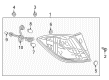
Chevrolet Reflector, Driver Side Part Number: 42816046
$23.54 MSRP: $36.84You Save: $13.30 (37%)Ships in 1-2 Business DaysProduct Specifications- Other Name: Lamp, Tail Lamp
- Position: Driver Side
- Replaces: 23174489

Chevrolet Tail Lamp, Rear Passenger Side Part Number: 84136779
$288.98 MSRP: $430.47You Save: $141.49 (33%)Ships in 1-3 Business DaysProduct Specifications- Other Name: Lamp, Rear Stop; Lamp, Tail Lamp
- Position: Rear Passenger Side
- Replaces: 23393364

Chevrolet Tail Lamp Assembly, Rear Driver Side Part Number: 85132583
$285.26 MSRP: $422.55You Save: $137.29 (33%)Ships in 1-3 Business DaysProduct Specifications- Other Name: Lamp Assembly-Rear Body Structure Stop; Tail Light; Lamp, Tail Lamp
- Position: Rear Driver Side
- Replaced by: 85608641

Chevrolet Tail Lamp Assembly, Rear Passenger Side Part Number: 84516377
$328.09 MSRP: $488.95You Save: $160.86 (33%)Ships in 1-3 Business DaysProduct Specifications- Other Name: Lamp, Rear Stop; Lamp, Tail Lamp
- Position: Rear Passenger Side
- Replaced by: 84974348

Chevrolet Tail Lamp Assembly, Rear Driver Side Part Number: 42678950
$155.13 MSRP: $230.36You Save: $75.23 (33%)Ships in 1-3 Business DaysProduct Specifications- Other Name: Lamp, Rear Stop; Back Up Light; Tail Light; Lamp, Tail Lamp
- Position: Rear Driver Side
Chevrolet Tail Lamp Assembly, Rear Passenger Side Part Number: 84882378
$342.13 MSRP: $509.94You Save: $167.81 (33%)Ships in 1-2 Business DaysProduct Specifications- Other Name: Lamp, Rear Stop; Lamp, Tail Lamp
- Position: Rear Passenger Side
- Replaces: 84595943

Chevrolet Backup Lamp Assembly, Rear Passenger Side Part Number: 84341670
$110.82 MSRP: $157.06You Save: $46.24 (30%)Ships in 1-3 Business DaysProduct Specifications- Other Name: Lamp Assembly-Rear Combination; Lamp, Tail Lamp
- Position: Rear Passenger Side
- Replaces: 84235061, 84214440

Chevrolet Backup Lamp Assembly, Rear Driver Side Part Number: 84075816
$142.66 MSRP: $202.62You Save: $59.96 (30%)Ships in 1-3 Business DaysProduct Specifications- Other Name: Lamp Assembly-Rear Combination; Lamp, Tail Lamp
- Position: Rear Driver Side

Chevrolet Tail Lamp, Black, Rear Passenger Side Part Number: 84725130
$425.36 MSRP: $634.38You Save: $209.02 (33%)Ships in 1-3 Business DaysProduct Specifications- Other Name: Lamp, Rear Stop; Lamp, Vehicle Security & Safety; Lamp, Tail Lamp
- Position: Rear Passenger Side
- Replaced by: 86526053
Chevrolet Tail Lamp Assembly, Rear Driver Side Part Number: 84882377
$363.41 MSRP: $541.76You Save: $178.35 (33%)Product Specifications- Other Name: Lamp, Rear Stop; Lamp, Tail Lamp
- Position: Rear Driver Side
- Replaces: 84595944


Chevrolet Tail Lamp, Rear Passenger Side Part Number: 85108377
$405.04 MSRP: $601.64You Save: $196.60 (33%)Ships in 1-2 Business DaysProduct Specifications- Other Name: Lamp Assembly-Rear Body Structure Stop; Lamp, Tail Lamp
- Position: Rear Passenger Side
- Replaced by: 86538887
- Replaces: 84891705, 84792628

Chevrolet Tail Lamp Assembly, Rear Driver Side Part Number: 84332798
$153.47 MSRP: $227.88You Save: $74.41 (33%)Ships in 1-3 Business DaysProduct Specifications- Other Name: Lamp, Rear Stop; Tail Light; Lamp, Tail Lamp
- Position: Rear Driver Side
- Replaces: 84226228
Chevrolet Tail Lamp, Black, Rear Passenger Side Part Number: 84529731
$426.94 MSRP: $634.38You Save: $207.44 (33%)Ships in 1-3 Business DaysProduct Specifications- Other Name: Lamp, Rear Stop; Lamp, Tail Lamp
- Position: Rear Passenger Side
- Replaced by: 86526051
Chevrolet Backup Lamp Assembly, Rear Driver Side Part Number: 84341669
$141.12 MSRP: $209.41You Save: $68.29 (33%)Ships in 1-3 Business DaysProduct Specifications- Other Name: Lamp Assembly-Rear Combination; Lamp, Tail Lamp
- Position: Rear Driver Side
- Replaces: 84235060, 84214439
Chevrolet Reflector, Passenger Side Part Number: 42816047
$24.75 MSRP: $36.84You Save: $12.09 (33%)Ships in 1-2 Business DaysProduct Specifications- Other Name: Lamp, Tail Lamp
- Position: Passenger Side
- Replaces: 23174490

Chevrolet Backup Lamp Assembly, Rear Passenger Side Part Number: 84595945
$268.36 MSRP: $379.24You Save: $110.88 (30%)Ships in 1-3 Business DaysProduct Specifications- Other Name: Lamp Assembly-Rear Combination; Lamp, Tail Lamp
- Position: Rear Passenger Side
- Replaces: 84469990
Chevrolet Tail Lamp Assembly, Rear Driver Side Part Number: 84769835
$184.98 MSRP: $274.99You Save: $90.01 (33%)Product Specifications- Other Name: Lamp, Rear Stop; Tail Light; Lamp, Tail Lamp
- Position: Rear Driver Side
- Replaces: 84282655, 84305803, 19418086, 84373387, 84229340, 84341665
| Page 1 of 24 |Next >
1-20 of 464 Results
Chevrolet Tail Light
Want to cut long-term maintenance and repair costs? Choose OEM Tail Light. Those parts deliver top durability you can trust. On our site, you'll find a huge catalog of genuine Chevrolet parts. Prices are unbeatable, so you can keep more in your pocket. Every OEM Chevrolet Tail Light includes a manufacturer's warranty. You can also get an easy return policy that keeps buying risk free. Fast delivery, get your car on the road quickly. It's simple to search, compare, and order. Stop guessing about quality or fit. Order today and save with parts that last.
Chevrolet Tail Light Parts Questions & Experts Answers
- Q: How to replace the tail light assembly and bulbs on Chevrolet Blazer?A:You should start by opening the endgate or liftgate to replace tail lamp assemblies and back up lamps and sidemarker lights as well as stop and turn signal bulbs. Start by removing tail lamp assembly screws before turning bulb sockets 1/4 turn counterclockwise to release them from the assembly. Remove the bulbs from their sockets and insert new bulbs into their places. Turn the bulb sockets 1/4 turn clockwise after you connect them with the tail lamp assembly before you return the tail lamp assembly to the vehicle. Screw the tail lamp assembly into place using 1.9 n.m (17 lb in) torque and finish by closing the endgate or liftgate.
- Q: How to Replace a Tail Light on a Sedan on Chevrolet Malibu?A:To change the tail, back up, sidemarker, stop, and turn signal bulb on a sedan, start with taking the screws out of the tail lamp after opening up the rear compartment. Pull back the side trim panel from inside the rear compartment, remove the wing nut that secures the tail lamp. Cinchely remove the tail lamp from the rearward of the quarter panel before pulling out the electrical connector of the tail lamp wiring. Turn the tail lamp, stop lamp and back up lamp by turning in a counter clockwise direction and remove the bulbs out of these sockets. For installation, entering the new bulbs into the tail lamp and stop lamp and back up lamp sockets, then rotating them clockwise until it's firmly into place. Reconnect the electrical connector to the tail lamp wiring harness and seat the tail lamp to the quarter panel having the two locking pins correctly engaged. Screw in the tail lamp screws and tighten them to 2 n.m (18 lb in) and replace the wing nut from inside rear compartment and trim panel back to rear compartment lid close.
- Q: How to service the tail light on Chevrolet Impala?A:Service the tail lamp by first opening the rear compartment and then disconnecting the rear compartment convenience net. First remove the wingnut then pull back the rear compartment trim panel from the tail lamp to expose the tail lamp. After exposing the tail lamp use additional wingnuts to detach it from the rear body panel. Begin by unscrewing the tail lamp socket counterclockwise before removing the bulb from within it. Disconnect the electrical connector from the tail lamp first. The sidemarker lamp socket requires counterclockwise rotation before you can remove its bulb from inside. Installation of the bulbs begins by putting the tail lamp bulb inside its socket first followed by the sidemarker bulb socket. First turn the sidemarker lamp socket clockwise and then screw the tail lamp socket clockwise for installation. The electrical connector powering the tail lamp must be connected next followed by putting back the tail lamp onto the rear body panel with wingnut security. To install the wingnut and convenience net, pull the rear compartment trim panel into position against the tail lamp before securing the wingnut and finishing by locking the convenience net and firmly closing the rear compartment.


Related Chevrolet Parts
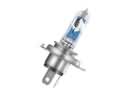 Chevrolet Headlight Bulb
 Chevrolet Back Up Light
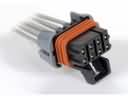 Chevrolet Chassis Wiring Harness Connector
 Chevrolet Dome Light Connector
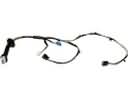 Chevrolet Door Harness Connector
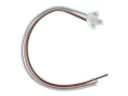 Chevrolet Door Lock Switch Connector
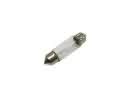 Chevrolet Interior Light Bulb
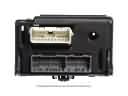 Chevrolet Light Control Module
 Chevrolet Power Seat Connector
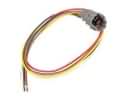 Chevrolet Rear Light Harness Connector
 Chevrolet Speaker Connector
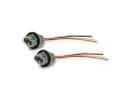 Chevrolet Turn Signal Light Connector
Browse Chevrolet Tail Light by Models
S10 Colorado C10 Tahoe Cruze Malibu Camaro Equinox Impala SS SSR Avalanche Silverado 1500 Silverado 2500 HD Caprice Classic Cobalt Suburban Traverse Blazer HHR Sonic Tracker Volt El Camino K10 Spark Trax Trailblazer Astro Cavalier Corvette C20 Aveo Beretta Bolt EUV Bolt EV C1500 C2500 C30 C3500 Celebrity City Express Express 1500 Express 2500 Express 3500 G10 G20 G30 K1500 K20 K2500 K30 K3500 K5 Blazer Lumina Metro Monte Carlo P30 Prizm S10 Blazer Silverado 2500 Uplander Venture Lumina APV Silverado 3500 Suburban 1500 Trailblazer EXT Avalanche 1500 Avalanche 2500 Aveo5 C10 Suburban C1500 Suburban C20 Suburban C2500 Suburban Captiva Sport Cruze Limited Impala Limited K10 Suburban K1500 Suburban K20 Suburban K2500 Suburban Malibu Limited P20 R10 R10 Suburban R1500 Suburban R20 R20 Suburban R2500 R2500 Suburban R30 R3500 Silverado 1500 Classic Silverado 1500 HD Silverado 1500 HD Classic Silverado 1500 LD Silverado 1500 LTD Silverado 2500 HD Classic Silverado 3500 Classic Silverado 3500 HD Spark EV Suburban 2500 V10 V10 Suburban V1500 Suburban V20 V20 Suburban V2500 Suburban V30 V3500