ChevyParts
My Garage
My Account
Cart
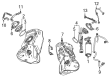
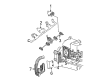
OEM GMC Yukon Fuel Injector
Gas Injector- Select Vehicle by Model
- Select Vehicle by VIN
Select Vehicle by Model
orMake
Model
Year
Select Vehicle by VIN
For the most accurate results, select vehicle by your VIN (Vehicle Identification Number).
31 Fuel Injectors found


GMC Yukon Injector Part Number: 19420316
$78.14 MSRP: $139.52You Save: $61.38 (44%)Ships in 1 Business Day


GMC Yukon Injector Part Number: 12710481
$69.60 MSRP: $141.40You Save: $71.80 (51%)

GMC Yukon Injector Part Number: 12594512
$73.36 MSRP: $149.00You Save: $75.64 (51%)Ships in 1-2 Business Days
GMC Yukon Injector Part Number: 12732623
$60.77 MSRP: $108.52You Save: $47.75 (44%)GMC Yukon Injector Part Number: 12690934
$38.83 MSRP: $109.30You Save: $70.47 (65%)Ships in 1-2 Business Days
GMC Yukon Injector Part Number: 97780474
$486.29 MSRP: $963.93You Save: $477.64 (50%)Ships in 1-3 Business Days
GMC Yukon Injector Part Number: 97780144
$422.63 MSRP: $837.17You Save: $414.54 (50%)
GMC Yukon Injector Part Number: 17113698
$112.36 MSRP: $228.20You Save: $115.84 (51%)GMC Yukon Injector Part Number: 12732622
$116.07 MSRP: $208.20You Save: $92.13 (45%)Ships in 1-2 Business Days


GMC Yukon Injection Nozzle Part Number: 10233973


GMC Yukon Injector Part Number: 12684125


GMC Yukon Injector Part Number: 19110538
$224.13 MSRP: $402.02You Save: $177.89 (45%)GMC Yukon Throttle Body Part Number: 17112511
GMC Yukon Injector Part Number: 17091432

GMC Yukon Injector Part Number: 17113582

GMC Yukon Fuel Rail Part Number: 52371460
GMC Yukon Throttle Body Part Number: 17112917
GMC Yukon Throttle Body Part Number: 17112514
GMC Yukon Throttle Body Part Number: 17112508
GMC Yukon Throttle Body Part Number: 17112913
| Page 1 of 2 |Next >
1-20 of 31 Results
GMC Yukon Fuel Injector
Want to cut long-term maintenance and repair costs? Choose OEM Fuel Injector. Those parts deliver top durability you can trust. On our site, you'll find a huge catalog of genuine GMC Yukon parts. Prices are unbeatable, so you can keep more in your pocket. Every OEM GMC Yukon Fuel Injector includes a manufacturer's warranty. You can also get an easy return policy that keeps buying risk free. Fast delivery, get your car on the road quickly. It's simple to search, compare, and order. Stop guessing about quality or fit. Order today and save with parts that last.
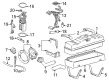
The Fuel Injector in GMC Yukon automobiles is an important element used in the direct injection of fuel into the cylinders of the engine depending on the load required for the engine. It is an electro-mechanical device managed by the engine control unit in lieu of the carburetor and is vital for augmenting engine performance and proficiency. Faulty fuel injectors cause poor idle, rough running of the engine, less power and poor fuel economy, this deteriorates catalytic converters and oxygen sensors. Because of such problems, there is a need to replace the fuel injectors as soon as they are noted to be faulty. Common types of Fuel Injector systems on GMC Yukon are direct injections and indirect injections which enhances fuel supply and engine power in the vehicles.
GMC Yukon Fuel Injector Parts Questions & Experts Answers
- Q: How to replace the fuel injectors on GMC Yukon?A:The fuel injection replacement process starts with taking out the air cleaner outlet duct followed by pressure relief from the fuel system. You must disconnect the engine wiring harness connectors from the evap purge solenoid together with the MAP Sensor and Ignition Coil and fuel injectors while marking each connector for future assembly. Thoroughly separate the engine wiring harness clip from three essential elements - ignition coil bracket, heater hose bracket and positive crankcase ventilation (PCV) hose. The technician disconnects three fuel system connections: the Fuel Rail quick fitting of the chassis fuel feed pipe and the two quick fittings connecting evap tubing to the Intake Manifold and evap canister purge solenoid. Separate the evap canister purge solenoid retainer attached to the Fuel Rail then remove all Fuel Rail bolts and gently raise the Fuel Rail assembly to protect the injector electrical connector terminals and spray tips from damage. Disassemble the Fuel Injector retainers along with injectors while discarding both upper and lower o-ring seals. Before installation allow the engine oil to become semi-fluid before applying it onto the new o-ring seals of the injectors. Position the seals onto the injectors before placing them into the Fuel Rail. Place the Intake Manifold onto the Fuel Rail before pushing it down until full seating. Complete this task by tightening Fuel Rail bolts to 10 nm (89 lb in) and then reassemble the evap tube with purge solenoid and the chassis fuel feed pipe and evap tube quick connect fittings. After reinstalling the pcv hose you must fasten the engine wiring harness with its clip bolt torqued to 9 nm (80 lb in). After reinstalling the heater hose bracket and nut the technician should connect engine wiring harness connectors to Ignition Coil and MAP Sensor and evap purge solenoid before installing the engine wiring harness bracket nut tightened to 5 nm (44 lb in). The last step involves linking the negative battery terminal while powering up the ignition to search for leaks before reinstalling the air cleaner outlet duct.

Related GMC Yukon Parts
 GMC Yukon Throttle Body
 GMC Yukon Fuel Pump
 GMC Yukon Fuel Tank
 GMC Yukon Gas Cap
 GMC Yukon Fuel Filler Housing
 GMC Yukon Fuel Injection Pump
 GMC Yukon Fuel Pressure Regulator
 GMC Yukon Fuel Pressure Sensor
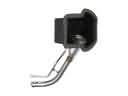 GMC Yukon Fuel Tank Filler Neck
 GMC Yukon Fuel Tank Strap
 GMC Yukon Idle Control Valve
 GMC Yukon Throttle Cable