ChevyParts
My Garage
My Account
Cart
OEM GMC Yukon XL 1500 Oil Cooler Hose
Oil Cooler Line- Select Vehicle by Model
- Select Vehicle by VIN
Select Vehicle by Model
orMake
Model
Year
Select Vehicle by VIN
For the most accurate results, select vehicle by your VIN (Vehicle Identification Number).
6 Oil Cooler Hoses found


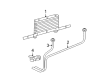
GMC Yukon XL 1500 Inlet Pipe Part Number: 25999420
$114.03 MSRP: $195.84You Save: $81.81 (42%)Ships in 1-2 Business Days


GMC Yukon XL 1500 Inlet Pipe Part Number: 25999418
$111.91 MSRP: $190.54You Save: $78.63 (42%)Ships in 1-2 Business Days


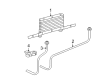
GMC Yukon XL 1500 Inlet Pipe, Upper Part Number: 25999416
$27.96 MSRP: $46.05You Save: $18.09 (40%)Ships in 1-2 Business Days


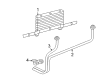
GMC Yukon XL 1500 Inlet Pipe Part Number: 15809058
$26.78 MSRP: $44.12You Save: $17.34 (40%)Ships in 1 Business Day


GMC Yukon XL 1500 Inlet Pipe, Upper Part Number: 15809053
$39.59 MSRP: $67.98You Save: $28.39 (42%)Ships in 1-2 Business Days


GMC Yukon XL 1500 Auxiliary Fluid Cooler Inlet Line Part Number: 15779543
$25.49 MSRP: $41.98You Save: $16.49 (40%)Ships in 1-3 Business Days
GMC Yukon XL 1500 Oil Cooler Hose
Want to cut long-term maintenance and repair costs? Choose OEM Oil Cooler Hose. Those parts deliver top durability you can trust. On our site, you'll find a huge catalog of genuine GMC Yukon XL 1500 parts. Prices are unbeatable, so you can keep more in your pocket. Every OEM GMC Yukon XL 1500 Oil Cooler Hose includes a manufacturer's warranty. You can also get an easy return policy that keeps buying risk free. Fast delivery, get your car on the road quickly. It's simple to search, compare, and order. Stop guessing about quality or fit. Order today and save with parts that last.
GMC Yukon XL 1500 Oil Cooler Hose Parts Questions & Experts Answers
- Q: How to replace the oil cooler hose on GMC Yukon XL 1500?A:The replacement of the oil cooler line should begin with taking the front grill assembly off and placing a drain pan below the vehicle. Dismantle the lower oil cooler line from its fitting at the radiator and the oil cooler line from its fitting at the auxiliary cooler. First support the vehicle while raising it and take the existing plastic cap covering from the fitting's quick connect assembly to a length of two inches. Apply the bent-tip screwdriver to extract one side of the e-clip until it disconnects from its position and then discard the component. Start by extracting the cooler line directly from the quick connect fitting before removing the oil cooler pipes from the Oil Pan clip and transmitting the oil cooler pipes. New e-clips should be used for the quick connect fittings by inserting one end into a slot while rotating until all three ears pass through the slots. Check that the retaining ring can spin effortlessly when installing the cooler line but keep the plastic cap for a separate purpose. A plastic cap should be present at both ends of the cooler line and a new one must be obtained for use if the cap gets damaged. Before completing the installation verify that the retaining ring is held down by the fitting through a process of seating the plastic o-ring cap completely without force. Properly secure the cooler line by tugging it hard to check the fitment while confirming that the cap remains free from any gaps against the fitting. The transmission quick connect fittings should have the cooler line ends inserted until you hear or feel a click. The oil cooler lines should be installed into the Oil Pan clip and secured with a torque pressure of 9 nm (80 inch lbs.). Lower the vehicle and proceed with fitting the oil cooler line to the auxiliary oil cooler fitting followed by connecting the lower oil cooler line to the radiator fitting then reinstall the front grill assembly. Finally, check the transmission fluid.

Related GMC Yukon XL 1500 Parts
 GMC Yukon XL 1500 A/C Idler Pulley
 GMC Yukon XL 1500 Automatic Transmission Oil Cooler Line
 GMC Yukon XL 1500 Coolant Reservoir Cap
 GMC Yukon XL 1500 Cooling Fan Clutch
 GMC Yukon XL 1500 Cooling Hose
 GMC Yukon XL 1500 Fan Blade
 GMC Yukon XL 1500 Fan Shroud
 GMC Yukon XL 1500 Radiator Cap
 GMC Yukon XL 1500 Radiator Hose
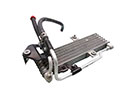 GMC Yukon XL 1500 Transmission Oil Cooler
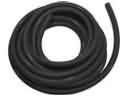 GMC Yukon XL 1500 Transmission Oil Cooler Hose
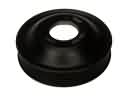 GMC Yukon XL 1500 Water Pump Pulley