Make sure this part fits

GM 10427835
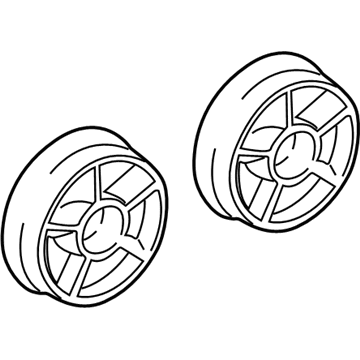
Fan Blade, Driver Side

2001-2007 GM

Customer Questions & Expert Answers (9)
GM 10427835 Fan Blade, Driver Side
  • Part Description
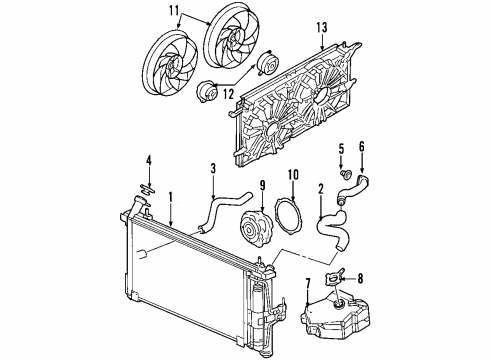
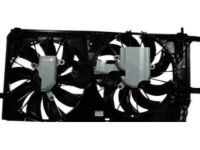
    Blade, Engine Cooling; Dual Radiator and Condenser Fan Assembly; Radiator Fan Assembly; Cooling Fan Assembly
  • Position
    Driver Side
  • Manufacturer
    General Motors
Make sure this part fits
$24.03 MSRP: $120.65
You Save: $96.62 (81%)
Ships in 1-2 Business Days
1
ADD TO CART
  • Related Parts
  • Product Specifications
  • Vehicle Fitment
  • Customer Questions & Expert Answers
  • Product Specifications

    BrandGenuine GM
    Manufacturer Part Number10427835
    Part DescriptionBlade, Engine Cooling; Dual Radiator and Condenser Fan Assembly; Radiator Fan Assembly; Cooling Fan Assembly
    Item Dimensions15.6 x 15.3 x 3.5 inches
    Item Weight1.10 Pounds
    PositionDriver Side
    ConditionNew
    Fitment TypeDirect Replacement
    ManufacturerGeneral Motors
    SKU10427835
    Shipping & ReturnShipping Policy Return Policy
    Warning: California's Proposition 65
  • Vehicle Fitment

    Year Make Model Trim Engine
    2002-2007 Buick RendezvousCX, CX Plus, CXL, CXL Plus6 Cyl 3.4 L GAS, 6 Cyl 3.5 L GAS
    2001-2005 Chevrolet VentureBase, LS, LT, Plus, Value, Warner Bros.6 Cyl 3.4 L GAS
    2001-2004 Oldsmobile SilhouetteGL, GLS, Premiere6 Cyl 3.4 L GAS
    2001-2005 Pontiac AztekBase, GT, Rally6 Cyl 3.4 L GAS
    2001-2005 Pontiac MontanaBase6 Cyl 3.4 L GAS
  • Customer Questions & Expert Answers

    Q:
    Is this 10427835 designed for my car? Posted by ChevyPartsGiant Specialist
    A:
    Please Select Your Vehicle model to see if part number 10427835 is suitable before ordering.
    Posted by ChevyPartsGiant Specialist
    Q:
    How to service and repair a radiator fan on Buick Rendezvous? Posted by Customer
    A:
    Start replacing the electric Radiator fan by first taking off the air cleaner along with duct assembly and then unplug the Radiator fan harness electrical connector. You should begin by taking away the right side diagonal brace together with loosening the engine mount strut nuts. Sliding brackets with bolts from the upper Radiator support allows you to rotate both stubs and brackets toward the back. The upper Radiator Hose must come off first together with both Radiator upper mount bolts then disconnect the Radiator upper mount and the Radiator Fan Shroud bolts. Use the hose clamp pliers (J 38185) to reposition the Radiator overflow hose clamp before detached and repositioning the hose and disconnecting the upper toc line running to the Radiator. Lift the vehicle while you detach the toc lines from the retainer clip on the fan module before letting the vehicle drop to the ground. The first step involves disconnecting engine wiring harness retainers which are mounted at the engine harness bracket before the harness wiring is repositioned and Radiator fans must be removed with their associated Radiator Fan Shroud. The first step of installation includes plugging in the Radiator fans to the Radiator Fan Shroud and moving the engine wiring harness to its proper position. First raise the vehicle while connecting the toc lines to the fan module retainer clip then lower the vehicle. After that disconnect the engine wiring harness retainers at the engine harness bracket and position the vehicle for installation. First connect the upper toc line to the Radiator before installing Radiator Fan Shroud bolts that should be tightened to 6 n.m (53 lb in). Afterward install Radiator upper mounts followed by their corresponding bolts which need to be tightened to 10 n.m (88 lb in). Utilize the hose clamp pliers (J 38185) to reposition the hose clamp before final installation of the upper Radiator Hose and the coolant overflow hose onto the Radiator. Begin by placing engine mount struts brackets evenly next to the upper Radiator support before you fasten the engine mount strut bracket brace bolts to 28 n.m (21 lb ft) torque followed by engine mount strut nut tightening to 48 n.m (35 lb ft). The right side diagonal brace and the Radiator fan harness electrical connector together with the air cleaner and duct assembly complete the installation process.
    Posted by ChevyPartsGiant Specialist
    Q:
    How to replace the radiator fan on Buick Rendezvous? Posted by Customer
    A:
    The electric Radiator fan replacement process starts by detaching the air cleaner and duct assembly along with the Radiator fan harness electrical connector. You should take out the right side diagonal brace then make the engine mount strut nuts slightly loose. The step includes loosening bracket brace bolts from the upper Radiator support while rotating struts and brackets towards the rear position. Start by taking away the upper Radiator Hose before removing the Radiator upper mount bolts. Next, remove the Radiator upper mounts together with the Radiator Fan Shroud bolts. Use hose clamp pliers (J38185) to relocate the coolant overflow hose clamp positioned at the Radiator and separate the hose from the clamp. The process begins with disconnecting the upper transmission oil cooler line from the Radiator and the transmission oil cooler lines from the fan module retainer clip followed by engine wiring harness retainer separation at engine harness bracket points and engine wiring harness repositioning. End the procedure by uninstalling both Radiator fans from their shroud. The first step for installation includes placing the Radiator fans with the Radiator Fan Shroud followed by repositioning the engine wiring harness. Begin by securing the engine harness retainers at their bracket on the engine harness then proceed with attaching the transmission oil cooler lines to the fan module retaining clip before establishing the upper transmission line to the Radiator. Secure the Radiator Fan Shroud bolts to 6 nm (53 inch lbs.) while you install the Radiator upper mounts including their bolts at 10 nm (88 inch lbs.). Use hose clamp pliers (J38185) to fix the coolant overflow hose properly onto the Radiator. Screw in the upper Radiator Hose and position the engine mount strut brackets next to the upper Radiator support while installing nut bolts through the upper Radiator support with a torque of 28 nm (21 ft. Lbs.). Fasten the engine mount strut nuts to 48 nm using 35 ft. Lbs. Torque setting, while also installing right side diagonal brace, Radiator Fan harness electrical connector, followed by air cleaner and duct assembly.
    Posted by ChevyPartsGiant Specialist
    Q:
    How to replace the fan blade on Chevrolet Venture? Posted by Customer
    A:
    Before replacing the Fan Blade make sure the ignition is off. Take out the cooling fans as well as the cooling Fan Shroud by turning the cooling fan nut (Cooling Fan Nut) to loosen it and remove it and the cooling fan. For installation, install the cooling fan back to its position while ensuring to tighten the cooling fan nut (Cooling Fan Nut) counterclockwise to a torque of 6nm (53 inch lbs.) then reinstall the cooling fans with the cooling Fan Shroud. If any abnormal noise or vibration is detected from the engine compartment, inspect and clean any foreign material from the cooling fan blades, and be sure to observe the electric coolant fan caution and the damaged Fan Blade caution when doing so.
    Posted by ChevyPartsGiant Specialist
    Q:
    How to replace the radiator fan on Chevrolet Venture? Posted by Customer
    A:
    Start the electric Radiator Fan replacement by taking off the air cleaner and duct assembly before removing the hood latch support bolts while repositioning the hood latch support. First disconnect the Radiator Fan harness electrical connector followed by removal of the right side diagonal brace. The first step includes nut torque reduction on the engine side of the engine mount struts before unscrewing bracket brace bolts from the upper radiator support to create forward movement of struts and brackets. Start by taking out first the upper Radiator Hose together with the radiator upper mount bolts prior to removing the radiator upper mounts alongside the Radiator Fan shroud bolts. The j 38185 hose clamp pliers (J 38185) should be used to relocate the coolant overflow hose clamp located on the radiator before removing and properly positioning the coolant overflow hose. The first step involves disconnecting the upper transmission oil cooler line from the radiator while also removing the transmission oil cooler lines from the fan module retainer clip before taking off the radiator fans with the Radiator Fan shroud. First install the radiator fans together with the Radiator Fan shroud and after that attach the transmission oil cooler lines to the fan module retainer clip and connect the upper transmission oil cooler line to the radiator. Secure the Radiator Fan shroud bolts to 6 nm (53 inch lbs.), then set the radiator upper mounts and their bolts to 10 nm (88 inch lbs.). Reposition the cooling overflow hose to the radiator through the use of j 38185 hose clamp pliers (J 38185) for proper fixation. Install the upper Radiator Hose while fitting the engine mount struts brackets to match with the upper radiator support. Tighten the engine mount strut bracket brace bolts to 28 nm (21 ft. Lbs.) at the upper radiator support. Fasten the engine strut mount nuts towards the engine at 48 nm (35 ft. Lbs.) before replacing the right side diagonal brace with the Radiator Fan harness electrical connector. Install the hood latch support on the upper radiator support before tightening the hood latch support bolts to 25 nm (18 ft. Lbs.) and place back the air cleaner and duct assembly.
    Posted by ChevyPartsGiant Specialist
    Q:
    How to replace the fan blade safely and correctly on Chevrolet Venture? Posted by Customer
    A:
    Begin the Fan Blade replacement process by making sure it is safe by validating both the electric coolant fan caution and damaged Fan Blade caution. Detecting any abnormal engine compartment noise or vibration will require blade foreign material inspection and cleaning from the cooling fan. Start by engaging the ignition but afterward extract the cooling fans as well as the cooling Fan Shroud while you turn the clockwise to loosen the cooling fan nut. You should pull out the cooling fan after you remove the cooling fan nut. Reinstall the cooling fan by putting it in place while counterclockwise tightening the cooling fan nut to 6 nm (53 inch lbs.) before placing the cooling fans back on with the cooling Fan Shroud.
    Posted by ChevyPartsGiant Specialist
    Q:
    What is the first step to replace the fan blade for the 2002 Buick Rendezvous? Posted by Customer
    A:
    Ensure the ignition is off.
    Posted by ChevyPartsGiant Specialist
    See expert answers on similar Fan Blade
    Q:
    What should be done with the coolant overflow hose for the 2006 Buick Rendezvous? Posted by Customer
    A:
    Install the coolant overflow hose to the radiator and reposition the hose clamp using the Hose Clamp Pliers (J38185).
    Posted by ChevyPartsGiant Specialist
    See expert answers on similar Radiator fan
    Q:
    What should be done with the transmission oil cooler lines after installation for the 2001 Chevrolet Venture? Posted by Customer
    A:
    Reattach the transmission oil cooler lines to their retainers.
    Posted by ChevyPartsGiant Specialist
    See expert answers on similar Radiator fan
    If you have any questions about this product, please don't hesitate to ask us. We will be happy to help you!

OEM GM 10427835, Excellent Performance and Perfect Fitment

To ensure reliability, purchase GM part # 10427835 Fan Blade, Driver Side. It is sometimes referred to as GM A/C Condenser Fan, GM Fan Blade, GM Radiator fan. Choosing OEM parts is the optimal decision for guaranteeing superior quality and perfect performance. These components undergo stringent quality checks and are carefully constructed to comply with GM's factory specifications, ensuring a smooth installation process.

ChevyPartsGiant.com is a leading supplier of genuine GM parts such as GM 10427835 Fan Blade, Driver Side. Our website boasts an extensive inventory of OEM GM parts, available at highly competitive prices in the market. Should you require any new genuine GM parts, rest assured we will deliver them swiftly and efficiently to your doorstep. Furthermore, all our parts come with the assurance of a manufacturer's warranty. For detailed Chevy parts information, click here.
Choose ChevyPartsGiant for discounted prices, exceptional service and fast delivery