Make sure this part fits

GM 25997053
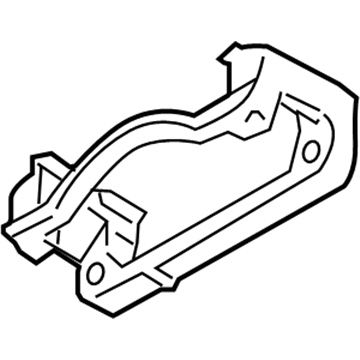
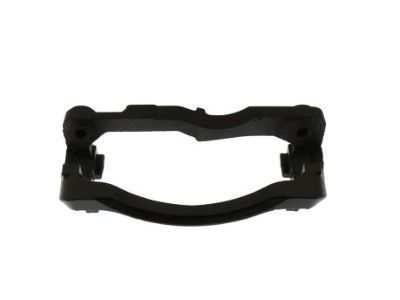
Caliper Bracket, Driver Side

1999-2013 GM

Customer Questions & Expert Answers (14)
GM 25997053 Caliper Bracket, Driver Side
  • Part Description
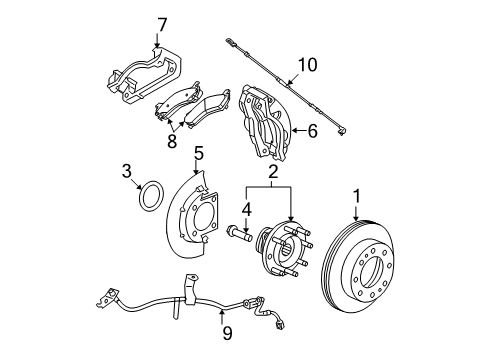
    Bracket Kit-Front Brake Caliper; Brake Caliper Bracket
  • Position
    Driver Side
  • Replaces
    18040093
  • Manufacturer
    General Motors
Make sure this part fits
$142.64 MSRP: $255.84
You Save: $113.20 (45%)
Ships in 1-2 Business Days
1
ADD TO CART
  • Related Parts
  • Product Specifications
  • Vehicle Fitment
  • Customer Questions & Expert Answers
  • Product Specifications

    BrandGenuine GM
    Manufacturer Part Number25997053
    Part DescriptionBracket Kit-Front Brake Caliper; Brake Caliper Bracket
    Other NamesCaliper Support; Bracket; Bracket Kit, Wheel Brake Cylinder/Caliper
    Item Dimensions14.3 x 6.2 x 5.1 inches
    Item Weight7.10 Pounds
    PositionDriver Side
    ConditionNew
    Fitment TypeDirect Replacement
    Replaces18040093
    ManufacturerGeneral Motors
    SKU25997053
    WarrantyThis genuine GM part is guaranteed by GM's factory warranty.
    Shipping & ReturnShipping Policy Return Policy
    Warning: California's Proposition 65
  • Vehicle Fitment

    Year Make Model Trim Engine
    2002-2006 Chevrolet Avalanche 2500Base, LS, LT8 Cyl 8.1 L GAS
    2001-2007 Chevrolet Silverado 1500Base, LS, LT, LTZ, SS, WT, Z71 Off-Road6 Cyl 4.3 L GAS, 8 Cyl 4.8 L GAS, 8 Cyl 5.3 L FLEX, 8 Cyl 5.3 L GAS, 8 Cyl 6.0 L GAS
    2007 Chevrolet Silverado 1500 ClassicLS, LT, SS, WT6 Cyl 4.3 L GAS, 8 Cyl 4.8 L GAS, 8 Cyl 5.3 L FLEX, 8 Cyl 5.3 L GAS, 8 Cyl 6.0 L GAS
    2005-2006, 2001-2003 Chevrolet Silverado 1500 HDBase, LS, LT8 Cyl 6.0 L GAS
    2007 Chevrolet Silverado 1500 HD ClassicLT8 Cyl 6.0 L GAS
    1999-2004 Chevrolet Silverado 2500Base, LS, LT, WT8 Cyl 5.3 L GAS, 8 Cyl 6.0 L BI-FUEL, 8 Cyl 6.0 L CNG, 8 Cyl 6.0 L GAS
    2001-2010 Chevrolet Silverado 2500 HDBase, LS, LT, LTZ, WT8 Cyl 6.0 L BI-FUEL, 8 Cyl 6.0 L CNG, 8 Cyl 6.0 L FLEX, 8 Cyl 6.0 L GAS, 8 Cyl 6.6 L DIESEL, 8 Cyl 8.1 L GAS
    2007 Chevrolet Silverado 2500 HD ClassicLS, LT, WT8 Cyl 6.0 L GAS, 8 Cyl 6.6 L DIESEL, 8 Cyl 8.1 L GAS
    2006 Chevrolet Silverado 3500LS, LT, WT8 Cyl 6.0 L GAS, 8 Cyl 6.6 L DIESEL, 8 Cyl 8.1 L GAS
    2007 Chevrolet Silverado 3500 ClassicLS, LT, WT8 Cyl 6.0 L GAS, 8 Cyl 6.6 L DIESEL, 8 Cyl 8.1 L GAS
    View More
  • Customer Questions & Expert Answers

    Q:
    Can you help me check if this 25997053 is the right part for my car? Posted by ChevyPartsGiant Specialist
    A:
    Please Select Your Vehicle model to see if part number 25997053 is suitable before ordering.
    Posted by ChevyPartsGiant Specialist
    Q:
    How to replace the front brake caliper bracket on Chevrolet Avalanche 2500? Posted by Customer
    A:
    Keep the brake caliper steady using heavy mechanic wire when you remove its mounting bracket while keeping the hydraulic brake hose attached. This prevents brake fluid damage to the hose. Detach the brake caliper from its holder without disconnecting the hose before removing both brake pads and anti-rattle clips from the caliper bracket. Take out the mounting bolts for the Brake Caliper Bracket and the unit itself before wiping away debris from both the inner bracket and its mounting surface. Repark the Brake Caliper Bracket in place then clean every bolt thread with denatured alcohol before applying threadlocker gm part 12345493 (Canadian part 10953488) on each thread. Fit the two caliper bracket bolts into place then tighten them to 175 nm (121 ft. Lbs.) when using 15 series or apply 300 nm (221 ft. Lbs.) for the 25 series. Replace the Brake Pad anti-rattle clips then push the pads onto the rotor before installing the brake caliper. Use a manual pump while the engine is off to bring the brake pedal to 2/3 of its range before easing off. Repeat this action to achieve a solid brake pedal response which correctly positions brake caliper pistons and pads.
    Posted by ChevyPartsGiant Specialist
    Q:
    How to replace the front brake caliper bracket on Chevrolet Silverado 1500? Posted by Customer
    A:
    Before replacing the front Brake Caliper Bracket you must support the brake caliper with heavy mechanic's wire or equivalent tool that allows the hydraulic flexible brake hose to stay connected to prevent damage. When replacing the front Brake Caliper Bracket keep the hydraulic brake flexible hose connected while taking out the brake pads and anti-rattle clips from the mounting bracket. Begin by removing two Brake Caliper Bracket mounting bolts followed by the caliper bracket itself while cleaning inside ends and mounting surface of all contaminants. During Brake Caliper Bracket installation position the bracket back in place while removing all traces of original adhesive patch and cleaning bolt threads with denatured alcohol before applying threadlocker gm p/n 12345493 (Canadian P/N 10953488) to the threads. For the 15 series use 121 ft. Lbs. Torque after tightening caliper bracket bolts while the 25 and 35 series require 221 ft. Lbs. Torque on these bolts. Smoothly slide the pads against the rotor until they make contact before placing the brake pads and anti-rattle clips back in place. You will finish the brake caliper installation by installing the tire-wheels-assemblies and dropping the vehicle to the ground before applying the brake pedal to a 2/3 distance and returning it to zero position. Wait 15 seconds and perform the procedure again until the brake pedal achieves full firmness which confirms proper Brake Caliper Piston and pad settlement.
    Posted by ChevyPartsGiant Specialist
    Q:
    How to replace the rear brake caliper bracket on the 1500 Series on Chevrolet Silverado 1500 Classic? Posted by Customer
    A:
    Before handling the 1500 series Brake Caliper Bracket replacement start by checking the brake master cylinder reservoir fluid. If the fluid rests in the center of its range no draining is needed but lowering the level to midpoint when the fluid is above the center mark. Put the brake caliper pistons into complete retraction through the use of a c-clamp placed over the housing top onto caliper backing. Tighten the clamp over the top of the caliper housing against the back of the outboard pad when the pistons reach their fully depressed position. Use heavy mechanic's wire to hold the caliper when you untie its bolts and take it away from the bracket. Avoid disconnecting the hydraulic hose during this step. Take out the brake pads and clips first then uninstall the Brake Caliper Bracket bolts to remove the entire bracket. Discard all contaminants from inside both Brake Caliper Bracket ends then check the mounting surface and threads for cleanliness. Set the Brake Caliper Bracket in place after cleansing both the threads and original adhesive surface while applying threadlocker gm p/n 12345493 (Canadian P/N 10953488) to the threads. Secure the Brake Caliper Bracket bolts at 200 nm (148 ft. Lbs.) torque and put on anti-rattle clips followed by brake pads. Run the caliper through its bracket and bolt it into position with 42 nm torque setting before placing the tire and wheel assembly back. Turn off the engine and press the brake pedal to its 2/3rds mark then release slowly to accomplish the pad and caliper piston bedding process. Put fresh brake fluid into the reservoir when required to reach the proper fluid level.
    Posted by ChevyPartsGiant Specialist
    Q:
    How to replace the rear brake caliper bracket on the 15/25 Series without NYS on Chevrolet Silverado 2500? Posted by Customer
    A:
    Start work on the rear Brake Caliper Bracket switch of the 15/25 series by lifting and holding the vehicle then removing the tire and wheel assembly. Secure the brake caliper with mechanic's wire or an equal protective method during replacement to avoid hurting the hydraulic brake hose and preventing brake fluid leaks. Extraction of the brake caliper from its position helps access the brake pads plus anti-rattle clips at the mounting bracket. Take off both Brake Caliper Bracket mounting bolts and the bracket then clean away any debris from inside the bracket and the mounting points. Reinstall the Brake Caliper Bracket and stay clear of its original adhesive patch by applying threadlocker gm p/n 12345493 (Canadian P/N 10953488) to the bolt threads after cleaning them with denatured alcohol. Put the two caliper bracket bolts into place and use 200 nm torque (148 ft. Lbs.) for jh5 cars or 300 nm torque (221 ft. Lbs.) for jh6/jh7 systems during installation. Reinstall the brake caliper after sliding brake pads against the rotor until contact is made and putting back anti-rattle clips. Put back the tire and wheel set. Set the vehicle down and without engine power gently push and release the Brake Pedal to 2/3 of its range. After waiting 15 seconds apply pushing pressure on the Brake Pedal three times to allow brake caliper pistons and brake pads to settle correctly.
    Posted by ChevyPartsGiant Specialist
    Q:
    How to replace the front brake caliper bracket on the 25/3500 Series on Chevrolet Silverado 3500 Classic? Posted by Customer
    A:
    You must check the fluid level inside the 25/3500 series brake master cylinder reservoir as the first step for caliper bracket replacement; empty fluid if it exceeds half the permissible limit but retain fluid at midpoint if it remains lower than half the reservoir capacity. The fluid needs replacement only when the reservoir reaches midway points between its maximum and minimum fluid marks yet exceeds that mark. First remove the wheel assembly before using two large c-clamps to compress caliper pistons through the brake caliper housing until they fully retract. After taking out the c-clamps move on to disconnect the brake caliper bolts supported by heavy mechanic's wire as you maintain the hydraulic brake flexible hose connection. First unfasten the Brake Caliper Bracket bolts alongside the brake pads and anti-rattle clips before removing the Brake Caliper Bracket . Wipe off all contaminants that are present on the Brake Caliper Bracket inside ends and on both mounting surfaces and threaded areas. Before tightening the Brake Caliper Bracket bolts , remove original adhesive from the bracket and clean bolt threads with denatured alcohol and apply threadlocker gm p/n 12345493 (Canadian P/N 10953488) to threads. Secure the bolts at 300 nm torque (221 ft. Lbs. Measurement).first install brake pads followed by anti-rattle clips before inserting them until they reach the rotor. Tighten all brake caliper bolts to 108 nm (80 ft. Lbs.) torque.reinstall the tire and wheel assembly once you finish your work. You must slowly press the brake pedal from engine off position to reach about two-thirds of its range then stop and do this again until the caliper pistons and pads fully seat properly. At the end you need to add clean brake fluid to reach the correct reservoir level if needed.
    Posted by ChevyPartsGiant Specialist
    Q:
    How to replace the rear brake caliper bracket on the 1500 Series without NYS on GMC Sierra 1500? Posted by Customer
    A:
    In building to substitute the rear Brake Caliper Bracket of 1500 series without nys, begin by checking out the brake fluid content inside the brake master cylinder reservoir; if it is beyond the midway mark between maximum and minimum mark, take out fluids to bring it to the midway mark. Then remove the tire and wheel assembly and compress the brake caliper pistons using a large c-clamp placed over the top of the caliper housing against the back of the outboard pad, and then tighten it until the pistons are fully retracted. Then remove the c-clamp and the brake caliper bolts and slide out the caliper from the bracket and suspend it with heavy mechanic's wire without breaking off the hydraulic brake hose. Go on to uninstall the brake pads, anti-rattle clips, and the bolts of the Brake Caliper Bracket, and then the bracket itself. Clean any contaminants in the inside ends of the bracket and make sure that the mounting surface and threads are clean. For installation, install the new Brake Caliper Bracket, while doing so, make sure to wipe out all the traces of the original adhesive patch, then clean the bolt threads with denatured alcohol to add threadlocker gm p/n 12345493 (Canadian P/N 10953488) to the threads. Put on the Brake Caliper Bracket bolts and fasten them to 200 nm (148 ft. Lbs.), and fit the anti-rattle clips and brake pads. Reinstall the caliper on the bracket and tighten using the brake caliper bolts to the value of 42 nm (31 ft. Lbs.) and then reinstall the tire and wheel assembly. In the off position release the pedal down slowly to about 2/3, then allow some pedal back up before repeated cycles until we have a firm pedal to properly seat the caliper pistons and pads. Lastly, top up the master cylinder reservoir with clean brake fluid if needed.
    Posted by ChevyPartsGiant Specialist
    Q:
    How to replace the front brake caliper bracket on GMC Yukon XL 2500? Posted by Customer
    A:
    Keep the brake caliper steady using heavy mechanic wire when you remove its mounting bracket while keeping the hydraulic brake hose attached. This prevents brake fluid damage to the hose. Detach the brake caliper from its holder without disconnecting the hose before removing both brake pads and anti-rattle clips from the caliper bracket. Take out the mounting bolts for the Brake Caliper Bracket and the unit itself before wiping away debris from both the inner bracket and its mounting surface. Repark the Brake Caliper Bracket in place then clean every bolt thread with denatured alcohol before applying threadlocker gm part 12345493 (Canadian part 10953488) on each thread. Fit the two caliper bracket bolts into place then tighten them to 175 nm (121 ft. Lbs.) when using 15 series or apply 300 nm (221 ft. Lbs.) for the 25 series. Replace the Brake Pad anti-rattle clips then push the pads onto the rotor before installing the brake caliper. Use a manual pump while the engine is off to bring the brake pedal to 2/3 of its range before easing off. Repeat this action to achieve a solid brake pedal response which correctly positions brake caliper pistons and pads.
    Posted by ChevyPartsGiant Specialist
    Q:
    How to replace the front brake caliper bracket on the 1500 Series on GMC Sierra 1500 Classic? Posted by Customer
    A:
    You need to test brake fluid level first. Tap the brake fluid reservoir until the top is at the mark between high and low level marks. Support and lift the vehicle before taking off the tire and wheel unit. Press the brake caliper pistons to full retraction by clamping the caliper housing at both sides with 2 large c-clamps. Use hand tools to remove the caliper guide pin bolts when you hold the guide pin in place with an open end wrench without letting it touch the brake caliper. Take out the brake caliper from its bracket without disconnecting the hydraulic hose before removing all brake pads, anti-rattle clips, and then the bracket bolts and bracket. Install the new caliper bracket across its mounting surface and inside ends after cleaning them both. Clean the brake caliper surface with crushed alcohol before applying threadlocker gm p/n 12345493 (Canadian P/N 10953488) to new bracket bolts threads. Distribute torque on the bolts to 180 nm (133 ft. Lbs.) before inserting the Brake Pad anti-rattle clips and brakes pads that need to touch the rotor. Little tool assistance helps you fasten the guide pin bolts of the caliper onto the bracket until they reach a torque of 100 nm (74 ft. Lbs.). Press the brake caliper guide pin seals into position and check that guide pins slide without resistance. Put the wheel back in place before lowering the vehicle and apply brake pressure until the pedal travels 2/3 of its distance without starting the engine. Do the hydraulic test until you get a strong pedal feel and add fresh brake fluid when the level needs adjustment.
    Posted by ChevyPartsGiant Specialist
    Q:
    What should you do after compressing the brake caliper pistons for the 2007 Chevrolet Silverado 3500 Classic? Posted by Customer
    A:
    Loosen the rear brake caliper mounting bolts without removing them.
    Posted by ChevyPartsGiant Specialist
    See expert answers on similar Brake Caliper Bracket
    Q:
    What components should be removed after supporting the caliper for the 2006 Chevrolet Silverado 1500? Posted by Customer
    A:
    Remove the brake pads and anti-rattle clips, followed by the brake caliper bracket bolts and the bracket itself.
    Posted by ChevyPartsGiant Specialist
    See expert answers on similar Brake Caliper Bracket
    Q:
    What is the torque specification for the brake caliper bracket bolts for the 2006 Chevrolet Silverado 3500? Posted by Customer
    A:
    Tighten them to 300 Nm (221 ft. lbs.).
    Posted by ChevyPartsGiant Specialist
    See expert answers on similar Brake Caliper Bracket
    Q:
    What is the first step to replace the rear brake caliper bracket for the 2006 GMC Sierra 1500? Posted by Customer
    A:
    Inspect the fluid level in the brake master cylinder reservoir.
    Posted by ChevyPartsGiant Specialist
    See expert answers on similar Brake Caliper Bracket
    Q:
    What components should be removed after supporting the caliper for the 2005 GMC Sierra 1500? Posted by Customer
    A:
    Remove the brake pads and anti-rattle clips, followed by the brake caliper bracket bolts to take off the bracket itself.
    Posted by ChevyPartsGiant Specialist
    See expert answers on similar Brake Caliper Bracket
    If you have any questions about this product, please don't hesitate to ask us. We will be happy to help you!

OEM GM 25997053, Excellent Performance and Perfect Fitment

To ensure reliability, purchase GM part # 25997053 Caliper Bracket, Driver Side. It is sometimes referred to as GM Brake Caliper Bracket. Choosing OEM parts is the optimal decision for guaranteeing superior quality and perfect performance. These components undergo stringent quality checks and are carefully constructed to comply with GM's factory specifications, ensuring a smooth installation process.

ChevyPartsGiant.com is a leading supplier of genuine GM parts such as GM 25997053 Caliper Bracket, Driver Side. Our website boasts an extensive inventory of OEM GM parts, available at highly competitive prices in the market. Should you require any new genuine GM parts, rest assured we will deliver them swiftly and efficiently to your doorstep. Furthermore, all our parts come with the assurance of a manufacturer's warranty. For detailed Chevy parts information, click here.
Choose ChevyPartsGiant for discounted prices, exceptional service and fast delivery