Make sure this part fits

GM 15321212
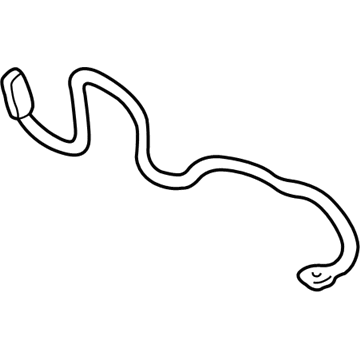
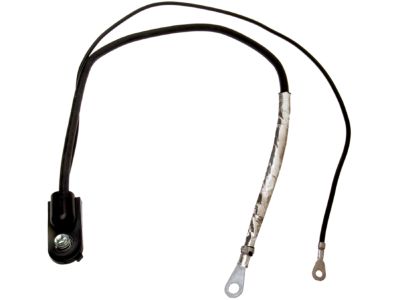
Negative Cable

1999-2007 GM

Customer Questions & Expert Answers (34)
GM 15321212 Negative Cable
  • Part Description
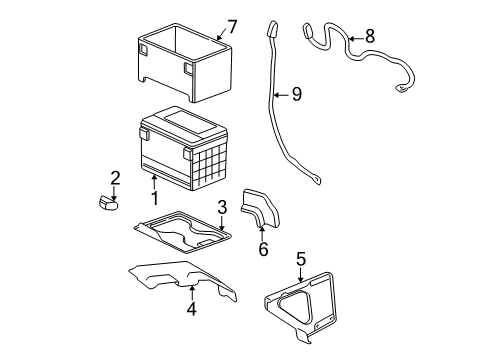
    Cable, Battery Negative; Battery Cables; Ground Strap
  • Manufacturer
    General Motors
Make sure this part fits
$245.71 MSRP: $440.74
You Save: $195.03 (45%)
Ships in 1-2 Business Days
1
ADD TO CART
  • Related Parts
  • Product Specifications
  • Vehicle Fitment
  • Customer Questions & Expert Answers
  • Product Specifications

    BrandGenuine GM
    Manufacturer Part Number15321212
    Part DescriptionCable, Battery Negative; Battery Cables; Ground Strap
    Other NamesCable, Battery Negative And Engine Ground
    Item Dimensions12.4 x 6.2 x 2.1 inches
    Item Weight1.70 Pounds
    ConditionNew
    Fitment TypeDirect Replacement
    ManufacturerGeneral Motors
    SKU15321212
    WarrantyThis genuine GM part is guaranteed by GM's factory warranty.
    Shipping & ReturnShipping Policy Return Policy
    Warning: California's Proposition 65
  • Vehicle Fitment

    Year Make Model Trim Engine
    2002-2006 Cadillac EscaladeBase8 Cyl 5.3 L GAS, 8 Cyl 6.0 L GAS
    2003-2006 Cadillac Escalade ESVBase8 Cyl 6.0 L GAS
    2002-2006 Cadillac Escalade EXTBase8 Cyl 6.0 L GAS
    2002-2006 Chevrolet Avalanche 1500Base, LS, LT, North Face, On Road Edition, WBH, Z66, Z718 Cyl 5.3 L FLEX, 8 Cyl 5.3 L GAS
    2002-2006 Chevrolet Avalanche 2500Base, LS, LT8 Cyl 8.1 L GAS
    1999-2006 Chevrolet Silverado 1500Base, Hybrid, LS, LT, SS, WT, Z71 Off-Road8 Cyl 4.8 L GAS, 8 Cyl 5.3 L FLEX, 8 Cyl 5.3 L FULL HYBRID EV-GAS (FHEV), 8 Cyl 5.3 L GAS, 8 Cyl 6.0 L GAS
    2007 Chevrolet Silverado 1500 ClassicHybrid, LS, LT, SS, WT8 Cyl 4.8 L GAS, 8 Cyl 5.3 L FLEX, 8 Cyl 5.3 L FULL HYBRID EV-GAS (FHEV), 8 Cyl 5.3 L GAS, 8 Cyl 6.0 L GAS
    2005-2006, 2001-2003 Chevrolet Silverado 1500 HDBase, LS, LT8 Cyl 6.0 L GAS
    2007 Chevrolet Silverado 1500 HD ClassicLT8 Cyl 6.0 L GAS
    1999-2004 Chevrolet Silverado 2500Base, LS, LT, WT8 Cyl 5.3 L GAS, 8 Cyl 6.0 L BI-FUEL, 8 Cyl 6.0 L CNG, 8 Cyl 6.0 L GAS
    View More
  • Customer Questions & Expert Answers

    Q:
    Is this 15321212 designed for my car? Posted by ChevyPartsGiant Specialist
    A:
    Please Select Your Vehicle model to see if part number 15321212 is suitable before ordering.
    Posted by ChevyPartsGiant Specialist
    Q:
    How to replace the negative battery cable on Cadillac Escalade EXT? Posted by Customer
    A:
    The first step to replace the negative Battery Cable is disconnecting the battery's negative terminal. The left front wheel house panel needs to be removed if it gets in the way. Through Power Steering Pump the vehicle with 4.8l, 5.3l or 6.0l engine requires removing the Battery Cable bracket bolt and bracket and disconnecting the accessory power fuse block front wiring harness electrical connector from the negative cable connector. After disconnecting the negative cable clip from the positive clip you should raise the vehicle and securely position it before removing the engine wiring harness ground/negative cable bolt. The battery installation for vehicles with an 8.1l engine requires first completing the same initial steps before relocating the wiring harness ground and negative cables and eliminating the forward lamp wiring harness ground/negative cable bolt to take off the negative Battery Cable. Begin installation by installing the negative Battery Cable before you mount the negative cable ring terminal and forward lamp wiring harness ring terminal to the frame while placing the frame hole's anti-rotation tab into position. Fasten the forward lamp wiring harness ground/negative cable bolt using 9 n.m (80 lb in) torque. The engine wiring harness ground-negative cable installation requires positioning the cables followed by engine harness ground-negative cable bolt tightening to 25 n.m (18 lb ft) until vehicle lowering to complete with negative cable clip attachment near the positive cable clip with engine wiring harness ground positioned beneath the negative cable ground. When working on 4.8l, 5.3l or 6.0l engines connect negative cable ring terminals and engine wiring harness ring terminals to the engine block then apply the engine wiring harness ground/negative cable bolt at 25 n.m (18 lb ft) before lowering the vehicle to install the negative cable clip on the positive cable clip. The accessory power fuse block front wiring harness electrical connector needs to be connected to the negative cable connector before installing the Battery Cable bracket and bolt to the Power Steering Pump. Keep the tension at 25 n.m (18 lb ft). Reinstall the left front wheel house panel if needed before connecting the negative Battery Cable.
    Posted by ChevyPartsGiant Specialist
    Q:
    How to disconnect and reconnect the negative battery cable on Chevrolet Avalanche 1500? Posted by Customer
    A:
    Follow these steps when removing the battery negative cable: switch off all illumination and components before verifying that the ignition is deactivated. First loosen the negative cable bolt then disconnect the Battery Cable from the battery. During installation first clean corrosion from both terminal bolt flanges and Battery Cable ends then connect the cable to its respective battery. During the negative cable installation process kvinna the bolt to 17 n.m (13 lb ft).
    Posted by ChevyPartsGiant Specialist
    Q:
    How to replace the positive battery cable on Chevrolet Avalanche 2500? Posted by Customer
    A:
    The procedure for replacing the positive Battery Cable consists of first disconnecting the negative Battery Cable followed by unsnapping the positive Battery Cable cap and then disconnecting the positive cable while understanding the integral nature of the bolt to the Battery Cable. At the underhood bussed electrical center (UBEC) users should slowly rotate the positive cable bolt then remove the engine sight shield when necessary. The first step is to remove the positive Battery Cable from the junction block by unsnap the junction block cover while also pulling away the positive Battery Cable from the block. Vehicle owners can replace the negative cable clip with the positive cable clip on constructions with 4.8 l, 5.3 l, or 6.0 l engine types before supporting and lifting the vehicle. When the vehicle has an 8.1 l engine you should remove the negative cable clip from the positive cable clip after raising the vehicle a second time. After removing the Battery Cable channel bolt you should slide out its pin from the oil pan tab and extract the cable from the channel. The Power Steering Pump requires removal of the Battery Cable bracket bolt along with its bracket before continuing to the starter lead nut and then extracting the positive cable from the starter. The technician should disconnect the positive cable clip from the oil pan while also removing the positive Battery Cable from the system. Follow these steps to remove the positive cable from the starter for both the 8.1 l and the other engine models: begin by removing the starter lead nut from the 8.1 l engine then the positive cable from the starter, and finally take out the positive cable clip nut and cable from the engine harness clip. Gaining access to the 8.1 l engine engine harness clip involves attaching the positive Battery Cable then securing it to the harness clip. Begin by installing the 8 n.m (71 lb in) tightened positive cable clip nut before connecting the positive cable to the starter while installing and tightening the starter lead nut to 9 n.m (80 lb in). The installation of the positive Battery Cable requires installation to the oil pan clip followed by attachment to the oil pan and assembly of the positive cable clip to its location. After connecting the positive cable to the starter, tightly install the starter lead nut to 9 n.m (80 lb in). The bracket with bolt requires installation and tightening at 25 n.m (18 lb ft). The positive Battery Cable installation requires you to position the cable in the channel before inserting its pin into the oil pan tab followed by torquing the positive cable channel bolt to 12 n.m (106 lb in). During the procedure of combining negative and positive cable clips, lower the vehicle then follow the sequence of applying negative cable clips for 8.1 l engine units as well as for 4.8 l, 5.3 l, and 6.0 l engines. After inserting the positive cable into the junction block users should close the junction block cover. Reposition the engine sight shield when ready and secure the positive cable bolt on the ubec with 9 n.m (80 lb in), then attach the positive Battery Cable before securing the bolt to 17 n.m (13 lb ft). The last step involves both closing the positive Battery Cable cap while reattaching the negative Battery Cable.
    Posted by ChevyPartsGiant Specialist
    Q:
    How to replace the positive battery cable on 4.8L, 5.3L, 6.0L, and 8.1L engines on Chevrolet Silverado 3500 Classic? Posted by Customer
    A:
    Starting the replacement of the positive cable on 4.8l, 5.3l, 6.0l, and 8.1l engines involves disconnecting the negative cable and unsnapping the positive cable cap. Remove the positive Battery Cable while taking note that the bolt forms an integral part of the cable which cannot be taken off. The first step involves loosening the positive cable bolt at the underhood bussed electrical center (UBEC) while optional engine sight shield removal might be needed. Disconnect the positive Battery Cable from the junction block after removing its cover. When working on 4.8l, 5.3l or 6.0l engines, first detach the negative cable clip from the positive cable clip before raising and supporting the vehicle. To start the 8.1l engine process, users should first remove the negative cable clip from the positive cable clip before lifting the vehicle. The channel pin must be pulled out of the Oil Pan tab before unfastening the positive Battery Cable from the channel. For engines using either a 4.8l, 5.3l or 6.0l begin by removing both the Battery Cable bracket bolt and bracket from the power steering pump and then proceed to remove the starter lead nut before taking off the positive cable from the starter. First disconnect the positive cable clip installed on the Oil Pan along with the positive cable itself. The 8.1l engine installation requires first removing the starter lead nut along with the positive cable from the starter before removing the positive cable clip nut together with the cable from the engine harness clip. Begin with the 8.1l engine installation of the positive Battery Cable before attaching it to the engine harness clip. First install the positive cable clip nut before tightening it to 8 n.m (71 lb in) and connect both ends of the positive cable to the starter while tightening the starter lead nut to 9 n.m (80 lb in). The positive cable installation requires you to first connect it to the clip positioned on the Oil Pan before attaching it to the starter with 9 n.m (80 lb in) torque. The Battery Cable bracket and mounting bolt require a torque setting of 25 n.m (18 lb ft) but the positive Battery Cable must be fitted into the channel then the pan tab should accept channel pin insertion. Next install the positive Battery Cable channel bolt and lock it down to 12 n.m (106 lb in). Lower the vehicle and install the negative cable clip to the positive cable clip for 8.1l engines. The negative cable clip needs installation onto the positive cable clip when repairing 4.8l, 5.3l or 6.0l engines. The positive cable must be inserted into the junction block before attaching the junction block cover. The procedure includes reattaching the engine sight shield while torqueing the ubec positive cable bolt to 9 n.m (80 lb in). Then connect the positive Battery Cable with 17 n.m (13 lb ft) torque before finishing by securing the positive cable cap and reinstalling the negative Battery Cable.
    Posted by ChevyPartsGiant Specialist
    Q:
    How to replace the positive battery cable on Chevrolet Silverado 3500? Posted by Customer
    A:
    The first step of positive battery cable replacement demands disconnecting the negative cable while implementing proper battery safety procedures. Open the positive battery cable cap then loosen its cable and extract it from the termini. Perform this step cautiously by loosening the positive cable bolt located at the underhood bussed electrical center (UBEC). The bolt stays integrated with the battery cable. The positive battery cable can be accessed from the junction block after removing the engine sight shield while unsnapping the junction block cover. Owners of vehicles equipped with 4.8L, 5.3L or 6.0L engines should detach the negative cable clip from the positive cable clip followed by vehicle lifting and support. Drivers with 8.1L engines should detach the negative clip from the positive clip before lifting the automobile. The positive battery cable channel requires removal of its bolt to free the channel pin from the oil pan attachment point while extracting the cable from the channel. Before disconnecting the battery cable from a 4.8L, 5.3L or 6.0L engine you should remove the bracket bolt from the power steering pump and the lead nut from the starter along with the positive cable itself. Disconnect the positive cable clip from the oil pan before taking off the positive battery cable. Begin 8.1L starter procedures by untwisting the starter lead nut and removing the positive cable connection from the starter. Then remove the positive cable clip nut before detaching the positive cable from the engine harness clip. The order for positive battery cable installation on 8.1L engines begins with cable attachment to the engine harness clip followed by final connection step. After installing the positive cable clip nut to 8 N.m torque (71 lb-in), attach the positive cable to the starter which requires a starter lead nut torque of 9 N.m (80 lb-in). Continue with positive battery cable installation for 4.8L, 5.3L or 6.0L engines by connecting it to the oil pan clip before securing the positive cable clip to the pan. After connecting the positive wire to the starter you should tighten the starter lead nut to 9 N.m (80 lb in). Place the battery cable bolt, then lock it to 25 N.m (18 lb ft) torque before you attach the positive battery cable to its channel. Slide the channel pin into the oil pan tab. Finish with the positive battery cable channel bolt torque set at 12 N.m (106 lb in). Inferior 8.1L engines need negative cable clip installation to positive cable clip. The installation of the negative cable clip to the positive cable clip must happen during the process for both 4.8L and 5.3L and 6.0L engine models. After putting the positive cable into the junction block position the junction block cover into its place. First reinstall the engine sight shield then secure the positive cable bolt at the UBEC to 9 N.m (80 lb in), reattach the positive battery cable and secure it to 17 N.m (13 lb ft) while locking the positive battery cable cap before reconnecting the negative battery cable.
    Posted by ChevyPartsGiant Specialist
    Q:
    How to replace the auxiliary positive battery cable from the battery relay to the starter on Chevrolet Silverado 1500 Classic? Posted by Customer
    A:
    The first step to replace the positive cable between battery Relay and starter involves disconnecting the auxiliary battery negative cable along with its boot rearrangement. First separate the auxiliary positive Battery Cable by removing its nut before removing the cable from both the Relay rail and the penetrating clip on the tray. Support the vehicle from the air and remove the frame bolt securing the auxiliary cable clip before taking out the starter lead nut and auxiliary positive Battery Cable attached to the starter stud. To install the auxiliary positive Battery Cable start by connecting it to the starter stud then tighten the starter lead nut to 9 n.m (80 lb in). Install next the auxiliary cable clip bolt to the frame by tightening it to 10 n.m (89 lb in) and then lower the vehicle. Install the auxiliary positive Battery Cable clip to the battery tray followed by connecting it to the auxiliary Relay then tighten the nut to 8 n.m (71 lb in). Finish the process by replacing the boot while reconnecting the negative cable of the auxiliary battery.
    Posted by ChevyPartsGiant Specialist
    Q:
    How to remove and install the positive battery cable on Chevrolet Suburban 1500? Posted by Customer
    A:
    The process to remove the positive Battery Cable begins by taking off both the negative cable first followed by the positive cable from the battery. You need to disconnect the positive cable from the engine wiring harness junction block before taking out the Battery Cable junction block from its bracket position. The negative cable attachment needs removal from its retaining clip on the positive cable so you can remove the nut from the generator back. After this you must disconnect the positive Battery Cable from the generator itself. Lift and sustain the automobile while unscrewing the four bolts that bind the positive cable to the engine framework before disengaging it from the power steering accessory bracket (4WD 15 series). Ultimately disconnect the positive Battery Cable by removing the nut from the Starter positive terminal and the positive cable from the Starter. After that, detach the Starter's retention clip before finalizing with the Starter cable removal. Begin the installation sequence by attaching the positive Battery Cable to the retention clip followed by the Starter where the nut should be tightened to 16 n.m (12 lb ft). Install and tighten four bolts on the positive cable until they reach 12 n.m (106 lb in) engine torque before connecting the cable to the power steering accessory bracket (4WD 15 series). Lower down the vehicle and secure the positive Battery Cable to the generator by tightening its nut to 18 n.m (13 lb ft). After connecting the negative cable to its retaining clip on the positive cable users must install the Battery Cable junction block onto the junction block bracket before securing the positive Battery Cable to the engine wiring harness junction block by tightening its bolt to 9 n.m (80 lb in). Complete the installation by attaching the positive Battery Cable to the battery then tightening the bolt to 17 n.m (13 lb ft) and finally connect the negative Battery Cable while tightening its bolt to 17 n.m (13 lb ft).
    Posted by ChevyPartsGiant Specialist
    Q:
    How to replace the negative battery cable on Chevrolet Silverado 2500? Posted by Customer
    A:
    To replace the battery negative cable disconnect first the negative Battery Cable. For vehicles that have a 4.8l, 53l or 6.0l engine remove the Battery Cable bracket bolt and bracket from the Power Steering Pump and disconnect the accessory power fuse block front wiring harness electrical connector from the negative cable connector. Remove negative cable clip from the positive cable place for these engine types and also remove engine wiring harness ground/negative cable bolt. Raise the vehicle and support it then from the 8.1l engine equipped vehicles remove the negative cable clip from the positive cable clip and remove again the engine wiring harness ground/negative cable bolt. Relocate the wiring harness ground and negative cables, remove the forward lamp wiring harness ground/negative cable bolt and lower the vehicle and remove the negative Battery Cable. For installation, begin by the installation of the negative Battery Cable, lifting the vehicle up again, and positioning the negative cable and forward lamp wiring harness ring terminal in to the frame, making sure that the anti-rotation on the forward lamp wiring harness terminals fits into the frame hole. Install the wiring harness bolt of the forward lamp ground / negative cable and tighten it to 9 n.m 80 lb in). The engine wiring harness ground has to be installed beneath negative cable ground. For 8.1l engine fitted vehicles, connect the wiring harness ground and negative cables positioning the anti-rotation tab as required, engage the engine wiring harness ground/negative cable bolt at 25 n.m (18 lb ft). Lower the vehicle and attach negative cable to positive cable with clip in place for 4.8l, 5.3l, or 6.0l engine vehicles position negative cable and engine wiring harness ring terminals to engine block, ensure the anti-rotation tab on negative cable is in the correct place before tightening the engine wiring harness ground/negative cable bolt to 25 n.m (18 lb ft). Lower the vehicle again, the negative cable clip to the positive cable clip attached, accessory power fuse block front wiring harness electrical connector to the negative cable connector if equipped, and for the 4.8l 5.3l or 6.0l engine equipped vehicles bolt the Battery Cable bracket on to the Power Steering Pump, tighten it to 25 n.m (18 lb ft), before attaching the negative Battery Cable.
    Posted by ChevyPartsGiant Specialist
    Q:
    How to replace the negative battery cable on Chevrolet Suburban 2500? Posted by Customer
    A:
    To replace the negative cable battery follow this step firstly it is necessary disconnect the negative Battery Cable and as for the vehicles equipped with a 4.8l, 5.3l, or 6 0l engine remove the Battery Cable bracket bolt and bracket from the Power Steering Pump. In case it is applicable, disconnect the accessory power fuse block front wiring harness electrical connector from the negative cable connector and remove the negative cable clip from the positive cable clip for the specified engine types. Place the vehicle on safety stands and then disconnect the engine wiring harness. For an 8.1l, also take off the negative cable clip from the positive cable clip. Remove the ground/ negative cable bolt on the engine wiring harness and relocate to the ground and negative cable of the wiring harness and then also remove the forward lamp wiring harness ground/ negative cable bolt and the negative Battery Cable. For installation, begin installing the negative Battery Cable, along with the positioning of the negative cable and forward lamp wiring harness ring terminals to the frame, while making sure the anti- rotation tab on the forward lamp wiring harness is inserted into the frame hole. The forward lamp wiring harness ground/negative cable bolt to 9 n. M (80 lb in), the engine wiring harness ground is to be installed under the forward negative cable ground. For an 8.1l, locate the wiring harness ground/negative cables in the proper location and then install and tighten the engine wiring harness ground/negative cable bolt, 25 n.m.(18 lb ft). Best position lowers its vehicle, place the negative cable clip to the positive cable clip and place the negative cable and engine wiring harness ring terminals for the engine types specified to the engine block, in which the normal place is to position the anti-rotation tab in good position. Mount and secure the engine wiring harness ground/negative cable bolt to 25 n.m (18 lb ft), bring the vehicle to a lower position and attach the negative cable clip to positive cable clip. If necessary, attach the accessory power fuse block front wiring harness electrical connector to the negative cable connector and install the Battery Cable bracket and bolt onto the Power Steering Pump with the Battery Cable bracket bolt tightened in ase to 25 n.m (18 lbft) before connecting the negative Battery Cable at last.
    Posted by ChevyPartsGiant Specialist
    Q:
    How to replace the auxiliary negative battery cable on GMC Sierra 3500? Posted by Customer
    A:
    Start by disconnecting the auxiliary battery negative cable followed by removing the auxiliary battery cable clips from their mounting on the dash front studs. Once you remove the engine sight shield and engine wiring harness/auxiliary negative battery cable bolt it will be possible to install the auxiliary negative battery cable. Begin auxiliary negative battery cable installation by placing the engine wiring harness ground terminal above and inside the auxiliary negative battery cable ground crimp. Follow the installation by tightening the engine wiring harness/auxiliary negative battery cable bolt to 16 N.m (12 lb ft). The next step is to reconnect the auxiliary battery negative cable before installing the engine sight shield and auxiliary battery cable clips on the dash front studs.
    Posted by ChevyPartsGiant Specialist
    Q:
    How to replace the positive battery cable on a 4.3L engine on GMC Sierra 1500 Classic? Posted by Customer
    A:
    The replacement of the positive Battery Cable on a 4.3l engine starts by removing the negative cable then unsnapping the positive Battery Cable cap. Unscrew the positive bolt on the Battery Cable before eliminating the cable from the battery terminal while keeping in mind that the bolt forms part of the cable structure. Begin by using a socket to loosen the positive cable bolt present at the underhood bussed electrical center (UBEC). Unsnap the junction block cover and then disconnect the positive Battery Cable from its junction block connection. You need to remove the Battery Cable bracket bolt along with the bracket from the Power Steering Pump followed by raising and supporting the vehicle. First disconnect the battery negative cable from its channel then install bolts onto the cable channel before removing the positive Battery Cable from the channel. Disconnect both components from the Starter including the Starter lead nut and positive cable as well as the positive cable from the clip on the Oil Pan. The first step of installation involves placing the positive Battery Cable before connecting it to both the Starter and the Oil Pan clip. Fasten the Starter lead nut along its thread to a torque of 9 n.m (80 lb in). Secure the positive cable by installing it into the channel while tightening Battery Cable channel bolts to 12 n.m (106 lb in). Reattach the negative cable to the battery channel then lower the vehicle into position before installing the Battery Cable bracket along with its bolt to the Power Steering Pump while torquing the bolt to 25 n.m (18 lb ft). Connect the positive cable to the junction block then put on the junction block cover right away. Tighten the positive cable bolt at the ubec to 9 n.m before securing the positive Battery Cable bolt at 17 n.m. Both operations require the positive Battery Cable cap closure followed by negative Battery Cable connection.
    Posted by ChevyPartsGiant Specialist
    Q:
    How to replace the negative battery cable on GMC Sierra 1500? Posted by Customer
    A:
    The negative Battery Cable change starts by removing the negative Battery Cable first followed by removal of the left front wheel house panel if required. Vehicles with 4.8l, 5.3l, or 6.0l engines require you to remove the Battery Cable bracket bolt and bracket from the Power Steering Pump and disconnect the accessory power fuse block front wiring harness electrical connector from the negative cable connector. Remove the negative cable clip from the positive cable clip as well as the engine wiring harness ground/negative cable bolt. Lift the vehicle before you find a stable supporting position. Vehicle owners must remove the negative cable clip from the positive cable clip before using a crane to lift and support their vehicle for removal of the engine wiring harness ground/negative cable bolt. Vehicles with an 8.1l engine must follow this procedure and then replace the wiring harness ground/negative cables. First remove the forward lamp wiring harness ground/negative cable bolt by lowering the vehicle before removing the negative Battery Cable. Begin by installing the negative Battery Cable and raising the vehicle while positioning the negative cable and forward lamp wiring harness ring terminals to the frame. Also insert the anti-rotation tab on the forward lamp wiring harness into the frame hole. Secure the forward lamp wiring harness ground/negative cable bolt through a torque of 9 n.m (80 lb in). Install the engine wiring harness ground/negative cable bolt with a torque of 25 n.m (18 lb ft) while making sure the negative cable anti-rotation tab is properly positioned. Lower the vehicle after positioning the negative cable clip against the positive cable clip and position the engine wiring harness ground below the negative cable ground. If your vehicle uses a 4.8l, 5.3l or 6.0l engine you must attach the negative cable and engine wiring harness ring terminals to the engine block while positioning the anti-rotation tab correctly before installing and tightening the engine wiring harness ground/negative cable bolt to 25 n.m (18 lb ft). Finish installation by fitting the negative cable clip to the positive cable clip, attaching the accessory power fuse block front wiring harness electrical connector if present, installing the Battery Cable bracket and bolt to the Power Steering Pump if present, tightening the bolt to 25 n.m (18 lb ft), and before connecting the negative Battery Cable install the left front wheel house panel if needed.
    Posted by ChevyPartsGiant Specialist
    Q:
    How to replace the positive battery cable on 4.8L, 5.3L, 6.0L, and 6.2L engines on GMC Sierra 3500 Classic? Posted by Customer
    A:
    The first step for battery cable replacement in vehicles with 4.8L, 5.3L, 6.0L and 6.2L engines includes disconnecting the negative cable and removing the hood junction block cover. The junction block retainers should be shifted from the locked position to the open position while removing the junction block. Before installation disconnect the positive battery cable connector at the underhood bussed electrical center (UBEC) then remove the mega fuse cover. First disconnect the mega fuse nut along with the generator battery jumper cable terminal from the mega fuse stud. Begin by removing the plenum front panel battery cable channel together with its clips from the panel studs and then continue by disconnecting the positive cable terminal from the mega fuse stud. The positive battery cable must be taken off of the vehicle at the end. Begin the installation process by inserting the positive battery cable inside the vehicle then connect its terminal to the mega fuse stud. Reposition the positive cable channel and its attachment clips to the front panel of the plenum before installing the generator battery jumper cable terminal at the mega fuse stud and the generator battery jumper cable at the mega fuse nut with 9 N.m (80 lb in) torque. Replace the positive battery cable connector that leads to the UBEC after inserting the mega fuse cover. First position the junction block retainers open then attach the junction block to the 4 bracket pivots then lock the retainers by pushing them down. The negative battery cable needs to be the last step by reconnecting it after reinstalling the under hood junction block cover.
    Posted by ChevyPartsGiant Specialist
    Q:
    How to replace the negative battery cable on GMC Yukon XL 1500? Posted by Customer
    A:
    To replace the negative Battery Cable, the negative Battery Cable has to be removed first and then unbolt and remove the batter cable bracket from the Power Steering Pump. If available, disconnect the accessory power fuse block front wiring harness elecrical connector from the negative cable connector, remove the negative cable clip from the positive cable clip and the engine wire harness ground/negative cable bolt. Lift and place the vehicle appropriately, then disconnect the engine wiring harness ground/negative cables bolt and place the wiring harness ground and negative cables. Next, loosen the ground/negative cable bolt of the forward lamp wiring harness and lower the vehicle before reconnecting the negative Battery Cable. Do this, lift the vehicle back up and connect the negative cable and forward lamp wiring harness ring terminals to the frame, insert the ring terminal of the forward lamp wiring harness into the hole on the frame. Bolt the forward lamp wiring harness ground/negative cable bolt and tighten it to 9 n.m (80 lb in), making sure that the engine wiring harness ground has been installed under the negative cable ground. Install and tighten the engine wiring harness ground/negative cable bolt to 25 n.m (18 lb ft), and then lower the vehicle. Mount the negative cable clip to the positive cable clip and confirm the position of the negative cable and engine wiring harness ring terminals at the engine block, keeping the anti-rotation tab of negative cable in proper position. Replace the engine wiring harness ground/negative cable bolt and tighten to 25 n.m (18 lb ft), and then lower the vehicle again. Mount the negative cable clip to positive cable clip and, if available, connect the accessory power fuse block front wiring harness electrical connector to negative cable connector. Finally, screw in the Battery Cable bracket and bolt the Power Steering Pump to 25 n.m(18lb ft) and connect the negative Battery Cable.
    Posted by ChevyPartsGiant Specialist
    Q:
    What steps are involved for 4.8L, 5.3L, or 6.0L engines for the 2003 Cadillac Escalade? Posted by Customer
    A:
    Remove the battery cable bracket bolt and bracket from the power steering pump, then remove the positive cable nut and the positive cable from the starter. Remove the positive cable clip from the oil pan and then the positive battery cable.
    Posted by ChevyPartsGiant Specialist
    See expert answers on similar Battery Cable
    Q:
    What are the final steps to complete the installation for the 2003 Chevrolet Avalanche 1500? Posted by Customer
    A:
    Lower the vehicle again, install the negative cable clip to the positive cable clip, connect the accessory power fuse block front wiring harness electrical connector to the negative cable connector if equipped, install the battery cable bracket and bolt to the power steering pump, tightening the bolt to 25 N.m (18 lb ft), and finally connect the negative battery cable.
    Posted by ChevyPartsGiant Specialist
    See expert answers on similar Battery Cable
    Q:
    What is the first step for installation for the 2006 Chevrolet Silverado 1500? Posted by Customer
    A:
    Begin by installing the positive battery cable and securing it to the clip on the oil pan, followed by connecting the positive cable to the starter.
    Posted by ChevyPartsGiant Specialist
    See expert answers on similar Battery Cable
    Q:
    What is the next step after tightening the nut for the 2007 Chevrolet Silverado 1500 Classic? Posted by Customer
    A:
    Clip the mega fuse back to the auxiliary battery tray.
    Posted by ChevyPartsGiant Specialist
    See expert answers on similar Battery Cable
    Q:
    How do you remove the negative battery cable for the 2005 Chevrolet Silverado 1500? Posted by Customer
    A:
    Remove the negative battery cable from the battery channel and the battery cable channel bolts, followed by the positive battery cable from the channel.
    Posted by ChevyPartsGiant Specialist
    See expert answers on similar Battery Cable
    Q:
    What is the torque specification for the engine wiring harness/auxiliary negative battery cable bolt for the 2001 Chevrolet Suburban 1500? Posted by Customer
    A:
    Install the engine wiring harness/auxiliary negative battery cable bolt and tighten it to 16 N.m (12 lb ft).
    Posted by ChevyPartsGiant Specialist
    See expert answers on similar Battery Cable
    Q:
    What is the first step to replace the negative battery cable on 4.8L, 5.3L, 6.0L, and 8.1L engines for the 2007 Chevrolet Silverado 3500 Classic? Posted by Customer
    A:
    First, disconnect the negative battery cable and, if necessary, remove the left front wheel house panel.
    Posted by ChevyPartsGiant Specialist
    See expert answers on similar Battery Cable
    Q:
    What is the next step after installing the positive cable for 8.1L engines for the 2004 Chevrolet Silverado 2500? Posted by Customer
    A:
    Connect the positive cable to the starter and install the starter lead nut, tightening it to 9 N.m (80 lb in).
    Posted by ChevyPartsGiant Specialist
    See expert answers on similar Battery Cable
    Q:
    What are the final steps after tightening the bolt for the 2006 Chevrolet Silverado 3500? Posted by Customer
    A:
    Reinstall the engine sight shield and the auxiliary battery cable clips to the studs at the front of the dash, and finally, connect the auxiliary battery negative cable.
    Posted by ChevyPartsGiant Specialist
    See expert answers on similar Battery Cable
    Q:
    What is the first step to replace the auxiliary battery positive cable for the 2004 Chevrolet Silverado 3500? Posted by Customer
    A:
    Disconnect the auxiliary battery negative cable and reposition the boot.
    Posted by ChevyPartsGiant Specialist
    See expert answers on similar Battery Cable
    Q:
    What are the torque specifications for tightening the starter lead nut and battery cable channel bolts for the 2004 Chevrolet Silverado 1500? Posted by Customer
    A:
    Tighten the starter lead nut to 9 N.m (80 lb in) and the battery cable channel bolts to 12 N.m (106 lb in).
    Posted by ChevyPartsGiant Specialist
    See expert answers on similar Battery Cable
    Q:
    What should be ensured during installation for the 2002 Chevrolet Tahoe? Posted by Customer
    A:
    Ensure the auxiliary negative battery cable terminal is positioned behind the engine wiring harness ground terminal.
    Posted by ChevyPartsGiant Specialist
    See expert answers on similar Battery Cable
    Q:
    How do you route the negative battery cable terminal for the 2007 GMC Sierra 3500 Classic? Posted by Customer
    A:
    Route the negative battery cable terminal through the opening between the radiator support and frame, ensuring it is positioned behind the forward lamp harness.
    Posted by ChevyPartsGiant Specialist
    See expert answers on similar Battery Cable
    Q:
    What is the torque specification for tightening the negative battery cable bolt for the 2004 GMC Sierra 1500? Posted by Customer
    A:
    Tighten the negative battery cable bolt to 17 N.m (13 lb ft).
    Posted by ChevyPartsGiant Specialist
    See expert answers on similar Battery Cable
    Q:
    How should the positive cable be secured to the starter for the 2001 GMC Yukon XL 1500? Posted by Customer
    A:
    Install the positive cable to the starter and secure it with the starter lead nut, tightening it to 9 N.m (80 lb in).
    Posted by ChevyPartsGiant Specialist
    See expert answers on similar Battery Cable
    Q:
    How do you remove the auxiliary positive battery cable from the starter for the 2005 GMC Sierra 1500? Posted by Customer
    A:
    Remove the auxiliary positive battery cable from the starter stud.
    Posted by ChevyPartsGiant Specialist
    See expert answers on similar Battery Cable
    Q:
    What is the first step to replace the auxiliary battery positive cable for the 2006 GMC Sierra 1500? Posted by Customer
    A:
    Disconnect the auxiliary battery negative cable and reposition the boot.
    Posted by ChevyPartsGiant Specialist
    See expert answers on similar Battery Cable
    Q:
    What should be done before disconnecting the battery for the 2006 GMC Sierra 3500? Posted by Customer
    A:
    Turn off all lamps and accessories and ensure the ignition is off.
    Posted by ChevyPartsGiant Specialist
    See expert answers on similar Battery Cable
    Q:
    What should be removed after the engine wiring harness ground/negative battery cable for the 2007 GMC Sierra 1500 Classic? Posted by Customer
    A:
    Remove the forward lamp wiring harness ground/negative cable bolt and the forward lamp wiring harness from the frame, followed by the negative battery cable from the cable channel.
    Posted by ChevyPartsGiant Specialist
    See expert answers on similar Battery Cable
    If you have any questions about this product, please don't hesitate to ask us. We will be happy to help you!

OEM GM 15321212, Excellent Performance and Perfect Fitment

To ensure reliability, purchase GM part # 15321212 Negative Cable. It is sometimes referred to as GM Battery Cable. Choosing OEM parts is the optimal decision for guaranteeing superior quality and perfect performance. These components undergo stringent quality checks and are carefully constructed to comply with GM's factory specifications, ensuring a smooth installation process.

ChevyPartsGiant.com is a leading supplier of genuine GM parts such as GM 15321212 Negative Cable. Our website boasts an extensive inventory of OEM GM parts, available at highly competitive prices in the market. Should you require any new genuine GM parts, rest assured we will deliver them swiftly and efficiently to your doorstep. Furthermore, all our parts come with the assurance of a manufacturer's warranty. For detailed Chevy parts information, click here.
Choose ChevyPartsGiant for discounted prices, exceptional service and fast delivery