ChevyParts
My Garage
My Account
Cart
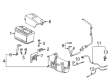
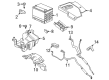
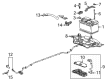
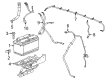
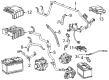
OEM Chevrolet Battery Cable
Car Battery Cable- Select Vehicle by Model
- Select Vehicle by VIN
Select Vehicle by Model
orMake
Model
Year
Select Vehicle by VIN
For the most accurate results, select vehicle by your VIN (Vehicle Identification Number).
745 Battery Cables found


Chevrolet Negative Cable Part Number: 22893833
$30.21 MSRP: $56.74You Save: $26.53 (47%)Ships in 1-2 Business DaysProduct Specifications- Other Name: Cable Assembly-Battery Negative Cable Extension; Battery Cables; Ground Strap; Cable, Battery Ground(Negative)


Chevrolet Positive Cable Part Number: 25850295
$130.07 MSRP: $284.00You Save: $153.93 (55%)Ships in 1-3 Business DaysProduct Specifications- Other Name: Cable, Battery (Positive); Battery Cables; Cable, Battery(Positive)

Chevrolet Battery Cable Part Number: 84660329
$36.39 MSRP: $64.98You Save: $28.59 (44%)Ships in 1-3 Business DaysProduct Specifications- Other Name: Cable Assembly-Starter Solenoid; Battery Cables; Cable, Battery(Negative)

Chevrolet Positive Cable Part Number: 23261761
$54.60 MSRP: $98.82You Save: $44.22 (45%)Ships in 1-2 Business DaysProduct Specifications- Other Name: Cable Assembly-Battery Positive; Battery Cables; Cable, Battery(Positive)

Chevrolet Negative Cable Part Number: 84318449
$51.98 MSRP: $97.62You Save: $45.64 (47%)Ships in 1-3 Business DaysProduct Specifications- Other Name: Cable Assembly-Battery Negative; Battery Cables; Ground Strap; Cable, Battery Negative And Engine Ground

Chevrolet Battery Cable Part Number: 85552166
$75.16 MSRP: $134.22You Save: $59.06 (44%)Ships in 1-3 Business DaysProduct Specifications- Other Name: Cable Assembly-Starter Solenoid; Cable; Cable, Battery(Positive)
- Replaced by: 87821664

Chevrolet Positive Cable Part Number: 84224168
$96.71 MSRP: $175.04You Save: $78.33 (45%)Ships in 1-2 Business DaysProduct Specifications- Other Name: Cable Assembly-Battery Positive; Battery Cables; Cable, Battery(Positive)


Chevrolet Positive Cable Part Number: 84806564
$115.17 MSRP: $206.58You Save: $91.41 (45%)Ships in 1-3 Business DaysProduct Specifications- Other Name: Cable Assembly-Battery Positive; Cable, Battery(Positive)

Chevrolet Positive Cable Part Number: 84989536
$113.47 MSRP: $203.54You Save: $90.07 (45%)Ships in 1-3 Business DaysProduct Specifications- Other Name: Cable Assembly-Battery Positive; Battery Cables

Chevrolet Negative Cable Part Number: 85525336
$97.74 MSRP: $174.54You Save: $76.80 (44%)Ships in 1-3 Business DaysProduct Specifications- Other Name: Cable Assembly-Battery Negative; Cable, Battery Ground(Negative)
Chevrolet Negative Cable Part Number: 84620571
$99.79 MSRP: $180.63You Save: $80.84 (45%)Ships in 1-2 Business DaysProduct Specifications- Other Name: Cable Assembly-Battery Negative; Battery Cables; Ground Strap; Cable, Battery Ground(Negative)
- Replaces: 84515421, 84806565

Chevrolet Battery Cable Part Number: 84180649
$49.37 MSRP: $92.14You Save: $42.77 (47%)Product Specifications- Other Name: Cable Assembly-Starter Solenoid; Battery Cables; Cable, Battery(Positive)
- Replaces: 84043737

Chevrolet Positive Cable Part Number: 87848225
$93.26 MSRP: $166.54You Save: $73.28 (44%)Ships in 1-2 Business DaysProduct Specifications- Other Name: Cable, Battery (Positive); Cable, Battery(Positive)
Chevrolet Negative Cable Part Number: 84806566
$91.28 MSRP: $163.00You Save: $71.72 (44%)Ships in 1-3 Business DaysProduct Specifications- Other Name: Cable Assembly-Battery Negative; Battery Cables; Ground Strap; Cable, Battery Ground(Negative)
- Replaces: 84614738

Chevrolet Battery Cable Part Number: 86788953
$93.44 MSRP: $166.86You Save: $73.42 (44%)Ships in 1-3 Business DaysProduct Specifications- Other Name: Cable Assembly-Generator Battery Jumper; Cable, Battery(Positive)
- Replaced by: 87821665
Chevrolet Positive Cable Part Number: 84997347
$87.28 MSRP: $155.86You Save: $68.58 (44%)Ships in 1-3 Business DaysProduct Specifications- Other Name: Cable Assembly-Battery Positive; Cable, Battery(Positive)

Chevrolet Negative Cable Part Number: 26679376
$91.45 MSRP: $171.74You Save: $80.29 (47%)Ships in 1-2 Business DaysProduct Specifications- Other Name: Cable Assembly-Battery Negative; Battery Cables; Ground Strap; Cable, Battery Ground(Negative)
- Replaces: 22793603

Chevrolet Battery Cable Part Number: 23386300
$47.16 MSRP: $85.36You Save: $38.20 (45%)Ships in 1-2 Business DaysProduct Specifications- Other Name: Cable Assembly-Auxiliary Generator Battery Jumper; Battery Cables; Cable, Generator
Chevrolet Positive Cable Part Number: 84911210
$97.35 MSRP: $173.84You Save: $76.49 (44%)Ships in 1-3 Business DaysProduct Specifications- Other Name: Cable Assembly-Battery Positive; Battery Cables; Cable, Battery(Positive)

Chevrolet Battery Cable Part Number: 85595355
$71.69 MSRP: $128.02You Save: $56.33 (44%)Ships in 1-3 Business DaysProduct Specifications- Other Name: Cable Assembly-Starter Solenoid; Positive Cable; Cable, Battery(Positive)
- Replaces: 84655052, 84598881
| Page 1 of 38 |Next >
1-20 of 745 Results
Chevrolet Battery Cable
Want to cut long-term maintenance and repair costs? Choose OEM Battery Cable. Those parts deliver top durability you can trust. On our site, you'll find a huge catalog of genuine Chevrolet parts. Prices are unbeatable, so you can keep more in your pocket. Every OEM Chevrolet Battery Cable includes a manufacturer's warranty. You can also get an easy return policy that keeps buying risk free. Fast delivery, get your car on the road quickly. It's simple to search, compare, and order. Stop guessing about quality or fit. Order today and save with parts that last.
Chevrolet Battery Cable Parts Questions & Experts Answers
- Q: How to replace the negative battery cable on Chevrolet Colorado?A:Use replacement cables that match the original cable attributes such as type, diameter, and length when replacing the battery negative cable. Also maintain consistent cable route installation. Start by unfastening the battery negative cable. You should first remove the bolt which fastens the battery negative cable to the battery tray before opening the battery cable harness retainer at the battery tray. Remove the battery negative cable from its position in the battery cables harness conduit's upper part. Lift the vehicle while providing just enough clearance to remove the cable through its wheelhouse path before taking out the left wheelhouse lining. The battery negative cable needs its bolt removed while you separate the cable from the engine block. Also remove the battery cable harness retainer at its location on the engine wiring harness bracket. Pull out the battery negative cable through the battery cables harness conduit. The installation process starts by placing the battery negative cable into the battery cables harness conduit while closing the battery cable harness retainer at the engine wiring harness bracket. Fasten the battery negative cable bolt to the engine block while tightening it to 35 N.m (26 lb ft). To continue install the left wheelhouse liner followed by lowering the vehicle and inserting the battery negative cable into the upper portion of the battery cables harness conduit then close the battery cable harness retainer at the battery tray. To complete the installation thread the battery negative cable bolt through the battery tray before tightening it to a torque range of 9 N.m (80 lb in).
- Q: How to replace the positive battery cable on Chevrolet S10?A:Experts must begin Battery Cable replacement by disconnecting the negative cable but moving on to separate the positive cable from the battery. Begin the replacement by uninstalling two screws which connect the positive cable to the generator and underhood fuse block respectively. Lift the vehicle while supporting it and remove the nut that holds the positive Battery Cable to the Starter and the positive Battery Cable bolt from the engine compartment. Set the new positive Battery Cable into its appropriate vehicle connections after taking off the battery positive cable. Secure the positive Battery Cable engine nut by twisting it to 6 newton meters (80 pound inch). Attach the positive Battery Cable Starter nut while torquing it to meet 9 n.m (80 lb in). The procedure involves lowering the vehicle then installing the retaining nut onto the generator before tightening it to 17 n.m (13 lb ft). Tighten the underhood fuse block nut which retains the positive Battery Cable to 10 n.m (89 lb in). The positive Battery Cable is connected to the battery followed by tightening the positive terminal bolt to 14 n.m (11 lb ft) while completing the process with the negative Battery Cable connection.
- Q: How to Replace a Battery Cable on Chevrolet Tahoe?A:You should start by disconnecting the negative Battery Cable before replacing it. First remove the outlet duct from the air cleaner before disconnecting the electrical connector which controls the battery current from the sensor. For vehicles with a battery current sensor installed you must first remove the clip that secures the sensor to the battery tray. The negative Battery Cable stud must be removed first from the front of the right cylinder head before taking out the negative Battery Cable terminal that connects to the cylinder head. Turn your wheels in a controlled manner while sustaining the vehicle elevation then extract the ground bolt which anchors the forward lamp wiring harness and separate the harness terminal which connects to the frame. Cut the negative Battery Cable terminal through the radiator support and frame opening. Then remove the negative Battery Cable clip from the chassis harness. Lower the car then take out the negative Battery Cable clip from its position on the right wheelhouse liner. To begin installations or if the negative Battery Cable needs replacement the user must first disconnect the vehicle negative Battery Cable and if performing a battery current sensor replacement this step must be completed as well. Installation requires installation of the battery current sensor only when the negative Battery Cable was replaced. Place the engine harness terminal behind the vehicle's negative battery terminal before installing the negative Battery Cable. Position the negative Battery Cable terminal at the cylinder head location while installing its stud to the front of the right cylinder head with torque to 25 nm (18 lb ft). Before lifting the vehicle secure the negative Battery Cable clip to the right wheelhouse liner and proceed with installation of the clip to the chassis harness. The negative Battery Cable terminal should pass behind the forward lamp harness as you guide it through the radiator support and frame opening. Bolt the forward lamp wiring harness terminal onto the frame while ensuring the anti-rotation tab enters the frame hole. Tighten the forward lamp wiring harness ground bolt to 25 nm (18 lb ft). Set the vehicle to its base position while you attach the battery current sensor clip to the battery tray if equipped and join the engine harness electrical connector to the battery current sensor. The air cleaner outlet duct goes on next followed by connecting the negative Battery Cable.


Related Chevrolet Parts
 Chevrolet Alternator
 Chevrolet Starter
 Chevrolet Alternator Bracket
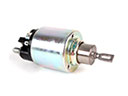 Chevrolet Starter Solenoid
 Chevrolet Batteries
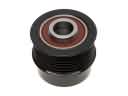 Chevrolet Alternator Pulley
 Chevrolet Alternator Bearing
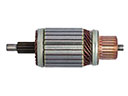 Chevrolet Armature
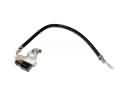 Chevrolet Battery Sensor
 Chevrolet Battery Vent Tube
 Chevrolet Starter Brush
 Chevrolet Starter Drive
Browse Chevrolet Battery Cable by Models
Nova S10 Colorado C10 Tahoe Cruze Malibu Camaro Equinox Impala SS SSR Avalanche Silverado 1500 Silverado 2500 HD Caprice Classic Cobalt Suburban Traverse Blazer HHR Sonic Tracker Volt El Camino K10 Spark Trax Trailblazer Astro Cavalier Corvette C20 Aveo Beretta Bolt EUV Bolt EV C1500 C2500 C30 C3500 Celebrity Chevette City Express Corsica Express 1500 Express 2500 Express 3500 G10 G20 G30 K1500 K20 K2500 K30 K3500 K5 Blazer Lumina Metro Monte Carlo P30 Prizm S10 Blazer Silverado 2500 Sprint Uplander Venture Lumina APV Silverado 3500 Suburban 1500 Trailblazer EXT Avalanche 1500 Avalanche 2500 Aveo5 C10 Suburban C1500 Suburban C20 Suburban C2500 Suburban Captiva Sport Citation II Cruze Limited Impala Limited K10 Suburban K1500 Suburban K20 Suburban K2500 Suburban Malibu Limited P20 R10 R10 Suburban R1500 Suburban R20 R20 Suburban R2500 R2500 Suburban R30 R3500 Silverado 1500 Classic Silverado 1500 HD Silverado 1500 HD Classic Silverado 1500 LD Silverado 1500 LTD Silverado 2500 HD Classic Silverado 3500 Classic Silverado 3500 HD Spark EV Spectrum Suburban 2500 Suburban 3500 HD V10 V10 Suburban V1500 Suburban V20 V20 Suburban V2500 Suburban V30 V3500