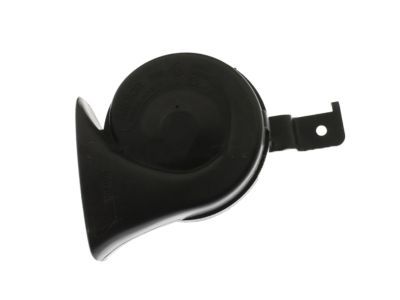
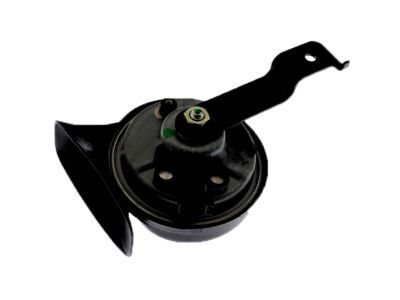
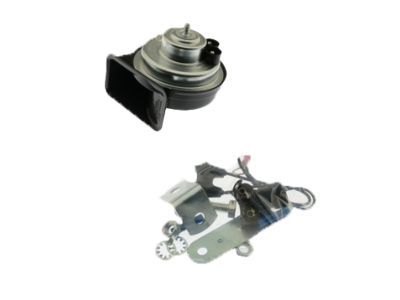
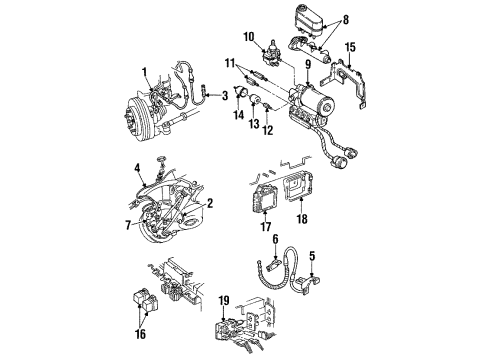
Make sure this part fits

GM 84594590
Control Module, Green Line, Driver Side

1984-2024 GM

Customer Questions & Expert Answers (14)
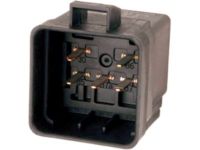
GM 84594590 Control Module, Green Line, Driver Side
  • Part Description
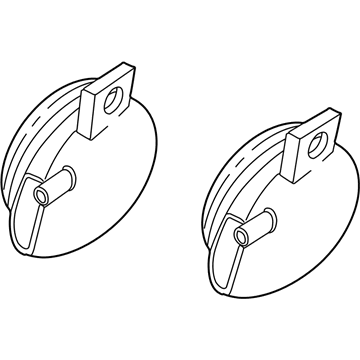
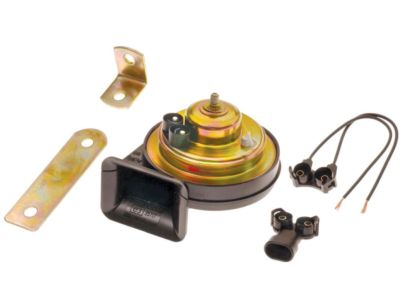
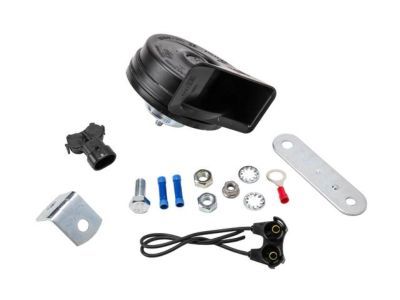
    Horn Kit, Single (Low Note); ABS Control Module
  • Position
    Driver Side
  • Replaces
    01999193, 02029366, 01999276, 01999284, 01999247, 01999194, 01892163, 01999198, 01892240, 01999249, 01999241, 01999252, 01892162, 01999160, 01999714, 10456443, 01999169, 01999218, 15017320, 01999172, 15014988, 15043345, 15248349, 01999159, 15172409, 1892240, 1999159, 1999172, 1999169, 1999241, 1999714, 1999247, 1999252, 1999284, 1999095, 1999276, 1999715, 2029366, 1999193, 1999160, 1999194, 25696075, 84614017, 22658714, 89046916, 01999095, 01999715, 01999221, 10402064, 10414427, 10298957, 10456327, 12368065, 12368062, 12368064, 15030677, 15059526, 15013182, 10456321, 15125048, 15072099, 15710911, 15018062, 1892163, 1892162, 15922907, 1999221, 1999218, 1999249, 25718727, 1999198, 89046918, 15857765, 19301082
  • Manufacturer
    General Motors
Make sure this part fits
$47.49 MSRP: $69.15
You Save: $21.66 (32%)
Ships in 1-2 Business Days
1
ADD TO CART
  • Vehicle Fitment

    Year Make Model Trim Engine
    1984-2005 Buick CenturyCustom, Estate, Estate Wagon, Limited, Olympia Limited, Special, Special Edition, T-Type4 Cyl 2.2 L GAS, 4 Cyl 2.5 L GAS, 6 Cyl 2.8 L GAS, 6 Cyl 3.0 L GAS, 6 Cyl 3.1 L GAS, 6 Cyl 3.3 L GAS, 6 Cyl 3.8 L GAS, 6 Cyl 4.3 L DIESEL
    1991-1996 Buick Commercial ChassisBase8 Cyl 5.0 L GAS, 8 Cyl 5.7 L GAS
    1984-1990 Buick ElectraEstate Wagon, Limited, Park Avenue, Park Avenue Ultra, T-Type6 Cyl 3.0 L GAS, 6 Cyl 3.8 L GAS, 6 Cyl 4.1 L GAS, 6 Cyl 4.3 L DIESEL, 8 Cyl 5.0 L GAS, 8 Cyl 5.7 L DIESEL
    2008-2017 Buick EnclaveBase, Convenience, CX, CXL, Leather, Premium6 Cyl 3.6 L GAS
    2005-2009 Buick LaCrosseCX, CXL, CXS, Super6 Cyl 3.6 L GAS, 6 Cyl 3.8 L GAS, 8 Cyl 5.3 L GAS
    1984-1999 Buick LeSabreBase, Collector's Edition, Custom, Estate Wagon, Limited, T-Type6 Cyl 3.0 L GAS, 6 Cyl 3.8 L GAS, 6 Cyl 4.1 L GAS, 8 Cyl 5.0 L GAS, 8 Cyl 5.7 L DIESEL
    1991-2005 Buick Park AvenueBase, Ultra6 Cyl 3.8 L GAS
    2004-2007 Buick RainierCXL, CXL Plus6 Cyl 4.2 L GAS, 8 Cyl 5.3 L GAS
    1988-1991 Buick ReattaBase6 Cyl 3.8 L GAS
    1984-2004 Buick Regal25th Anniversary Edition, Base, Custom, GNX, Gran Sport, Grand National, GS, GSE, Limited, LS, LSE, Olympic Gold Edition, T-Type6 Cyl 2.8 L GAS, 6 Cyl 3.1 L GAS, 6 Cyl 3.8 L GAS, 6 Cyl 4.1 L GAS, 6 Cyl 4.3 L DIESEL, 8 Cyl 5.0 L GAS, 8 Cyl 5.7 L DIESEL
    View More
    Warning: California's Proposition 65
  • Customer Questions & Expert Answers

    Q:
    Is 84594590 compatible with my car? Posted by ChevyPartsGiant Specialist
    A:
    Please Select Your Vehicle model to see if part number 84594590 is suitable before ordering.
    Posted by ChevyPartsGiant Specialist
    Q:
    How to replace the horn on Buick Century? Posted by Customer
    A:
    First open the hood to reach the rh headlamp assembly before removal. When replacing the Horn you should disconnect the electrical connector of the Horn followed by removing the Horn bracket bolt until you can take the Horn off the frame rail extension. Position the Horn assembly to the frame rail extension by ensuring that the Horn anti-rotation tab inserts itself into the frame rail slot. Mount the Horn bracket bolt while tightening it to 15 n.m (11 lb ft) and attach the Horn electrical connector. The procedure ends with the reinstallation of the rh headlamp assembly followed by closing the hood.
    Posted by ChevyPartsGiant Specialist
    Q:
    How to replace the horn assembly on Buick Rainier? Posted by Customer
    A:
    The process to replace the Horn begins by unscrewing the 2 left bolts which fasten the headlamp housing followed by detaching the battery ventilation hose from the battery carrier. Begin by disconnecting the Horn assembly electrical connector until you remove the securing bolt for the Horn assembly to take the Horn assembly free. Follow these steps to install the Horn assembly by putting it on the body and bolting it down using the provided bolt which should be tightened to 10 n.m (88 lb in). Finish the installation by reconnecting the Horn electrical connector followed by inserting the battery ventilation hose onto the battery carrier then bolt the headlamp housing using its left holding points.
    Posted by ChevyPartsGiant Specialist
    Q:
    How to replace the horn and reinstall the headlamp on Buick Rendezvous? Posted by Customer
    A:
    Before removing the Horn start by taking off right and left headlamps followed by disconnecting electrical harnesses and unscrewing bracket bolts before the Horn can be removed from the bumper impact bar. Installation requires positioning the Horn onto its respective place on the front bumper impact bar while making sure the Horn anti-rotation tab matches with the bar tab and then securing the Horn bracket bolt at 10 n.m (89 lb in). After connecting the Horn electrical connector you should put back the right or left headlamp.
    Posted by ChevyPartsGiant Specialist
    Q:
    How to replace the horn on Buick Park Avenue? Posted by Customer
    A:
    The horn replacement begins with raising and supporting the car above the ground. Start by taking off the lower air deflector followed by detaching electrical connectors from both horns. The next step is to remove the bolts which connect the frame rail horns to the left front side and to take out the horns. The horns need to be positioned onto the left front frame rail but all operators must strictly adhere to the Fastener Notice in Service Precautions. Fasten the horn retaining bolts before tightening them to 15 N.m (11 lb ft). Reinstall the front air deflector after which you can reconnect electrical connectors to the horns before proceeding to lower the vehicle.
    Posted by ChevyPartsGiant Specialist
    Q:
    How to replace the horn on Cadillac DeVille? Posted by Customer
    A:
    Before replacing the horn start by lifting and supporting the vehicle. The first task involves removing the lower air deflector while simultaneously disconnecting the horn connectors from the horns. Start the process by removing the fastener holding horns to the body structure followed by extracting them. Install the horns onto the body by following the service precautions regarding fasteners specified in the Fastener Notice. Secure the horns under the provided provided fastener then tighten the bolts to 15 N.m (11 lb ft). After horn connector installation you should reinstall the front air deflector while lowering the vehicle.
    Posted by ChevyPartsGiant Specialist
    Q:
    How to replace the horn on Chevrolet Classic? Posted by Customer
    A:
    Headlamp assembly removal on the right side is the first step before you disconnect the Horn electrical connector. You should start by disassembling the front frame rail by removing its Horn bracket bolt followed by removing the Horn from that location. Put the Horn on the front rail of the frame while tightening the Horn bracket bolt to 10 n.m according to the service precautions fastener notice. When replacing a Horn, first install the right headlamp assembly followed by a connection of the Horn electrical connector.
    Posted by ChevyPartsGiant Specialist
    Q:
    How to service and repair the horn on a Chevrolet Corvette? Posted by Customer
    A:
    Starting the horn replacement requires you to detach the right front fascia lower closeout panel. The horn assembly electrical connector and the bolt need to be disconnected first in order to extract the horn assembly away from the skid bar. To install position the horn assembly on the skid bar with the aligning tab seated within the hole and use a torque of 25 N.m (18 lb ft) on the horn assembly bolt according to Service Precautions Fastener Notice. The procedure requires connecting the horn assembly electrical connector after installing the right front fascia lower closeout panel.
    Posted by ChevyPartsGiant Specialist
    Q:
    How to replace the horn on Buick LaCrosse? Posted by Customer
    A:
    The first step to replace the Horn involves opening the hood and taking out the rh headlamp assembly. First disconnect the electrical connector of the Horn before removing the bolt securing the bracket and removing the Horn from its position on the frame rail extension. Insert the Horn assembly onto the frame rail extension by placing it in a way that the Horn anti-rotation tab engages the frame rail slot. Position the Horn bracket bolt into place, when tightened it should reach 15 n.m (11 lb ft). Hook up the Horn electrical connector and return the rh headlamp assembly to its place then close the hood.
    Posted by ChevyPartsGiant Specialist
    Q:
    How to replace the horn on Chevrolet Impala? Posted by Customer
    A:
    Begin the Horn replacement by opening the hood then taking out the right headlamp. Detach the Horn electrical connector followed by Horn bracket bolt removal before removing the Horn from the frame rail extension. Position the Horn over the frame rail extension by placing the Horn anti-rotation tab inside the slot. Secure the Horn bracket bolt at 15 n.m using 11 lb ft torque. The Horn electrical connector needs to be restored after which the right headlamp and hood can be put into place.
    Posted by ChevyPartsGiant Specialist
    Q:
    How to replace the horn on Chevrolet Monte Carlo? Posted by Customer
    A:
    The initial step to replace the Horn begins with opening the hood followed by right headlamp removal. The installation process requires the Horn electrical connector to be disconnected while the Horn bracket must be unbolted to detach the Horn from its position on the frame rail extension. At the start of installation position the Horn onto the frame rail extension while checking that the Horn anti-rotation tab enters the slot on the frame rail. Secure the Horn bracket bolt with torque directing it to 15 n.m (11 lb ft). Users should first reattach the Horn electrical connector before installing the right headlamp followed by hood closure.
    Posted by ChevyPartsGiant Specialist
    Q:
    How to replace the horn assembly on Chevrolet Corvette? Posted by Customer
    A:
    To replace the horn, the first step is to remove the right front wheelhouse extension panel. Disconnect horn assembly electrical connector and take off horn assembly bolt and remove horn assembly from the skid bar. To install, put the horn assembly on the skid bar so that the aligning tab on the horn assembly is in the hole on the skid bar. Fit the horn assembly bolt and tighten it to 25 N.m (18 lb ft). Then, connect the horn assembly electrical connector and reinstall the right front wheelhouse extension panel.
    Posted by ChevyPartsGiant Specialist
    Q:
    How to replace the horn assembly on Chevrolet Trailblazer? Posted by Customer
    A:
    The process to replace the Horn begins by unscrewing the 2 left bolts which fasten the headlamp housing followed by detaching the battery ventilation hose from the battery carrier. Begin by disconnecting the Horn assembly electrical connector until you remove the securing bolt for the Horn assembly to take the Horn assembly free. Follow these steps to install the Horn assembly by putting it on the body and bolting it down using the provided bolt which should be tightened to 10 n.m (88 lb in). Finish the installation by reconnecting the Horn electrical connector followed by inserting the battery ventilation hose onto the battery carrier then bolt the headlamp housing using its left holding points.
    Posted by ChevyPartsGiant Specialist
    Q:
    How to replace the horn on Chevrolet Venture? Posted by Customer
    A:
    The replacement process begins by removing right or left headlamp before disconnecting the Horn electrical connector. Detaching the Horn bracket bolt enables the removal of the Horn which needs to be taken off the front impact bar. Beginning the installation requires fastening the Horn onto the front impact bar while tightening the Horn bracket bolt to 15 n.m (11 lb ft). Keep a record of the fastener notice in service precautions. Reinstall the right or left headlamp after connecting the Horn electrical connector.
    Posted by ChevyPartsGiant Specialist
    If you have any questions about this product, please don't hesitate to ask us. We will be happy to help you!

OEM GM Control Module, Green Line, Driver Side 84594590 Designed for Proper Fit and Performance

Original OEM GM parts deliver superior quality and meet all performance standards needed for optimal automotive operation. The authentic part identified by 84594590 Control Module, Green Line, Driver Side is available in the market under the name GM Horn. This genuine product has a full warranty coverage from the manufacturer available at all authorized GM dealers throughout the United States. This part 84594590 Control Module, Green Line, Driver Side fits certain Chevrolet S10, Colorado, C10 models, as well as GMC Acadia, Sierra 1500, Yukon. Additionally, it is compatible with Cadillac Escalade, CTS, Allante and Buick Enclave, Reatta, Regal models.
The original GM component designated by manufacturer part number 84594590 maintains top performance when functioning as the Horn Kit, Single (Low Note); ABS Control Module unit at its Driver Side. The component 84594590 is constructed from durable material and its dimensions span 6.6 x 4.3 x 4.5 inches while weighing 0.90 Pounds. The Direct Replacement component is ready in New condition to ensure full compatibility with your vehicle system. This component receives the designation of Lower Note Horn; Horn; Horn Kit, Horn; Horn, Horn. The part 84594590 has available replacement options 01999193, 02029366, 01999276, 01999284, 01999247, 01999194, 01892163, 01999198, 01892240, 01999249, 01999241, 01999252, 01892162, 01999160, 01999714, 10456443, 01999169, 01999218, 15017320, 01999172, 15014988, 15043345, 15248349, 01999159, 15172409, 1892240, 1999159, 1999172, 1999169, 1999241, 1999714, 1999247, 1999252, 1999284, 1999095, 1999276, 1999715, 2029366, 1999193, 1999160, 1999194, 25696075, 84614017, 22658714, 89046916, 01999095, 01999715, 01999221, 10402064, 10414427, 10298957, 10456327, 12368065, 12368062, 12368064, 15030677, 15059526, 15013182, 10456321, 15125048, 15072099, 15710911, 15018062, 1892163, 1892162, 15922907, 1999221, 1999218, 1999249, 25718727, 1999198, 89046918, 15857765, 19301082. GM manufacturer provides a warranty that ensures reliable operation of this product. The Shipping Policy and Return Policy pages outline complete details regarding shipping procedures and return processes.
If you want to save money in the long run on maintenance and repairs, you should choose OEM products because they're of the top level of durability. Are you on the quest of finding GM parts, our site is worth a visit. We stock an endless selection of high-quality GM components including things like ignition coils all the way through to fan shrouds and all at prices that can not be matched. You have nothing to worry about because all our OEM parts are covered with a manufacturer warranty, which guarantees superior quality and value.