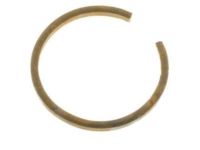
Make sure this part fits

GM 26059845
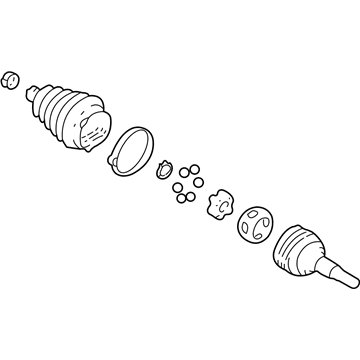
C.V. Joint, Outer

1997-2005 GM

Customer Questions & Expert Answers (8)
GM 26059845 C.V. Joint, Outer
  • Part Description
    Outer CV Joint
  • Position
    Outer
  • Manufacturer
    General Motors
  • Manufacturer's Notes
    This part is discontinued.
Make sure this part fits
  • Related Parts
  • Product Specifications
  • Vehicle Fitment
  • Customer Questions & Expert Answers
  • Product Specifications

    BrandGenuine GM
    Manufacturer Part Number26059845
    Part DescriptionOuter CV Joint
    Other NamesOuter Joint; Outer Joint Assembly; Joint Kit, Front Wheel Drive Axle; CV Joint
    Item Dimensions7.8 x 7.1 x 6.7 inches
    Item Weight6.90 Pounds
    PositionOuter
    ConditionNew
    Fitment TypeDirect Replacement
    Require Quantity2
    ManufacturerGeneral Motors
    SKU26059845
    WarrantyThis genuine GM part is guaranteed by GM's factory warranty.
    Shipping & ReturnShipping Policy Return Policy
    Warning: California's Proposition 65
  • Vehicle Fitment

    Year Make Model Trim Engine
    2004-2005 Chevrolet ClassicBase, LS4 Cyl 2.2 L GAS
    1997-2003 Chevrolet MalibuBase, LS4 Cyl 2.4 L GAS, 6 Cyl 3.1 L GAS
    1999-2004 Oldsmobile AleroGL, GLS, GX4 Cyl 2.2 L GAS, 4 Cyl 2.4 L GAS, 6 Cyl 3.4 L GAS
    1997-1999 Oldsmobile CutlassBase, GL, GLS6 Cyl 3.1 L GAS
    1997 Oldsmobile Cutlass SupremeBase6 Cyl 3.1 L GAS
    1999-2005 Pontiac Grand AmGT, GT1, SE, SE1, SE24 Cyl 2.2 L GAS, 4 Cyl 2.4 L GAS, 6 Cyl 3.4 L GAS
  • Customer Questions & Expert Answers

    Q:
    Can you help me check if this 26059845 is the right part for my car? Posted by ChevyPartsGiant Specialist
    A:
    Please Select Your Vehicle model to see if part number 26059845 is suitable before ordering.
    Posted by ChevyPartsGiant Specialist
    Q:
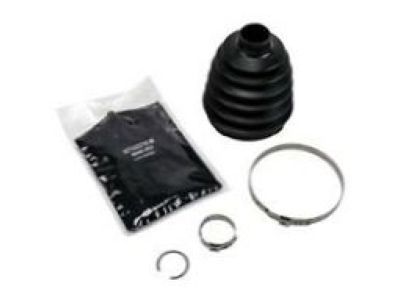
    How to Service and Repair the CV Joint Boot on Chevrolet Malibu? Posted by Customer
    A:
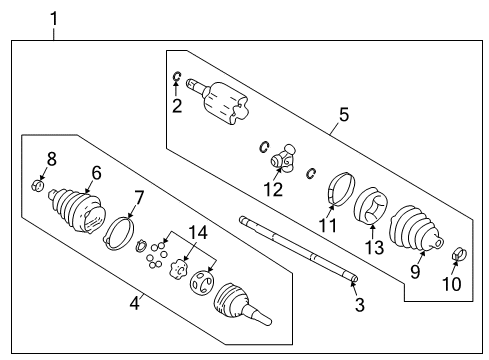
    Service and repair of the constant velocity joint boot requires j35910 drive axle seal clamp pliers and j8059 snap ring pliers as necessary tools. The toolset includes drive axle seal clamp pliers (J35910) together with snap ring pliers (J8059). You need side cutters to cut the large seal retaining clamp from the CV Joint before throwing it away and then proceed to remove the small clamp from the halfshaft bar . Gently pull away the seal by separating it from the CV Joint outer race through bar motion. The snap ring pliers (J8059) should spread the ears on the retaining ring after you wipe out grease from the CV Joint inner race. Then you can remove the CV Joint assembly from the bar . Take the bar seal aside then strike the CV Joint cage with a brass drift and hammer to eliminate all six chrome alloy balls . Place the CV Joint cage and inner race directly at right angles to the CV Joint outer race ensuring the cage windows match the outer race lands. Start by removing the cage along with the inner race and rotate the inner race by 90 degrees to match with the cage windows then you can easily remove it from the cage window. First clean all parts with cleaning solvent until all remaining grease and contaminants vanish while the parts become dry. The assembly process begins with placing a new uncrimped seal retaining clamp onto the seal neck followed by seal bar insertion to the seal groove. The drive axle seal clamp pliers (J35910) functions with a breaker bar and torque wrench to tighten the seal retaining clamp to 136 nm (100 ft. Lbs.) during the wrapping process to verify proper gap spacing. Install both races by applying a small amount of service kit grease to their ball grooves before placing the inner race at a right angle to the cage so you can guide it into position. The retaining ring portion on the inner race must face the halfshaft bar. Place the cage with inner race assembly inside the outer race. Start by inserting the first chrome ball and complete each insertion by tilting the cage to add the opposing ball until all six balls are properly placed in position. Apply grease to the CV Joint while pressing the CV Joint onto the bar while the retaining ring sets correctly. Drive the large-seal diameter through the seal retaining clamp until the seal seats properly onto the CV Joint outer race. Position the seal lip inside the groove. Tighten the seal retaining clamp with the drive axle seal clamp pliers (J35910) alongside the breaker bar and torque wrench to 176 nm (130 ft. Lbs.) while ensuring 1.90mm (1/16 inch) gap dimension.
    Posted by ChevyPartsGiant Specialist
    Q:
    How to replace the outer CV Joint and seal on Chevrolet Malibu? Posted by Customer
    A:
    In order to replace the wheel drive shaft outer joint and seal, start by using a side cutter to remove, and discard, the large seal retaining clamp from the CV and also the small seal retaining clamp from the half shaft bar. Dismount the seal the CV joint outer race and slide it out from joint over the back . Wipe any grease from the inner race and then use the J 8059 Snap Ring Pliers to spread the CV joint inner race race retaining ring's ears before removing the CV joint assembly from the bar. Remove the seal from the bar and carefully tap the CV joint cage with the help of a brass drift and hammer so as to push out all the six chrome alloy balls. Rotate the CV joint cage and inner race to 90 degrees relative to the CV joint outer race, so that the windows of the cage align with the lands of the outer race. Take out the cage and inner race after which one rotates inner race 90 degrees to align it with the windows of the cage and turns it into the cage. Clean all parts thoroughly with Cleaning solvent and let them dry. For assembly, install the seal retaining clamp on the neck of the seal where it wasn't crimped and then slide the seal onto the halfshaft bar while positioning it on the seal groove. Crimp the seal retaining clamp with the help of J 35910 Drive Axle Seal Clamp Pliers, breaker bar, and torque wrench, holding 136 (100 ft. lbs. Nm) torque tightening it and monitor the dimension of the gap. Lightly grease from the service kit of the ball grooves of both races and fix the inner race at a 90 angle to the cage and push it into the cage. Ensure that the retaining ring side of the inner faces the halfshaft bar, then insert the cage and inner race in the outer race. Put the first chrome ball and tip the cage to add the opposite ball, then continue to do this until there are six balls in place. After that, the CV joint should be packed with grease, then one should push the CV joint onto the bar until the retaining ring is seated, and the seal should be shaped properly. Push the large diameter of the seal in conjunction with the large seal retaining clamp to fit over the CV joint outer race such that the seal lip is fitted into the groove. Lastly, crimp the seal retaining clamp with the J 35910 , breaker bar , and a torque wrench till making the gap dimension 1.90mm ( /16 inch) 176Nm (130ft. lbs.).
    Posted by ChevyPartsGiant Specialist
    Q:
    What tools are required to service and repair the CV Joint Boot for the Wheel Drive Shaft Outer Joint and Seal Replacement on Chevrolet Classic? Posted by Customer
    A:
    For servicing and repairing the constant velocity-joint boot for the wheel drive shaft outer joint and seal replacement, some of the necessary tools required are; j 35910 drive axle seal clamp pliers (J 35910) and j 8059 snap ring pliers (J 8059). Start by using a side cutter to remove the large seal retaining clamp from the CV Joint and throwing it away, then the small seal retaining clamp from the halfshaft bar. Clear grease from CV Joint inner race . Using the j 8059 spread ears on the race retaining flange and eliminate the CV Joint assembly from the bar, and then eliminate the seal from the bar . Use a brass drift hammered carefully to knock out all six chrome alloy balls from the CV Joint cage. While positioning CV Joint cage and inner race at 90 degrees to the CV Joint outer race , the windows should be aligned with the lands of the outer race . Take off the CV Joint cage and the inner race, then align inner race 90 degrees with the cage windows. Clean thoroughly every part with cleaning solvent and dry them. When assembling, apply a new seal retaining clamp to the neck of the seal without crimping and slide the seal onto the halfshaft bar while inserting it into the seal groove . Crimp the seal retaining clamp as in the figure j 35910, using a breaker bar and a torque wrench, torque 136 nm (100 ft lbs.). Apply grease to the grooves of the ball, and hold the inner race at 90 degrees from the cage and hoping at that point to put it into the cage. Ensure the retaining ring side of the inner race faces the halfshaft bar and then drop the cage and inner race into outer race. With the chrome balls in place, pack the CV Joint with grease, and push the CV Joint on to the bar until retaining ring is seated. Make sure the shape of seal is correct, place slide the large diameter of the seal over the CV Joint outer race and align the position of the seal lip to fit into the groove. Lastly, crimp the seal retaining clamp using a breaker bar, a torque wrench, and a j 35910 to a 176 nm (130 ft. Lbs.) while verifying the gap dimension to be 1.90mm (1/16 in.).
    Posted by ChevyPartsGiant Specialist
    Q:
    What is the procedure for crimping the seal retaining clamp for the 2004 Chevrolet Classic? Posted by Customer
    A:
    Position the neck of the inboard seal in the seal groove on the halfshaft bar and crimp the seal retaining clamp using J 35910 to 136 Nm (100 ft. lbs.).
    Posted by ChevyPartsGiant Specialist
    See expert answers on similar CV Joint
    Q:
    What should be done with the grease on the CV joint inner race for the 2005 Chevrolet Classic? Posted by Customer
    A:
    Wipe the grease from the face of the CV joint inner race.
    Posted by ChevyPartsGiant Specialist
    See expert answers on similar CV Joint
    Q:
    What should be done with the grease during assembly for the 2002 Chevrolet Malibu? Posted by Customer
    A:
    Reseat the first spacer ring in the groove on the bar, place half of the grease from the service kit in the seal, and use the remainder to repack the housing.
    Posted by ChevyPartsGiant Specialist
    See expert answers on similar CV Joint
    Q:
    What is the final step in the process for the 2003 Chevrolet Malibu? Posted by Customer
    A:
    Repack the housing with grease, install the trilobal tripot bushing flush with the housing face, position the larger new clamp on the seal, slide the housing over the spider assembly, and ensure proper alignment before latching the seal retaining clamp with the Drive Axle Seal Clamp Pliers (J35566).
    Posted by ChevyPartsGiant Specialist
    See expert answers on similar CV Joint
    If you have any questions about this product, please don't hesitate to ask us. We will be happy to help you!

OEM GM 26059845, Excellent Performance and Perfect Fitment

To ensure reliability, purchase GM part # 26059845 C.V. Joint, Outer. It is sometimes referred to as GM CV Joint. Choosing OEM parts is the optimal decision for guaranteeing superior quality and perfect performance. These components undergo stringent quality checks and are carefully constructed to comply with GM's factory specifications, ensuring a smooth installation process.

ChevyPartsGiant.com is a leading supplier of genuine GM parts such as GM 26059845 C.V. Joint, Outer. Our website boasts an extensive inventory of OEM GM parts, available at highly competitive prices in the market. Should you require any new genuine GM parts, rest assured we will deliver them swiftly and efficiently to your doorstep. Furthermore, all our parts come with the assurance of a manufacturer's warranty. For detailed Chevy parts information, click here.
Choose ChevyPartsGiant for discounted prices, exceptional service and fast delivery