Make sure this part fits

GM 12553837
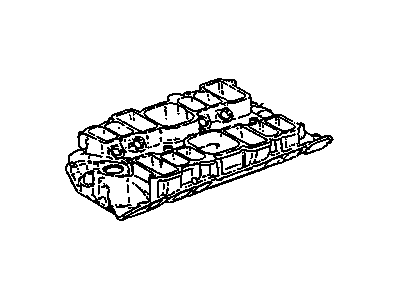
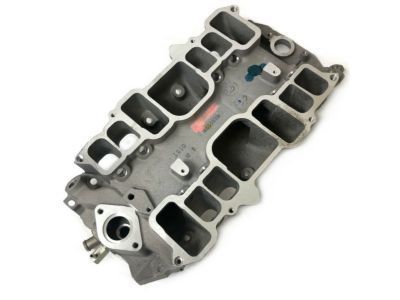
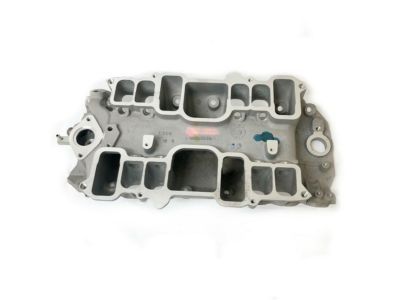
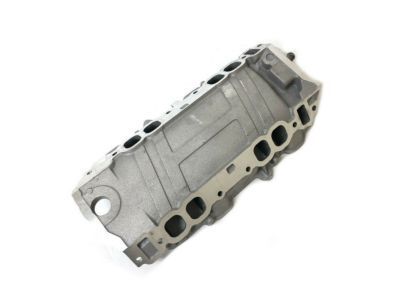
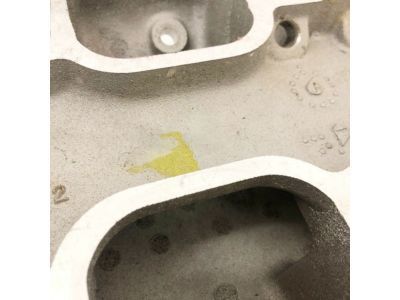
Intake Manifold, Lower

1996-2000 GM

Customer Questions & Expert Answers (10)
GM 12553837 Intake Manifold, Lower
  • Part Description
    Manifold Assembly-Lower Intake
  • Position
    Lower
  • Manufacturer
    General Motors
  • Manufacturer's Notes
    This part is discontinued.
Make sure this part fits
  • Product Specifications
  • Vehicle Fitment
  • Customer Questions & Expert Answers
  • Product Specifications

    BrandGenuine GM
    Manufacturer Part Number12553837
    Part DescriptionManifold Assembly-Lower Intake
    Other NamesManifold; Manifold, Engine Fuel Intake Manifold
    Item Dimensions24.8 x 14.6 x 5.8 inches
    Item Weight17.20 Pounds
    PositionLower
    ConditionNew
    Fitment TypeDirect Replacement
    ManufacturerGeneral Motors
    SKU12553837
    WarrantyThis genuine GM part is guaranteed by GM's factory warranty.
    Shipping & ReturnShipping Policy Return Policy
    Warning: California's Proposition 65
  • Vehicle Fitment

    Year Make Model Trim Engine
    1996-2000 Chevrolet C2500Base, Cheyenne, LS, Silverado, WT8 Cyl 7.4 L GAS
    1996-1999 Chevrolet C2500 SuburbanBase, LS, LT8 Cyl 7.4 L GAS
    1996-2000 Chevrolet C3500Base, Cheyenne, LS, Silverado8 Cyl 7.4 L GAS
    1996-2000 Chevrolet Express 3500Base, LS8 Cyl 7.4 L GAS
    1996-2000 Chevrolet K2500Base, Cheyenne, LS, Silverado, WT8 Cyl 7.4 L GAS
    1996-1999 Chevrolet K2500 SuburbanBase, LS, LT8 Cyl 7.4 L GAS
    1996-2000 Chevrolet K3500Base, Cheyenne, LS, Silverado8 Cyl 7.4 L GAS
    1996-2000 GMC C2500Sierra SL, Sierra SLE, Sierra SLT8 Cyl 7.4 L GAS
    1996-1999 GMC C2500 SuburbanBase, SLE, SLT8 Cyl 7.4 L GAS
    1996-2000 GMC C3500Sierra SL, Sierra SLE, Sierra SLT8 Cyl 7.4 L GAS
    View More
  • Customer Questions & Expert Answers

    Q:
    Is this 12553837 designed for my car? Posted by ChevyPartsGiant Specialist
    A:
    Please Select Your Vehicle model to see if part number 12553837 is suitable before ordering.
    Posted by ChevyPartsGiant Specialist
    Q:
    How to Replace the Lower Intake Manifold for Lower on Chevrolet K3500? Posted by Customer
    A:
    Draining the cooling system should be the first step before uninstalling the lower Intake Manifold and disconnecting the negative battery cable. Start the replacement process by removing the upper Intake Manifold and suction line from the A/C Compressor and Distributor and MAP Sensor and Radiator Hose from the Thermostat Housing from the engine block. Detach Heater Core input and output hoses from the Heater Core and disconnect the coolant bypass hose from both the lower Intake Manifold and water pump. The procedure begins with removing retaining bolts from the Fuel Rail then discarding the Fuel Rail before proceeding to extract lower Intake Manifold bolts from the engine head and finally separating the lower Intake Manifold from the engine block and its included gaskets and seals. Use clean strokes to remove all oil and grease from each sealing area. Place the gaskets onto the Cylinder Head with the this side up symbol facing up before installing the lower Intake Manifold onto the engine block. Apply bolt thread locking material to the lower Intake Manifold bolts, install them to the engine head, and tighten in sequence to 30 nm (22 ft. Lbs.)after the initial tightening to 30 nm (22 ft. Lbs.) there should be a re-tightening sequence to 40 nm (30 ft. Lbs.). Install the Fuel Rail alongside the retaining bolts together with the coolant bypass hose followed by heater hoses toward the lower Intake Manifold. Install the Distributor alongside the Radiator Hose and MAP Sensor and Thermostat Housing to the engine block. Reconnect both pipes between the A/C Compressor and upper Intake Manifold to the lower Intake Manifold. As a final step install the discharge line to the A/C Compressor before refilling the cooling system and reconnecting the battery negative cable.
    Posted by ChevyPartsGiant Specialist
    Q:
    How to Replace the Lower Intake Manifold for Lower on GMC C3500? Posted by Customer
    A:
    Take out the negative cable from the battery to prevent any more damage, then drain the engine coolant from the system. Remove the air cleaner assembly as well as the Radiator Hose, the upper and lower heater hoses and the water pump inlet hose. Take out all the electrical cables, unplug them and keep them somewhere safe. Take away the Distributor and twist the vacuum brake booster hose to take it out, if this equipment is present. Separate the accelerator control cable and the cruise control cable, if they are there and take off the Drive Belt. Refrigerant doesn't have to be released when working on your a/c unit. Remove the A/C Compressor, if it is fitted and store it until later. Take out the PCV Valve and unplug the egr pipe from the bracket as well as the front of the Intake Manifold. Also, detach the fuel connections from the back of the Intake Manifold. Unplug the electrical connector from the Power Steering Pump and then remove the power steering bracket by first taking off the Power Steering Pump, nut and bolts and then guide the bracket forward with the pump attached. Take out the bracket on the back of the right Cylinder Head, remove each valve rocker arm cover and remove the Intake Manifold as well. Make sure to clean all the surfaces before attaching the Intake Manifold and the valve rocker arm covers. Attach the power steering bracket by sliding it onto the stud, putting in the nuts and bolts finger tight and finally tightening them to 41 nm (30 ft. Lbs.). Place the Power Steering Pump back in place and also reconnect its electrical cable. If you look at the back of the Intake Manifold, you need to attach the fuel lines there and the same goes for the wiring bracket at the rear of the right Cylinder Head. Hold the PCV Valve in place and fasten it, attach the egr valve end to the metal bracket and the front intake tube and if there is a vacuum booster, screw it in by twisting. Equip the air check valve (crossover) pipe, if provided and the A/C Compressor to the power steering bracket. Secure the Drive Belt, link the accelerator and cruise control to the cables, if included and then put in the Distributor. Connect each electrical part and place the hoses: upper Radiator Hose, heater hoses and water pump inlet. Put in the air cleaner assembly, add the coolant to the cooling system and reattach the negative cable of the battery.
    Posted by ChevyPartsGiant Specialist
    Q:
    How should the intake manifold and its components be installed and serviced on GMC C2500? Posted by Customer
    A:
    The Intake Manifold, throttle body, fuel injection rail, and fuel injectors all can be removed as a assembly; if not servicing the separate components, install the Intake Manifold in an entire approach. Do not propagate Intake Manifold gaskets, replace the old Intake Manifold-to-cylinder head gaskets with fresh ones. Start off installing main caps and gaskets, and then the Intake Manifold itself. Apply a 5 mm (0.20 inch) band of threadlock gm p/n 12345382 or equivalent to the threads of the Intake Manifold bolts and make sure to follow the fastener notice in service precautions. Mount the bolts of Intake Manifold while tightening them in sequence, for the 1st run to 5 nm (44 inch lbs.), and for the final turn to 10 nm (89 inch lbs.). If previously removed, install the manifold absolute pressure (MAP) sensor with the electrical connector end toward the front of the engine. Next is the installation of the positive crankcase ventilation (PCV) valve and hose, and then the engine coolant air bleed hose and clamp onto Throttle Body. If so necessary, install accelerator control cable bracket and bolts, then tighten the bracket bolts to 10 nm (89 inch lbs.). Finally, install the evaporative emission (EVAP) purge solenoid, bolt, and isolator , fastening the solenoid bolt to 10 nm (89 inch lbs.).
    Posted by ChevyPartsGiant Specialist
    Q:
    How to service and repair the intake manifold on GMC C2500? Posted by Customer
    A:
    The service and repair of an Intake Manifold starts with removing the manifold absolute pressure (MAP) sensor at the rear of the intake by following a step-by-step process to reattach it post-diligent cleaning and evaluation. Check the sealing grommet attached to the MAP Sensor for signs of damage or tear formation. Begin by disposing of the Intake Manifold-to-cylinder head gaskets before removing the Fuel Rail with its injectors and then the Throttle Body and gasket. Use a tool to uninstall the evaporative emissions (EVAP) purge solenoid unit along with its bolt and isolator parts. Use solvent and safety glasses to clean the Intake Manifold by concentrating on surfaces and internal passages of the gasket. Use compressed air to dry the Intake Manifold. The inspection should focus on evaluating the Throttle Body studs with inserts and the wire harness stud coupled with its insert and Fuel Rail bolt inserts for indications of loose threads or damaged fastenings. Examine all Intake Manifold vacuum passages for debris while also inspecting every vacuum fitting and MAP Sensor mounting bore for damage and checking the entire composite Intake Manifold assembly for cracks or damage especially between the intake runners. Systematically inspect all fuel injector bore and gasket sealing surfaces for excess damage or scoring as well as the cylinder head deck for warpage. Use a straight edge across the Intake Manifold cylinder head deck surface, positioning it over at least two runner port openings, and insert a feeler gauge; replacement of the Intake Manifold becomes necessary when warpage reaches more than 3 mm (0.118 inch) across a 200 mm (7.87 inch) area. After repairing the MAP Sensor and evap solenoid you must install both components before securing the evap solenoid bolt with a torque of 10 nm (89 inch lbs.).
    Posted by ChevyPartsGiant Specialist
    Q:
    What are the torque specifications for tightening the upper intake manifold studs for the 2000 Chevrolet Express 3500? Posted by Customer
    A:
    Tighten the studs on the first pass to 12 Nm (44 inch lbs.) and on the second pass to 10 Nm (89 inch lbs.), tightening from the center bolts to the outer bolts.
    Posted by ChevyPartsGiant Specialist
    See expert answers on similar Intake Manifold
    Q:
    What is the first step to replace the upper intake manifold for the 2000 Chevrolet K3500? Posted by Customer
    A:
    Disconnect the battery negative cable.
    Posted by ChevyPartsGiant Specialist
    See expert answers on similar Intake Manifold
    Q:
    What is the first step to replace the lower intake manifold for the 2000 GMC Savana 3500? Posted by Customer
    A:
    Disconnect the battery negative cable and drain the engine coolant.
    Posted by ChevyPartsGiant Specialist
    See expert answers on similar Intake Manifold
    Q:
    What is the first step to replace the upper intake manifold for the 2000 GMC Savana 3500? Posted by Customer
    A:
    Disconnect the battery negative cable.
    Posted by ChevyPartsGiant Specialist
    See expert answers on similar Intake Manifold
    Q:
    What is the first step to service the intake manifold for the 2000 GMC C2500? Posted by Customer
    A:
    Begin by removing the Positive Crankcase Ventilation (PCV) hose and valve.
    Posted by ChevyPartsGiant Specialist
    See expert answers on similar Intake Manifold
    If you have any questions about this product, please don't hesitate to ask us. We will be happy to help you!

OEM GM 12553837, Excellent Performance and Perfect Fitment

To ensure reliability, purchase GM part # 12553837 Intake Manifold, Lower. It is sometimes referred to as GM Intake Manifold. Choosing OEM parts is the optimal decision for guaranteeing superior quality and perfect performance. These components undergo stringent quality checks and are carefully constructed to comply with GM's factory specifications, ensuring a smooth installation process.

ChevyPartsGiant.com is a leading supplier of genuine GM parts such as GM 12553837 Intake Manifold, Lower. Our website boasts an extensive inventory of OEM GM parts, available at highly competitive prices in the market. Should you require any new genuine GM parts, rest assured we will deliver them swiftly and efficiently to your doorstep. Furthermore, all our parts come with the assurance of a manufacturer's warranty. For detailed Chevy parts information, click here.
Choose ChevyPartsGiant for discounted prices, exceptional service and fast delivery