Make sure this part fits

GM 19330710
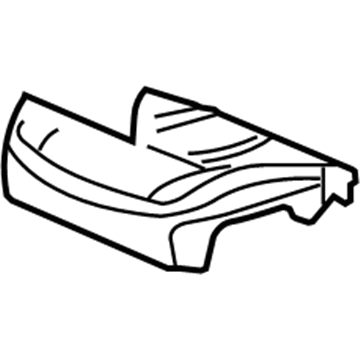
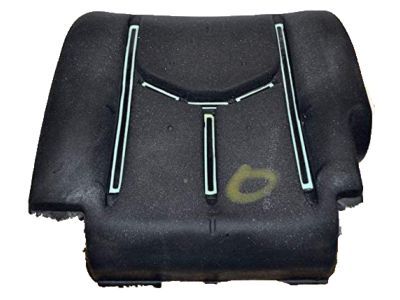
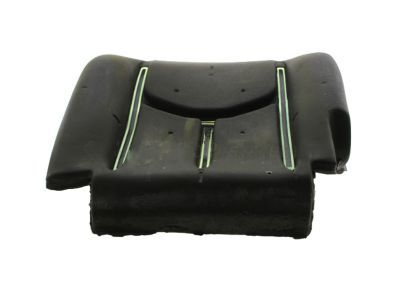
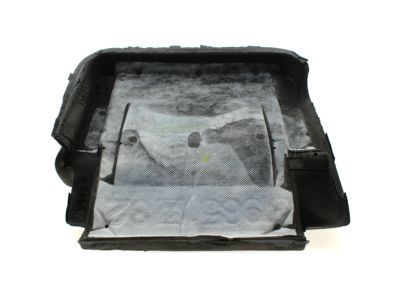
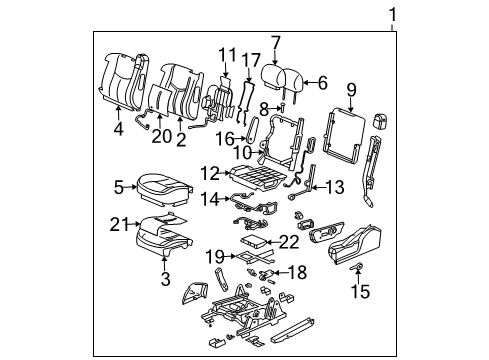
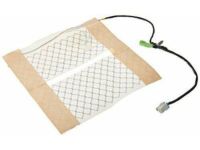
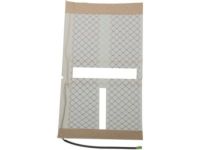
Seat Cushion Pad, Driver Side

2003-2007 GM

Customer Questions & Expert Answers (15)
GM 19330710 Seat Cushion Pad, Driver Side
  • Part Description
    Pad, Seat Cushion
  • Position
    Driver Side
  • Replaces
    88941606
  • Manufacturer
    General Motors
Make sure this part fits
$128.37 MSRP: $191.87
You Save: $63.50 (34%)
Ships in 1-3 Business Days
1
ADD TO CART
  • Related Parts
  • Product Specifications
  • Vehicle Fitment
  • Customer Questions & Expert Answers
  • Product Specifications

    BrandGenuine GM
    Manufacturer Part Number19330710
    Part DescriptionPad, Seat Cushion
    Other NamesSeat Cushion
    Item Dimensions27.9 x 23.0 x 8.5 inches
    Item Weight2.00 Pounds
    PositionDriver Side
    ConditionNew
    Fitment TypeDirect Replacement
    Replaces88941606
    ManufacturerGeneral Motors
    SKU19330710
    WarrantyThis genuine GM part is guaranteed by GM's factory warranty.
    Shipping & ReturnShipping Policy Return Policy
    Warning: California's Proposition 65
  • Vehicle Fitment

    Year Make Model Trim Engine
    2004-2006 Cadillac EscaladeBase8 Cyl 5.3 L GAS, 8 Cyl 6.0 L GAS
    2003-2006 Cadillac Escalade ESVBase8 Cyl 6.0 L GAS
    2003-2006 Cadillac Escalade EXTBase8 Cyl 6.0 L GAS
    2003-2006 Chevrolet Avalanche 1500Base, LS, LT, North Face, On Road Edition, WBH, Z66, Z718 Cyl 5.3 L FLEX, 8 Cyl 5.3 L GAS
    2003-2006 Chevrolet Avalanche 2500Base, LS, LT8 Cyl 8.1 L GAS
    2003-2007 Chevrolet Silverado 1500Base, Hybrid, LS, LT, LTZ, SS, WT, Z71 Off-Road6 Cyl 4.3 L GAS, 8 Cyl 4.8 L GAS, 8 Cyl 5.3 L FLEX, 8 Cyl 5.3 L FULL HYBRID EV-GAS (FHEV), 8 Cyl 5.3 L GAS, 8 Cyl 6.0 L GAS
    2007 Chevrolet Silverado 1500 ClassicHybrid, LS, LT, SS, WT6 Cyl 4.3 L GAS, 8 Cyl 4.8 L GAS, 8 Cyl 5.3 L FLEX, 8 Cyl 5.3 L FULL HYBRID EV-GAS (FHEV), 8 Cyl 5.3 L GAS, 8 Cyl 6.0 L GAS
    2005-2006, 2003 Chevrolet Silverado 1500 HDBase, LS, LT8 Cyl 6.0 L GAS
    2007 Chevrolet Silverado 1500 HD ClassicLT8 Cyl 6.0 L GAS
    2003-2004 Chevrolet Silverado 2500Base, LS, LT, WT8 Cyl 6.0 L GAS
    View More
  • Customer Questions & Expert Answers

    Q:
    Is this 19330710 designed for my car? Posted by ChevyPartsGiant Specialist
    A:
    Please Select Your Vehicle model to see if part number 19330710 is suitable before ordering.
    Posted by ChevyPartsGiant Specialist
    Q:
    How to remove and replace the Seat Cushion Pad and trim cover on Cadillac Escalade ESV? Posted by Customer
    A:
    Starting the process involves removing the front seat trim panel alongside taking off the seat cushion front nuts that exist under the seat. Vehicle owners with power lumbar should remove the lumbar wire harness through the disconnect of the lumbar cable. First disconnect all electrical connectors followed by removing the pressure sensor from the front passenger seat frame when your vehicle has the Inflatable Restraint Passenger Presence System. Start by removing the seat cushion from rear plastic holders forward while pulling it out and continue by removing the seat switch bezel and the lumbar actuator. To remove the seat trim cover from the seat cushion frame users should unclip it first then separate seat cushion trim cover from seat cushion pad using a side motion carefully. A complete replacement of the passenger presence system assembly should take place to reduce injury risk because its components including bladder, pressure sensor, seat cushion and control module function together as one calibrated unit. Front passenger seat cushion replacement demands replacement of the Inflatable Restraint Passenger Presence System at the same time. Thoroughly remove the pad from the seat cushion frame together with its heater element when present. The process starts with the seat cushion heater element installation when needed before installing the Inflatable Restraint Passenger Presence System. Carefully pull the seat cushion cover onto the frame pad while moving from the side. Afterward attach the seat cushion pad to the seat cushion frame. The seat trim cover needs to be fastened to the seat cushion frame before you install the lumbar actuator together with the seat switch bezel. Attach the cushion to the rear plastic holders before pushing it in the rear direction and join the lumbar cable and the lumbar wire harness when power lumbar is equipped. The pressure sensor should be positioned on the front passenger seat frame if the vehicle features the Inflatable Restraint Passenger Presence System before reattaching all electrical connectors. Insert and tighten the front nuts on the studs under the cushion until they reach 21 N.m (15 lb ft) torque. Then reinstall the front seat trim panel. The Inflatable Restraint Passenger Presence System needs a final operation to re-zero it.
    Posted by ChevyPartsGiant Specialist
    Q:
    How to remove and replace the Seat Cushion Pad and trim cover on Cadillac Escalade EXT? Posted by Customer
    A:
    Both the seat cushion trim cover and pad removal begins by removing front nuts which are located underneath the seat cushion followed by front seat trim panel demount. The power lumbar wire harness needs disconnection as well as the lumbar cable unsnap for seats equipped with this option. Remove the electrical connectors on the front passenger seat frame and take out the pressure sensor when present on the Inflatable Restraint Passenger Presence System. To access the parts you need to remove the seat cushion from its rear plastic holders by pulling the forward direction. After that you need to take out the seat switch bezel and lumbar actuator. Carefully remove the seat trim cover from the seat cushion frame before separating the seat cushion trim cover from the seat cushion pad through a side moving motion. The passenger presence system requires replacement as an entire unit because its calibration depends on the bladder along with the pressure sensor and seat cushion and control module. A replacement of the front passenger seat cushion requires an entire new Inflatable Restraint Passenger Presence System as well. The pad needs removal from the frame of the seat cushion while also removing the seat cushion heating element whenever installed. Install the seat cushion heater element first according to the installation process and then install the Inflatable Restraint Passenger Presence System. Seamlessly place the seat cushion pad onto the frame before directing the frame pad into the cushion cover by applying a side motion. After affixing the seat trim cover to the seat cushion frame users should proceed to install the lumbar actuator followed by the seat switch bezel. After placing the cushion on its rear plastic holders the installer should push the seat forward while reattaching the lumbar cable and wire harness for power lumbar features. The pressure sensor installation should be completed on the front passenger seat frame when possible while also repairing electrical connectors. The front nuts should be installed onto underneath positioning studs of the cushion before tightening them to 21 N.m (15 lb ft). Then reinstall the front seat trim panel. The service procedure calls for re-zeroing of the Inflatable Restraint Passenger Presence System as the last step.
    Posted by ChevyPartsGiant Specialist
    Q:
    How to replace the rear seat back cover and Seat Cushion Pad on Chevrolet Silverado 2500? Posted by Customer
    A:
    The replacement starts by extracting the rear seat before proceeding to remove any seat back folding cover present and detaching any seat back armrest components. The second step requires the removal of head restraints from the seat back followed by j-clip removal from the seat back cover. The hook-and-loop strips require removal to let go of the cover from the foam pad arrangement. Using cardboard pieces you must slide under the foam pad from its sides to easily remove the seat back cover after safely lifting it from the pad. You should install the seat back cover by putting it on the foam pad while removing the cardboard before connecting its hook and loop retention system. First secure the j-clips which fasten the seat back cover and then reinstall the head restraints to the seat back. Reattach the armrest if it was dismounted followed by installation of the seat back folding cover before finally putting back the rear seat inside the vehicle.
    Posted by ChevyPartsGiant Specialist
    Q:
    How to remove and replace the Seat Cushion Pad and trim cover on Chevrolet Silverado 1500? Posted by Customer
    A:
    The seat cushion trim pad replacement process begins with removing front underside seat cushion nuts and disassembling the front seat trim panel. The process requires unhooking the lumbar wire harnesses because power lumbar systems exist in certain vehicles. Conduct the removal of the pressure sensor when present on the Inflatable Restraint Passenger Presence System component of the front passenger seat frame after disconnecting all electrical connectors. Remove the seat cushion starting by taking it off the rear plastic holders before pulling it forward to remove the seat switch bezel and the lumbar actuator. Separate the seat cushion trim cover from the seat cushion pad using a side motion after unclipping it from the seat cushion frame. The installation of a complete new passenger presence system assembly should be done because the bladder and pressure sensor alongside their corresponding seat cushion and control module must operate as a unit. The replacement of front passenger seat cushions requires that you must also change the Inflatable Restraint Passenger Presence System. You should remove the pad along with any seat cushion heat elements that exist. Begin the installation by attaching the seat cushion heater element when present followed by Inflatable Restraint Passenger Presence System installation. Space the cushion pad on the seat cushion frame while you smoothly push the covering over the pad from the sides. Suitably fasten the seat trim cover onto the seat cushion frame before installing both the lumbar actuator and the seat switch bezel. Advance the cushion rearward by placing it into the available rear plastic holders. Users must first connect the lumbar cable along with the lumbar wire harness when power lumbar is present before installing the pressure sensor onto the front passenger seat frame when needed. Secure the front nuts through the studs found beneath the cushion by tightening them to 21 N.m (15 lb ft). The last step involves installation of the front seat trim panel while performing a re-zero procedure for the Inflatable Restraint Passenger Presence System.
    Posted by ChevyPartsGiant Specialist
    Q:
    How to Replace a Rear Seat Cushion Pad and Cover on Chevrolet Silverado 3500? Posted by Customer
    A:
    The first step to replace the rear seat cushion cover and pad is to remove the rear seat from the vehicle and the rear passenger seat riser. The next step requires removal of hog rings or J-clips from the rear seat cushion cover edges while completing the disconnection process for the rear heater connector. The repair process starts by taking out seat belt buckles together with all remaining hog rings or J-clips that hold the seat cushion cover to the seat cushion frame . To remove the seat cushion cover from the foam pad begin by releasing the hook and loop-strips securing it to the pad then detach the center screw securing the latch cover if equipped. Install the seat cushion cover onto the foam pad by following the fastener notice in service precautions. Affix the center screw on the latch cover while tightening it to 2 N.m (18 lb in) and press the hook and loop-strips into place that attach the seat cushion cover to the foam pad. The buckles of the seat must be installed after completing the process and you should connect the rear heater connector if your car comes with this feature. The last step includes fixing the seat cushion cover to the frame using hog rings and J-clips while reattaching the rear seat risers and setting the rear seat in position.
    Posted by ChevyPartsGiant Specialist
    Q:
    How to replace the Seat Cushion Pad and trim cover on Chevrolet Silverado 3500 Classic? Posted by Customer
    A:
    Start by removing front seat nuts under the blanket before progressing to disassemble the front seat trim panel. The lumbar wire harness needs removal through disconnection and the lumbar cable needs unsnapping when power lumbar is equipped. Start by disconnecting electrical connectors before removing the pressure sensor when necessary from the front passenger seat frame. Pull forward the seat cushion after lifting it off its rear plastic holders. Disassemble the seat switch bezel and the lumbar actuator followed by unclipping the seat trim cover off the seat cushion frame. The seat cushion pad separation from the trim cover must be performed using side-to-side movements. The passenger presence system requires replacement as a unified complete assembly because the bladder and pressure sensor with seat cushion along with control module operate as calibrated units. A front passenger seat cushion replacement requires complete replacement of the Inflatable Restraint Passenger Presence System. The pad requires removal from the seat frame along with any present seat heating element. Installation requires first placement of seat cushion heater elements (if available) followed by Inflatable Restraint Passenger Presence System assembly. Begin by attaching the seat cushion pad to its frame. Then pull the seat cushion cover onto the frame pad while working from side to side. The seat trim cover attaches to the seat cushion frame before adding the lumbar actuator and the seat switch bezel. Slide the cushion onto the rear plastic mounts before pushing it towards the back. When power lumbar is available the installation process starts with cable and harness connection but pressure sensors only need installation when applicable. After reconnecting all electrical cables, attach the front nuts onto the studs under the cushion's bottom section and achieve 21 N.m (15 lb ft) of torque on each nut. To finish the installation place the front seat trim panel and reset the Inflatable Restraint Passenger Presence System to zero position.
    Posted by ChevyPartsGiant Specialist
    Q:
    How to replace the front seat back cushion cover and Seat Cushion Pad on Chevrolet Silverado 1500 Classic? Posted by Customer
    A:
    The process of replacing the front seat back cushion cover and cushion pad begins with removing the head restraint followed by taking off the seat trim panel. The next step requires removing the nut from the lower Seat Belt anchor followed by detaching the j-strip retainer found at the bottom of the seat back cover. At this point disconnect the heater seat element connector when it exists. Take out the armrest from the seat if present before you can access the armrest clip through a partial lift of the seat back cover. To access the air bag cover put the flat-bladed tool inside the seat cover and pull it over the air bag. After that remove the seat cover to expose the entire seat area. The panel fasteners need disconnection for rear cardboard panel removal until the head restraint retainers can be unclipped. Get rid of all retaining bolts from the Seat Belt tower cover before pulling off the cover. First push the Seat Belt and Seat Belt bezel through the seat cover opening prior to lifting away the remaining part of the seat back cover from the foam pad and removing the foam pad from the frame. When installing the foam pad onto the frame first then follow up by attaching the Seat Belt tower while securing bolt retention for the Seat Belt tower cover at 1.9 n.m (17 lb in). Place the rear cardboard panel onto the frame while fastening its pieces and position the seat back cover partially onto the top section of the frame. The Seat Belt and bezel should first go through the tower opening before you put the armrest clip in place and move the remaining cover from side to side. First install armrests before wrapping the seat cover around the air bag cover when equipping the seat with them. Tighten the nut attached to the lower Seat Belt anchor at 53 n.m (39 lb ft). Conclude the installation by inserting the seat trim panel along with head restraints so that the velcro in the seat cushion retains the seat cover and connect the j-strip at the bottom of the seat.
    Posted by ChevyPartsGiant Specialist
    Q:
    How to remove and replace the Seat Cushion Pad and trim cover on GMC Sierra 3500? Posted by Customer
    A:
    The procedure for seat cushion trim cover and pad replacement starts with front nuts removal beneath the seat cushion then moving onto removing the front seat trim panel. The lumbar wire harness needs disconnecting and the lumbar cable needs unsnapping for vehicles having power lumbar features. When replacing the seat cushion trim cover and pad disconnect the electrical connectors and detach the pressure sensor from the front passenger seat frame if your vehicle has an Inflatable Restraint Passenger Presence System. Start by pulling the seat cushion forward from its rear plastic holders to lift it off then uninstall the lumbar actuator and seat switch bezel. To replace the seat cushion pad and frame you must first unclip the trim cover from the frame before using a side motion for pad and cover separation. The passenger presence system requires assembly replacement due to safety concerns because all parts including bladder, pressure sensor, seat cushion and control module must be replaced simultaneously. A front passenger seat cushion replacement requires complete replacement of the Inflatable Restraint Passenger Presence System. The seat cushion pad and seat cushion heater element need removal from the frame. Start the installation process by placing the seat cushion heater element first if the system supports it then add the Inflatable Restraint Passenger Presence System. Connect the seat cushion pad to the seat cushion frame before gently pulling the seat cushion cover over the frame pad in a side-to-side direction. Secure the seat trim cover to the seat cushion frame before you install the lumbar actuator along with the seat switch bezel. Handle the cushion to fit onto its rear plastic holders and move it to the back position. Installation of the lumbar cable and the lumbar wire harness begins prior to attaching the pressure sensor to the seat frame (if power lumbar is present). Complete the cable connection procedure then attach front nuts to underside studs on the cushion before tightening each screw to 21 N.m (15 lb ft). In the final step install the front seat trim panel and perform a re-zero operation on the Inflatable Restraint Passenger Presence System.
    Posted by ChevyPartsGiant Specialist
    Q:
    How to remove and replace the Seat Cushion Pad and trim cover on GMC Sierra 1500? Posted by Customer
    A:
    The first step to change a seat cushion requires removing front nuts beneath the seat followed by removing its front trim panel. Vacuum the power functions from the lumbar cable and detach the wire harness from the power lumbar if it exists. Disconnection of electrical wiring should start as a first step whereas owners of vehicles featuring the Inflatable Restraint Passenger Presence System must extract the pressure sensor which resides on the front passenger seat frame. You must first lift the seat cushion beyond its rear plastic holders before pulling it forward before taking out the seat switch bezel and the lumbar actuator. Lift the seat trim cover off its mounting on the seat cushion frame after which you must gently peel the seat cushion trim cover off the seat cushion pad using a side to side action. The replacement of the passenger presence system as a complete assembly is crucial for safety reasons because the bladder along with pressure sensor and seat cushion and control module work together as a calibrated unit. A new front passenger seat cushion requires replacement of the whole Inflatable Restraint Passenger Presence System. Extraction of the pad from both the seat cushion frame and the seat cushion heater element should be completed when possible. Start by installing the seat cushion element first unless it is not used then continue with the Inflatable Restraint Passenger Presence System installation process. Connect the seat cushion pad to the frame first before gently pulling the cover onto the pad using a side steering motion. Attach the seat trim cover onto the seat cushion frame while also installing the lumbar actuator followed by the seat switch bezel. The process begins by moving the cushion to the rear plastic holders before pushing it toward the back. If the system has power lumbar functionality, connect the rear lumbar cable as well as the lumbar wire harness. The front passenger seat frame requires installation of the pressure sensor when using the Inflatable Restraint Passenger Presence System and you should reconnect all electrical connectors. Thread the front nuts into the studs below the cushion before torquing them to 21 N.m (15 lb ft) then put back the front seat trim panel. The last step involves resetting the zero value of the Inflatable Restraint Passenger Presence System.
    Posted by ChevyPartsGiant Specialist
    Q:
    How to replace the rear Seat Cushion Pad and cover on GMC Sierra 1500 Classic? Posted by Customer
    A:
    Vehicle owners should remove their rear seat before they start the replacement process of the rear seat cushion cover and pad. Secondly take out the rear passenger seat riser. The first step includes taking off hog rings and J-clips attached to the rear segment of the seat cushion cover while disconnecting the rear heating component if your vehicle has this feature. The seat belt buckles can be taken out if required. Complete removal of hog ring and J-clip fasteners must be performed to detach seat cushion cover from seat cushion frame. Unfasten the hook and loop-strips connecting the seat cushion cover to foam pad while separating the center screw securing the latch cover if your vehicle has this component. You should then detach the seat cushion cover from the foam pad. Start by placing the seat cushion cover on the foam pad and fix the center screw retaining the latch cover at 2 N.m (18 lb in). Reposition the hook and loop-strips on the seat cushion cover before fastening them to the foam pad . Replace seat buckles originally removed during the process. Connect the rear heater connector when installed before using hog rings or J-clips to fasten the seat cushion cover on the metal frame of the cushion. Reposition the rear passenger seat risers before returning both the rear seat and its risers into the vehicle.
    Posted by ChevyPartsGiant Specialist
    Q:
    How to remove and replace the Seat Cushion Pad and trim cover on GMC Yukon? Posted by Customer
    A:
    Both the seat cushion trim cover and pad removal begins by removing front nuts which are located underneath the seat cushion followed by front seat trim panel demount. The power lumbar wire harness needs disconnection as well as the lumbar cable unsnap for seats equipped with this option. Remove the electrical connectors on the front passenger seat frame and take out the pressure sensor when present on the Inflatable Restraint Passenger Presence System. To access the parts you need to remove the seat cushion from its rear plastic holders by pulling the forward direction. After that you need to take out the seat switch bezel and lumbar actuator. Carefully remove the seat trim cover from the seat cushion frame before separating the seat cushion trim cover from the seat cushion pad through a side moving motion. The passenger presence system requires replacement as an entire unit because its calibration depends on the bladder along with the pressure sensor and seat cushion and control module. A replacement of the front passenger seat cushion requires an entire new Inflatable Restraint Passenger Presence System as well. The pad needs removal from the frame of the seat cushion while also removing the seat cushion heating element whenever installed. Install the seat cushion heater element first according to the installation process and then install the Inflatable Restraint Passenger Presence System. Seamlessly place the seat cushion pad onto the frame before directing the frame pad into the cushion cover by applying a side motion. After affixing the seat trim cover to the seat cushion frame users should proceed to install the lumbar actuator followed by the seat switch bezel. After placing the cushion on its rear plastic holders the installer should push the seat forward while reattaching the lumbar cable and wire harness for power lumbar features. The pressure sensor installation should be completed on the front passenger seat frame when possible while also repairing electrical connectors. The front nuts should be installed onto underneath positioning studs of the cushion before tightening them to 21 N.m (15 lb ft). Then reinstall the front seat trim panel. The service procedure calls for re-zeroing of the Inflatable Restraint Passenger Presence System as the last step.
    Posted by ChevyPartsGiant Specialist
    Q:
    How to Replace a Rear Seat Cushion Pad and Cover for 60/40 and 50/50 Split Seats on GMC Yukon XL 2500? Posted by Customer
    A:
    The process for changing the rear seat cushion cover and pad must start with removing the rear passenger seat followed by the removal of the rear passenger seat riser. The first step requires removing the seat cushion plastic cover from its frame before loosening hog rings or J-clips that bind the rear edge of the seat cushion cover . The technician should disconnect the rear heater connector along with removing the seat belt buckles if they are present. The next step requires you to disconnect all hog rings or J-clips from the seat cushion frame while detaching the hook and loop-strips between the seat cushion cover and foam pad. Take off the seat cushion cover by removing the center screw that holds the latch cover in place and stepping off the cover from the foam pad. The installation starts by using the foam pad to place the seat cushion cover while following the Fastener Notice in Service Precautions. Install the center screw that retains the latch cover by tightening it to 2 N.m (18 lb in). After that, wrap the hook and loop-strips around the foam pad for seat cushion cover attachment. Reinstallation requires the seat buckles to be reconnected along with the attachment of the heater connector to the rear part if present. Completing the installation requires fastening the hog rings or J-clips to fasten the seat cushion cover onto the seat cushion frame while the seat cushion plastic cover gets anchored to the seat cushion frame and the rear passenger seat risers are reinstalled before slotting the rear passenger seat back into its position.
    Posted by ChevyPartsGiant Specialist
    Q:
    How to replace the front seat back cover and Seat Cushion Pad on GMC Sierra 1500? Posted by Customer
    A:
    The process of replacing the front seat back cover and pad requires the removal of the head restraint and seat trim panel followed by the lower Seat Belt anchor nut before disengaging the j-strip retainer at the bottom of the seat back cover and disconnecting the heater seat element connector if present. The armrest should be removed before lifting the seat cover over the air bag cover until you reach the top seating position. The bottom end of your seat back cover has a j-strip retainer which needs uninstallation followed by disconnecting all heater seats elements connectors if they exist. You should lift the seat back cover half off its foam pad to access the armrest clip along with the armrest (if equipped). Push a flat-bladed tool beneath the seat cover to slide it over the air bag cover before carrying out the seat cover removal up to the seat top. Remove the rear cardboard panel by disengaging its panel fasteners and release the head restraint retainers by unclipping them. You should remove the bolts that secure the Seat Belt tower cover before removing the cover from its position. Feed the Seat Belt along with the Seat Belt bezel through the seat cover opening before lifting the rest of the cover from the foam pad until the pad can be removed from the frame. Install the Seat Belt tower by affixing the foam pad on the frame first and then tighten the Seat Belt tower cover bolts to 1.9 n.m (17 lb in). After placing the rear cardboard panel and hooking its fasteners the seat back cover needs to be partially installed onto the frame top. After routing the Seat Belt and its bezel through the tower opening users must mount the armrest clip then gently pull the remaining cover portion using alternating side-to-side movements of the hand. Install the armrests and head restraint retainers before fitting the seat cover around the air bag cover and inserting the nut onto the lower Seat Belt anchor while tightening it to 53 n.m (39 lb ft). You need to put the seat trim panel in position and install the head restraints before pushing the seat cover down to check it has secure retention from the velcro in the seat cushion and to join the j-strip at seat bottom.
    Posted by ChevyPartsGiant Specialist
    Q:
    What is the next step after removing the pad from the seat cushion frame for the 2005 Chevrolet Avalanche 1500? Posted by Customer
    A:
    Remove the seat cushion heater element if equipped.
    Posted by ChevyPartsGiant Specialist
    See expert answers on similar Seat Cushion Pad
    If you have any questions about this product, please don't hesitate to ask us. We will be happy to help you!

OEM GM 19330710, Excellent Performance and Perfect Fitment

To ensure reliability, purchase GM part # 19330710 Seat Cushion Pad, Driver Side. It is sometimes referred to as GM Seat Cushion Pad. Choosing OEM parts is the optimal decision for guaranteeing superior quality and perfect performance. These components undergo stringent quality checks and are carefully constructed to comply with GM's factory specifications, ensuring a smooth installation process.

ChevyPartsGiant.com is a leading supplier of genuine GM parts such as GM 19330710 Seat Cushion Pad, Driver Side. Our website boasts an extensive inventory of OEM GM parts, available at highly competitive prices in the market. Should you require any new genuine GM parts, rest assured we will deliver them swiftly and efficiently to your doorstep. Furthermore, all our parts come with the assurance of a manufacturer's warranty. For detailed Chevy parts information, click here.
Choose ChevyPartsGiant for discounted prices, exceptional service and fast delivery