Make sure this part fits

GM 12599806
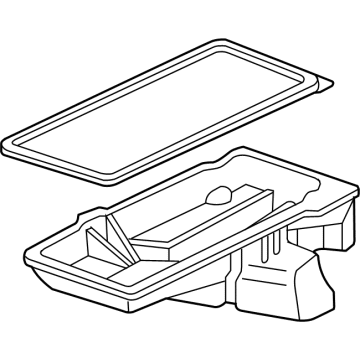
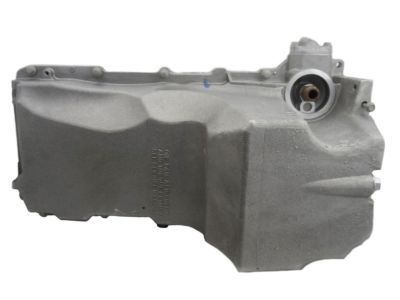
Oil Pan

2007 GM

Customer Questions & Expert Answers (7)
GM 12599806 Oil Pan
GM 12599806 Oil Pan
  • Part Description
    Pan, Engine Oil
  • Replaces
    12599805
  • Manufacturer
    General Motors
Make sure this part fits
$136.32 MSRP: $328.67
You Save: $192.35 (59%)
Ships in 1-3 Business Days
1
ADD TO CART
  • Related Parts
  • Product Specifications
  • Vehicle Fitment
  • Customer Questions & Expert Answers
  • Product Specifications

    BrandGenuine GM
    Manufacturer Part Number12599806
    Part DescriptionPan, Engine Oil
    Item Dimensions26.6 x 12.6 x 12.6 inches
    Item Weight16.00 Pounds
    ConditionNew
    Fitment TypeDirect Replacement
    Replaces12599805
    ManufacturerGeneral Motors
    SKU12599806
    WarrantyThis genuine GM part is guaranteed by GM's factory warranty.
    Shipping & ReturnShipping Policy Return Policy
    Warning: California's Proposition 65
  • Vehicle Fitment

    Year Make Model Trim Engine
    2007 Chevrolet Express 1500Base, LS, LT8 Cyl 5.3 L FLEX, 8 Cyl 5.3 L GAS
    2007 Chevrolet Express 2500Base, LS, LT8 Cyl 4.8 L GAS, 8 Cyl 6.0 L GAS
    2007 Chevrolet Express 3500Base, LS, LT8 Cyl 4.8 L GAS, 8 Cyl 6.0 L GAS
    2007 Chevrolet Silverado 1500LS, LT, LTZ, WT8 Cyl 4.8 L GAS, 8 Cyl 5.3 L FLEX, 8 Cyl 5.3 L GAS, 8 Cyl 6.0 L GAS
    2007 Chevrolet Silverado 1500 ClassicHybrid, LS, LT, SS, WT8 Cyl 4.8 L GAS, 8 Cyl 5.3 L FLEX, 8 Cyl 5.3 L FULL HYBRID EV-GAS (FHEV), 8 Cyl 5.3 L GAS, 8 Cyl 6.0 L GAS
    2007 Chevrolet Silverado 1500 HD ClassicLT8 Cyl 6.0 L GAS
    2007 Chevrolet Silverado 2500 HDLT, LTZ, WT8 Cyl 6.0 L GAS
    2007 Chevrolet Silverado 2500 HD ClassicLS, LT, WT8 Cyl 6.0 L GAS
    2007 Chevrolet Silverado 3500 ClassicLS, LT, WT8 Cyl 6.0 L GAS
    2007 Chevrolet Silverado 3500 HDLT, LTZ, WT8 Cyl 6.0 L GAS
    View More
  • Customer Questions & Expert Answers

    Q:
    Is this 12599806 designed for my car? Posted by ChevyPartsGiant Specialist
    A:
    Please Select Your Vehicle model to see if part number 12599806 is suitable before ordering.
    Posted by ChevyPartsGiant Specialist
    Q:
    How to replace the oil pan on Chevrolet Silverado 1500 Classic? Posted by Customer
    A:
    Begin the Oil Pan replacement process by securely raising your vehicle then supporting it. Start by draining the oil through Drain Plug and Oil Filter removal after disconnecting the skid plate bolts and plate (if equipment includes these components). The 2wd requires removal of the crossmember bolts along with the bar component. In addition to front differential carrier removal 4wd owners should complete the same process. Begin by taking out the battery cable bracket bolts then proceed to remove Starter and transmission cover while seizing positive battery cable clip bolts next to evenly disconnect oil level sensor electrical connector. The procedure requires transmission bolt removal for both manual and automatic designs. Afterward, discard the oil level sensor which cannot be reused. Take out the Oil Pan bolts and nuts before removing the Oil Pan and throwing away the Oil Pan Gasket. It's essential to examine and clean the Oil Pan when needed. During installation apply a 0.197 inch (5 mm) wide adhesive strip across both sides of front cover to engine block junction while extending the adhesive strip to cover the entire rear oil seal housing to engine block junction. Install the Oil Pan Gasket immediately after gasket placement while adhesive remains wet. Install a brand new gasket. Before mounting the Oil Pan it must rest flat or sit no further than 0.3 mm (0.011 inch) in front of the engine block's rear surface. Set the Oil Pan straight with a straight edge after you have pressed the gasket into its grooves. After tightening the Oil Pan bolts and nuts until they become snug use a feeler gauge to check the transmission housing clearance. If this measurement is over 0.3 mm (0.011 inch) repeat the alignment process. The alignment process must be repeated when the feeler gauge measurement goes beyond 0.3 mm (0.011 inch). After tightening the Oil Pan bolts to 25 nm torque with specified sequence apply a feeler gauge measurement for clearance check. Slide the new Drain Plug o-ring along the Drain Plug before tightening it to 25 nm (18 ft. Lbs.). After tightening the new oil level sensor to 13 nm (115 inch lbs.), put the transmission cover back in place and secure all bolts to 12 nm (106 inch lbs.). Tighten both manual and automatic transmission bolts with 50 nm (37 ft. Lbs.) of torque. Finally, bolt and tighten the positive battery cable clip to 9 nm (80 inch lbs.). Reinstall the Starter and attach the oil level sensor electrical connector. Reinstall the battery cable bracket bolts while maintaining a torque of 12 nm (106 inch lbs.). The 2wd crossmember requires bolt installation at 100 nm (74 ft. Lbs.) torque. When reinstalling the front differential carrier and crossmember for 4wd models keep the bolts at 100 nm (74 ft. Lbs.). Follow this step by reinstalling the skid plate of the Oil Pan with 20 nm (15 ft. Lbs.) torque settings. Apply clean engine oil to the Oil Filter gasket before installing it then torque the filter to 30 nm (22 ft. Lbs.). To finish the procedure lower the vehicle down and add the correct amount and grade of engine oil as recommended.
    Posted by ChevyPartsGiant Specialist
    Q:
    How to replace the oil pan on Chevrolet Silverado 3500 Classic? Posted by Customer
    A:
    First, in the case vehicles are equipped with 4wheel drive (4WD), the inner axle housing nuts and washers are to be removed from the bracket and the front drive axle is to be supported with a suitable jack before making any replacement. The next step is to remove differential carrier lower and upper mounting bolts and nuts, lower front drive axle, and the transmission cover bolt. If necessary, remove the Oil Pan skid plate by removing its bolts, then crossbar bolts and crossbar itself. Take off bolt and cover transmission, drain the engine oil and take off the engine Oil Filter, and put the Drain Plug and Oil Filter back on until tight. For the vehicles with the 4 l60-e automatic transmission, pull out transmission bolt and stud on the right hand side, as well as the lower bolt on the left hand side. When you have the 4l80-e automatic transmission, unfasten the transmission converter cover bolts. Disconnect the oil level sensor e / c connector, remove the battery cable channel bolt, and pull out the channel pin from the Oil Pan tab; disconnect the engine wiring harness clip and the positive battery cable clip from the positive battery cable clip, remove the engine oil cooler lines, and the positive battery cable clip bolt and clip out. Remove the Oil Pan bolts and the Oil Pan itself, making sure to avoid foreign objects falling into the oil passages. Drill out the Oil Pan Gasket retaining rivets if necessary and discard the gasket and rivets. Clean and inspect engine Oil Pan where necessary. At the time of installation, it is necessary to apply a 5 mm (0.2 inch) bead of a sealant 20 mm (0.8 inch) long to the engine block on tabs of a front and rear cover gaskets that extend into the Oil Pan surface. Ensure that the oil gallery passages in the Oil Pan are properly aligned with the engine block using the new gasket of the Oil Pan, pre-assemble the gasket to the pan and load the Oil Pan, gasket, and bolts to the block. Secure Oil Pan bolts so that they are snug but not over tightened, then install transmission converter cover bolts so that they are snug for the 4l80-e automatic transmission, and the transmission bolt and stud at the right side for the 4l60-e automatic transmission. Use the bottom bolt on the left-hand side till it's locked in place, then tighten the Oil Pan and Oil Pan-to-Oil Pan front cover bolts to 25 nm (18 ft. Lbs) and Oil Pan-to-rear cover bolts to 12 nm (106 inch lbs.) and the bellhousing, converter cover and transmission bolts/stud to 50 nm (37 ft. Lbs.). Mount the positive battery cable clip onto the Oil Pan and tighten bolt to 9 nm (80 inch lbs.) and attach engine oil cooler lines to the positive battery cable clip, engine wiring harness clip, and the positive battery cable clip. Insert slide the channel pin in the Oil Pan tab, install the battery cable channel bolt and tighten it in 12 nm (106 inch lbs). Connect the oil level sensor electrical connector, install and bolt the transmission cover, after bolting it to a 12 nm (106 inch lbs), the remaining bolt to install is the crossbar and the bolt shall be tightened to 100 nm (74 ft. Lbs.). If necessary, install the Oil Pan skid plate and its bolts at 20 nm (15 ft. Lbs.), and then the transmission cover bolts at 12 nm (106 inch lbs.). Lift the front drive axle into position and this is for 4wd, install the differential carrier upper mounting bolt and nut that are going to be tight until snug, then install the lower mounting bolt and nut and tighten to 100 nm (75 ft. Lbs). Finally, install the inner axle housing washers and nuts to the bracket, tighten nuts to 100 nm (75 ft. Lbs.), remove the jack from the front drive axle, and new engine oil and a new Oil Filter.
    Posted by ChevyPartsGiant Specialist
    Q:
    How to replace the oil pan on 4WD on GMC Sierra 3500 Classic? Posted by Customer
    A:
    First, raise and support your vehicle when replacing the Oil Pan on 4wd vehicles. You need to remove skid plate bolts and skid plate when working on 1500 series vehicles. The Oil Pan skid plate bolts on the vehicle's rear need loosening but the front bolts and skid plate should be removed if installed. Start by placing a suitable drain pan underneath the Oil Pan Drain Plug (430) before you remove the Drain Plug. Allow all oil to drain out before reinstalling the Drain Plug tight. A drain pan goes under the Oil Filter before you remove it at point (437) so the filter can empty before you put the filter back properly. For both 1500 and 2500 series vehicles extract the right and left side transmission cover bolts and cover before removing the crossbar bolts/nuts and crossbar. When working with 4l60-e/4l70-e automatic transmissions you should remove the two lower transmission bolts. For 4l80-e, remove the 2 lower transmission bolts; the transmission lower bolts are to be removed for 4l80-e but for 6l80-e only the left bolt and right stud need to come out. Disconnect the engine harness electrical connector from the oil level sensor then remove the engine harness clip from the transmission oil cooler line bracket before removing the battery cable channel bolt. Reposition the channel pin from the Oil Pan tab while removing compatible oil cooler lines from the transmission-specific clip. Begin by removing the fasteners of the transmission oil cooler line clip from the Oil Pan before moving onto Oil Pan bolts followed by the pan's removal. Before pan reuse, users must drill out Oil Pan Gasket rivets when needed before removing both the gasket itself and its rivets. The first step for installation requires critical alignment of the structural Oil Pan followed by strict avoidance of gasket reuse during assembly. Place a new Oil Pan Gasket onto the Oil Pan followed by a 5 mm (0.20 in) bead of sealant on the front and rear cover engine block gasket tabs before installing the Oil Pan and its bolts to a snug torque. When installing the lower right transmission stud together with the lower left transmission bolt you should tighten them until they become snug on vehicles with 6l80-e automatic transmission. Snap the transmission bolts into place until they reach a snug fit for 4l80-e along with 4l60-e/4l70-e. The tightness of both the Oil Pan bolts and the front cover bolts to 25 n.m (18 lb ft) and the rear cover bolts to 12 n.m (106 lb in) and the transmission bolts/stud to 50 n.m (37 lb ft) is required. Next attach the transmission oil cooler line clip before installing its bolt to the Oil Pan while maintaining a torque of 9 n.m (80 lb in). Secure the oil cooler lines to the installation clip first then position the channel and slide the channel pin into the Oil Pan tab. Last, install the battery cable channel bolt and tighten it to 12 n.m (106 lb in). The oil level sensor needs its electrical connection from the engine harness while the engine harness clip must mount at the transmission oil cooler line bracket. Both 1500 and 2500 versions require cleaning all original adhesive traces while distilling the bolt threads with denatured alcohol followed by an application of gm p/n 12345493 threadlock (Canadian P/N 10953488) or its equivalent to the bolts. For 2500 series vehicles torque nuts to 120 n.m (89 lb ft) while 1500 series requires 100 n.m (74 lb ft) torque. Secure the left side transmission cover in position then install its bolt before tightly torquing it to 12 n.m (106 lb in). Finish by installing the right side transmission cover bolt. Routine use of the original Oil Pan requires replacing the Oil Filter with a new one using clean engine oil to lubricate the seal then securing it at 30 n.m (22 lb ft). Reinstall the front differential carrier followed by steering rack installation and bolting. Tighten left side bolts to 200 n.m (148 lb ft) while right side bolts require 100 n.m (74 lb ft). On 2500 series vehicles position the Oil Pan skid plate then install the 2 front Oil Pan bolts if equipped; tighten all bolts including the 2 rear Oil Pan bolts to 28 n.m (21 lb ft). The Oil Pan skid plate requires mounting on 1500 series vehicles while torqueing the bolts to 28 n.m (21 lb ft). Drop the vehicle before filling its engine with new engine oil and check for fluid leaks with the engine operating.
    Posted by ChevyPartsGiant Specialist
    Q:
    How to replace the oil pan on GMC Sierra 1500? Posted by Customer
    A:
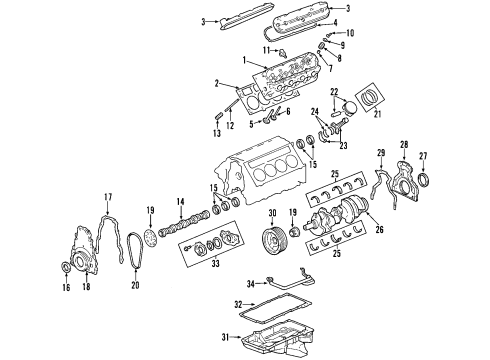
    The initial step to replace the Oil Pan requires vehicle elevation and proper vehicle support. Begin by draining your vehicle's oil by first removing the Drain Plug and filter but only after you have taken out the Oil Pan skid plate bolts and plate. The crossmember bolts and bar should be removed before starting 2-wheel drive replacement work. The front differential carrier needs removal in addition to crossmember bolts and bar for 4-wheel drive vehicles. The replacement process begins with removing the engine harness bracket bolts and Starter and transmission cover and engine harness and transmission tube bracket along with two engine wire harness bracket bolts. Remove manual and automatic transmission bolts when they apply. First remove the bolts securing the Oil Pan before removing the nuts from their position next remove the Oil Pan from the vehicle while getting rid of the old gasket. Check and clean the Oil Pan when needed. Installation requires a 5 mm (0.197 in) wide adhesive bead that should cover the entire engine block junction front and rear oil seal housing junction. Fit a brand-new Oil Pan Gasket during installation when adhesive is still fresh. A proper installation requires the Oil Pan to remain both flush and not extended beyond 0.3 mm (0.011 in) from the rear face of the engine block. Press the gasket into position through the grooves before sliding the Oil Pan back until it contacts a straight edge. After securing the Oil Pan bolts and nuts to a modest torque they should be measured with a feeler gauge to check the Oil Pan-to-transmission housing clearance. Proceed with repeat alignment operations if the clearance measurement exceeds 0.3 mm (0.011 in). Recheck the Oil Pan-to-transmission housing clearance measurement after torquing all bolts and nuts to 25 n.m (18 lb ft) based on the specified tightening sequence. Set the Drain Plug o-ring with a new one and torque it to 25 n.m (18 lb ft). Drive the transmission cover bolts to a torque of 12 n.m (106 lb in) before final installation. Fasten automatic and manual transmission bolts to 50 n.m when possible. You should bolt the engine wire harness bracket bolts to 9 n.m (80 lb in) along with the engine harness and transmission tube bracket bolt at this torque value. Replace the Starter while also reattaching the oil level sensor electrical wiring connector. Fasten the engine harness bracket bolts to 12 newton-meters (106 pounds-inch torque specification). The crossmember and bolts need installation for 2wd vehicles at 100 n.m (74 lb ft), while 4wd vehicles require front differential carrier and crossmember installation at 100 n.m (74 lb ft). The Oil Pan skid plate should be reinstalled with its bolts tightened to a torque of 20 n.m (15 lb ft). Use clean engine oil to treat the Oil Filter gasket before placing the filter and securing it to 30 n.m (22 lb ft). The last step involves lowering the vehicle before adding the correct amount of premium engine oil.
    Posted by ChevyPartsGiant Specialist
    Q:
    How to replace the oil pan on GMC Sierra 1500 Classic? Posted by Customer
    A:
    Begin the Oil Pan replacement process by securely raising your vehicle then supporting it. Start by draining the oil through Drain Plug and Oil Filter removal after disconnecting the skid plate bolts and plate (if equipment includes these components). The 2wd requires removal of the crossmember bolts along with the bar component. In addition to front differential carrier removal 4wd owners should complete the same process. Begin by taking out the battery cable bracket bolts then proceed to remove Starter and transmission cover while seizing positive battery cable clip bolts next to evenly disconnect oil level sensor electrical connector. The procedure requires transmission bolt removal for both manual and automatic designs. Afterward, discard the oil level sensor which cannot be reused. Take out the Oil Pan bolts and nuts before removing the Oil Pan and throwing away the Oil Pan Gasket. It's essential to examine and clean the Oil Pan when needed. During installation apply a 0.197 inch (5 mm) wide adhesive strip across both sides of front cover to engine block junction while extending the adhesive strip to cover the entire rear oil seal housing to engine block junction. Install the Oil Pan Gasket immediately after gasket placement while adhesive remains wet. Install a brand new gasket. Before mounting the Oil Pan it must rest flat or sit no further than 0.3 mm (0.011 inch) in front of the engine block's rear surface. Set the Oil Pan straight with a straight edge after you have pressed the gasket into its grooves. After tightening the Oil Pan bolts and nuts until they become snug use a feeler gauge to check the transmission housing clearance. If this measurement is over 0.3 mm (0.011 inch) repeat the alignment process. The alignment process must be repeated when the feeler gauge measurement goes beyond 0.3 mm (0.011 inch). After tightening the Oil Pan bolts to 25 nm torque with specified sequence apply a feeler gauge measurement for clearance check. Slide the new Drain Plug o-ring along the Drain Plug before tightening it to 25 nm (18 ft. Lbs.). After tightening the new oil level sensor to 13 nm (115 inch lbs.), put the transmission cover back in place and secure all bolts to 12 nm (106 inch lbs.). Tighten both manual and automatic transmission bolts with 50 nm (37 ft. Lbs.) of torque. Finally, bolt and tighten the positive battery cable clip to 9 nm (80 inch lbs.). Reinstall the Starter and attach the oil level sensor electrical connector. Reinstall the battery cable bracket bolts while maintaining a torque of 12 nm (106 inch lbs.). The 2wd crossmember requires bolt installation at 100 nm (74 ft. Lbs.) torque. When reinstalling the front differential carrier and crossmember for 4wd models keep the bolts at 100 nm (74 ft. Lbs.). Follow this step by reinstalling the skid plate of the Oil Pan with 20 nm (15 ft. Lbs.) torque settings. Apply clean engine oil to the Oil Filter gasket before installing it then torque the filter to 30 nm (22 ft. Lbs.). To finish the procedure lower the vehicle down and add the correct amount and grade of engine oil as recommended.
    Posted by ChevyPartsGiant Specialist
    Q:
    How do you remove the oil pan for the 2007 GMC Savana 2500? Posted by Customer
    A:
    Remove the oil pan bolts and the oil pan itself, ensuring no foreign material enters the oil passages.
    Posted by ChevyPartsGiant Specialist
    See expert answers on similar Oil Pan
    If you have any questions about this product, please don't hesitate to ask us. We will be happy to help you!

OEM GM 12599806, Excellent Performance and Perfect Fitment

To ensure reliability, purchase GM part # 12599806 Oil Pan. It is sometimes referred to as GM Oil Pan. Choosing OEM parts is the optimal decision for guaranteeing superior quality and perfect performance. These components undergo stringent quality checks and are carefully constructed to comply with GM's factory specifications, ensuring a smooth installation process.

ChevyPartsGiant.com is a leading supplier of genuine GM parts such as GM 12599806 Oil Pan. Our website boasts an extensive inventory of OEM GM parts, available at highly competitive prices in the market. Should you require any new genuine GM parts, rest assured we will deliver them swiftly and efficiently to your doorstep. Furthermore, all our parts come with the assurance of a manufacturer's warranty. For detailed Chevy parts information, click here.
Choose ChevyPartsGiant for discounted prices, exceptional service and fast delivery