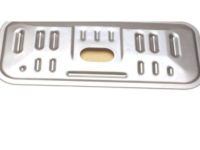
Make sure this part fits

GM 8681485
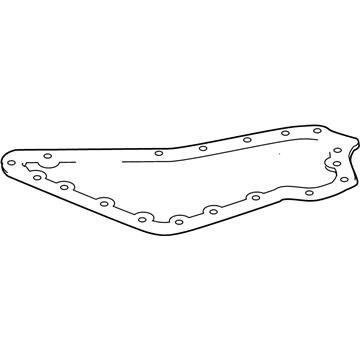
Oil Pan

1993-2011 GM

Customer Questions & Expert Answers (13)
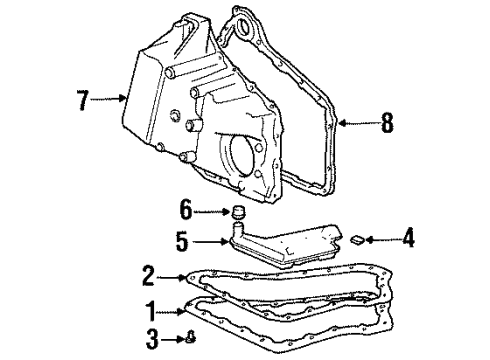
GM 8681485 Oil Pan
  • Part Description
    Pan-Automatic Transmission Oil; Automatic Transmission Oil Pan
  • Manufacturer
    General Motors
Make sure this part fits
$48.56 MSRP: $76.09
You Save: $27.53 (37%)
Currently Unavailable

Due to manufacturer supply shortage, this item isn't currently available for ordering.

  • Vehicle Fitment

    Year Make Model Trim Engine
    2006-2010 Buick LucerneCXL, CXS, Super8 Cyl 4.6 L GAS
    2006-2011 Cadillac DTSBase, Livery, Luxury, Platinum, Premium8 Cyl 4.6 L GAS
    1994-2005 Cadillac DeVilleBase, Concours, d'Elegance, DHS, DTS, Protection Series8 Cyl 4.6 L GAS
    1993-2002 Cadillac EldoradoBase, ESC, ETC, Sport, Touring8 Cyl 4.6 L GAS
    1993-2004 Cadillac SevilleSLS, STS8 Cyl 4.6 L GAS
    2001-2003, 1995-1999 Oldsmobile AuroraBase6 Cyl 3.5 L GAS, 8 Cyl 4.0 L GAS
    2004-2005 Pontiac BonnevilleGXP8 Cyl 4.6 L GAS
    Warning: California's Proposition 65
  • Customer Questions & Expert Answers

    Q:
    Is 8681485 compatible with my car? Posted by ChevyPartsGiant Specialist
    A:
    Please Select Your Vehicle model to see if part number 8681485 is suitable before ordering.
    Posted by ChevyPartsGiant Specialist
    Q:
    How to service and repair the Transmission Pan on a Hydra-Matic 4T80-E on Cadillac Eldorado? Posted by Customer
    A:
    The first step of servicing and repairing the fluid pan includes both raising the vehicle and providing supportive measures. A drain pan should be positioned beneath the transmission bottom pan to receive the fluid. A full drain of transaxle fluid requires both bottom pan and case Drain Plug removal on the hydra-matic 4t80-e with the side cover and Torque Converter holding the rest of the fluid although most service procedures do not require Torque Converter draining. Start by draining the pan fluid through loosened lower pan bolts before you uninstall the bolts, pan and seal. A damaged bottom pan sealing surface demands a new replacement. All other conditions allow reusing the bottom pan seal. Before sealing the bottom pan and case surfaces maintain their cleanliness along with cleaning the bolts and tapped holes in the case. Use a small screwdriver to uninstall left or right scavenger screens and their corresponding seals while maintaining care against case damage and scoring. Place the new left and right scavenger seals together with screens inside the bottom pan followed by the pan installation including sealing and bolt attachment which should be initially tightened by hand. First tighten the pan bolts to 3 nm (27 inch lbs.) followed by another tightening cycle to 6 nm (53 inch lbs.) which should be completed by finally torquing them to 12 nm (106 inch lbs.). Place the vehicle into its lowest position while filling it with dexron iii transmission fluid up to the required level.
    Posted by ChevyPartsGiant Specialist
    Q:
    How to replace the transmission pan on a Hydra-Matic 4T80-E on Cadillac DeVille? Posted by Customer
    A:
    A proper starting point to replace the Oil Pan consists of elevating and supporting the vehicle. A drain pan should sit underneath the transmission bottom pan during fluid drainage. Partial transmission fluid drainage occurs when servicing the hydra-matic 4t80-e because the side cover and Torque Converter maintain fluid within them; draining from the side cover requires removal of the case Drain Plug after bottom pan extraction but Torque Converter draining should only happen for specific service needs. The procedure requires bottom pan bolt loosening while draining fluid from the pan until the bolts and pan with its seal can be successfully removed. Before reinstallation you must replace the bottom pan seal as it is not reusable because you found dents or nicks on the sealing surface while inspecting it. The case sealing process requires clean and dry bottom pan and sealing surfaces while bolts and tapped holes in the case must also be free from debris for optimal bolt torque. Begin by installing the bottom pan followed by the new seal and then securing the bolts with a finger-touch force before securing them to the correct torque. Pan bolts must be tightened to the stated torque values of 3 nm (27 inch lbs.), then 6 nm (53 inch lbs.) and finally 12 nm (106 inch lbs.) in that order throughout multiple stages. The final task involves slowly lowering the vehicle while filling the transmission with dexron-iii fluid per specifications.
    Posted by ChevyPartsGiant Specialist
    Q:
    How to replace the transmission pan on Cadillac Eldorado? Posted by Customer
    A:
    Begin replacement of the Oil Pan by raising your vehicle upside down while supporting it. One must put a drain pan beneath the transmission bottom pan in order to collect the liquid. Draining transaxle fluid from the hydra-matic 4t80-e requires the removal of the bottom pan since the side cover and Torque Converter maintain fluid retention; draining side cover fluid requires removing the case Drain Plug when the bottom pan is already off and Torque Converter draining is usually not necessary during service procedures. Remove any fluid collected in the pan by loosening the bottom pan bolts before completing the pan bolt removal and total pan extraction along with the removing the seal. Bottom pan replacement is necessary when damage appears on its sealing surface during inspection. The bottom pan seal cannot be reused so technicians should replace the seal with a new one after performing any service. You must ensure the bottom pan and case sealing surfaces are dry and clean together with bolted and tapped holes in the case because proper bolt torque depends on this condition. Install the new bottom pan and new seal while bolting it throughout before tightening the bolts manually at first. Follow this specific tightening order for pan bolts which includes first a 3 nm (27 inch lbs.) torque then 6 nm (53 inch lbs.) and ending with 12 nm (106 inch lbs.). After lowering the vehicle you should put dexron iii transmission fluid according to the required amount.
    Posted by ChevyPartsGiant Specialist
    Q:
    How to service the Transmission Pan on a HYDRA-MATIC 4T80E on Cadillac DeVille? Posted by Customer
    A:
    The service of fluid pan requires you to raise the vehicle and provide support while installing a drain pan underneath the transmission bottom pan. Area the drain pan underneath the transmission bottom pan before fluid begins to flow. The bottom pan removal on a hydra-matic 4t80e allows fluid drainage from the side cover but fails to empt the Torque Converter contents; extracting fluid from the side cover requires accessing the Drain Plug in the case following bottom pan removal yet this does not usually require Torque Converter drainage. You should drain fluid from the pan while loosening the bottom pan bolts before taking out the bottom pan bolts and the pan and gasket together. Dents or nicks on the bottom pan sealing surface need replacement if they are detected. Cleaning both the bottom pan and case sealing surfaces will achieve proper sealing when the bolts and tapped holes remain both clean and dry to achieve optimal torque levels. Every time the bottom pan needs service the original gasket must be replaced with a new one before reinstalling the bottom pan. Put the new gasket together with the bottom pan and bolts on it before tightening the bolts manually. Three pan bolt installations require correct torque combination according to this order: 3 nm (27 inch lbs.) followed by 6 nm (53 inch lbs.) and concluding with 12 nm (106 inch lbs.). Finally lower the vehicle then fill it with dexron-iii transmission fluid per the required amount.
    Posted by ChevyPartsGiant Specialist
    Q:
    How to replace the transmission pan on a Hydra-Matic 4T80-E on Cadillac Seville? Posted by Customer
    A:
    Starting Oil Pan replacement requires that you raise and support the vehicle. A drain pan should be positioned under the transmission bottom pan to contain the fluid. When servicing the hydra-matic 4t80-e transaxle using the bottom pan removal method the fluid drain is only partial because the side cover along with the Torque Converter hold fluid inside them while fluid drainage from the side cover requires removing the Drain Plug post-pan removal but the Torque Converter does not need draining except in special situations. You should loosen and drain the pan fluid then take out the bottom pan bolts and pan and seal. Examine the bottom pan because any damage on its sealing surface indicates the need for replacement because the bottom pan seal becomes unusable after removal and requires a brand new seal for installation. The proper case and bottom pan sealing requires clean dry surfaces so perform this step before tightening any bolts located in the case and tapped holes. Begin with finger-tightening the bottom pan bolts before adding the new seal and bottom pan followed by bolt tightening. The pan bolts need three tightens by following this specification sequence: 3 nm (27 inch lbs.) for the first tighten and 6 nm (53 inch lbs.) for the second tighten before finishing with 12 nm (106 inch lbs.). Install the dexron iii transmission fluid when lowering the vehicle.
    Posted by ChevyPartsGiant Specialist
    Q:
    How to service the transmission pan on a HYDRAMATIC 4T80-E on Cadillac Seville? Posted by Customer
    A:
    The first step for servicing the fluid pan requires you to raise and support the vehicle. A drain pan must be placed beneath the transmission bottom pan during fluid collection. The bottom pan removal from hydramatic 4t80-e leaves some transaxle fluid inside the side cover and Torque Converter since the Drain Plug in the case needs to come out after the bottom pan is detached. Fluid extraction from the Torque Converter itself is not essential during regular maintenance. You should first drain the fluid from the pan by loosening its bottom bolts before you can remove both the bottom bolts and pan along with the new seal. The bottom pan must replace when denting or nicking appears on its sealing surface. Cleaning both the sealing surfaces of the bottom pan and the case and drying them properly leads to correct sealing while cleaning and drying all caso bolts and threaded opening helps maintain precise tightening torque. Fasten the bottom pan along with its new seal and bolts before tightening them loosely. Tackle the pan bolt torquing procedure by tightening the bolts successively at 3 nm (27 inch lbs.) for the first sequence then 6 nm (53 inch lbs.) followed by 12 nm (106 inch lbs.). Perform the fluid addition of dexron-iii transmission fluid while lowering the vehicle. Perform reset of the transmission oil life indicator when doing a full fluid replacement task. The bottom pan seal becomes unusable after the bottom pan removal so replacement is needed following any service procedures.
    Posted by ChevyPartsGiant Specialist
    Q:
    How do you detach the oil pan for the 2009 Buick Lucerne? Posted by Customer
    A:
    Use a rubber mallet or screwdriver to gently pry the oil pan loose and allow the fluid to drain.
    Posted by ChevyPartsGiant Specialist
    See expert answers on similar Transmission Pan
    Q:
    How do you prepare the oil pan and case for reinstallation for the 2010 Buick Lucerne? Posted by Customer
    A:
    Ensure the oil pan and case flanges are dry and free of oil film, then clean the case and oil pan gasket surfaces with solvent and air dry them.
    Posted by ChevyPartsGiant Specialist
    See expert answers on similar Transmission Pan
    Q:
    How do you detach the oil pan for the 2008 Buick Lucerne? Posted by Customer
    A:
    Use a rubber mallet or screwdriver to gently pry the oil pan loose and allow the fluid to drain.
    Posted by ChevyPartsGiant Specialist
    See expert answers on similar Transmission Pan
    Q:
    What should you check for on the oil pan flange for the 2007 Buick Lucerne? Posted by Customer
    A:
    Check for distortion and replace it if bent or distorted without attempting to straighten it.
    Posted by ChevyPartsGiant Specialist
    See expert answers on similar Transmission Pan
    Q:
    What should you do after installing the oil pan for the 2006 Buick Lucerne? Posted by Customer
    A:
    Lower the vehicle and fill the transaxle with DEXTRON(r) III, ensuring not to overfill to prevent foaming and potential damage.
    Posted by ChevyPartsGiant Specialist
    See expert answers on similar Transmission Pan
    Q:
    Does removing the bottom pan on the HYDRAMATIC 4T80-E fully drain the transaxle fluid for the 2000 Cadillac Eldorado? Posted by Customer
    A:
    No, it only partially drains the transaxle fluid, as the side cover and torque converter hold the remaining fluid.
    Posted by ChevyPartsGiant Specialist
    See expert answers on similar Transmission Pan
    If you have any questions about this product, please don't hesitate to ask us. We will be happy to help you!

OEM GM Oil Pan 8681485 Designed for Proper Fit and Performance

Original OEM GM parts deliver superior quality and meet all performance standards needed for optimal automotive operation. The authentic part identified by 8681485 Oil Pan is available in the market under the name GM Transmission Pan. This genuine product has a full warranty coverage from the manufacturer available at all authorized GM dealers throughout the United States. This part 8681485 Oil Pan fits certain Cadillac DTS, DeVille, Eldorado models, as well as Buick Lucerne. Additionally, it is compatible with Pontiac Bonneville and Oldsmobile Aurora models.
The original GM component designated by manufacturer part number 8681485 maintains top performance when functioning as the Pan-Automatic Transmission Oil; Automatic Transmission Oil Pan unit. The component 8681485 is constructed from durable material and its dimensions span 24.5 x 21.9 x 3.1 inches while weighing 4.30 Pounds. The Direct Replacement component is ready in New condition to ensure full compatibility with your vehicle system. This component receives the designation of Transmission Pan; Pan, Transmission Oil Pan. The part 8681485 has available replacement options. GM manufacturer provides a warranty that ensures reliable operation of this product. The Shipping Policy and Return Policy pages outline complete details regarding shipping procedures and return processes.
If you want to save money in the long run on maintenance and repairs, you should choose OEM products because they're of the top level of durability. Are you on the quest of finding GM parts, our site is worth a visit. We stock an endless selection of high-quality GM components including things like ignition coils all the way through to fan shrouds and all at prices that can not be matched. You have nothing to worry about because all our OEM parts are covered with a manufacturer warranty, which guarantees superior quality and value.