Make sure this part fits

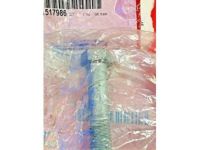
GM 15820927
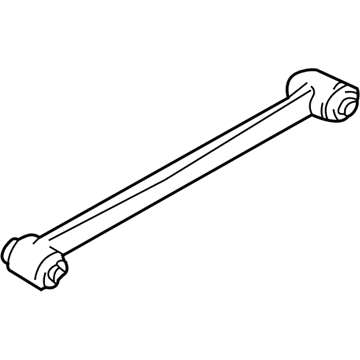
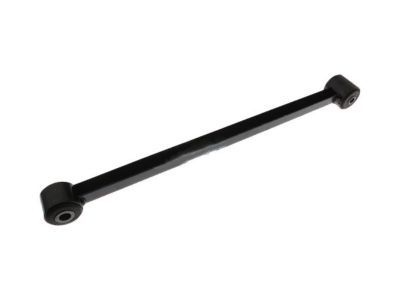
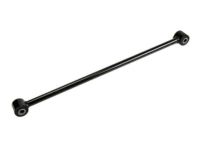
Trailing Arm, Rear

1988-2016 GM

Customer Questions & Expert Answers (23)
GM 15820927 Trailing Arm, Rear
  • Part Description
    Arm Assembly-Rear Suspension Trailing; Suspension Trailing Arm; Lateral Link; Lateral Arm
  • Position
    Rear
  • Replaces
    10244461
  • Manufacturer
    General Motors
Make sure this part fits
$58.45 MSRP: $100.38
You Save: $41.93 (42%)
Ships in 1-2 Business Days
1
ADD TO CART
  • Related Parts
  • Product Specifications
  • Vehicle Fitment
  • Customer Questions & Expert Answers
  • Product Specifications

    BrandGenuine GM
    Manufacturer Part Number15820927
    Part DescriptionArm Assembly-Rear Suspension Trailing; Suspension Trailing Arm; Lateral Link; Lateral Arm
    Other NamesArm, Rear Axle Control Arm
    Item Dimensions24.4 x 2.6 x 2.5 inches
    Item Weight3.50 Pounds
    PositionRear
    ConditionNew
    Fitment TypeDirect Replacement
    Replaces10244461
    ManufacturerGeneral Motors
    SKU15820927
    WarrantyThis genuine GM part is guaranteed by GM's factory warranty.
    Shipping & ReturnShipping Policy Return Policy
    Warning: California's Proposition 65
  • Vehicle Fitment

    Year Make Model Trim Engine
    1997-2005 Buick CenturyCustom, Limited, Special Edition6 Cyl 3.1 L GAS
    2005-2009 Buick LaCrosseCX, CXL, CXS, Super6 Cyl 3.6 L GAS, 6 Cyl 3.8 L GAS, 8 Cyl 5.3 L GAS
    1988-2004 Buick Regal25th Anniversary Edition, Custom, Gran Sport, GS, GSE, Limited, LS, LSE, Olympic Gold Edition6 Cyl 2.8 L GAS, 6 Cyl 3.1 L GAS, 6 Cyl 3.8 L GAS
    2000-2013 Chevrolet Impala50th Anniversary Edition, Base, LS, LS Sport, LT, LTZ, Police, SS6 Cyl 3.4 L GAS, 6 Cyl 3.5 L FLEX, 6 Cyl 3.5 L GAS, 6 Cyl 3.6 L FLEX, 6 Cyl 3.6 L GAS, 6 Cyl 3.8 L GAS, 6 Cyl 3.9 L FLEX, 6 Cyl 3.9 L GAS, 8 Cyl 5.3 L GAS
    2014-2016 Chevrolet Impala LimitedLS, LT, LTZ, Police6 Cyl 3.6 L FLEX
    1990-2001 Chevrolet LuminaBase, Euro, LS, LTZ, Z344 Cyl 2.2 L GAS, 4 Cyl 2.5 L GAS, 6 Cyl 3.1 L FLEX, 6 Cyl 3.1 L GAS, 6 Cyl 3.4 L GAS, 6 Cyl 3.8 L GAS
    1995-2007 Chevrolet Monte CarloIndianapolis 500 Pace Car, LS, LS Competition, LS Sport, LT, LTZ, SS, SS 35th Anniversary Edition, SS Dale Earnhardt Signature Edition, SS High Sport, SS Pace Car, Z346 Cyl 3.1 L GAS, 6 Cyl 3.4 L GAS, 6 Cyl 3.5 L FLEX, 6 Cyl 3.5 L GAS, 6 Cyl 3.8 L GAS, 6 Cyl 3.9 L GAS, 8 Cyl 5.3 L GAS
    1997 Oldsmobile CutlassGLS6 Cyl 3.1 L GAS
    1988-1997 Oldsmobile Cutlass SupremeBase, Indy 500 Pace Car, International, S, SL4 Cyl 2.3 L GAS, 6 Cyl 2.8 L GAS, 6 Cyl 3.1 L GAS, 6 Cyl 3.4 L GAS
    1998-2002 Oldsmobile IntrigueBase, GL, GLS, GX6 Cyl 3.5 L GAS, 6 Cyl 3.8 L GAS
    View More
  • Customer Questions & Expert Answers

    Q:
    Is this 15820927 designed for my car? Posted by ChevyPartsGiant Specialist
    A:
    Please Select Your Vehicle model to see if part number 15820927 is suitable before ordering.
    Posted by ChevyPartsGiant Specialist
    Q:
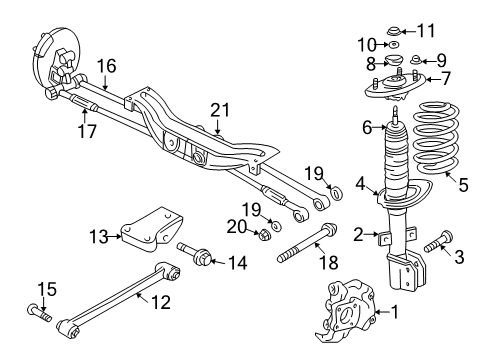
    How to replace the trailing arm (6) on Buick Century? Posted by Customer
    A:
    Next, to replace the trailing arm, first, lift and support the vehicle. Lift the bolt and nut used in the connection of the trailing arm to the knuckle, followed by removal of the nut and bolt from the trailing arm to the trailing arm bracket, and then remove the trailing arm from vehicle. For installation attach the trailing arm to the trailing arm bracket making sure to observe the Fastener Notice in Service Precautions. Ensure the connection with the bolt and nut, by tightening the bolt at 105 Nm (77 ft. lbs). Next install the trailing arm to the knuckle and attach bolt and nut while you tighten the nut 70 Nm + 65 degrees (52 ft. lbs. + 65 degrees). Finally, lower the vehicle.
    Posted by ChevyPartsGiant Specialist
    Q:
    How to properly service and repair the trailing arm on Buick LaCrosse? Posted by Customer
    A:
    To replace the trailing arm, lift and stabilize the vehicle, first. Remove the bolt and nut from the trailing arm and the knuckle , as well as the nut and bolt from the trailing arm and the trailing arm bracket. After you have separated these components, take the trailing arm off from the vehicle. For release, start by installing the trailing arm onto the trailing arm bracket and follow the Fastener Notice in Service Precautions. Next, you should secure the bolt and nut that fastens the trailing arm to the trailing arm bracket by tightening them with a value of 110 N.m (81 lb ft) Then join the trailing arm with the knuckle and bolt and nut , where the nut should be tightened to 240 N.m (177 lb ft). Finally, lower the vehicle.
    Posted by ChevyPartsGiant Specialist
    Q:
    How to replace the trailing arm on Buick LaCrosse? Posted by Customer
    A:
    To replace the trailing arm, first, lift up and hold the vehicle. Remove nut and bolt from the trailing arm and the knuckle , as well as nut and bolt from the trailing arm and trailing arm bracket. After this removal, take the trailing arm from the vehicle. During the installation, flag the trailing arm on the trailing arm bracket, make sure that one adheres to the fastener notice and the precautions mentioned in the fastener notice. Next, fit the bolt and nut to attach the trailing arm to the trailing arm bracket, tightening until 110 N.m (81 lb ft). Then attach one end of the trailing arm to the knuckle and add the bolt and nut , securing the nut to 240 N.m (177 lb ft). Finally, lower the vehicle.
    Posted by ChevyPartsGiant Specialist
    Q:
    How to service and repair the trailing arm on Buick Century? Posted by Customer
    A:
    Raising and supporting the vehicle is the first thing to do in this case to service and repair the Trailing Arm. Use the torque angle meter (J 366602-A) for the right torque specifications. Start up with removal of the abs electric connector from the Wheel Speed Sensor , then from the knuckle to the Trailing Arm and from the Trailing Arm bracket then remove the Trailing Arm . For installation, attach the Trailing Arm to the Trailing Arm bracket , ensure that you install the bracket bolt and nut and install the bracket nut upto 105 nm( 77 ft.lbs). Next, attach the leading joining arm to the knuckle, torquing the leading joining arm to knuckle nut to 70 nm + 65 degrees (52 ft. Lbs., + 65 degrees) mentality. Lastly, reconnect the abs electric connector of the Wheel Speed Sensor and lower the car.
    Posted by ChevyPartsGiant Specialist
    Q:
    How to service and repair the trailing arm on Buick Regal? Posted by Customer
    A:
    First, raise and support the vehicle to service and repair the Trailing Arm. Attributes of the installation process shall be undertake using the torque angle meter (J 36660-A), as it will be useful in determining the values of torque depending on the angle. Remove the abs electrical connector from the Wheel Speed Sensor , before also removing the Trailing Arm from the knuckle and from the Trailing Arm bracket before removing it. For the installation, connect the Trailing Arm to the Trailing Arm bracket by installing the bracket bolt and nut and tighten the bracket nut to 105 nm (77 ft. Lbs.). Subsequently, attach the Trailing Arm to the knuckle and tighten the Trailing Arm to knuckle nut to 260 nm (192 ft. Lbs.). Finally, reconnect the abs electric connector from the Wheel Speed Sensor and drop your vehicle.
    Posted by ChevyPartsGiant Specialist
    Q:
    How to replace the trailing arm on Buick Regal? Posted by Customer
    A:
    The first step for trailing arm replacement involves lifting and securely supporting the vehicle. Begin by disassembling the trailing arm-to-knuckle connection with bolt followed by nut then continue removing the trailing arm-to-trailing arm bracket attachment with bolt followed by nut to extract trailing arm from the vehicle. Follow the Fastener Notice in Service Precautions when fastening the trailing arm onto the trailing arm bracket. Bolt and nut securely fasten the trailing arm to the trailing arm bracket at 105 Nm torque (77 ft. lbs.). Next, connect the trailing arm to the knuckle and install bolt and nut , tightening the nut in two passes: The first fastening torque will reach 70 Nm at 65 degrees intersection while the final fastening torque reaches 200 Nm (148 ft. lbs.). Attach the trailing arm to the trailing arm bracket first by tightening the bolt and nut from 200 Nm (148 ft. lbs.) to 105 Nm (77 ft. lbs.). Finally, lower the vehicle.
    Posted by ChevyPartsGiant Specialist
    Q:
    How to service and repair the trailing arm on Chevrolet Lumina? Posted by Customer
    A:
    Begin any trailing arm repair or servicing process by properly elevating the vehicle and providing suitable support. Separate the ABS electrical harness from the trail arm before uninstalling the knuckle-to-trailing arm nut and bolt and washer then the trailing arm-to-body nut and bolt. Remove the trailing arm as the following step. Begin by placing the trailing arm under the vehicle then fasten the trailing arm-to-body nut followed by the bolt but do not tighten the hardware. Lay down the trailing arm onto the knuckle before securing it with nut , bolt , and washer . Use the Torque Angle Meter (J 36660-A) to tighten the knuckle nut, ensuring it reaches 112 Nm (82 ft. lbs.), and then tighten the body nut to 95 Nm (70 ft. lbs.) using the same tool. Reinstall the ABS electrical harness before lowering the car.
    Posted by ChevyPartsGiant Specialist
    Q:
    How to service and repair the trailing arm on Chevrolet Impala? Posted by Customer
    A:
    Support and elevate the car first before servicing and repairing the trailing arm. It is advisable to remove the tire and wheel assembly. Disconnect the ABS electric harness and then disconnect the trailing arm from knuckle and from the trailing arm bracket before trailing arm. To install, attach the trailing arm to the trailing arm bracket, making sure to install the bracket bolt/screw and nut, tighten the bracket nut to 105 Nm (77 ft. lbs.). Next, attach the trailing arm to the knuckle and use the trailing arm to knuckle nut leaving it at 260 Nm (192 ft. lbs.). And torque the ABS electrical harness, put the tire and wheel assembly and lastly the vehicle with lowering. The tool that is needed for this procedure is the Torque Angle Meter (J 36660-A).
    Posted by ChevyPartsGiant Specialist
    Q:
    How to replace the trailing arm (6) on Chevrolet Monte Carlo? Posted by Customer
    A:
    To change the trailing arm, first, lift the vehicle and hold it in position. Three bolts here, one on the knuckle side and the cross member side as well. Remove the knuckle worm and nut and remove the sign washer and the rod washer and the bearing assembly and the vehicle will lift up from side. For installation, mount the trailing arm onto the trailing arm bracket making sure to comply with the Fastener Notice in Service Precaution. Secure the trailing arm to the trailing arm bracket with the bolt and nut, tightening the bolt at 105 Nm (77 ft. lbs.). Next, you will join the trailing arm to the knuckle and secure it with the bolt and nut that will need to be tightened by 70 Nm + 65 degrees (52 ft. lbs. + 65 degrees). Finally, lower the vehicle.
    Posted by ChevyPartsGiant Specialist
    Q:
    How to service and repair the control arm on Chevrolet Lumina? Posted by Customer
    A:
    To service and repairing the Control Arm, the vehicle should be raised and adequately supported. Lower the Control Arm insulator clamp bolts by removing the tire and wheel assembly as well as the stabilizer shaft. Next, disconnect the lower Ball Joint cotter pin and nut, and separate the Ball Joint from the lower Control Arm using the tie rod puller/ball joint remover (J 35917). Write down the location of the bolt in order to align it then remove the nuts and bolts joining the lower Control Arm and the frame then remove the lower Control Arm. To install, position lower arm control and put the lower arm control bolts through the front frame. Lift the lower Control Arm to align the next slot of the pin with the cotter pin hole on the Ball Joint stud without exceeding 60 degrees(1 flat) of tightening while tightening the Ball Joint nut, and do not loosen nut while installing. Install the Ball Joint and the Ball Joint stud nut to the lower Control Arm, tightening the lower Control Arm-to-frame nuts to a torque setting of 70nm (52ft. Lbs.). As well as the lower Ball Joint nut tightening to a torque setting of 85nm (63ft lbs.). Replace a new cotter pin and the stabilizer shaft to the lower Control Arm insulator clamp and fasten the stabilizer shaft bushing clamp bolts to a 48nm (35 ft. Lbs.). Finally, lower the vehicle and reinstall the tire and wheel assembly.
    Posted by ChevyPartsGiant Specialist
    Q:
    How do you install the new trailing arm for the 2006 Buick LaCrosse? Posted by Customer
    A:
    Attach the trailing arm to the trailing arm bracket, following the Fastener Notice in Service Precautions.
    Posted by ChevyPartsGiant Specialist
    See expert answers on similar Trailing Arm
    Q:
    What should be removed from the trailing arm and the trailing arm bracket for the 2003 Buick Century? Posted by Customer
    A:
    The nut and bolt.
    Posted by ChevyPartsGiant Specialist
    See expert answers on similar Trailing Arm
    Q:
    What is the first step to replace the trailing arm for the 2005 Buick Century? Posted by Customer
    A:
    Raise and support the vehicle.
    Posted by ChevyPartsGiant Specialist
    See expert answers on similar Trailing Arm
    Q:
    What should be removed from the trailing arm and the trailing arm bracket for the 2005 Buick LaCrosse? Posted by Customer
    A:
    The nut and bolt.
    Posted by ChevyPartsGiant Specialist
    See expert answers on similar Trailing Arm
    Q:
    What should be done after connecting the trailing arm to the knuckle for the 2001 Chevrolet Impala? Posted by Customer
    A:
    Reconnect the ABS electrical harness.
    Posted by ChevyPartsGiant Specialist
    See expert answers on similar Trailing Arm
    Q:
    How do you install the new trailing arm for the 2009 Chevrolet Impala? Posted by Customer
    A:
    Position the trailing arm onto the trailing arm bracket and install the bolt and nut to secure it, tightening them to 105 Nm (77 lb ft).
    Posted by ChevyPartsGiant Specialist
    See expert answers on similar Trailing Arm
    Q:
    What is the next step after removing the necessary components for the 2005 Chevrolet Monte Carlo? Posted by Customer
    A:
    Take out the trailing arm from the vehicle.
    Posted by ChevyPartsGiant Specialist
    See expert answers on similar Trailing Arm
    Q:
    How do you begin the installation of the trailing arm for the 2008 Chevrolet Impala? Posted by Customer
    A:
    Attach the trailing arm to the trailing arm bracket, following the fastener notice.
    Posted by ChevyPartsGiant Specialist
    See expert answers on similar Trailing Arm
    Q:
    What is the first step to replace the trailing arm for the 2004 Chevrolet Monte Carlo? Posted by Customer
    A:
    Raise and support the vehicle.
    Posted by ChevyPartsGiant Specialist
    See expert answers on similar Trailing Arm
    Q:
    How do you fasten the trailing arm to the knuckle for the 2010 Chevrolet Impala? Posted by Customer
    A:
    Use a bolt and nut, tightening the nut to 240 Nm (177 lb ft).
    Posted by ChevyPartsGiant Specialist
    See expert answers on similar Trailing Arm
    Q:
    What is the next step after installing the trailing arm to the bracket for the 2007 Chevrolet Impala? Posted by Customer
    A:
    Attach the trailing arm to the knuckle and secure it with the bolt and nut, tightening the nut to 240 N.m (177 lb ft).
    Posted by ChevyPartsGiant Specialist
    See expert answers on similar Trailing Arm
    Q:
    What is the next step after removing the bolts and nuts for the 2006 Chevrolet Monte Carlo? Posted by Customer
    A:
    Take out the trailing arm from the vehicle.
    Posted by ChevyPartsGiant Specialist
    See expert answers on similar Trailing Arm
    If you have any questions about this product, please don't hesitate to ask us. We will be happy to help you!

OEM GM 15820927, Excellent Performance and Perfect Fitment

To ensure reliability, purchase GM part # 15820927 Trailing Arm, Rear. It is sometimes referred to as GM Control Arm, GM Trailing Arm. Choosing OEM parts is the optimal decision for guaranteeing superior quality and perfect performance. These components undergo stringent quality checks and are carefully constructed to comply with GM's factory specifications, ensuring a smooth installation process.

ChevyPartsGiant.com is a leading supplier of genuine GM parts such as GM 15820927 Trailing Arm, Rear. Our website boasts an extensive inventory of OEM GM parts, available at highly competitive prices in the market. Should you require any new genuine GM parts, rest assured we will deliver them swiftly and efficiently to your doorstep. Furthermore, all our parts come with the assurance of a manufacturer's warranty. For detailed Chevy parts information, click here.
Choose ChevyPartsGiant for discounted prices, exceptional service and fast delivery