Make sure this part fits

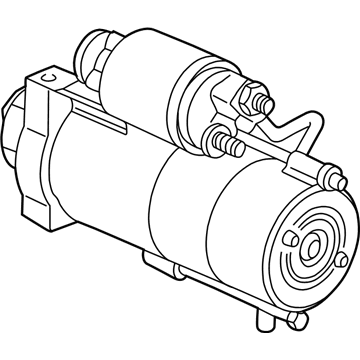
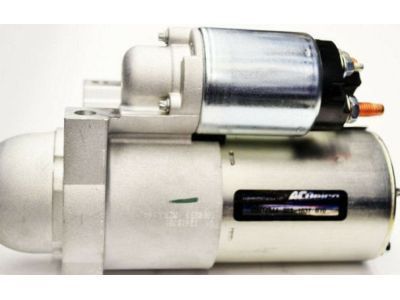
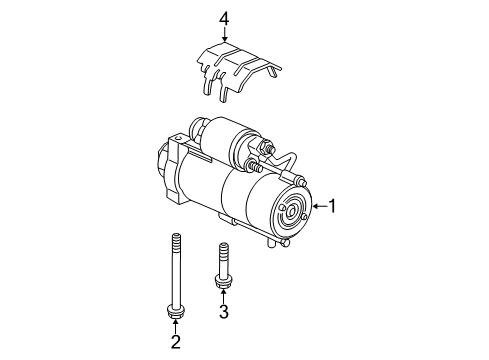
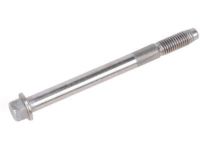
GM 89017844
Starter

2006-2008 GM

Customer Questions & Expert Answers (12)
GM 89017844 Starter
GM 89017844 Starter
  • Part Description
    Starter, Starter Motor
  • Manufacturer
    General Motors
Make sure this part fits
$294.17 MSRP: $646.70
You Save: $352.53 (55%)
Core Charge: $45.00
Ships in 1-2 Business Days
1
ADD TO CART
  • Related Parts
  • Product Specifications
  • Vehicle Fitment
  • Customer Questions & Expert Answers
  • Product Specifications

    BrandGenuine GM
    Manufacturer Part Number89017844
    Part DescriptionStarter, Starter Motor
    Other NamesStarter Motor
    Item Dimensions12.3 x 6.8 x 6.1 inches
    Item Weight9.70 Pounds
    ConditionNew
    Fitment TypeDirect Replacement
    ManufacturerGeneral Motors
    SKU89017844
    WarrantyThis genuine GM part is guaranteed by GM's factory warranty.
    Shipping & ReturnShipping Policy Return Policy
    Warning: California's Proposition 65
  • Vehicle Fitment

    Year Make Model Trim Engine
    2006-2008 Cadillac EscaladeBase, Platinum8 Cyl 6.0 L GAS, 8 Cyl 6.2 L GAS
    2006-2008 Cadillac Escalade ESVBase, Platinum8 Cyl 6.0 L GAS, 8 Cyl 6.2 L GAS
    2006-2008 Cadillac Escalade EXTBase8 Cyl 6.0 L GAS, 8 Cyl 6.2 L GAS
    2007-2008 Chevrolet AvalancheLT, LTZ8 Cyl 6.0 L GAS
    2006 Chevrolet Avalanche 2500LS, LT8 Cyl 8.1 L GAS
    2006-2007 Chevrolet Express 2500Base, LS, LT8 Cyl 6.0 L GAS
    2006-2007 Chevrolet Express 3500Base, LS, LT8 Cyl 6.0 L GAS
    2006 Chevrolet SSRBase8 Cyl 6.0 L GAS
    2006-2008 Chevrolet Silverado 1500LT, LTZ8 Cyl 6.0 L GAS
    2007 Chevrolet Silverado 1500 ClassicLT, SS8 Cyl 6.0 L GAS
    View More
  • Customer Questions & Expert Answers

    Q:
    Is 89017844 compatible with my car? Posted by ChevyPartsGiant Specialist
    A:
    Please Select Your Vehicle model to see if part number 89017844 is suitable before ordering.
    Posted by ChevyPartsGiant Specialist
    Q:
    How to replace the starter motor on Cadillac Escalade? Posted by Customer
    A:
    Starting the Starter motor replacement process requires the vehicle to be raised while disconnecting the negative Battery Cable. Owners of 1500 series vehicles must take off the oil pan skid plate bolts together with steel plate while 2500 series owners should begin with skid plate bolt removal from the front then loosen the back two bolts before removing the plate if equipped. The replacement process starts with removing the transmission cover bolt and the two Starter bolts followed by taking off the engine wiring harness electrical connector from the oil level sensor. To prevent wire and cable damage do not hang the Starter from the solenoid terminals since a rope or mechanics wire serve as effective support. Move the Starter until it exits the transmission space before using proper support. Put the vehicle in half position after which you should take out the right-front wheel and tire. Start by taking off the Starter solenoid cable clip bolt from the frame then remove the Starter solenoid cable nut followed by the engine wiring harness lead nut and terminal from the Starter. The Starter solenoid cable needs to be detached from the Starter before removing it through the wheel well opening. The transmission cover needs unsnapping before removing the Starter heat shield. To install the Starter begin with attaching the Starter heat shield when replacement is necessary along with connecting the transmission cover onto the Starter. Thread the Starter through the wheel well access point then join the Starter solenoid cable to the Starter unit with the nut torque to 9 n.m (80 lb in). Secure the Starter solenoid cable clip onto the frame after tightening the clip bolt to 10 n.m (89 lb in). Fasten the engine wiring harness lead terminal to the Starter using a lead nut while tightening it to 3.4 n.m (30 lb in). Place the Starter properly before tightening the two bolts to 50 n.m (37 lb ft). After reinstalling the right front wheel and tire the technician can raise the vehicle before connecting the engine wiring harness electrical connector to the oil level sensor. The transmission cover bolt needs to be installed while securing it to 9 n.m (80 lb in). Residents should install the oil pan skid plate on 2500 series vehicles by tightening rear bolts followed by front bolts to 28 n.m (21 lb ft) torque settings; 1500 series vehicles require skid plate installation together with rear bolts and front bolts tightened to the same specifications. Drop the vehicle and restore the negative Battery Cable as the last step of the maintenance procedure.
    Posted by ChevyPartsGiant Specialist
    Q:
    How to replace the starter motor on Cadillac Escalade ESV? Posted by Customer
    A:
    Start by disconnecting the negative Battery Cable before raising the vehicle for replacement of the Starter motor. The Starter motor replacement requires the removal of oil pan skid plate bolts and plate from 1500 series vehicles. This procedure also includes removing front oil pan skid plate bolts while loosening rear bolts for 2500 series vehicles before removing the skid plate if it is present. The next step requires removal of the transmission cover bolt and Starter bolts followed by engine wiring harness electrical connector removal from the oil level sensor position. It is essential not to suspend the Starter with cables or wires attached to solenoid terminals. Instead use a rope or mechanics wire. Move the Starter to clear the transmission before securing it properly for lowering the vehicle to a halfway position. First detach the right front wheel and tire before removing the engine wiring harness lead nut and terminal from the Starter device. First disconnect the Starter solenoid cable nut and the Starter solenoid cable clip bolt at the frame before removing the Starter solenoid cable from the Starter. Finally extract the Starter through the wheel well opening. The removal process of the Starter begins by unsnapping the transmission cover before removing the Starter heat shield. The installation process should begin with thermal shield attachment to the replacement Starter followed by cover assembly onto the Starter before starting the wheel well opening. Fasten the Starter solenoid cable to the Starter before torquing the Starter solenoid cable nut to 9 n.m (80 lb in). Connect the Starter solenoid cable clip to the frame while securing the Starter solenoid cable clip bolt through slot tightening it to 10 n.m (89 lb in). Fasten the Starter lead terminal with a lead nut by tightening it to 3.4 n.m (30 lb in). Place the Starter in position then tighten its bolts to 50 n.m (37 lb ft). Secure the Starter solenoid electrical connector of the engine wiring harness to the oil level sensor and replace the right front wheel and tire. Then lift the vehicle up and support it under proper points before connecting the engine wiring harness electrical connector to the oil level sensor. Finally, install the transmission cover bolt and tighten it to 9 n.m (80 lb in). Fasten the transmission cover bolt by applying torque to 9 n.m (80 lb in). The rear bolts on the oil pan skid plate must be tightened first to 28 n.m (21 lb ft) before moving to the front bolts during installation on 2500 series vehicles. Installation of the oil pan skid plate and bolts on 1500 series vehicles requires achieving the same torque value. End the process by putting the vehicle back to the ground before reattaching the negative Battery Cable.
    Posted by ChevyPartsGiant Specialist
    Q:
    How to replace the starter motor on Chevrolet Avalanche 2500? Posted by Customer
    A:
    Begin fixture replacement of the Starter motor by starting with negative Battery Cable disconnect and appropriate vehicle elevation. 4wd models require users to first remove front axle mounting bracket nuts before shifting the front axle mounting bracket bolt until it rests against the support bushing without unfastening this bolt. The Starter motor bolts must be taken off next while gently moving the Starter forward past the transmission area. You need to disconnect the Starter lead through two steps which involve unfastening the Starter lead nut and the positive cable nut before separating the positive cable from the Starter. You can remove the Starter heat shield by unfastening all bolts and the nut and removing the shield. The Starter heat shield installation should include bolt attachment with the nut and bolt tightening at 3 n.m (35 lb in) for the bolts and 5 n.m (44 lb in) for the nut. Secure the Starter with the positive cable through its nut by tightening it to 9 n.m (80 lb in). Secure the Starter lead by placing its nut tight enough to reach 3.4 n.m (30 lb in). Install the Starter while placing its bolts and torque these bolts to achieve 50 n.m (37 lb ft). Place the completely seated front axle mounting bracket bolt before installing its nuts and tightening both to 95 n.m (70 lb ft). Lower the vehicle before reattaching the negative Battery Cable as the last step.
    Posted by ChevyPartsGiant Specialist
    Q:
    How to replace the starter motor on Chevrolet SSR? Posted by Customer
    A:
    Start by lifting the vehicle then disconnecting the battery's negative terminal before you begin replacing the Starter motor. The right transmission cover bolt and the Starter bolts get removed before the Starter moves forward until it exceeds transmission constraints. First obtain the Starter solenoid nut and Starter lead from their location on the solenoid stud so the Starter can be removed through the right wheel well opening. You can take off the Starter shield when necessary. Installation begins with the Starter shield provided that you need it followed by entering the Starter into the right wheel well opening of the vehicle. Use the Starter solenoid lead to connect it to the solenoid stud then tighten it with the Starter solenoid nut to 3.4 n.m (30 lb in). Secure the Starter power lead using a nut that requires a torque of 9 n.m (80 lb in). The Starter requires a rearward sliding motion before installing Starter bolts which should be torqued to 50 n.m (37 lb ft). Reinstall the right transmission cover bolt before tightening it to 9 n.m (80 lb in) and reconnect the negative Battery Cable and finally lower the vehicle.
    Posted by ChevyPartsGiant Specialist
    Q:
    How to replace the starter motor on Chevrolet Suburban 1500? Posted by Customer
    A:
    A Starter motor replacement starts by removing the negative Battery Cable before safely elevating the vehicle. First remove the transmission cover bolt before you should take off front axle mounting bracket nuts from vehicles with four wheel drive (4WD). You must reposition the front axle mounting bracket bolt to match the support bushing but keep it in place. The procedure begins with dismantling Starter bolts then disconnecting the oil level sensor electrical connector. After clearing the transmission you should slide the Starter forward before removing the lead nut then the lead and the positive cable nut from the Starter. Afterward remove the positive cable from the Starter. Lay the Starter unit on a workbench followed by the removal of the heat shield from the Starter if needed and unsnap the transmission cover. Install the Starter heat shield when needed then place the transmission cover onto the Starter through snapping it in position. Compose the positive cable to the Starter while securing the positive cable nut at a torque of 9 n.m (80 lb in). Fitting the Starter lead with the Starter lead nut requires nut tightening to 3.4 n.m (30 lb in). Install the Starter bolts into position then tighten them until they reach 50 n.m (37 lb ft). Reconnect the oil level sensor electrical connector then install the front axle mounting bracket nuts with 95 n.m (70 lb ft) torque. Keep the front axle mounting bracket bolt positioned completely inside its seat before installing these nuts. Use a torque wrench to install the transmission cover bolt at 9 n.m (80 lb in) then lower the vehicle and reconnect the negative Battery Cable.
    Posted by ChevyPartsGiant Specialist
    Q:
    How to replace the starter motor on 4.8L, 5.3L, 6.0L, and 6.2L engines on GMC Sierra 3500 Classic? Posted by Customer
    A:
    To replace the starter motor replacement on 4.8l, 5.3l, 6.0l, and 6.2l engines requires initial Battery Cable disconnect followed by vehicle lift. Vehicle owners should first remove both front oil pan skid plate bolts from 2500 series models before loosening the rear bolts to detach the skid plate when present. The Starter replacement procedure starts with disconnecting the Starter bolts and the transmission cover bolt and removing the engine wiring harness electrical connector from the oil level sensor while carefully not suspending the Starter through its cables or wires; use a rope or mechanics wire for support instead. Mechanics wire and rope serve better than traditional wires for support purposes. Move the Starter forward until it clears the transmission before securing it for proper support at this position. Then lower the vehicle to a resting position halfway down. Clean out the wheel and tire from the right front side before pulling off the right front wheelhouse liner. First remove the lead nut and terminal from the Starter before removing the Starter solenoid cable clip bolt from the frame and the solenoid cable nut then disconnect the solenoid cable from the Starter. Through the wheel well opening draw out the Starter while you should separate the transmission cover and Starter heat shield when installing new parts. When installing a replacement Starter begin by putting on the heat shield followed by attaching the transmission cover to the Starter before you insert it through the wheel well opening. Secure the Starter solenoid cable using a solenoid cable nut at 9 n.m (80 lb in) torque and a solenoid cable clip bolt at 10 n.m (89 lb in). Connect the Starter lead terminal from the engine wiring harness to the Starter then apply a lead nut torque of 3.4 n.m (30 lb in). Fasten the Starter into position while tightening the bolts to 50 n.m (37 lb ft). After replacing the right front wheelhouse liner and right front wheel and tire the vehicle must be raised before resumption. The transmission cover bolt gets installed using 9 n.m (80 lb in) torque while connecting the engine wiring harness electrical connector to the oil level sensor. The installation of the oil pan skid plate for 2500 series vehicles requires torquing rear bolts and front bolts to 28 n.m (21 lb ft). Drop the vehicle and reattach the negative battery terminal to complete the installation.
    Posted by ChevyPartsGiant Specialist
    Q:
    How to replace the starter motor on a 4.3L engine on GMC Sierra 1500? Posted by Customer
    A:
    Disengage the negative Battery Cable and get the vehicle off the ground before you change the Starter motor of a 4.3l vehicle. Remove all the bolts holding the oil pan skid plate where possible and the plate as well as disconnect the Starter solenoid cable clip bolt from the frame. Then do not remove from the Starter the bolts of the Starter motor, the Starter solenoid cable lead nut and point, the Starter solenoid cable lead. Also, pull off the engine wiring harness lead nut as well as the engine wiring harness lead from the Starter before lifting the Starter out of the vehicle. The fact that my Starter shield was damaged means that it must be replaced. In case of installing a new Starter, connect Starter heat shield to it, place it in the vehicle, attach engine wiring harness lead nut. Secure it to the Starter using tightened engines wiring harness lead nut to the value of 3.4 n.m (30 lb in). Then, attach the Starter solenoid cable lead to the Starter and tighten the Starter solenoid cable nut to 9 n.m( 80 lb in). Mount the Starter motor bolts and tighten them to 50 n.m (37 lb ft) and position and mount the Starter solenoid cable clip to the frame and tighten to the Starter solenoid cable clip bolt to 10 n.m (89 lb in). If necessary, mount the oil pan skid plate and fasten bolts to 28 n.m (21 lb ft). Lastly, disconnect the vehicle and connect the negative Battery Cable.
    Posted by ChevyPartsGiant Specialist
    Q:
    What needs to be disconnected after removing the bolts for the 2007 Chevrolet Express 3500? Posted by Customer
    A:
    Disconnect the oil level sensor electrical connector.
    Posted by ChevyPartsGiant Specialist
    See expert answers on similar Starter
    Q:
    What is the first step to replace the starter motor on a 4.3L engine for the 2008 Chevrolet Silverado 1500? Posted by Customer
    A:
    Disconnect the negative battery cable and raise the vehicle securely.
    Posted by ChevyPartsGiant Specialist
    See expert answers on similar Starter
    Q:
    What should be removed after raising for the 2008 Chevrolet Trailblazer? Posted by Customer
    A:
    Remove the rear steering gear crossmember.
    Posted by ChevyPartsGiant Specialist
    See expert answers on similar Starter
    Q:
    What should be done after removing the tire for the 2006 GMC Savana 2500? Posted by Customer
    A:
    Take out the right fender wheelhouse inner panel.
    Posted by ChevyPartsGiant Specialist
    See expert answers on similar Starter
    If you have any questions about this product, please don't hesitate to ask us. We will be happy to help you!

OEM GM 89017844, Excellent Performance and Perfect Fitment

To ensure reliability, purchase GM part # 89017844 Starter. It is sometimes referred to as GM Starter. Choosing OEM parts is the optimal decision for guaranteeing superior quality and perfect performance. These components undergo stringent quality checks and are carefully constructed to comply with GM's factory specifications, ensuring a smooth installation process.

ChevyPartsGiant.com is a leading supplier of genuine GM parts such as GM 89017844 Starter. Our website boasts an extensive inventory of OEM GM parts, available at highly competitive prices in the market. Should you require any new genuine GM parts, rest assured we will deliver them swiftly and efficiently to your doorstep. Furthermore, all our parts come with the assurance of a manufacturer's warranty. For detailed Chevy parts information, click here.
Choose ChevyPartsGiant for discounted prices, exceptional service and fast delivery