ChevyParts
My Garage
My Account
Cart
OEM 2010 Cadillac DTS CV Boot
Axle Boot- Select Vehicle by Model
- Select Vehicle by VIN
Select Vehicle by Model
orMake
Model
Year
Select Vehicle by VIN
For the most accurate results, select vehicle by your VIN (Vehicle Identification Number).
4 CV Boots found


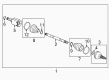
2010 Cadillac DTS Outer CV Joint Boot, Front Part Number: 19210864
$39.87 MSRP: $68.46You Save: $28.59 (42%)Ships in 1-2 Business DaysProduct Specifications- Other Name: Boot Kit, Front Axle; CV Boot; Outer Boot; Inner Boot Kit; Outer Boot Kit; Boots; Boot Kit, Front Wheel Drive Axle Shaft
- Position: Front
- Replaces: 15918509, 19206498
- Item Weight: 0.90 Pounds
- Item Dimensions: 6.4 x 6.4 x 5.7 inches
- Condition: New
- Fitment Type: Direct Replacement
- SKU: 19210864
- Warranty: This genuine part is guaranteed by GM's factory warranty.


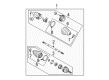
2010 Cadillac DTS Boot Kit, Front Part Number: 20984614
$36.52 MSRP: $92.67You Save: $56.15 (61%)Ships in 1-2 Business DaysProduct Specifications- Other Name: Boot Kit, Front Wheel Drive Axle Shaft; CV Boot; Inner CV Joint Boot; Inner Boot; Boots
- Position: Front
- Item Weight: 1.70 Pounds
- Item Dimensions: 7.8 x 7.1 x 7.0 inches
- Condition: New
- Fitment Type: Direct Replacement
- SKU: 20984614
- Warranty: This genuine part is guaranteed by GM's factory warranty.

2010 Cadillac DTS Inner Boot, Front Part Number: 26075586
Product Specifications- Other Name: Boot Kit, Front Wheel Drive Axle Shaft; CV Boot
- Position: Front
- Item Weight: 1.70 Pounds
- Item Dimensions: 6.7 x 5.8 x 6.1 inches
- Condition: New
- Fitment Type: Direct Replacement
- SKU: 26075586
- Warranty: This genuine part is guaranteed by GM's factory warranty.

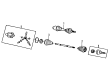
2010 Cadillac DTS Outer Boot, Front Part Number: 19149657
Product Specifications- Other Name: Boot Kit, Front Axle; CV Boot; Boot Kit, Front Wheel Drive Axle Shaft
- Position: Front
- Item Weight: 1.60 Pounds
- Item Dimensions: 8.7 x 6.9 x 7.4 inches
- Condition: New
- Fitment Type: Direct Replacement
- Require Quantity: 2
- SKU: 19149657
- Warranty: This genuine part is guaranteed by GM's factory warranty.
2010 Cadillac DTS CV Boot
With a comprehensive array of OEM 2010 Cadillac DTS CV Boot, from fuel pumps to door handles, our website is a one-stop-shop for your needs. All our genuine 2010 Cadillac DTS CV Boot are backed by the manufacturer's warranty and are offered at competitive prices in the market. Rest assured, you can shop with complete confidence.
2010 Cadillac DTS CV Boot Parts and Q&A
- Q: How to replace the Outer CV Joint and CV Boot (FE7) on 2010 Cadillac DTS?A: In order to replace the wheel drive shaft outer joint and boot (FE7), begin the process of removing the large rectangular seal retaining clamp from the cv joint with a side cutter and discard it making sure not to cut through the inboard or outboard boot because it may break the sealing surface. Use a hand grinder to cut through the swage ring and take off the small eared clamp with a side cutter and throw it away. Then, remove the halfshaft outboard seal from the cv joint outer ring that has larger diameter, by sliding the seal away from the joint down the halfshaft bar. Wipe off the grease from the face of the cv joint inner race, then spread the ears on the race retaining ring with j 8059 and pull out the cv joint assembly from the halfshaft bar. Take out and throw away the old outboard seal and with the use of a brass drift tap and tilt the cv joint cage, removing every one of the six chrome alloy balls. Turn the cv joint cage and inner race 90 degrees to align with the outer race, after which they can be lifted out along with the cage and inner race, by rotating the inner race upwards to separate it from the cage. Clean inner and outer race assmbilies, cv joint cage and chrome alloy balls thoroughly with cleaning solvent that will remove all old grease and contaminants and the dry those parts. The cv joint assembly should be inspected for abnormal wear, cracks or damage and such defective parts are changed, and the half shaft bar should be cleaned using wire brush to clear the rust at the seal mounting area. Mount the halfshaft into a vise for eared clamp installation when installing then install a new swage ring or eared clamp onto the neck of the outboard seal without swaging or crimping. Slide the outboard seal onto halfshaft bar and slide in the seal groove. For swage ring installation, use dt-48267 to align and attach the swage ring by tightening bolts alternately until both sides are bottomed and check for lip deformity and re-swage if needed. Crimp the eared clamp with use of j 35910 to a torque of 136nm (100 lbft), the gap dimension needs must be checked, continuing to tighten until stabilized. Apply a thin layer of grease of the service kit to the grooves of the ball of the inner and outer parts then put the inner race and mount it on the cage laying it in line with the outer race. This is followed by the insertion of the chrome balls into the area, packing the cv joint with grease together with pushing it on the halfshaft bar until a retainer ring is seated. Make sure that the outboard seal has a proper shape then slide the large diameter of the outboard seal, together with the large seal retaining clamp over the cv joint outer race where the seal lip should be placed in the groove. Tighten the seal retaining clamp into 174 nm (130 lb ft) crimp while measuring the gap dimension hence tightening it up to the following dimension 1.9 mm (5/64 in).
Related 2010 Cadillac DTS Parts
 2010 Cadillac DTS Axle Shaft
 2010 Cadillac DTS CV Joint
 2010 Cadillac DTS Crankshaft Seal
 2010 Cadillac DTS Crankshaft Thrust Washer Set
 2010 Cadillac DTS Cylinder Head
 2010 Cadillac DTS Drive Shaft
 2010 Cadillac DTS Engine Mount Bracket
 2010 Cadillac DTS Lash Adjuster
 2010 Cadillac DTS Motor And Transmission Mount
 2010 Cadillac DTS Oil Pan
 2010 Cadillac DTS Oil Pump
 2010 Cadillac DTS Piston