ChevyParts
My Garage
My Account
Cart
OEM Buick Century Tie Rod
Steering Tie Rod- Select Vehicle by Model
- Select Vehicle by VIN
Select Vehicle by Model
orMake
Model
Year
Select Vehicle by VIN
For the most accurate results, select vehicle by your VIN (Vehicle Identification Number).
6 Tie Rods found


Buick Century Inner Tie Rod Part Number: 26021769
$117.23 MSRP: $184.47You Save: $67.24 (37%)Ships in 1-3 Business Days
Buick Century Tie Rod, Inner Part Number: 26026745
$107.47 MSRP: $215.79You Save: $108.32 (51%)
Buick Century Outer Tie Rod Part Number: 19418696
$51.95 MSRP: $126.79You Save: $74.84 (60%)
Buick Century Outer Tie Rod Part Number: 26086580


Buick Century Tie Rod, Outer Part Number: 21011027
Buick Century Outer Tie Rod Part Number: 26063859
Buick Century Tie Rod
Want to cut long-term maintenance and repair costs? Choose OEM Tie Rod. Those parts deliver top durability you can trust. On our site, you'll find a huge catalog of genuine Buick Century parts. Prices are unbeatable, so you can keep more in your pocket. Every OEM Buick Century Tie Rod includes a manufacturer's warranty. You can also get an easy return policy that keeps buying risk free. Fast delivery, get your car on the road quickly. It's simple to search, compare, and order. Stop guessing about quality or fit. Order today and save with parts that last.
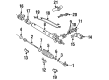
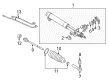
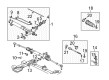
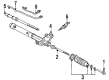
The steering system of the Buick Century received its essential component in the form of the reliable Tie Rod which operated in all Century models built between 1936 and 2005. The steering gear receives direction from the steering wheel through the critical connection point that directs signals to steering knuckles and front wheels. Both the inner and outer Buick Century Tie Rods form an assembly that preserves precise steering control thus allowing for smooth driving performance. The steering system depends heavily on inner tie rods since they have a fundamental function in system operation although outer tie rods display easier replacement characteristics. Inspection of Buick Century Tie Rod must be done regularly because worn-out components create Smooth-play that reduces vehicle safety. The Buick Century Tie Rod plays a vital role in boosting functional performance and safety standards while being a leading aspect in automobile markets worldwide. Different Buick car models can use this Tie Rod because it provides universal application across multiple models to ensure maximum performance in varied driving scenarios. The the automaker model part maintains its reputation through both its durable engineering construction and reliable design which results in quality safety experiences in driver performance.
Buick Century Tie Rod Parts Questions & Experts Answers
- Q: How to Replace the Inner Tie Rod in a Steering Gear on Buick Century?A:Steering gear inner Tie Rod replacement requires removing both the Rack and Pinion Boot and breather tube. The maintenance professional needs to hold the rack throughout both inner Tie Rod removal and installation operations to avoid damage. Start by taking off the shock dampener from the inner Tie Rod assembly then reinstall it onto the rack. The removal process begins by placing a wrench on each flat surface of the rack assembly while another wrench secures the flats of the inner Tie Rod housing. Then rotate the inner Tie Rod housing counterclockwise until the assembly breaks free from the rack. When performing rack assembly use j 34028 (Inner Tie Rod Wrench) to move shock dampener forward onto rack. The inner Tie Rod assembly installation on the rack happens when you use j 34028 and a torque wrench to tighten the inner Tie Rod housing at 100 nm (74 ft. Lbs.) while keeping a wrench on the flats of the rack assembly. Position the inner Tie Rod assembly into a vise clamp before staking both sides of the inner Tie Rod assembly to the rack's flats. Check both inner Tie Rod housing stakes by placing a 0.25 mm gauge between rack and housing to ensure clean passing is impossible. Crank the shock dampener so the front lip touches the inner Tie Rod housing .

Related Buick Century Parts
 Buick Century Power Steering Pump
 Buick Century Rack And Pinion
 Buick Century Steering Wheel
 Buick Century Power Steering Hose
 Buick Century Power Steering Reservoir
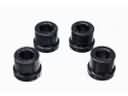 Buick Century Rack & Pinion Bushing
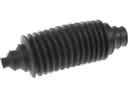 Buick Century Rack and Pinion Boot
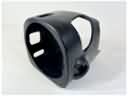 Buick Century Steering Column Cover
 Buick Century Steering Column Seal
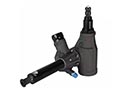 Buick Century Steering Gearbox
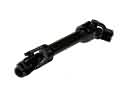 Buick Century Steering Shaft
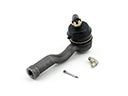 Buick Century Tie Rod End