ChevyParts
My Garage
My Account
Cart
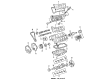
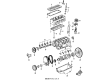
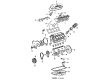
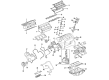
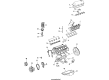
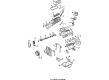
OEM Cadillac Crankshaft Seal
- Select Vehicle by Model
- Select Vehicle by VIN
Select Vehicle by Model
orMake
Model
Year
Select Vehicle by VIN
For the most accurate results, select vehicle by your VIN (Vehicle Identification Number).
34 Crankshaft Seals found


Cadillac Rear Main Seal Part Number: 12665076
$27.74 MSRP: $45.69You Save: $17.95 (40%)Ships in 1-3 Business DaysProduct Specifications- Other Name: Seal, Engine Rear Main Bearing; Crankshaft Seal
- Position: Rear
- Replaces: 12634615


Cadillac Rear Main Seal Part Number: 90325571
$15.40 MSRP: $25.37You Save: $9.97 (40%)Ships in 1-3 Business DaysProduct Specifications- Other Name: Seal, Engine Rear Main Bearing; Crankshaft Seal
- Position: Rear
- Replaces: 96101489, 90352112, 96376569


Cadillac Rear Main Seal Part Number: 89060436
$24.24 MSRP: $39.93You Save: $15.69 (40%)Ships in 1-3 Business DaysProduct Specifications- Other Name: Seal Kit, Crankshaft Rear Oil; Crankshaft Seal; Seal Kit, Engine Rear Main Bearing; Seal, Engine Rear Main Bearing
- Position: Rear
- Replaces: 12550574, 12585671, 89018162


Cadillac Oil Seal, Front Part Number: 12608750
$9.22 MSRP: $15.19You Save: $5.97 (40%)Ships in 1-3 Business DaysProduct Specifications- Other Name: Seal, Engine Front Cover & Crankshaft Seal; Crankshaft Seal; Front Crank Seal; Front Seal; Belt Tensioner Seal
- Position: Front
- Replaces: 12592355


Cadillac Rear Main Seal Part Number: 12637710
$42.94 MSRP: $73.74You Save: $30.80 (42%)Ships in 1-2 Business DaysProduct Specifications- Other Name: Seal, Engine Rear Main Bearing; Crankshaft Seal; Rear Main Seal Gasket; Rear Main Seal Retainer
- Position: Rear
- Replaces: 12608748, 12620955, 12592243, 12592242

Cadillac Rear Main Seal Retainer Part Number: 12658976
$91.41 MSRP: $125.12You Save: $33.71 (27%)Product Specifications- Other Name: Housing Assembly-Crankshaft Rear Oil Seal
- Position: Rear
- Replaced by: 12705665


Cadillac Oil Seal, Front Part Number: 25193519
$9.34 MSRP: $15.39You Save: $6.05 (40%)Product Specifications- Other Name: Seal, Engine Front Cover & Crankshaft Seal; Engine Crankshaft Seal; Crankshaft Seal; Front Crank Seal; Timing Cover Seal; Front Seal; Front Cover Seal; Seal, Engine Oil Pump Body
- Position: Front

Cadillac Oil Seal, Front Part Number: 12556109
$14.48 MSRP: $27.19You Save: $12.71 (47%)Ships in 1-2 Business DaysProduct Specifications- Other Name: Seal Assembly-Crankshaft Front Oil; Timing Cover Gasket; Timing Cover Seal; Crankshaft Seal; Front Cover Seal; Seal, Engine Front Cover & Crankshaft Seal; Seal, Engine Front Cover
- Position: Front


Cadillac Rear Main Seal Part Number: 40009072
$12.00 MSRP: $19.05You Save: $7.05 (38%)Ships in 1-3 Business DaysProduct Specifications- Other Name: Seal, Engine Rear Main Bearing
- Position: Rear
- Replaces: 55506777, 55515617

Cadillac Crankshaft Seal Part Number: 90183572
$26.43 MSRP: $41.40You Save: $14.97 (37%)Ships in 1-3 Business DaysProduct Specifications- Other Name: Seal, Engine Front Cover & Crankshaft Seal; Seal Ring; Front Crank Seal; Shaft Seals; Timing Cover Seal; Crankshaft Seal; Engine Oil Pump Cover.
- Position: Front
- Replaces: 90136297, 90156855

Cadillac Crankshaft Seal, Front Part Number: 55509254
$8.59 MSRP: $14.16You Save: $5.57 (40%)Product Specifications- Other Name: Seal Assembly-Crankshaft Front Oil; Timing Cover; Front Crank Seal; Front Cover; Seal, Engine Front Cover & Crankshaft Seal
- Position: Front

Cadillac Rear Main Seal Part Number: 1647308
$31.26 MSRP: $48.96You Save: $17.70 (37%)Ships in 1-3 Business DaysProduct Specifications- Other Name: Seal; Crankshaft Seal; Seal, Engine Rear Main Bearing
Cadillac Rear Cover, Lower Part Number: 55515618
$68.88 MSRP: $107.89You Save: $39.01 (37%)Ships in 1-3 Business DaysProduct Specifications- Other Name: Cover Assembly-Timing Chain Lower; Crankshaft Seal; Timing Cover; Rear Main Seal Retainer; Rear Main Seal Housing; Housing
- Position: Lower
- Replaced by: 40009071

Cadillac Front Crank Seal Part Number: 14076303
$2.86 MSRP: $13.05You Save: $10.19 (79%)Ships in 1-2 Business DaysProduct Specifications- Other Name: Seal, Engine Front Cover & Crankshaft Seal; Timing Cover Gasket; Timing Cover Seal; Front Cover Seal
- Position: Front

Cadillac Rear Main Seal Part Number: 1627806
$19.77 MSRP: $39.73You Save: $19.96 (51%)Product Specifications- Other Name: Seal, Crankshaft Rear Main Bearing Cap; Crankshaft Seal; Seal, Engine Rear Main Bearing
- Position: Rear


Cadillac Oil Seal Part Number: 552711
Product Specifications- Other Name: Seal Assembly-Crankshaft Oil; Timing Cover Gasket; Timing Cover Seal; Crankshaft Seal; Front Crank Seal; Timing Cover Oil Seal; Front Cover Seal; Seal, Engine Front Cover & Crankshaft Seal


Cadillac Crankshaft Seal, Front Part Number: 1647311
Product Specifications- Other Name: Seal, Engine Front Cover; Timing Cover Gasket; Timing Cover Seal; Timing Cover Oil Seal; Cover Seal; Front Cover Seal; Seal, Engine Front Cover & Crankshaft Seal
- Position: Front


Cadillac Crankshaft Seal Part Number: 90322669
$24.95 MSRP: $44.58You Save: $19.63 (45%)Product Specifications- Other Name: Seal, Engine Front Cover & Crankshaft Seal; Front Crank Seal; Seal, Engine Oil Pump Cover
- Position: Front

Cadillac Rear Main Seal Part Number: 1627821
Product Specifications- Other Name: Seal; Crankshaft Seal; Seal, Engine Rear Main Bearing
Cadillac Rear Main Seal Part Number: 10054563
Product Specifications- Other Name: Seal Kit, Engine Rear Main Bearing; Crankshaft Seal
- Position: Rear
| Page 1 of 2 |Next >
1-20 of 34 Results
Cadillac Crankshaft Seal
Want to cut long-term maintenance and repair costs? Choose OEM Crankshaft Seal. Those parts deliver top durability you can trust. On our site, you'll find a huge catalog of genuine Cadillac parts. Prices are unbeatable, so you can keep more in your pocket. Every OEM Cadillac Crankshaft Seal includes a manufacturer's warranty. You can also get an easy return policy that keeps buying risk free. Fast delivery, get your car on the road quickly. It's simple to search, compare, and order. Stop guessing about quality or fit. Order today and save with parts that last.
Cadillac Crankshaft Seal Parts Questions & Experts Answers
- Q: How to Service and Repair the Crankshaft Seal on Cadillac CTS?A:The process of front crankshaft oil seal replacement requires uninstalling both the A/C Compressor and power steering pump Drive Belt as well as generator and water pump drive belts. Proceed with the removal of the crankshaft balancer while referring to proper procedure guidelines. A flat-bladed tool can be used to eliminate the crankshaft oil seal. The installer should avoid using lubrication on the crankshaft front oil seal and crankshaft balancer sealing surfaces. You should employ the oil seal installer (J 29184) to set the new crankshaft front oil seal before you can reinstall the crankshaft balancer. Proceed to install the generator belt and the water pump Drive Belt and subsequently attach the A/C Compressor and power steering pump Drive Belt.
- Q: How to replace the front crankshaft seal (140) for exclusions RPOs LC9, LMG, LY2, and LY5 on Cadillac Escalade?A:The Crankshaft Front Oil Seal Installer (J 41478) serves as the necessary tool to replace crankshaft front oil seal (140) for all models outside of RPOs LC9, LMG, LY2, and LY5. Start the replacement procedure by disconnecting the crankshaft balancer. After removing the crankshaft front oil seal (140) from the front cover proceed with the next step. Oiling the oil seal sealing surface should be avoided as well as reusing the crankshaft front oil seal. Apply clean engine oil to both the outer portion of new oil seal (140) and bore of front cover oil seal surface. The crankshaft front oil seal (140) should be mounted onto the J 41478 guide before inserting the J 41478 threaded rod (along with nut, washer, and guide, and oil seal) into the crankshaft end. Follow these steps to install the oil seal into the cover bore using the J 41478 while applying one wrench to the hex on its installer bolt and the other wrench to turn its installer nut clockwise for complete seal insertion. Check that the front cover bore receives the complete and uniform installation of the oil seal after you take off J 41478. Finally, reinstall the crankshaft balancer.
- Q: How to replace the rear crankshaft seal on Cadillac XLR?A:Begin Crankshaft rear oil seal replacement by removing the Flywheel first. Installation requires the Crankshaft rear oil seal remover (J 42841-A) which should be positioned on the Crankshaft with retaining bolt attachment. Drive eight 25 mm (1.0 in) self-drilling screws through the seal while following the guideholes inside the removal tool, slowing the drill speed as each screw threads into position. The seal assembly operation requires complete screw installation followed by bolt removal to permit the center forcing screw which will extract the seal assembly from the Crankshaft. Use the seal applicator (EN-48072) to evenly apply sealant onto a clean and dry bore before installation to avoid drain back holes becoming blocked. Check engine block bore and Crankshaft flange for possible damage before removing debris from the oil drain-back hole. Use gm p/n 12378392 or 12346139 cleaner solvent (Canadian P/N 88901247) to clean the bore. The Crankshaft rear oil seal installer (J 45930-A) provides the correct bolts to secure the en-48072 pilot base before the applicator housing must be installed over the base using the bottoming installation method in the bore. The bore's outer diameter should receive sealant gm p/n 12378521 (Canadian P/N 88901148) application avoiding the drain hole blockage. Gently pull out the applicator housing while checking both that the sealant spreads smoothly and that the drain back hole remains clear. Secure the new cassette style Crankshaft rear oil seal onto the center hub of the j 45930-a by tightening its mounting bolts to a secure attachment on the Crankshaft. Twist the center nut so the drive section of j 45930-a reaches crankcase bottom then loosen all components to separate the installer from the mounting bolts. Apply the new seal correctly following defined surface measurements then inspect tools to eliminate leftover sealant before reinstalling the Flywheel.


Related Cadillac Parts
 Cadillac Timing Belt
 Cadillac Balance Shaft Bearing Set
 Cadillac Camshaft Bearing
 Cadillac Coolant Filter
 Cadillac Crankshaft Gear
 Cadillac Dipstick
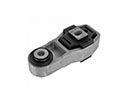 Cadillac Engine Mount Torque Strut
 Cadillac Intake Valve
 Cadillac Oil Drain Plug Gasket
 Cadillac Oil Filler Cap
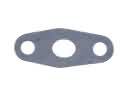 Cadillac Oil Pump Gasket
 Cadillac Rocker Shaft Spring Kit