ChevyParts
My Garage
My Account
Cart
OEM Cadillac Seville Motor And Transmission Mount
Motor and Trans Mount- Select Vehicle by Model
- Select Vehicle by VIN
Select Vehicle by Model
orMake
Model
Year
Select Vehicle by VIN
For the most accurate results, select vehicle by your VIN (Vehicle Identification Number).
26 Motor And Transmission Mounts found

Cadillac Seville Motor Mount Part Number: 22188025
$147.06 MSRP: $201.32You Save: $54.26 (27%)Ships in 1-2 Business Days
Cadillac Seville Motor Mount, Passenger Side Part Number: 1634359
$143.18Ships in 1-2 Business Days


Cadillac Seville Motor Mount, Passenger Side Part Number: 25710672


Cadillac Seville Motor Mount Part Number: 22171683


Cadillac Seville Motor Mount Part Number: 25696073


Cadillac Seville Transmission Mount, Driver Side Part Number: 25695932


Cadillac Seville Transmission Mount Part Number: 25696037

Cadillac Seville Transmission Mount, Driver Side Part Number: 17996395

Cadillac Seville Motor Mount Part Number: 1620155

Cadillac Seville Transmission Mount, Driver Side Part Number: 22178759


Cadillac Seville Motor Mount Part Number: 1620158

Cadillac Seville Motor Mount, Passenger Side Part Number: 1634218

Cadillac Seville Engine Support, Passenger Side Part Number: 20708666


Cadillac Seville Engine Support, Passenger Side Part Number: 3545223

Cadillac Seville Engine Support, Driver Side Part Number: 3545224

Cadillac Seville Mount Bracket Part Number: 25691448
| Page 1 of 2 |Next >
1-20 of 26 Results
Cadillac Seville Motor And Transmission Mount
Want to cut long-term maintenance and repair costs? Choose OEM Motor And Transmission Mount. Those parts deliver top durability you can trust. On our site, you'll find a huge catalog of genuine Cadillac Seville parts. Prices are unbeatable, so you can keep more in your pocket. Every OEM Cadillac Seville Motor And Transmission Mount includes a manufacturer's warranty. You can also get an easy return policy that keeps buying risk free. Fast delivery, get your car on the road quickly. It's simple to search, compare, and order. Stop guessing about quality or fit. Order today and save with parts that last.
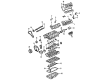
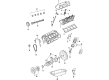
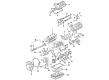
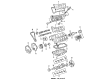
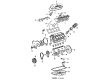
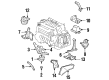
Speaking of the Motor And Transmission Mount, this part is essential for emphasizing Cadillac car dependability and power. Intended to provide a stable connection between the transmission and the car's body, this Motor And Transmission Mount also reduces oscillations produced by the engine in the Seville lineup. The Cadillac Seville manufactured between 1975 and 2004 have multiple configurations involving the one or multiple Motor And Transmission Mounts intended to support and eliminate movements. This makes the Motor And Transmission Mount a very crucial component in the Cadillac Seville as it ensures that the vehicle operates as intended making the ride luxurious but also safe. Specially, The Motor And Transmission Mount has signification construction material and hardened design that helping to differentiant the product in automotive market with deep absorption of vibration and sternity. The Cadillac Seville for many years has changed its type from the compact luxury car to a mid-size car, showing the direction of changes introduced by the Cadillac Motor And Transmission Mount. Due to alignment and lesser wear and tear on the motor and transmission, Cadillac seville motor and transmission mount increases life span of the vehicle and makes it safer to drive thus playing a vital role in Cadillac's history.
Cadillac Seville Motor And Transmission Mount Parts and Q&A
- Q: How to inspect the automatic Motor and Transmission Mount on Cadillac Seville?A:Start by raising the vehicle to check whether fluid loss occurred from transmission/transaxle or engine or other components before proceeding with automatic transmission mount examination. You should lift up the transmission/transaxle to maintain a little tension on the mount. Look for damage evidence while inspecting the mount where heat check cracks may appear on the hard rubber surface or when rubber separates from the metal plate or shows splits through the center. A new transmission/transaxle mount needs to be purchased when any of these listed problems appear. The replacement process should follow the instructions for automatic transmission mount replacement - left and automatic transmission mount replacement - rear along with automatic transmission mount bracket replacement - left and transmission mount bracket replacement - rear. Lower the transmission/transaxle when there is any movement at the metal plate mounting points. Then securely torque the bolts or nuts which connect the mount to its framework. Technical information about Engine Mounts is located in the corresponding inspection materials.
- Q: How to replace the LH automatic transmission mount, Motor And Transmission Mount on Cadillac Seville?A:Vehicle elevation and powertrain assembly stabilization through a jack are necessary before starting left automatic transmission mount replacement procedures. First remove the transmission mount securing nut then reduce the jack height to let the engine drop toward the ground. The procedure begins with bolt and nut removal connecting the mount to the frame before moving onto the 2 nuts connecting the mount to the frame and ending with removal of the mount . Begin with mount installation before you secure the mount bolt and nut against the frame while maintaining 70 Nm (52 ft. lbs.) torque. Lower the engine and transmission assembly into position before installing the mounting nut to connect it between the mount and mount bracket while maintaining a torque of 75 Nm (55 ft. lbs.). Before completing the installation, remove the engine assembly support jack while lowering the vehicle.


Related Cadillac Seville Parts
 Cadillac Seville Crankshaft
 Cadillac Seville Crankshaft Seal
 Cadillac Seville Dipstick Tube
 Cadillac Seville Engine Mount Bracket
 Cadillac Seville Exhaust Valve
 Cadillac Seville Oil Pan Gasket
 Cadillac Seville Oil Pump
 Cadillac Seville Piston
 Cadillac Seville Rod Bearing
 Cadillac Seville Timing Chain
 Cadillac Seville Valve Cover Gasket
 Cadillac Seville Valve Stem Oil Seal