ChevyParts
My Garage
My Account
Cart
OEM GMC Fuel Injector
Gas Injector- Select Vehicle by Model
- Select Vehicle by VIN
Select Vehicle by Model
orMake
Model
Year
Select Vehicle by VIN
For the most accurate results, select vehicle by your VIN (Vehicle Identification Number).
102 Fuel Injectors found


GMC Injector Part Number: 19244616
$76.99 MSRP: $240.20You Save: $163.21 (68%)Ships in 1 Business DayProduct Specifications- Other Name: Injector Kit, Fuel Injection; Fuel Injector
- Replaces: 17113124, 17113197


GMC Injector Part Number: 12580426
$107.23 MSRP: $217.78You Save: $110.55 (51%)Ships in 1-2 Business DaysProduct Specifications- Other Name: Injector Assembly-Sequential Multiport Fuel; Fuel Injector; Injector, Fuel Injection
- Replaces: 88894361


GMC Injector Part Number: 12633789
$98.37 MSRP: $199.78You Save: $101.41 (51%)Ships in 1-2 Business DaysProduct Specifications- Other Name: Injector Assembly-Direct Fuel; Fuel Injector; Injector, Fuel Injection


GMC Injector Part Number: 12662564
$95.63 MSRP: $194.24You Save: $98.61 (51%)Ships in 1-2 Business DaysProduct Specifications- Other Name: Injector Assembly-Direct Fuel; Fuel Injector; Injector, Fuel Injection
- Replaces: 12627093, 12662570, 12633913


GMC Injector Part Number: 12608362
$94.78 MSRP: $192.52You Save: $97.74 (51%)Ships in 1-2 Business DaysProduct Specifications- Other Name: Injector Assembly-Direct Fuel; Fuel Injector; Injector, Fuel Injection


GMC Injector Part Number: 12671568
$95.68 MSRP: $194.32You Save: $98.64 (51%)Ships in 1-2 Business DaysProduct Specifications- Other Name: Injector Assembly-Direct Fuel
- Replaced by: 12662571

GMC Injector Part Number: 19210900
$399.51 MSRP: $737.27You Save: $337.76 (46%)Ships in 1-2 Business DaysProduct Specifications- Other Name: Injector Kit, Fuel Injection; Common Rail Injector; Fuel Injector

GMC Injector Part Number: 19244615
$120.95 MSRP: $227.14You Save: $106.19 (47%)Ships in 1 Business DayProduct Specifications- Other Name: Injector Kit, Fuel Injection; Fuel Injector
- Replaces: 17113221

GMC Injector Part Number: 23437819
$348.69 MSRP: $635.14You Save: $286.45 (46%)Ships in 1-2 Business DaysProduct Specifications- Other Name: Injector, Fuel Injection; Fuel Injector
GMC Injector Part Number: 17111928
$150.31 MSRP: $269.62You Save: $119.31 (45%)Ships in 1-3 Business DaysProduct Specifications- Other Name: Fuel Injector
- Replaced by: 19110532
GMC Injector Part Number: 12732623
$60.77 MSRP: $108.52You Save: $47.75 (44%)Product Specifications- Other Name: Injector Kit-Multiport Fuel; Injector Kit, Fuel Injection
- Replaces: 12726901, 19420648

GMC Injector Part Number: 12663380
$151.82 MSRP: $308.36You Save: $156.54 (51%)Ships in 1-2 Business DaysProduct Specifications- Other Name: Injector, Fuel Injection; Fuel Injector
- Replaces: 12634491

GMC Injector Part Number: 19110532
$150.31 MSRP: $269.62You Save: $119.31 (45%)Ships in 1-3 Business DaysProduct Specifications- Other Name: Injector, Fuel; Fuel Injector; Fuel Injector Kit, Throttle Body/Carburetor; Injector Kit, Throttle Body/Carburetor
- Replaces: 17111929, 17112521, 17111468, 17111931, 17111930, 17111928
GMC Injector Part Number: 12733960
$46.29 MSRP: $94.02You Save: $47.73 (51%)Ships in 1-2 Business DaysProduct Specifications- Other Name: Injector Assembly-Direct Fuel; Injector, Fuel Injection
- Replaced by: 12739680
- Replaces: 12698632, 12689534

GMC Injector Part Number: 55513509
$352.09 MSRP: $637.26You Save: $285.17 (45%)Product Specifications- Other Name: Injector Kit-Multiport Fuel; Fuel Injector; Injector Kit, Fuel Injection
- Replaces: 55490914

GMC Injector Part Number: 12702932
$368.80 MSRP: $661.52You Save: $292.72 (45%)Product Specifications- Other Name: Injector Kit-Multiport Fuel; Fuel Injector; Injector Kit, Fuel Injection
GMC Injector Part Number: 17112249
$137.76 MSRP: $247.10You Save: $109.34 (45%)Ships in 1-3 Business DaysProduct Specifications- Other Name: Fuel Injector
- Replaced by: 19110533
GMC Injector Part Number: 17111929
$150.31 MSRP: $269.62You Save: $119.31 (45%)Ships in 1-3 Business DaysProduct Specifications- Other Name: Fuel Injector
- Replaced by: 19110532

GMC Injector Part Number: 88894353
$120.24 MSRP: $244.20You Save: $123.96 (51%)Ships in 1-2 Business DaysProduct Specifications- Other Name: Injector, Fuel Injection; Fuel Injector
GMC Injector Part Number: 19420033
$413.38 MSRP: $741.48You Save: $328.10 (45%)Ships in 1-3 Business DaysProduct Specifications- Other Name: Injector Kit, Fuel Injection; Fuel Injector; Injector, Fuel Injection
- Replaces: 22991067
| Page 1 of 6 |Next >
1-20 of 102 Results
GMC Fuel Injector
Want to cut long-term maintenance and repair costs? Choose OEM Fuel Injector. Those parts deliver top durability you can trust. On our site, you'll find a huge catalog of genuine GMC parts. Prices are unbeatable, so you can keep more in your pocket. Every OEM GMC Fuel Injector includes a manufacturer's warranty. You can also get an easy return policy that keeps buying risk free. Fast delivery, get your car on the road quickly. It's simple to search, compare, and order. Stop guessing about quality or fit. Order today and save with parts that last.
GMC Fuel Injector Parts Questions & Experts Answers
- Q: How to clean fuel injectors effectively on GMC Canyon?A:The tools required to clean fuel injectors include j 37287 (Fuel Line Shut-Off Adapters) and j 35800-a (Fuel Injector Cleaner) alongside j 42873-1 (3/8 Fuel Line Shut-Off Valve) and j 42873-2 (5/16 Return Pipe Shut-Off Valve) and j 42964-1 (3/8 Fuel Pipe Shut-Off Valve) and j 42964-2 (5/16 Fuel Pipe Shut-Off Valve). Gm top-engine cleaner (P/N 12346535 for US dealers or Canadian P/N 992872) should be used alone as the cleansing agent without fuel tank addition and the solution concentration must stay below 10 percent. Us dealers must empty two 24 ml containers of gm top-engine cleaner into the j 35800-a but canadian dealers need to measure and add 48 ml of the same product to this tank. Clients who wish to use an engine cleaning product different from gm top-engine cleaner must combine 96 ml of their selected cleaner with 864 ml of regular unleaded fuel. Begin by enabling the injector cleaning tank with fuel but you must disable the vehicle Fuel Pump and disconnect the fuel feed followed by plugging the lines through the proper shut-off adapters. Insert the j 35800-a into the Fuel Rail while maintaining 510 kpa (75 psi) pressure for a duration until engine stalling occurs. The Fuel Pump relay and lines should be reconnected before letting the vehicle idle for another two minutes of operation. The injector balance test should determine the drop in fuel pressure of each injector. Replace the injector with the lowest pressure drop if necessary. The solution requires customers to add port Fuel Injector cleaner (GM P/N 12345104 or Canadian P/N 10953467) in one ounce amount per gallon of gasoline while instructing them about fuel brand impacts and recommending regular cleaner usage to stop future problems. Drive the vehicle during the road test to make sure the original customer problem no longer exists.
- Q: How to replace the fuel injectors on GMC Yukon?A:The Fuel Injector replacement process starts by properly removing the air cleaner outlet duct then using ch-48027 or without it when relieving fuel system pressure. You need to disconnect ranges of engine wiring harness electrical connectors off components including evap purge solenoid, generator, map sensor and Ignition Coil and fuel injectors while you need to mark the connectors for correct future placement. The engine wiring harness clips and negative charge lead need to be detached from the right cylinder head position. First disconnect the quick connect fitting that feeds fuel to the chassis from its location on the Fuel Rail and also release the quick connect fittings at the intake manifold for the evap tube then at the evap canister purge solenoid. After unhinging the retainer holding the evap canister purge solenoid to the Fuel Rail you can extract the Fuel Rail assembly bolts while lifting the rail assembly carefully to prevent damage to the electrical connector terminals and spray tips. Begin the procedure by cleaning the Fuel Rail followed by removing the Fuel Injector retainers and lift out the injectors after disposing the old o-ring seals. Start by applying engine oil to new o-ring seals before installing them to injectors followed by inserting the injectors into the Fuel Rail. Position the Fuel Rail properly onto the intake manifold while keeping the retainers in place. Push down on the rail to achieve complete seating. After fitting the Fuel Rail bolts at 10 nm (89 lb in) tightness connect the evap tube and purge solenoid as well as the chassis fuel feed pipe quick connect fitting. Next position the pcv hose then gather the engine wiring harness before fixing it into position with its clips. The negative Battery Cable needs to be reconnected when all electrical connectors are tightened in place and engine wiring harness brackets receive a 5 nm (44 lb in) torque setting. Complete the check for leaks by turning the ignition on before reinstalling the air cleaner outlet duct.
- Q: How to replace a fuel injector on GMC Sierra 1500?A:The first step to replace the fuel injector requires removal of the fuel meter body. Start by removing the injector retainer lock nuts before taking off the retainer. Be careful during fuel injector removal to protect the electrical connector terminals because the fuel injector requires complete assembly servicing. Electrical injectors must stay free of all liquids because submersion in cleaning agents will harm their functions and they should never undergo cleaning procedures. A small tip punch should be used to push downwards between the injector terminals while pulling the injector downwards until it comes out. Check that the chosen fuel injectors are compatible with the vehicle application before placing your order. The installation requires engine oil lubrication of new injector O-ring seals before fuel injector insertion within the fuel meter body injector socket. Place the injector retainer together with its lock nuts on the fuel meter body before securing both nuts to 3 Nm (27 lb in). You should install the fuel meter body as the last step.


Related GMC Parts
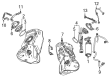
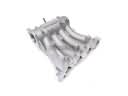 GMC Intake Manifold
 GMC Throttle Cable
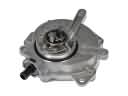 GMC Vacuum Pump
 GMC Fuel Tank Sending Unit
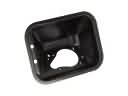 GMC Fuel Filler Housing
 GMC Fuel Injector O-Ring
 GMC Fuel Pressure Sensor
 GMC Fuel Pump Gasket
 GMC Fuel Pump Seal
 GMC Fuel Pump Strainer
 GMC Fuel Tank Strap
 GMC Throttle Body Gasket
Browse GMC Fuel Injector by Models
Acadia Sierra 1500 Yukon Canyon Sierra 2500 HD Terrain Envoy Sonoma Typhoon Syclone Caballero C1500 Envoy XL Envoy XUV Jimmy K1500 S15 S15 Jimmy Safari Savana 2500 Savana 3500 Sierra 2500 Sierra 3500 Yukon XL Acadia Limited C2500 C3500 G2500 K2500 K3500 Savana 1500 Yukon XL 1500 C1500 Suburban C2500 Suburban G1500 G3500 K1500 Suburban K2500 Suburban P2500 R1500 R1500 Suburban R2500 R2500 Suburban R3500 Sierra 1500 Classic Sierra 1500 HD Sierra 1500 HD Classic Sierra 1500 Limited Sierra 2500 HD Classic Sierra 3500 Classic Sierra 3500 HD V1500 V1500 Suburban V2500 V2500 Suburban V3500 Yukon XL 2500