Popular OEM Chevrolet Avalanche 1500 Parts
- Body & Hardware Parts View More >
- Steering Parts View More >
- Electrical Parts View More >
- Air & Fuel Delivery Parts View More >
- Charging & Starting Parts View More >
- Engine Parts View More >
- Belts & Cooling Parts View More >
- Suspension Parts View More >
- Driveline & Axles Parts View More >
- Emission Control & Exhaust Parts View More >
- Transmission Parts View More >
- Brakes Parts View More >
Why Buy Genuine Chevrolet Avalanche 1500 Parts From ChevyPartsGiant.com
Looking for real Chevrolet Avalanche 1500 parts? ChevyPartsGiant.com may be a better choice to find genuine parts at wallet-friendly prices. We sell only OEM Chevrolet Avalanche 1500 parts, ensuring perfect fit, reliability, and long-term performance. With our website, you can easily get access to the same parts found at local Chevrolet stores. All components are produced by Chevrolet and are exclusively fitted on Chevrolet Avalanche 1500 automobiles. By shopping at our store, you can enjoy the quality of the Chevrolet factory without the high prices of brick-and-mortar facilities. We achieve this because we are an online store operating at lower costs, which we pass on to you. We also have a user-friendly platform where you can find and order genuine Chevrolet Avalanche 1500 parts swiftly. We are here to make your process of restoring a Chevrolet Avalanche 1500 or dealing with simple repairs quick and inexpensive. We also make it easy to obtain Chevrolet Avalanche 1500 parts at competitive shipping prices and a team of knowledgeable staff ready to take your order. Choose ChevyPartsGiant.com to save time and money, as well as keep your Chevrolet Avalanche 1500 in the good condition.
The Chevrolet Avalanche 1500 introduced itself to vehicle markets in September 2001 for a 2002 manufacturing cycle that united features from SUVs with features from pickups. The GMT800 platform supports the Avalanche 1500 model that features a 5.3L V8 Vortec engine to produce 285 horsepower for dependable driving on different terrain types. The four-speed automatic transmission of this vehicle enables smooth shifting while the 5.3L V8 Vortec engine produces reliable acceleration. The car employs plastic components in its structure to achieve improved efficiency and handling capabilities. The Chevrolet Avalanche 1500 model equipped with Z71 Off-Road package delivers effective off-road performance through its combination of off-road suspension (features) with GM's Autotrac all-wheel-drive system. The Convert-a-Cab system provides useful features to users because it enables personalized cargo configuration adjustment. The Chevrolet Avalanche 1500 maintains its reliable quality and lifetime performance through exclusive use of genuine Chevrolet parts in its interior design. OEM Chevrolet Avalanche 1500 parts preserve the vehicle's structure while improving performance outputs during every year of use. The Chevrolet Avalanche 1500 possesses functional versatility through its various useful features which continue to provide dependable choices to auto buyers seeking adaptable vehicles.
Chevrolet Avalanche 1500 owners may see three clusters of faults grouped by system and function. In the drivetrain, the Avalanche 1500 can display a service 4WD message with stored transfer case codes. The usual cause is a failing transfer case position sensor or a worn selector switch. Replace the sensor, confirm motor travel, and clear codes after a TCCM relearn. In the fuel system, the Avalanche 1500 may show an erratic gauge that drops or jumps. The common root is a failed fuel level sensor. High mileage Avalanche 1500 trucks often need a complete fuel pump module. Verify sender signal, inspect wiring, then replace the fuel pump if resistance readings fluctuate. For engine management and emissions, the Avalanche 1500 often triggers a check engine light. A loose or worn gas cap commonly causes an EVAP leak code. Fit a new gas cap, inspect the filler neck seal, and run a smoke test if needed. Chevrolet diagnostic steps should start with a full scan and a visual inspection. Chevrolet service information helps confirm procedures and torque values. The Avalanche 1500 benefits from timely sensor replacements and EVAP sealing checks. Chevrolet reliability improves when these systems receive prompt attention.
Chevrolet Avalanche 1500 Parts Questions & Answers
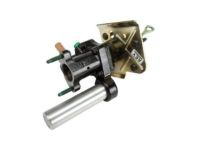
- Q: How to replace the vacuum brake booster on Chevrolet Avalanche 1500?A:Before replacing the vacuum Brake Booster you need to engage the parking brake and use wheel blocks. First disconnect the Brake Master Cylinder before removing it and disconnecting the Brake Booster check valve vacuum hose. Start by taking off the clip from the brake pedal stud then remove the stop lamp switch and Pushrod from the same point. Sever the vacuum booster from its frame using four mounting nuts and remove it while discarding the sealing gasket. You need to set a new gasket onto the booster before adding the vacuum booster. Use a 36 n.m torque setting to secure the four vacuum booster mounting nuts. Connect the Pushrod and stoplamp switch to the brake pedal stud and put the Pushrod retaining clip on last. Remount the vacuum booster unit along with the master cylinder using its check valve connection to the vacuum hose. After blocking the wheels shut down the vehicle then release the park brake to free up the wheels.
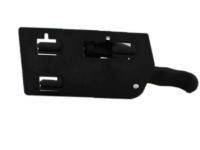
- Q: How to replace the front exterior door handle on Chevrolet Avalanche 1500?A:The replacement process for the front door exterior handle begins with removing the trim panel as well as the water deflector from the door. Cotter pin devices allow users to detach the outside handle rod and lock cylinder rod from their specific rod holding points. Stand by while holding the outside handle with tape then disconnect its mounting nuts before removing the rubber cover to get to the outboard nut for releasing the door-lock cylinder from the outside handle assembly. Refer to appropriate guidance when dealing with a lock cylinder that is difficult to manipulate. Set the handle aside before proceeding with new handle installation on the vehicle. The inside of lock case and cylinder keyway need to receive gm p/n 12345120 or canadian p/n 726548 lubricant or equivalent before installing the door-lock cylinder within the outside handle housing. Secure the lock cylinder rod by attaching its clip to the main rod and the handle rod clip followed by tightening the outside handle mounting nuts to 9 n.m (80 lb in) torque. Reposition the rubber cover together with the water deflector as well as the trim panel.
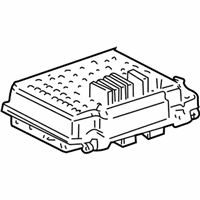
- Q: How to replace the RH end panel and the Fuse Box on Chevrolet Avalanche 1500?A:The first task to change the right side end panel and fuse block requires removing the right side end panel. The tabs need to be pushed for detaching the fuse block before you gently pull it from the instrument panel to reveal the retaining bolt. A screwdriver will help you detach the wire harness block from the fuse block for removing the I/P wiring harness block from the car. Join the fuse block to the I/P wire harness block by inserting the retaining bolt and tighten it to 6 N.m (53 lb in). The installation process includes fitting the fuse block into the I/P until it clicks while performing wiring connector attachment to the fuse block then reattaching the right side end panel.
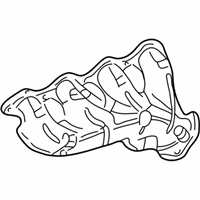
- Q: How to replace the right exhaust manifold on 4.8L, 5.3L, and 6.0L engines on Chevrolet Avalanche 1500?A:You need to begin the right Exhaust Manifold change procedure for 4.8l, 5.3l, and 6.0l engines by taking off the ignition coils along with the spark plugs. Start by elevating the vehicle and then remove the nuts on the Exhaust Manifold pipes. Lower the vehicle so you can remove the Exhaust Manifold bolts and manifold and gasket which you should discard the gasket. The Exhaust Manifold requires heat shield bolts removal to eliminate both the shield attachment parts from the Exhaust Manifold. When keeping the Exhaust Manifold you must inspect and clean it thoroughly. You should attach the heat shield along with its bolts to the Exhaust Manifold only when needed then tighten the bolts to 9 nm (80 inch lbs.). Proper bolt torque on the Exhaust Manifold will stop vehicle emission issues and ensure correct on-board diagnostics (OBD) ii system operation and check that all bolt holes have smooth threads without debris but avoid applying sealant to the first three threads on the bolt. Wrap the boundary of the Exhaust Manifold bolt threads with threadlocker gm p/n 12345493 (Canadian P/N 10953488) or equivalent material to the extent of 5 mm (0.2 inches). Install the Exhaust Manifold and new gasket before tightening the bolts starting from the middle of the two then moving to opposite sides until reaching the outside bolts. Finish the tightening at 25 nm (18 ft. Lbs.) using the same pattern. Use a flat punch to bend the Exhaust Manifold Gasket exposed edges at the front of the right cylinder head. The installation continues by raising the vehicle and installing Exhaust Manifold pipe nuts which should be tightened to 50 nm (37 ft. Lbs.) followed by vehicle lowering.


