Make sure this part fits

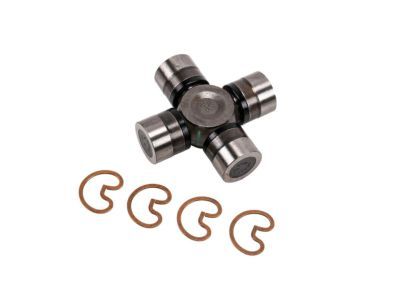
GM 19121436
Universal Joints

2006-2019 GM

Customer Questions & Expert Answers (8)
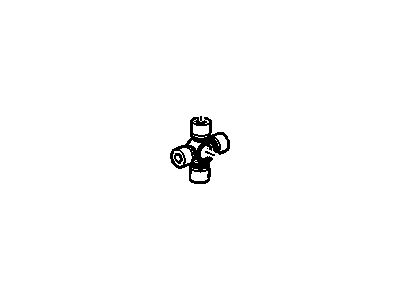
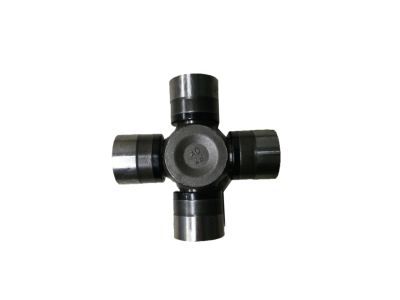
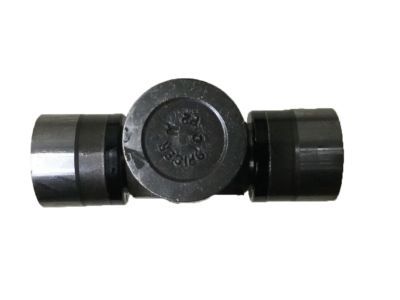
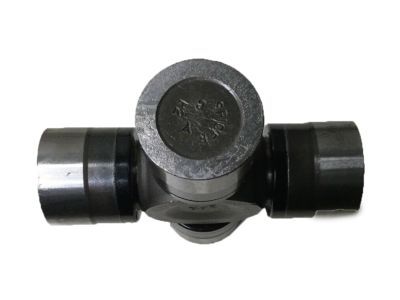
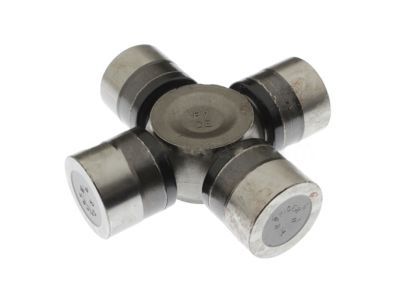
GM 19121436 Universal Joints
  • Part Description
    Joint Kit, Propeller Shaft Universal; U Joint
  • Replaces
    15515792, 19256890, 15898097, 88934794, 88935919
  • Manufacturer
    General Motors
Make sure this part fits
$123.08 MSRP: $300.30
You Save: $177.22 (60%)
Ships in 1-2 Business Days
1
ADD TO CART
  • Related Parts
  • Product Specifications
  • Vehicle Fitment
  • Customer Questions & Expert Answers
  • Product Specifications

    BrandGenuine GM
    Manufacturer Part Number19121436
    Part DescriptionJoint Kit, Propeller Shaft Universal; U Joint
    Other NamesJoint Kit, Propeller Shaft Universal Joint
    Item Dimensions4.1 x 4.0 x 1.6 inches
    Item Weight2.60 Pounds
    ConditionNew
    Fitment TypeDirect Replacement
    Replaces15515792, 19256890, 15898097, 88934794, 88935919
    ManufacturerGeneral Motors
    SKU19121436
    WarrantyThis genuine GM part is guaranteed by GM's factory warranty.
    Shipping & ReturnShipping Policy Return Policy
    Warning: California's Proposition 65
  • Vehicle Fitment

    Year Make Model Trim Engine
    2007-2010 Chevrolet Silverado 1500LS, LT, LTZ, WT6 Cyl 4.3 L GAS, 8 Cyl 4.8 L FLEX, 8 Cyl 4.8 L GAS, 8 Cyl 5.3 L FLEX, 8 Cyl 5.3 L GAS, 8 Cyl 6.0 L GAS, 8 Cyl 6.2 L FLEX
    2006-2019 Chevrolet Silverado 2500 HDHigh Country, LS, LT, LTZ, WT8 Cyl 6.0 L CNG, 8 Cyl 6.0 L FLEX, 8 Cyl 6.0 L GAS, 8 Cyl 6.6 L DIESEL, 8 Cyl 8.1 L GAS
    2007 Chevrolet Silverado 2500 HD ClassicLS, LT, WT8 Cyl 6.0 L GAS, 8 Cyl 6.6 L DIESEL, 8 Cyl 8.1 L GAS
    2006 Chevrolet Silverado 3500LS, LT, WT8 Cyl 6.0 L GAS, 8 Cyl 6.6 L DIESEL, 8 Cyl 8.1 L GAS
    2007 Chevrolet Silverado 3500 ClassicLS, LT, WT8 Cyl 6.0 L GAS, 8 Cyl 6.6 L DIESEL, 8 Cyl 8.1 L GAS
    2007-2019 Chevrolet Silverado 3500 HDHigh Country, LT, LTZ, WT8 Cyl 6.0 L CNG, 8 Cyl 6.0 L FLEX, 8 Cyl 6.0 L GAS, 8 Cyl 6.6 L DIESEL
    2007-2010 GMC Sierra 1500Denali, SL, SLE, SLT, WT6 Cyl 4.3 L GAS, 8 Cyl 4.8 L FLEX, 8 Cyl 4.8 L GAS, 8 Cyl 5.3 L FLEX, 8 Cyl 5.3 L GAS, 8 Cyl 6.0 L GAS, 8 Cyl 6.2 L FLEX, 8 Cyl 6.2 L GAS
    2006-2019 GMC Sierra 2500 HDBase, Denali, SL, SLE, SLT, WT8 Cyl 6.0 L CNG, 8 Cyl 6.0 L FLEX, 8 Cyl 6.0 L GAS, 8 Cyl 6.6 L DIESEL, 8 Cyl 8.1 L GAS
    2007 GMC Sierra 2500 HD ClassicSL, SLE, SLT, WT8 Cyl 6.0 L GAS, 8 Cyl 6.6 L DIESEL, 8 Cyl 8.1 L GAS
    2006 GMC Sierra 3500SL, SLE, SLT, WT8 Cyl 6.0 L GAS, 8 Cyl 6.6 L DIESEL, 8 Cyl 8.1 L GAS
    View More
  • Customer Questions & Expert Answers

    Q:
    Is this 19121436 designed for my car? Posted by ChevyPartsGiant Specialist
    A:
    Please Select Your Vehicle model to see if part number 19121436 is suitable before ordering.
    Posted by ChevyPartsGiant Specialist
    Q:
    How to replace the universal joint with a nylon injected ring on Chevrolet Silverado 3500 Classic? Posted by Customer
    A:
    Start your nylon injected ring replacement by obtaining two tools: U Joint Bearing Separator (J 9522-3) and U Joint Bearing Spacer Remover (J 9522-5). Keep the propeller shaft in level position when supporting it because contact with the tube can harm its structure. Place the lower yoke part of the universal joint onto a 30 mm (1 1/8 inch) socket before indicating the propeller shaft positions. Working with the U Joint Bearing Separator (J 9522-3) you should carefully cut through the plastic retaining ring on the lower bearing cup before pressing it out of the yoke ear. Use the U Joint Bearing Spacer Remover (J 9522-5) tool between the seal and bearing cup when the cup stays attached. Turn the propeller shaft to take away the other bearing cup as you note the slip yoke position in relation to the tube. Clean both bearing cup bores in the yoke ears along with all retaining ring grooves before assembly. Use a proper tool to remove all sheared plastic bits that remain in the grooves. Push a bearing cup into one yoke side then position the cross to align the trunnion freely before pressing the cup until it meets the yoke face. Do the same process using the second bearing cup and confirm the trunnions sit properly. Check the needle bearings for accurate alignment and force them toward the yoke until the bearing retainer groove moves out from the yoke. Push the bearing retainer into place using a dead blow hammer while inserting it to all the way home. You can apply chassis grease to the snap ring to simplify its installation steps.
    Posted by ChevyPartsGiant Specialist
    Q:
    How to replace a universal joint on Chevrolet Silverado 1500? Posted by Customer
    A:
    When working on a Universal Joint start by holding the propeller shaft still in a horizontal position using one yoke clamp to prevent damage to the Slip Yoke sealing surface. Mild yoke tapping lets the Universal Joint retaining ring relax before pliers can fully uninstall it. By holding the propeller shaft and using help position it level in place then attach a socket that fits properly with the opposite side of j-9522-3 (U-Joint Bearing Separator). Use the j-9522-3 tool to take out universal bearings from yoke until it stops. Put j-9522-5 tool on the joint afterward and apply both tools through press to pull out stubborn bearings. Apply this step again to disassemble the remaining side of the propeller shaft. Since the Slip Yoke requires replacement at the same time we replace the Universal Joint. Suppress the Slip Yoke retaining ring and take out the yoke before you pull the universal bearing out of the yoke with the j-9522-3 and j-9522-5 tools. After you get the bearing out you can free the spider from the yoke. Use proper tools to wash both parts until they are completely clean. Install the universal bearings in the yoke on the propeller shaft until one Universal Joint spider seats before pressing it to match the surface of the yoke. Put on one retaining ring and do the same steps for the opposite bearing. Test if the Universal Joint moves without friction before gently striking the yoke. Place remaining universal bearings on the driveshaft then fasten them with electrical tape before final vehicle installation. Insert the universal spider into the Slip Yoke then put in the universal bearings and push them fully down until they fit securely. Drive bearings into each Slip Yoke at equal depth then put on the retaining rings. Repeat this process for the second bearing. Place the end of the propeller shaft inside the Slip Yoke while putting the universal spider inside its bearing and pushing it into place through the yoke. Set the retaining ring afterward. Keep rotating the propeller shaft while testing the movement of the Universal Joint through both bearings. Lightly tap the parts if needed to achieve a free movement.
    Posted by ChevyPartsGiant Specialist
    Q:
    How to replace the universal joint with an external snap ring on GMC Sierra 3500 Classic? Posted by Customer
    A:
    Begin replacement of the universal joint by acquiring U-Joint Bearing Separator (J 9522-3) and U-Joint Bearing Spacer Remover (J 9522-5). Hold the propeller shaft flat during this process because securely fastening the tubing in a vise can harm it. Label the ends of the propeller shaft before you disassemble it. Use pliers to pinch both snap ring ends before tapping the cup lightly to release trapped pressure if needed. Fitting the U-Joint Bearing Separator onto open horizontal bearing cups pushes the lower cup through the yoke ear when you put the 30 mm (1-1/8 inch) hex head socket or 27 mm (1-1/16 inch) socket under the yoke base. By lifting the cross first you should put the U-Joint Bearing Spacer Remover (J 9522-5) between the seal and the bearing cup. Keep compressing until the bearing cup comes out. Turn the propeller shaft to push out the other bearing cup in the slip yoke while you note its relationship to the tube. Carefully remove the cross and other universal joint parts before checking if retaining ring grooves and bearing cup bores maintain cleanliness and order. Put a bearing cup into one yoke side with smooth trunnion movement before pressing it to touch the yoke ear. Push the opposite bearing cup into place at both trunnion holes and confirm that parts move freely when pressed gently. Check the needle bearings when motion is restricted. Push the tool until you see the groove on the retainer, push both pieces together after adding the bearing retainer until they lock into place. To make the retaining ring easier to place use a dead blow hammer and grease to assist the process.
    Posted by ChevyPartsGiant Specialist
    Q:
    How to replace the universal joint with a nylon injected ring on GMC Sierra 1500? Posted by Customer
    A:
    You can set up and mark the yoke ends before putting the propeller shaft into a horizontal press with nylon support. Use a 30mm 1 1/8" socket in one yoke ear to support the propeller shaft when applying J 9522-3 bearing separator between horizontal bearing cups to push the lower bearing out. When the bearing cup proves stubborn, use the J 9522-5 to exceed pressure between the seal and cartrige by inserting it between the two surfaces. Turn the propeller shaft to drive the opposite bearing cup out and take off the cross assembly and joint parts separately. Use a clean tool to push away small plastic fragments inside the bearin. Lay one bearing cup inside the yoke then attach the yoke's bottom end piece. Afterward, put the cross parts together ensuring the trunnion moves without obstacles. Push both bearing cups into the yoke unit until the tips reach the surface then do the same on the other side to line up trunnion parts. Check the needle bearing alignment when a running problem exists. Press the yoke while ensuring the bearing retainer groove moves away then put the bearing retainer parts into place and tap them until both pieces snap into place. A dead blow hammer may be used to gently push the yoke when retainer installation becomes difficult. Adding chassis grease to the snap ring also helps ensure correct placement.
    Posted by ChevyPartsGiant Specialist
    Q:
    How to replace the universal joint with an external snap ring on GMC Sierra 3500? Posted by Customer
    A:
    The replacement requires two special tools: J 9522-3 U-Joint Bearing Separator and J 9522-5 U-Joint Bearing Spacer Remover. Keep the propeller shaft flat as you start the replacement to prevent damaging the tube when positioning it in a clamp holder. Identify which side of the propeller shaft connects to the transmission and the rear axle. Use pliers to take apart the snap rings and hit the end of the cup gently when needed. Rest the lower yoke ear on a 30 mm hex socket or 27 mm socket. Put the U-Joint Bearing Separator (J 9522-3) in the horizontal bearing cups. Press the bottom bearing cup out of the yoke ear while supporting the ends horizontally. When the bearing cup remains stuck lift the propeller shaft cross to insert U-Joint Bearing Spacer Remover J 9522-5 between seal and cup for further pressing out. Adjust the propeller shaft spin to push the opposite bearing cup from its position while noting how the yoke connects to the tube for proper reinstallation. Examine both bearing cup bores and retainer ring grooves for damage while inspecting them for dirty or damaged parts. Press one bearing cup into half of the yoke part before attaching the cross to center the trunnion properly. Push the bearing cup straight into the yoke until its face rests flat against the surface and do the same on the opposite side to align trunnions. Check to see if the bearing cup retainer groove is showing while pressing down on the cup. Test the needle bearings when you feel binding pressure. Insert the bearing retainer in the groove while pressing uniformly until it locks. Use a dead blow hammer to secure both retainers if required followed by grease application to ensure better retention.
    Posted by ChevyPartsGiant Specialist
    Q:
    What is the first step in removing the bearing cup for the 2006 Chevrolet Silverado 3500? Posted by Customer
    A:
    Use the U Joint Bearing Separator (J 9522-3) to shear the plastic retaining ring on the bearing cup and press the lower bearing cup out of the yoke ear.
    Posted by ChevyPartsGiant Specialist
    See expert answers on similar Universal Joint
    Q:
    How should the universal joint be positioned for removal for the 2007 GMC Sierra 1500? Posted by Customer
    A:
    Position the universal joint with the lower ear of the yoke resting on a 30 mm (1 1/8 in) socket.
    Posted by ChevyPartsGiant Specialist
    See expert answers on similar Universal Joint
    If you have any questions about this product, please don't hesitate to ask us. We will be happy to help you!

OEM GM 19121436, Excellent Performance and Perfect Fitment

To ensure reliability, purchase GM part # 19121436 Universal Joints. It is sometimes referred to as GM Universal Joint. Choosing OEM parts is the optimal decision for guaranteeing superior quality and perfect performance. These components undergo stringent quality checks and are carefully constructed to comply with GM's factory specifications, ensuring a smooth installation process.

ChevyPartsGiant.com is a leading supplier of genuine GM parts such as GM 19121436 Universal Joints. Our website boasts an extensive inventory of OEM GM parts, available at highly competitive prices in the market. Should you require any new genuine GM parts, rest assured we will deliver them swiftly and efficiently to your doorstep. Furthermore, all our parts come with the assurance of a manufacturer's warranty. For detailed Chevy parts information, click here.
Choose ChevyPartsGiant for discounted prices, exceptional service and fast delivery