Make sure this part fits

GM 24507499
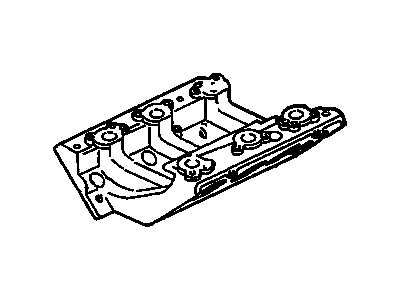
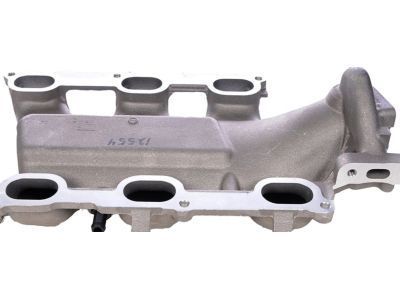
Intake Manifold

2000-2005 GM

Customer Questions & Expert Answers (16)
GM 24507499 Intake Manifold
  • Part Description
    Manifold, Engine Fuel Intake Manifold
  • Position
    Upper
  • Manufacturer
    General Motors
  • Manufacturer's Notes
    This part is discontinued.
Make sure this part fits
  • Product Specifications
  • Vehicle Fitment
  • Customer Questions & Expert Answers
  • Product Specifications

    BrandGenuine GM
    Manufacturer Part Number24507499
    Part DescriptionManifold, Engine Fuel Intake Manifold
    Item Dimensions9.5 x 21.4 x 12.4 inches
    Item Weight7.20 Pounds
    PositionUpper
    ConditionNew
    Fitment TypeDirect Replacement
    ManufacturerGeneral Motors
    SKU24507499
    WarrantyThis genuine GM part is guaranteed by GM's factory warranty.
    Shipping & ReturnShipping Policy Return Policy
    Warning: California's Proposition 65
  • Vehicle Fitment

    Year Make Model Trim Engine
    2000-2005 Buick CenturyCustom, Limited, Special Edition6 Cyl 3.1 L GAS
    2000-2001 Chevrolet LuminaBase6 Cyl 3.1 L GAS
    2000-2003 Chevrolet MalibuBase, LS6 Cyl 3.1 L GAS
    2000-2003 Pontiac Grand PrixSE6 Cyl 3.1 L GAS
  • Customer Questions & Expert Answers

    Q:
    Can you help me check if this 24507499 is the right part for my car? Posted by ChevyPartsGiant Specialist
    A:
    Please Select Your Vehicle model to see if part number 24507499 is suitable before ordering.
    Posted by ChevyPartsGiant Specialist
    Q:
    How to replace the upper intake manifold on Buick Century? Posted by Customer
    A:
    A battery ground disconnect (negative cable) should be the first step when replacing the upper Intake Manifold. The first step involves removing the vacuum hose at the Throttle Body air inlet duct and the wiring harness at the iat sensor position in this duct. Before commencing drainage of engine coolant from the cooling system you must remove both the Throttle Body air inlet duct and the Throttle Body air inlet duct. Begin by removing the accelerator control and cruise control cables with bracket from the Throttle Body before removing wiring harness connectors including both the throttle position (TP) sensor and idle air control (IAC) valve. Detach the left front Spark Plug Wires and sequester the wiring harness attachment clips which interface with the camshaft position (CMP) sensor, left spark plug wire harness and engine wiring harness. Thermostat bypass pipe coolant hoses require disconnecting from the Throttle Body before removing ignition coil brackets with installed coils and purge and vacuum solenoids together. Disconnect the vacuum hose at the manifold air pressure (MAP) sensor and upper Intake Manifold before removing both components and their bracket. Disconnect the emission control vacuum harness together with all upper Intake Manifold vacuum hose connections which include vacuum booster hose automatic transaxle vacuum modulator hose and heater and air conditioning vacuum source hose and Fuel Pressure Regulator. The generator brace along with generator bracket requires removal first. Then the exhaust gas recirculation (EGR) valve gets removed next. The upper Intake Manifold and its gasket require removal after wrenching off right and left upper Intake Manifold bolts and studs. The manifold seal surfaces need degreaser application prior to upper Intake Manifold gasket and upper Intake Manifold installation. Start with loosely putting the left and right upper Intake Manifold studs and bolts then finish tightening with 25 nm (18 ft. Lbs.). Reinstall both the EGR Valve as well as the generator bracket followed by the generator brace. Insert vacuum hoses at their designated ports on the upper Intake Manifold as well as on the emission control vacuum harness. After installing the MAP Sensor bracket you can connect the vacuum hose between the MAP Sensor and upper Intake Manifold. Reinstall the ignition coil bracket which holds coils and purge solenoid and vacuum canister solenoid before connecting thermostat bypass pipe coolant hoses to the Throttle Body. To complete the work restore three wiring harness attachment clips which serve the cmp sensor and left spark plug wire harness and engine harness before connecting the left Spark Plug Wires and wiring harness connectors to the Throttle Body. The completion process includes installing the Throttle Body air inlet duct followed by iat sensor wiring harness connection. Then install the accelerator control and cruise control cables with bracket to the Throttle Body. Next fill the cooling system with engine coolant and finally reconnect the battery ground (negative) cable.
    Posted by ChevyPartsGiant Specialist
    Q:
    How to replace the upper intake manifold on Chevrolet Malibu? Posted by Customer
    A:
    To remove the upper Intake Manifold, start by removing the top half of the air cleaner assembly, draining the cooling system and removing the brake vacuum pipe at the plenum. Pull off the Fuel Pressure Regulator vacuum hose away from the Fuel Pressure Regulator and PCV Valve, remove the electronic Ignition Coil and module assembly, throttle cable bracket with cables, evap canister purge solenoid, throttle position (TP) sensor, idle air control (IAC) sensor, fuel injector harness, and the manifold absolute pressure (MAP) sensor. Then take off the egr pipe, the inlet and outlet hoses attached to the Throttle Body, the upper Intake Manifold bolts. Remove the upper Intake Manifold and gaskets and clean the gasket surfaces. For installation, set the upper bottle of gaskets to manifold and apply thread lock gm p/n 12345382 to threads of bolts, for the upper Intake Manifold bolts tighten to 25 nm (18 ft. Lbs.). Replace the MAP Sensor , egr pipe , and inlet and outlet hose from Throttle Body . Reconnect the vacuum hose to the Fuel Pressure Regulator and the crankcase ventilation valve, then tp sensor, iac, and fuel injector harness. Mount the evap canister purge solenoid, electronic Ignition Coil and module assembly, throttle cable bracket and cables from the Throttle Body, as well as the top half of the air cleaner assembly. Finally, reinstall the brake vacuum pipe, top up the cooling system, and look for adequate fluid levels and leaks.
    Posted by ChevyPartsGiant Specialist
    Q:
    How to Service and Repair the Intake Manifold on a Chevrolet Lumina? Posted by Customer
    A:
    You must start by disconnecting the battery ground cable to replace a lower Intake Manifold. Start by removing the upper Intake Manifold before disconnecting the radiator inlet hose along with the Thermostat bypass hose and completing the removal of the Thermostat bypass pipe. The work sequence requires removal of three parts: the left valve Rocker Arm cover and generator and the right valve Rocker Arm cover. Begin by disconnecting the engine coolant temperature (ECT) wiring harness and removing the Fuel Injector and manifold air pressure (MAP) wiring harness. Next detach the fuel pipe clip bolt and its retaining clip. Begin by removing the fuel feed and return pipes that attach to the Fuel Injector rail before taking the Fuel Injector rail off. Move the Power Steering Pump to a suitable location before disconnecting the heater inlet pipe connected to the lower Intake Manifold through a heater hose. The procedure requires removal of the lower Intake Manifold bolts followed by the lower Intake Manifold and valve rocker arms and push rods. The technician cleans all seal and gasket areas on both the engine block and cylinder heads before removing residual rtv sealer. When installing a new lower Intake Manifold begin by taking off the ect sensor and water outlet bolts before removing the water outlet. The water outlet must be bolted down with 25 nm (18 ft. Lbs.) torque during installation if you take off the Thermostat or water outlet. Reinstall the ect sensor when it has been removed. Place an 8-12 mm bead of rtv sealer (GM P/N 12345739 or equivalent) on the lower Intake Manifold contact ridges between the engine block then install lower Intake Manifold gaskets followed by push rods and valve rocker arms. Apply gm p/n 12345382 sealant to all lower Intake Manifold bolt threads and tighten the vertical and diagonal bolts to 13 nm (115 inch lbs.) apply a torque of 13 nm (115 inch lbs.) when tightening the diagonal bolts. Hand tighten the vertical and diagonal lower Intake Manifold bolts, then tighten the vertical bolts to 13 nm (115 inch lbs.) and the diagonal bolts to 13 nm (115 inch lbs.). First install both the Power Steering Pump and the heater inlet pipe with its attached heater hose before reattaching the Fuel Injector rail. Position the fuel return and feed pipes onto the Fuel Injector rail while securing the fuel pipe clip with a torque of 8 nm (71 inch lbs.). Begin by connecting the Thermostat bypass hose and radiator inlet hose followed by installing the Fuel Injector and map wiring harness and the ect wiring harness. As a conclusion reinstall the right and left valve Rocker Arm covers with the generator and upper Intake Manifold followed by reconnecting the battery ground cable.
    Posted by ChevyPartsGiant Specialist
    Q:
    How to replace the lower intake manifold on Chevrolet Lumina? Posted by Customer
    A:
    First, remove the battery ground cable to change the lower Intake Manifold. Remove the upper Intake Manifold, then unplug the radiator inlet hose, thermostat bypass hose, and take away the Thermostat bypass pipe. Secondly, remove the right valve Rocker Arm cover. Remove the left valve Rocker Arm cover and generator. Unplug engine coolant temperature wiring harness, fuel injector and manifold air pressure wiring harness, and remove fuel pipe clip bolt and clip. Remove the fuel feed and return pipes from the Fuel Injector rail then remove the Fuel Injector rail. Free the heater inlet pipe with heater hose from the lower Intake Manifold. Reposition the Power Steering Pump. Remove bolts holding the lower Intake Manifold and the lower Intake Manifold and valve rocker arms and push, rods. Remove the old gasket and seal surfaces off the cylinder and engine block and remove any loose rtv sealer. If replacing the lower Intake Manifold, remove the engine cool temperature sensor and the water outlet bolts, followed by removing the water outlet and Thermostat. For the instalation, if disassebled, tighten the Thermostat and water outlet, with the water outlet bolts to 25 nm (18 ft lbf). If the engine Coolant Temperature Sensor was degraded, reinstall it. Apply 8-12mm bead of rtv sealer (GM P/N 12345739 or equiv.) each ridge where lower Intake Manifold makes contact with engine block, install the lower Intake Manifold gaskets, push rods, and valve rocker arms. Install the lower Intake Manifold while applying sealant (GM P/N 12345382) on the threads of the bolt around the vertical and diagonal lower Intake Manifold and hand tighten the bolts before tightening to 13 nm (115 inch lbs.). Connect heater inlet pipe and heater hose, reinstall Power Steering Pump, and install Fuel Injector rail. Connect the fuel return and feed pipes to the Fuel Injector rail, then install the fuel pipe clip and tighten the fuel abc. Pipe clip to the bolt to 8 nm, (71 inch lbs.). Replace the Thermostat bypass hose and radiator inlet hose, install and connect the Fuel Injector and manifold air pressure wiring harness, and then install and connect the engine coolant temperature wiring harness. Finally, install back the right and left valve Rocker Arm covers, the generator, the upper Intake Manifold, and the battery ground cable character.
    Posted by ChevyPartsGiant Specialist
    Q:
    Which wiring harnesses need to be disconnected for the 2001 Buick Century? Posted by Customer
    A:
    Disconnect the engine coolant temperature (ECT) wiring harness, fuel injector wiring harness, and manifold air pressure (MAP) wiring harness.
    Posted by ChevyPartsGiant Specialist
    See expert answers on similar Intake Manifold
    Q:
    How should the bolts be treated during installation for the 2005 Buick Century? Posted by Customer
    A:
    Apply sealant to the threads of the bolts, ensuring vertical bolts are tightened before diagonal ones.
    Posted by ChevyPartsGiant Specialist
    See expert answers on similar Intake Manifold
    Q:
    What should be done after disconnecting the ECT sensor for the 2003 Buick Century? Posted by Customer
    A:
    Disconnect and remove the fuel injector and Manifold Absolute Pressure (MAP) sensor wiring harnesses, then remove the fuel pipe clip bolt and clip, followed by the fuel feed and return pipes from the fuel injector rail, and finally the fuel injector rail itself.
    Posted by ChevyPartsGiant Specialist
    See expert answers on similar Intake Manifold
    Q:
    What is the first step in the installation process for the 2000 Buick Century? Posted by Customer
    A:
    Start by installing the thermostat and the water outlet.
    Posted by ChevyPartsGiant Specialist
    See expert answers on similar Intake Manifold
    Q:
    What electrical connectors need to be connected for the 2004 Buick Century? Posted by Customer
    A:
    Connect the electrical connectors to the EVAP canister purge valve, T/P sensor, IAC valve, MAF sensor, and EGR valve.
    Posted by ChevyPartsGiant Specialist
    See expert answers on similar Intake Manifold
    Q:
    Which electrical connectors need to be disconnected for the 2002 Buick Century? Posted by Customer
    A:
    Disconnect the electrical connectors from the exhaust gas recirculation (EGR) valve, mass air flow (MAF) sensor, idle air control (IAC) valve, throttle position (T/P) sensor, and EVAP canister purge valve.
    Posted by ChevyPartsGiant Specialist
    See expert answers on similar Intake Manifold
    Q:
    What wiring harnesses should be reconnected for the 2000 Chevrolet Malibu? Posted by Customer
    A:
    Reconnect the fuel injector and MAP wiring harness, followed by the ECT wiring harness.
    Posted by ChevyPartsGiant Specialist
    See expert answers on similar Intake Manifold
    Q:
    What should be done with the fuel injector rail for the 2001 Chevrolet Malibu? Posted by Customer
    A:
    Remove the fuel injector rail with lines and set it aside.
    Posted by ChevyPartsGiant Specialist
    See expert answers on similar Intake Manifold
    Q:
    What should be done after returning the engine to the proper position for the 2001 Chevrolet Lumina? Posted by Customer
    A:
    Install the engine mount struts, connect the thermostat bypass pipe coolant hoses to the throttle body, and install the coolant pipe nut.
    Posted by ChevyPartsGiant Specialist
    See expert answers on similar Intake Manifold
    Q:
    What needs to be disconnected before removing the fuel injector rail for the 2003 Chevrolet Malibu? Posted by Customer
    A:
    Disconnect the Engine Coolant Temperature (ECT) sensor electrical connector.
    Posted by ChevyPartsGiant Specialist
    See expert answers on similar Intake Manifold
    Q:
    If replacing the lower intake manifold, what additional components need to be removed for the 2002 Chevrolet Malibu? Posted by Customer
    A:
    Remove the ECT sensor, water outlet bolts, water outlet, and the thermostat.
    Posted by ChevyPartsGiant Specialist
    See expert answers on similar Intake Manifold
    If you have any questions about this product, please don't hesitate to ask us. We will be happy to help you!

OEM GM 24507499, Excellent Performance and Perfect Fitment

To ensure reliability, purchase GM part # 24507499 Intake Manifold. It is sometimes referred to as GM Intake Manifold. Choosing OEM parts is the optimal decision for guaranteeing superior quality and perfect performance. These components undergo stringent quality checks and are carefully constructed to comply with GM's factory specifications, ensuring a smooth installation process.

ChevyPartsGiant.com is a leading supplier of genuine GM parts such as GM 24507499 Intake Manifold. Our website boasts an extensive inventory of OEM GM parts, available at highly competitive prices in the market. Should you require any new genuine GM parts, rest assured we will deliver them swiftly and efficiently to your doorstep. Furthermore, all our parts come with the assurance of a manufacturer's warranty. For detailed Chevy parts information, click here.
Choose ChevyPartsGiant for discounted prices, exceptional service and fast delivery